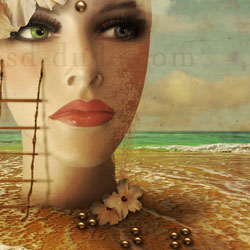
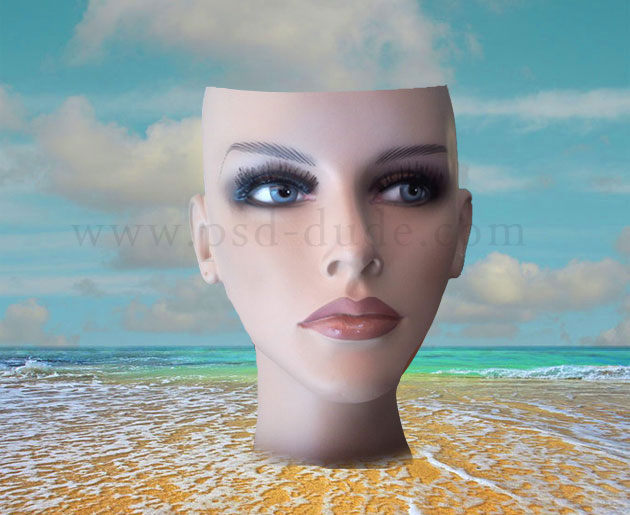
I was always drawn towards strange ideas in art and a style that for sure defines me is surrealism. So in this new Photoshop tutorial I will create a surreal beach scene with a big girl model head on a sunny sandy beach.
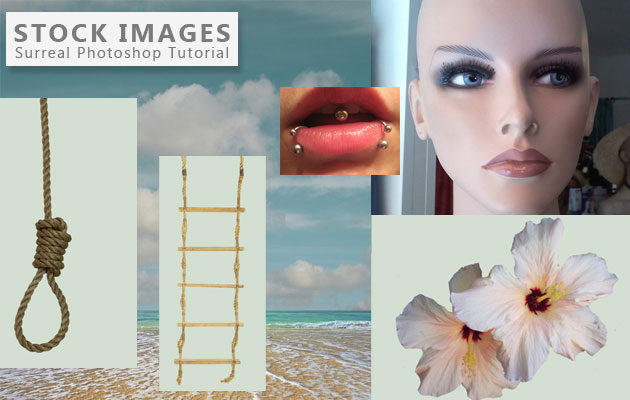
Here are the stock images used for this surreal photo manipulation; some of them are PNG images so that you don't have to worry about cropping. I will be glad if you practice this tutorial with different photos, adding your oqn ideas; so, upload your work in our comments section.
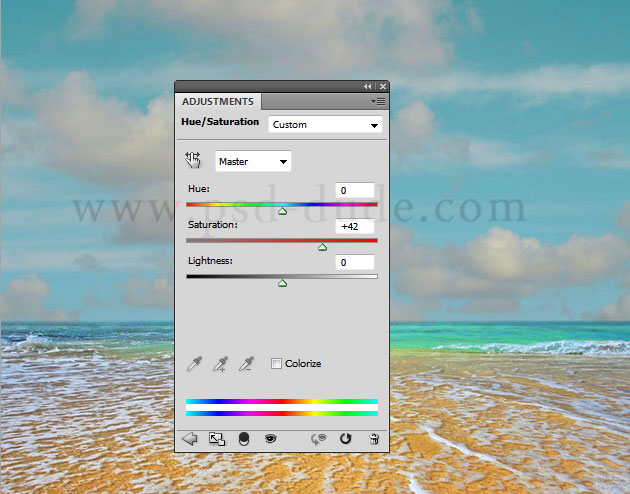
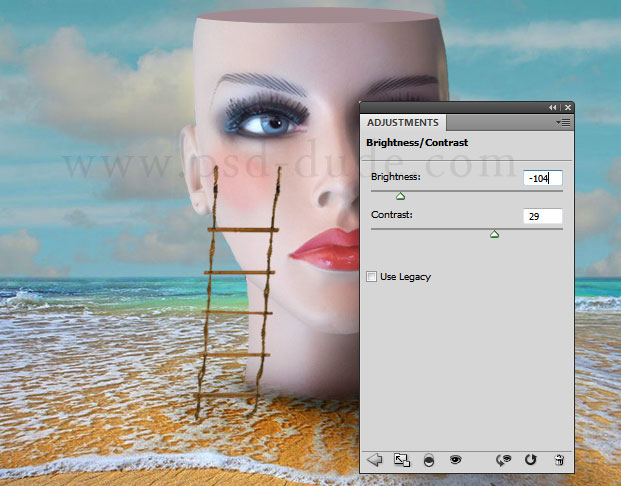
First I will start by adding this beautiful Beach Premade Background. Add a Hue/Saturation adjustment layer with these settings.
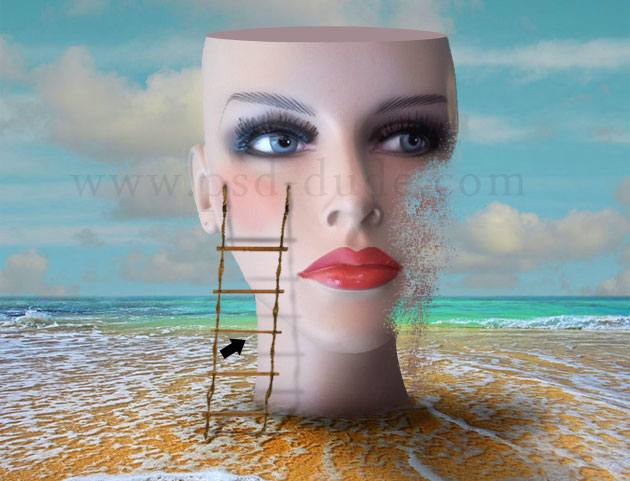
Copy this Manequin Head stock image and cut out only the girl head. Use a selection tool to select and crop the manequin head.
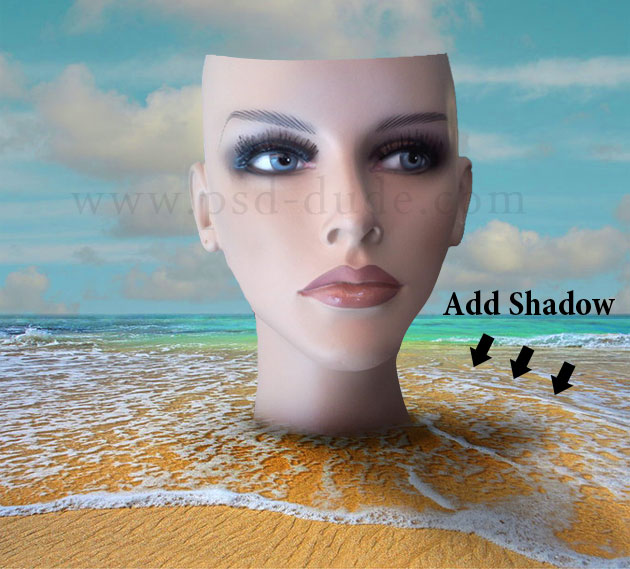
In a new layer use a soft round brush and color black to create a shadow effect for the girl. You can use a Soft Light blend mode and/or play with the opacity levels to obtain a realistic shadow. Learn more about how to cast shadow in Photoshop.
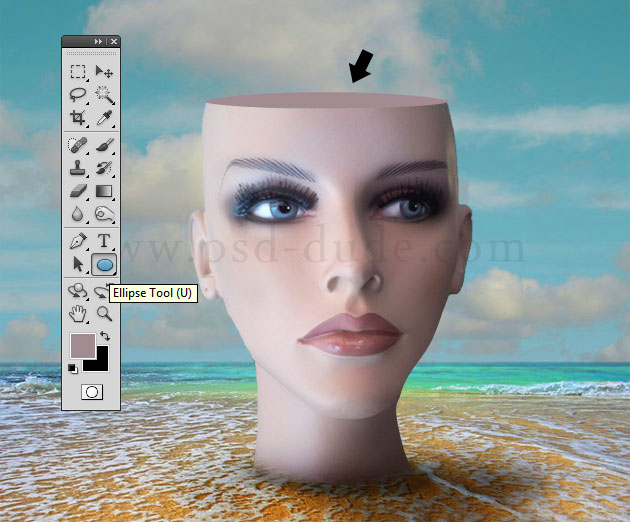
Use the Ellipse Tool, color #a28b91 to create a surface on top of the girl's head like shown:
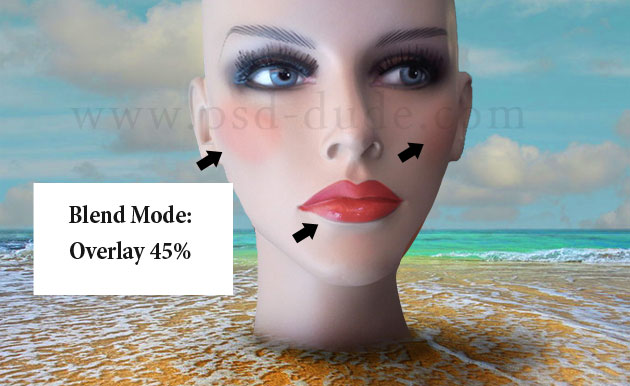
In a new layer use the Brush Tool and color #cf2222 to add some makeup to the lips and cheeks. For the lips use a hard round brush opacity 100% and for the cheeks use a soft round brush, different opacity levels to obtain a soft natural look.
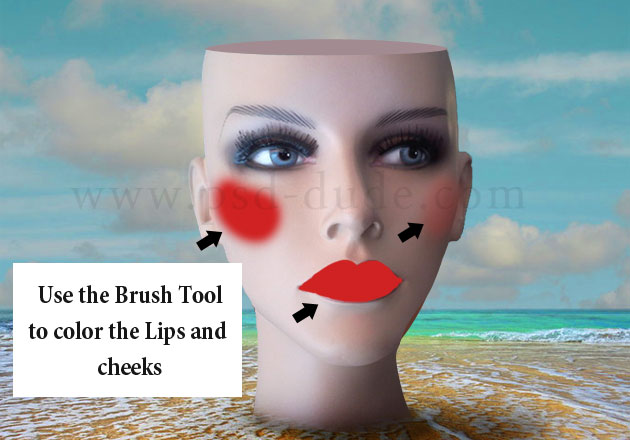
Change the blend mode of the Make-up Layer to Overlay 45% opacity level. You can of course use other tones and colors to create a nice looking Photoshop make up effect.
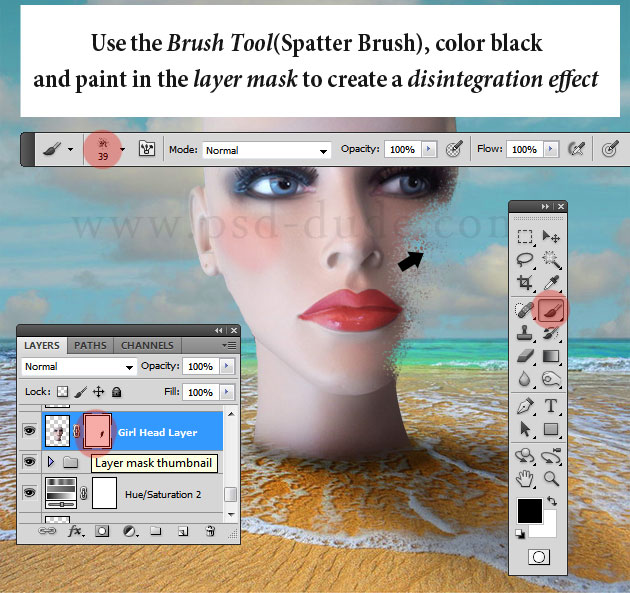
Add a layer mask to the Girl Heard Layer and use the Brush Tool to create a disintegration effect. You have to use a Spatter Brush for this effect and click several times using different brush sizes.
Create a new layer and use again the the Brush Tool with the same Spatter Brush and click several times using different brush sizes. Use the Eyedropper Tool to choose some colors from the skin tones.
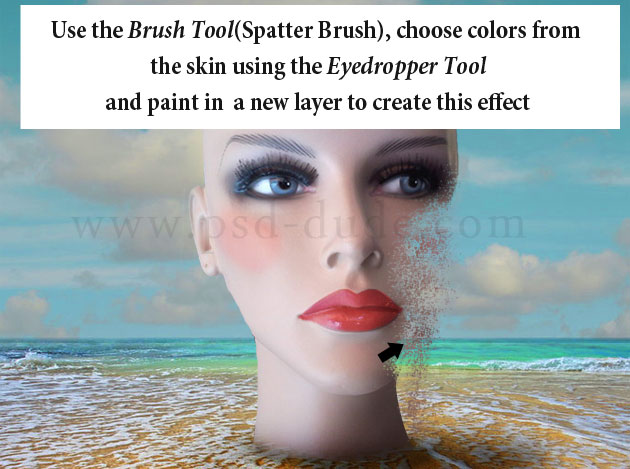
To adjust the result you can use the Eraser Tool with the same Spatter Brush to obtain a nonrepetitive didintegration effect.
I will now add a ship rope ladder using this PNG stock image. You have to resize the ladder, add an adjustment layer to make it a little darker and also change the perspective a little bit using the Edit>Transform>Perspective Tool.
To make it look realistic you have to add ashadow effect. Simply duplicate the ladder, color it in black, use a soft Gaussian Blur and change the perspective like shown in the image. Use the Edit>Transform>Distort Tool to obtain the right position. Make sure to add the shadow only on the girl face and on the ground; erase the unwanted areas.
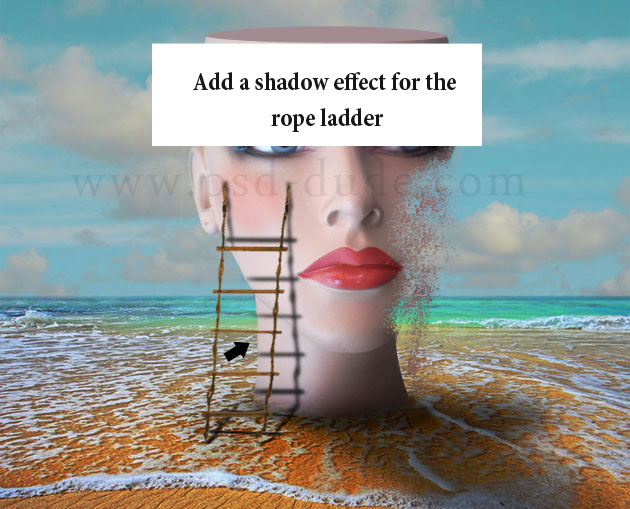
To cast a realistic shadow in Photoshop is quite difficult especially if you have a complicated situation with different objects on vertical and horizontal scale; so you really have to try to obtain a good result. So lower the opacity of the shadow to arround 40%.
Use these hibiscus flower PNG cutout image and add on the girl like show in the image.
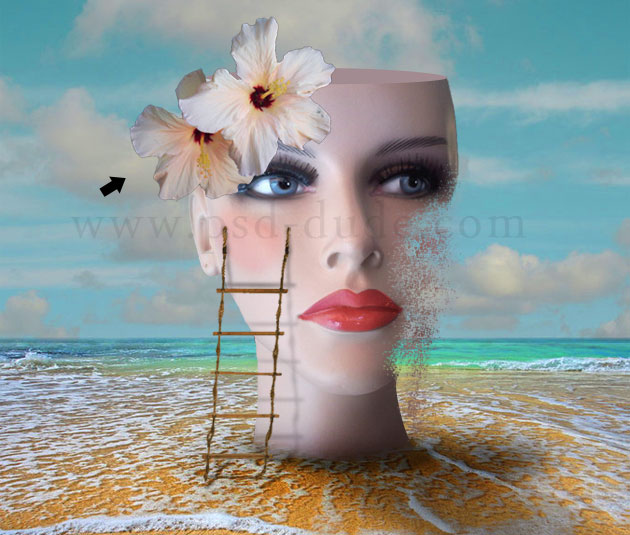
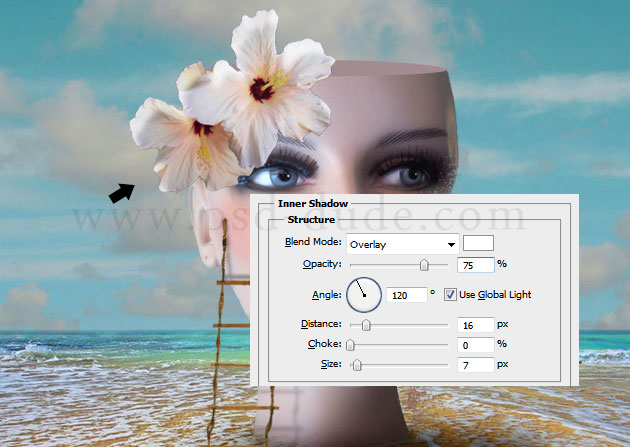
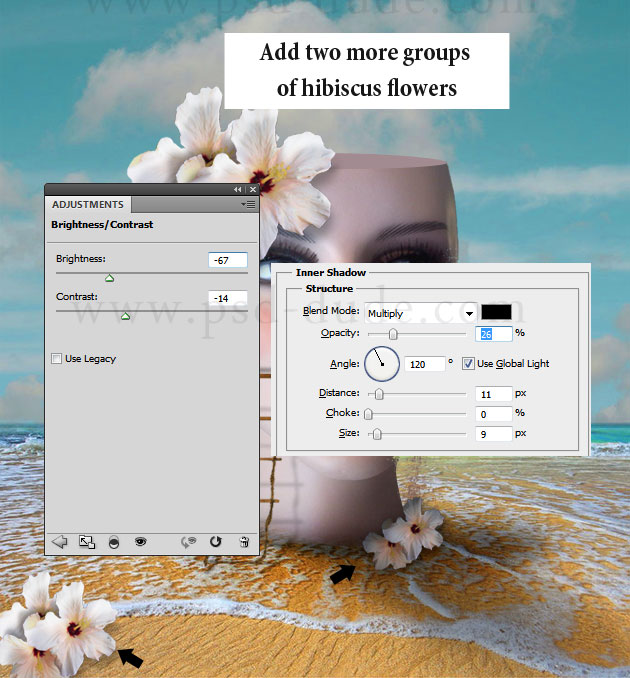
Add an Inner Shadow layer style to the Hibiscus Flowers Layer to lighten the edges of the image.
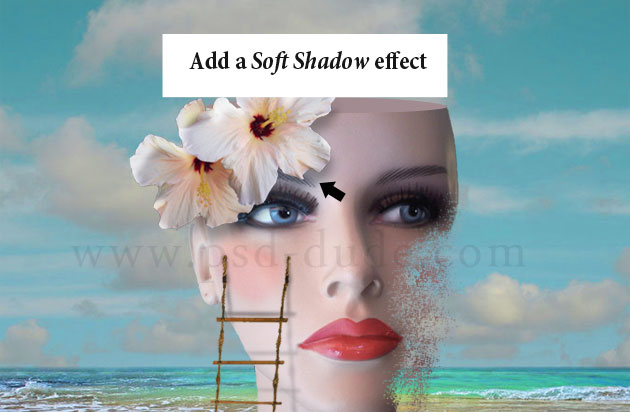
Also add a soft shadow effect like shown in the image; use the techniques used for casting shadow used in the previous steps.
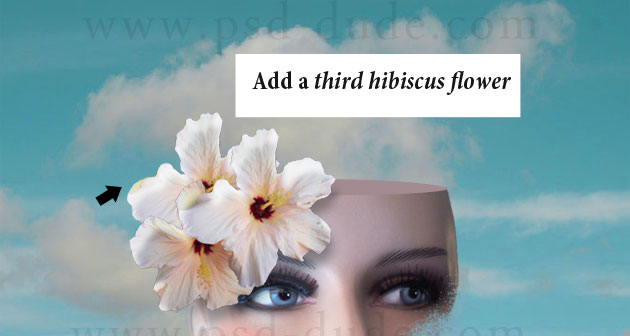
Crop one of the flowers and place it behind the other two to obtain more volume.
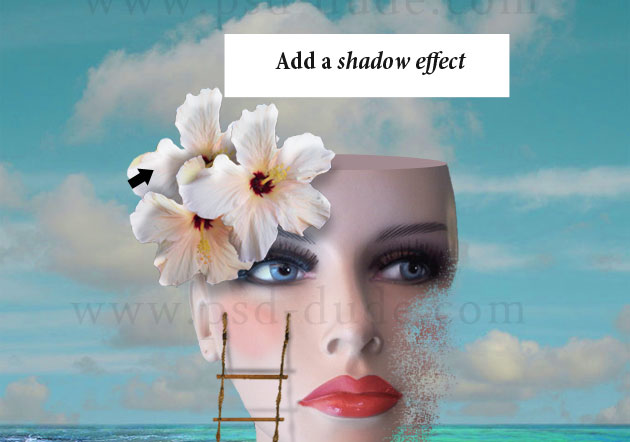
Use a soft round brush, black color, opacity 30% to create a shadow between the two flowers and the third.
You can duplicate the Flowers Group of Layers and place them here and there like shown in the image; make sure you follow the light shadow rules as much as possible. As you can see I have added a Brightness and Contrast adjustment layer and an Inner Shadow effect for small group of flowers under the girl head.
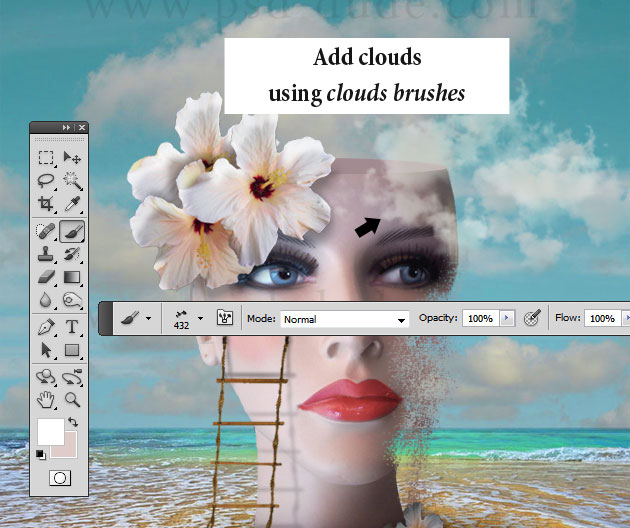
Create two new layers above all the other layers and call them Clauds Layers; use one of these clouds brushes and use a white color for the brush tool like in the image. The clouds don't look identical to the clouds on the sky but after some color adjustments, gradients and filters, the differences will hopefully vanish.
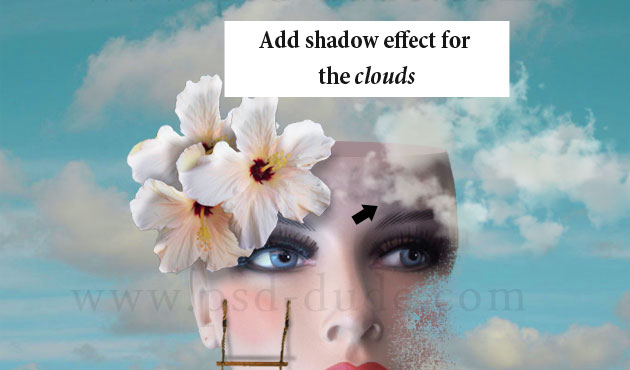
Add a soft shadow for the clouds that dropes on the girl face.
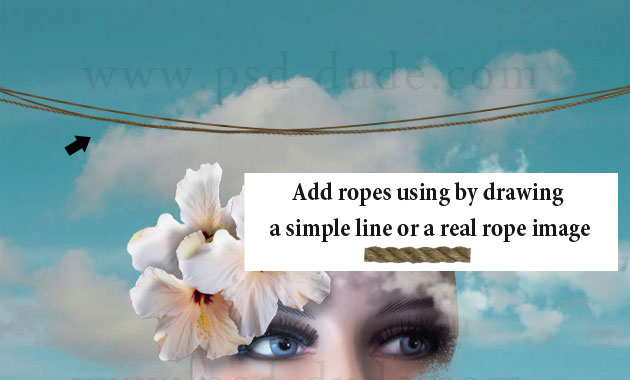
I decided to add some ropes above the girl head just to add more visual effect on that area. You can simply draw the line or you can use this rope PNG image to create a more realistic rope.
To create the rope from the stock image simply crop an area, flip horizontal and copy that area multiple times to create a line. Use the Warp Tool with Arch effect to create a bended line.
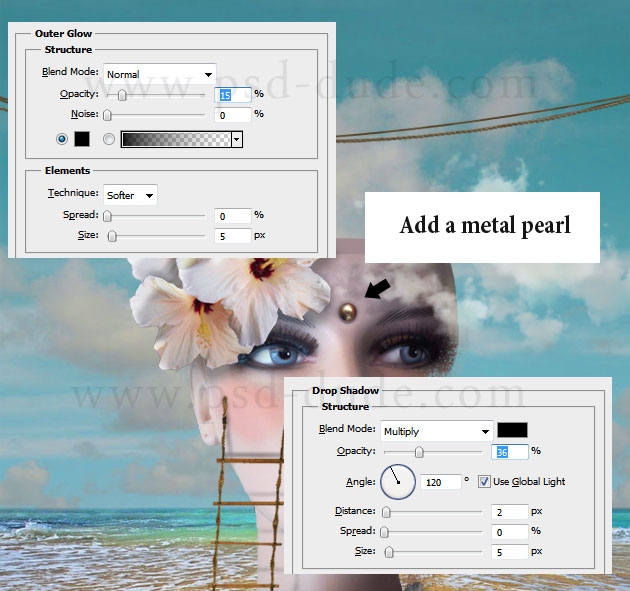
I will use this piercing stock image to create a metal pearl. Use the Elliptical Marquee Tool to crop a round shape and place it like in the image. Use a Drop Shadow and Outer Glow layer style to blend the pearl with the girl forehead.
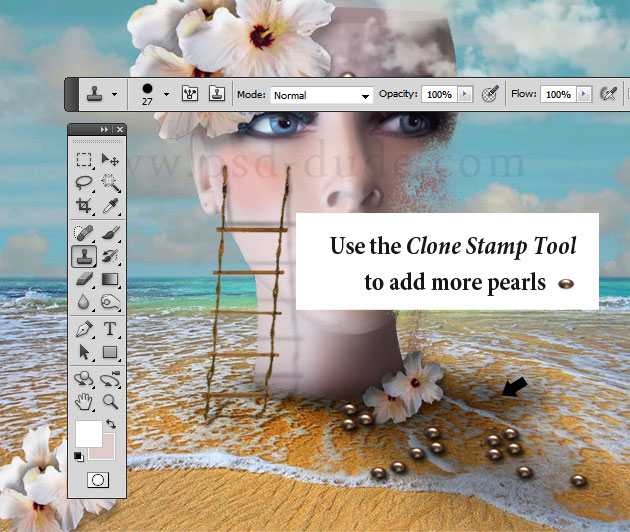
Copy the pearl in another layer; resize to 50% on the vertical scale and place it on the sand. Use the Clone Stamp Tool to multiply the pearls as shown in the image. I also added some pearls on the rope.
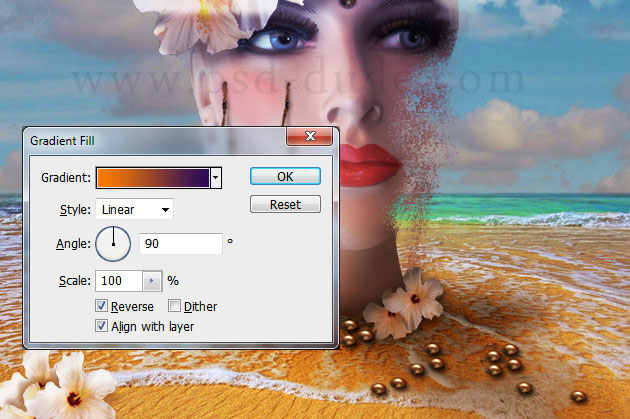
Now I am going to add some nice photo filters and gradients to blend the images one with another and to obtain a nice warm vintage color tone. So first add a Gradient adjustment layer using a color map made by these two colors: #290a59 and #ff7c00 ; set the blend mode of the gradient layer to Overlay 35% opacity.
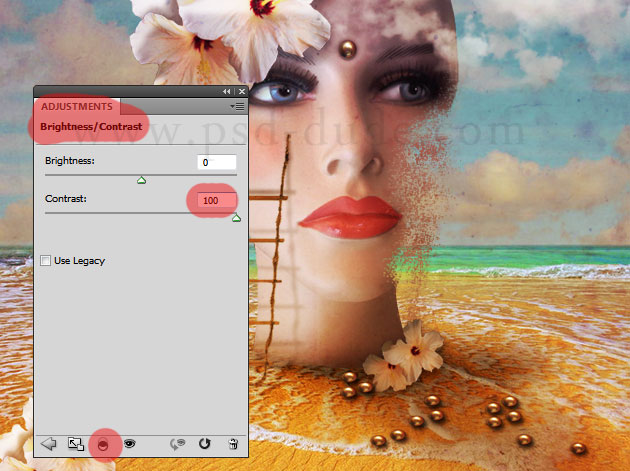
For a more vintage old look I will use this old paper texture. You can find more old paper textures in this list. set the blend mode of the paper texture layer to Overlay 35% opacity. And I have also added a Brightness/Contrast adjustment only for this texture.
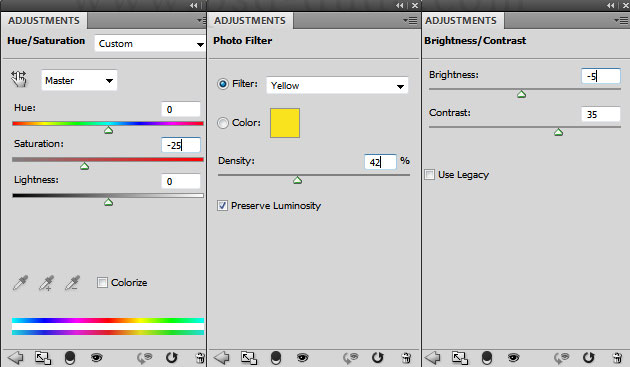
For the final touches add a Hue/Saturation, a Brightness/Contrast and a Photo Filter adjustments like in the image.
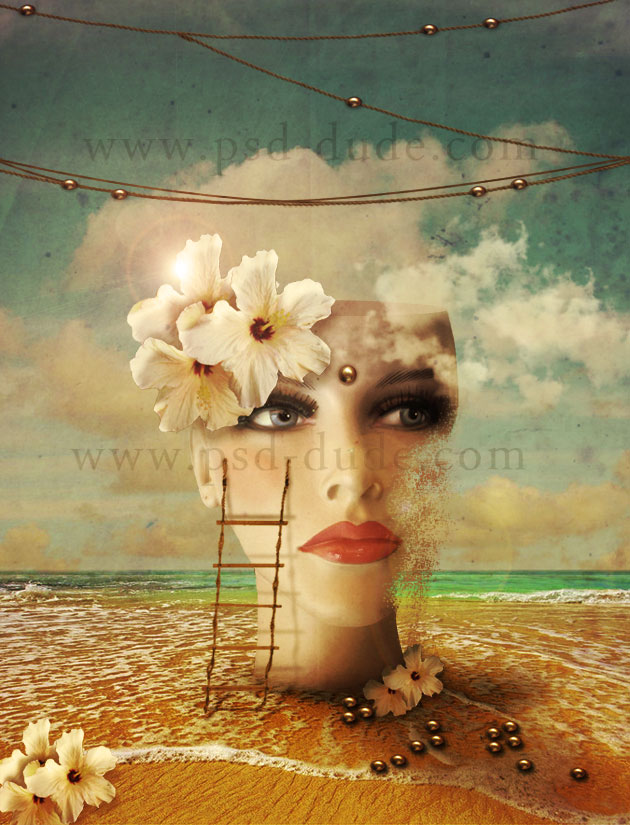
So here is the final result for surreal beach photo manipulation made in Photoshop using some stock images, brushes, filters and adjustments. If you want you can add a lens flare effect using these lens flare brushes; use color white for the brush. You have to add the lens flare brush in a new layer but make sure to place it BELOW the photo effects and adjustment layers to obtain a beautiful result.
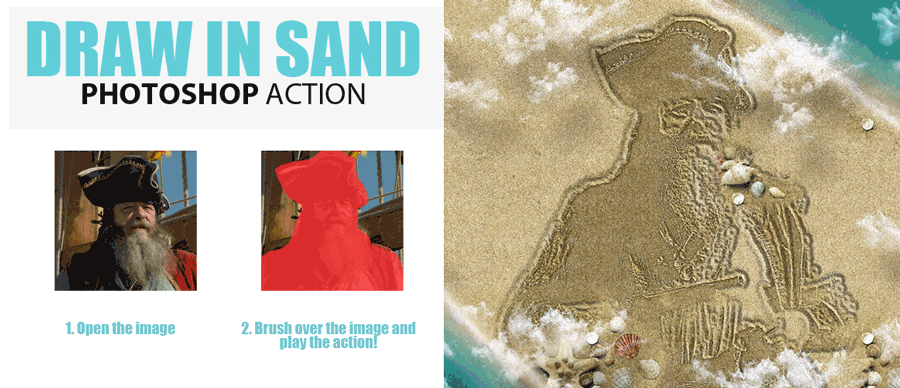
Draw in Sand Photoshop Action
Draw in Sand Photoshop Action turns your images into sand drawing in just a few seconds. Fully customizable draw in sand effect with layer styles intact. It woorks for any type of image.
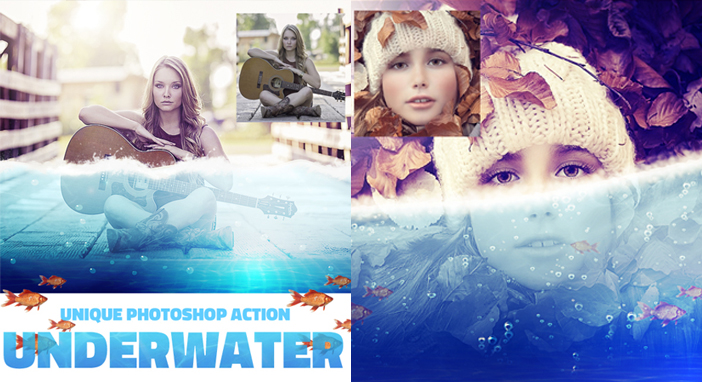
With Underwater Photoshop action you can create a subaquatic, underwater effect using your own photos. This action with styles intact, will allow you to create realistic underwater effects. In the preview you can see the before and after effects. The underwater result contains easy to edit layers with layers styles intact so that you can customize the look.
Underwater Photoshop Action
If you are looking for great quality water texture and backgrounds for your projects you can find lots of free images at Textures4Photoshop.
Sand Writing Photoshop Style Action

You can also check out this awesome water text PSD mockup that you can download for free.
15 comment(s) for "Create a Surreal Beach Photo Manipulation in Photoshop"
Keep up the good work! reply
Mary
My realisation: http://www.chez-mireilled.com/article-montage-surrealiste-avec-photoshop-115371287.html
Thanks for sharing it, as it was good practice in re-familiarizing myself with the PS tools.
your result is beautiful but there are some things that you have to improve:
- without the neck the face seems like it is floating in the air; you have to add a neck and a realistic shadow to the entire head.
- also you have to learn how to cast realistic shadows (for example an object doesn't have a shadow on the air, only on solid/liquid objects.
- and you might also want to read this Blending and Adjustments in Photo Manipulation tutorial that teaches you how to blend and adjust multiple stock images in Photoshop
Keep up the good work! reply