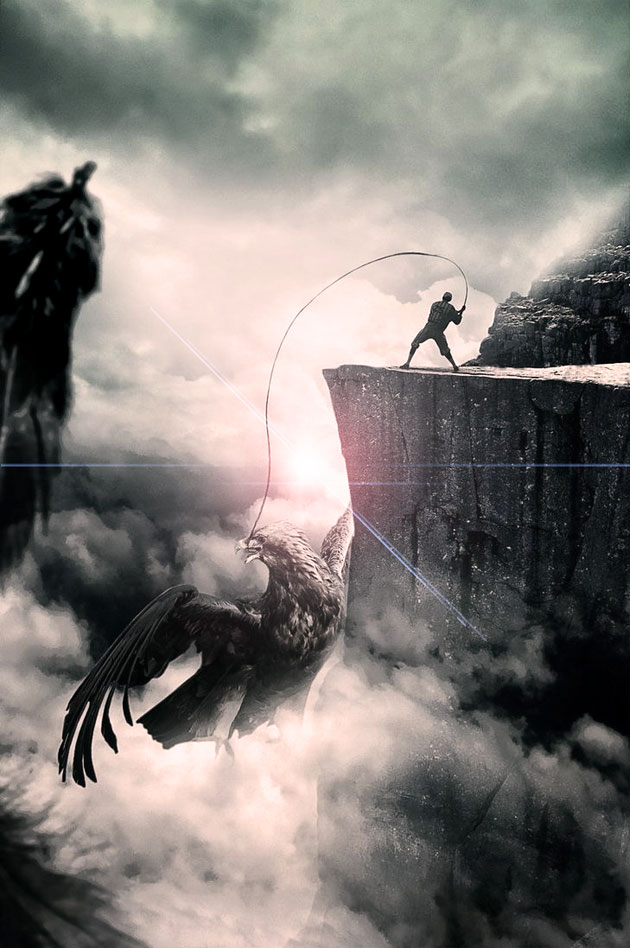
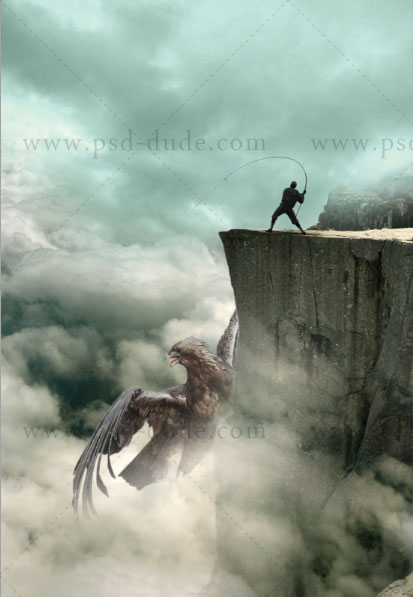
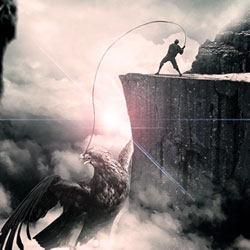
Here is the final result for this beautiful fantasy Photoshop surreal hunting scene photo manipulation. This photo manipulation has both fantasy and surreal features so I am pretty sure you will enjoy it; and it is actually the first photo manipulation guest tutorial that we publish on psd-dude.
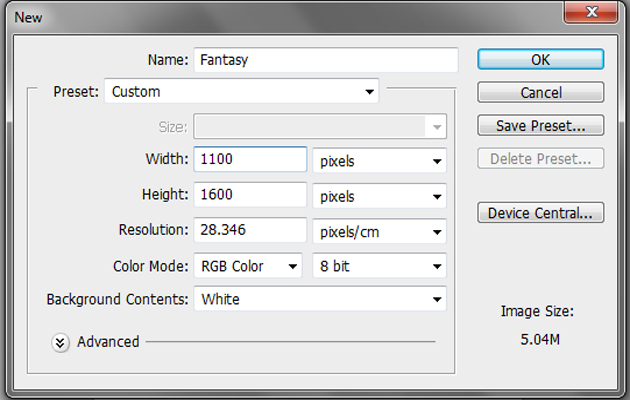
Open up a new file in Photoshop using these settings: Width:1100px and Height: 1600px
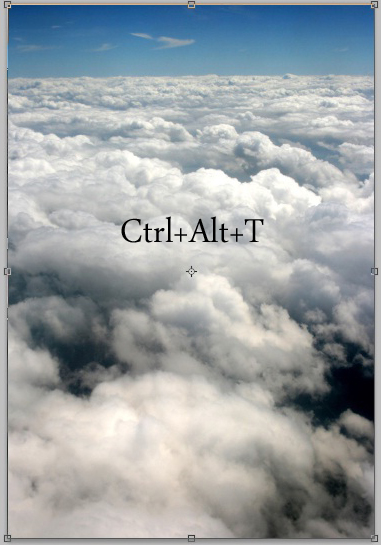
Open the clouds stock and press Ctrl+alt+t to to increase the size a little bit.
Now open the upper sky into our image.
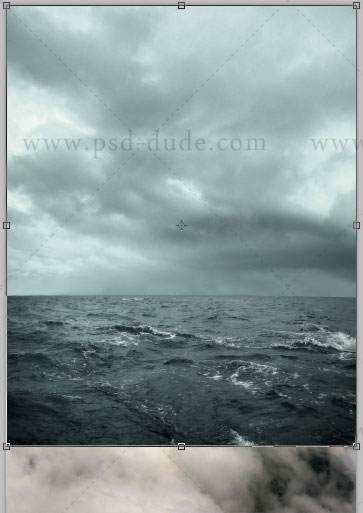
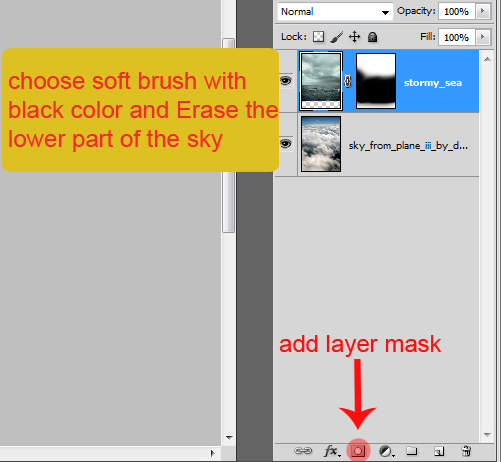
Add layer mask and choose soft brush with black color and erase the lower part of it as shown below.
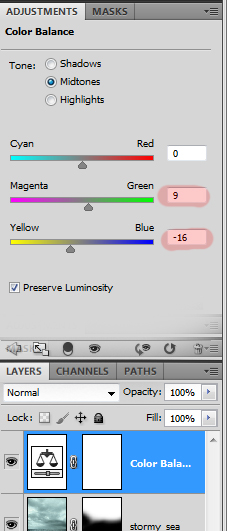
Now we will add an adjustment layer so go to Layer>New adjustment layer>Color Balance and apply the settings as shown below
Now the background is ready you will put the Cliff stock into our image.
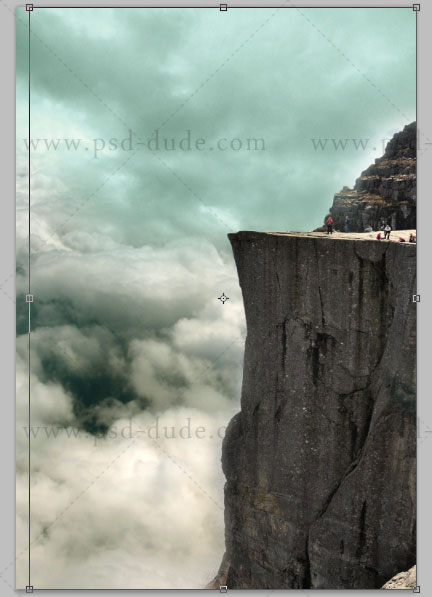
To remove the people on the cliff we're going to use the Clone Stamp Tool
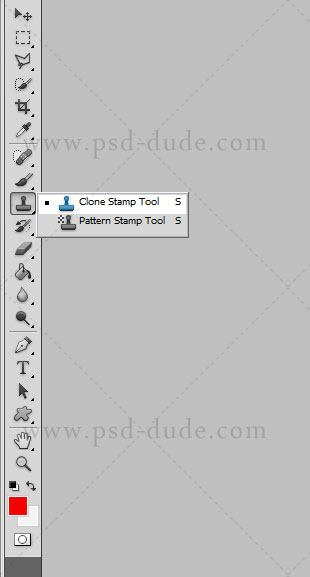
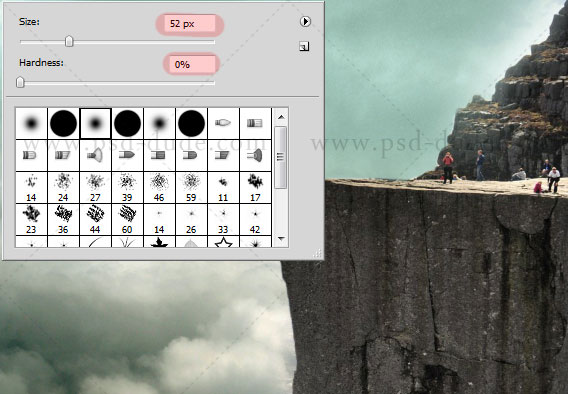
Chosse soft brush and set setting as shown below
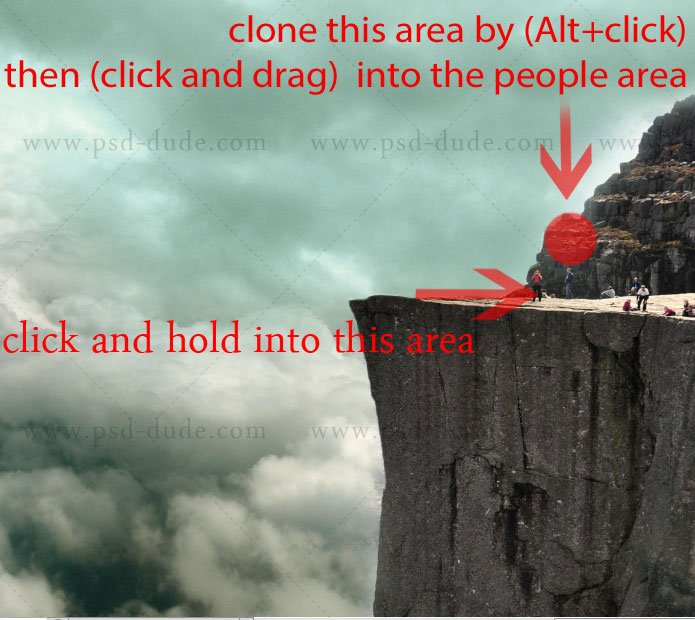
Now use the Clone Stamp Tool to clone the area near the people (Alt/+click) then (click and drag) into the people area like shown in the image below.
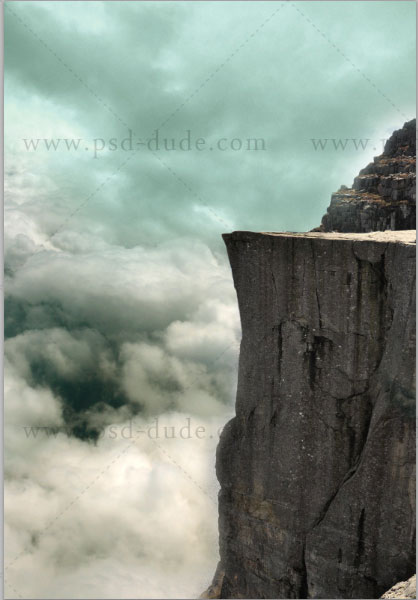
Your image should now look similar to this one
Now add a layer mask to the cliff layer and choose soft brush with black color and start Erase the lower part of the image and a little bit the upper part.
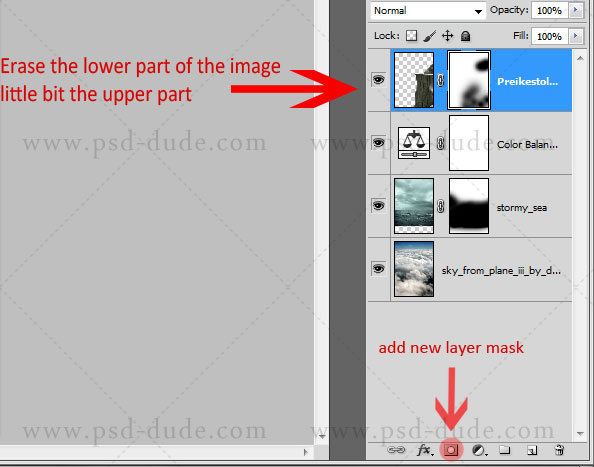
Your image should now look similar to this one
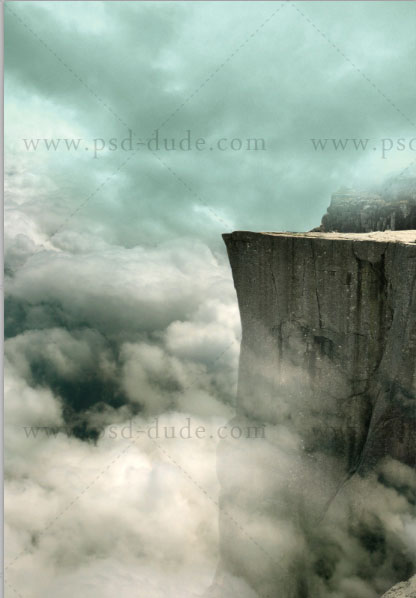
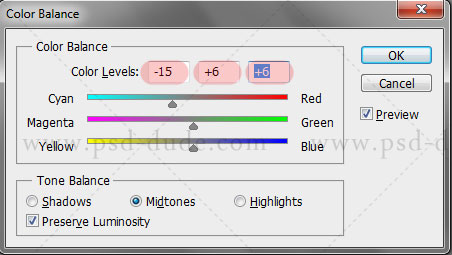
Now you will change the color of the cliff in order to become consistent with the rest of the image by clicking Ctrl+B and set colors like shown in the image below
Open the man stock into our image
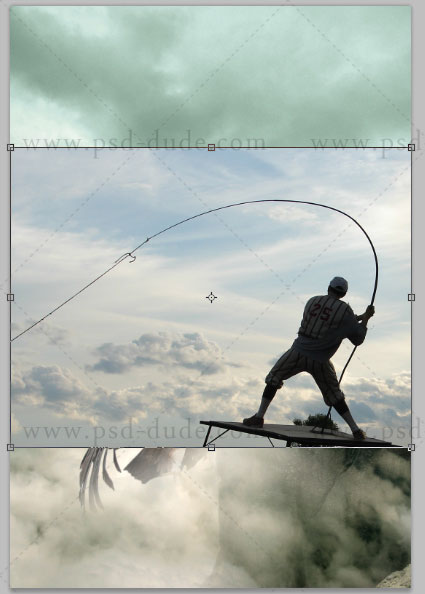
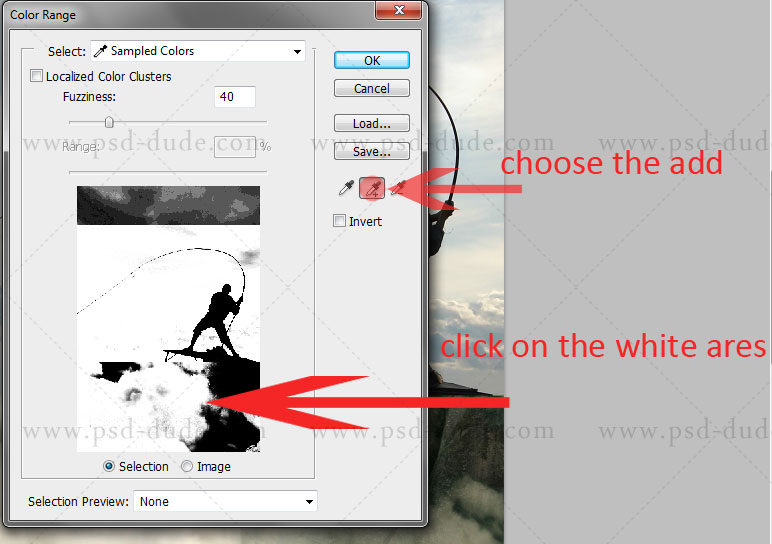
Now we need to remove the background from the man in order to do that you will choose Rectangle marquee tool (M) right click and choose color range.
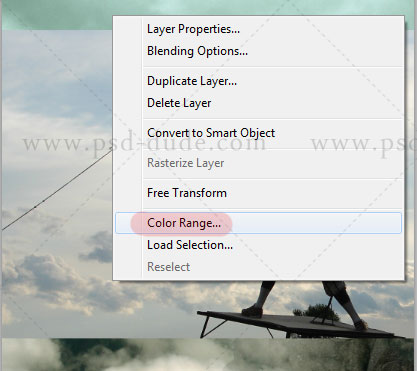
Now click on (add to sample) and select the white areas by clicking on it then click ok to select the background as shown in the image below
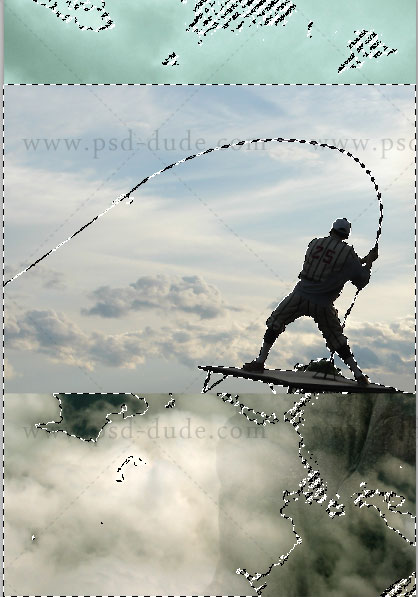
Now we have selected the background so just press (delete) on your keyboard to remove the background from the man
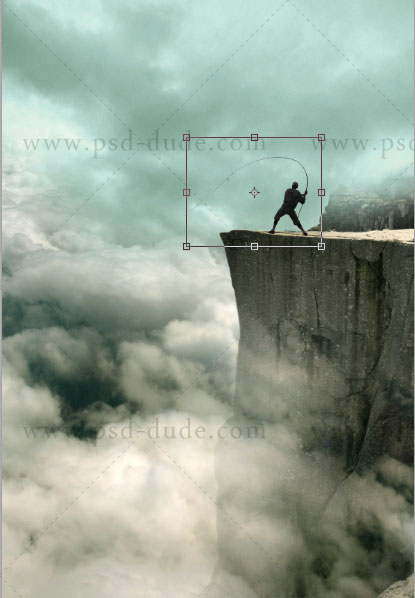
Press Ctrl+alt+t to resize the man layer and put it on the cliff as shown below
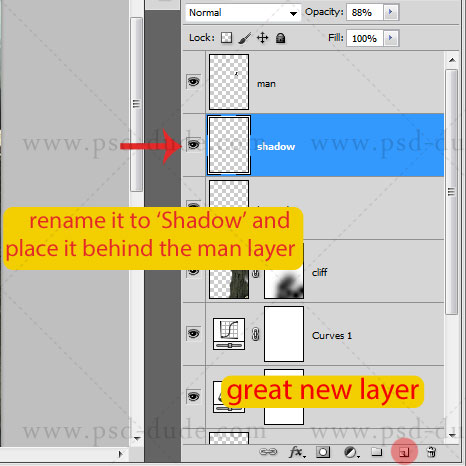
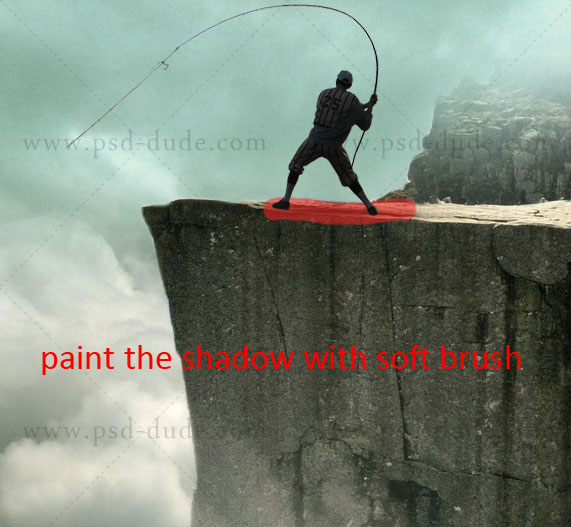
now you will create a new layer by clicking in the Create a new layer button. Then, rename it to Shadow and place it behind the man layer.
Now paint the shadow of the man using the images below as reference
Open the eagle stock into our image and resize it using the Free Transform Tool(Ctrl/Command+T).
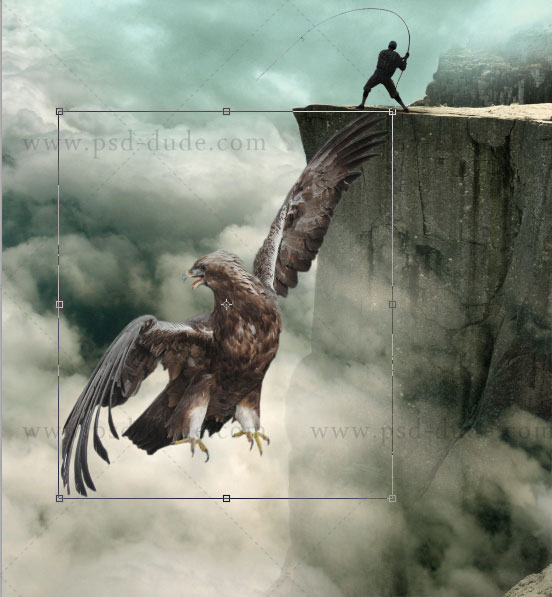
Place it below the cliff layer
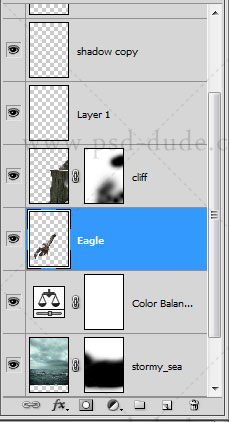
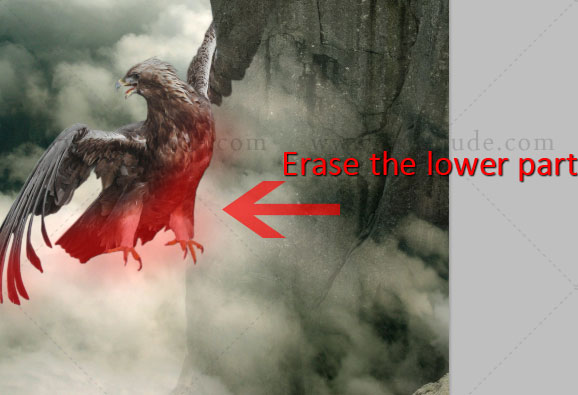
Now add a layer mask to the eagle layer and choose soft brush with black color and erase the lower part of the eagle as shown in the image below
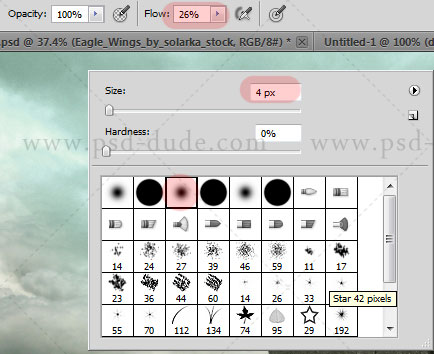
Create another new layer rename it Line and choose soft brush with black color as shown in the image below
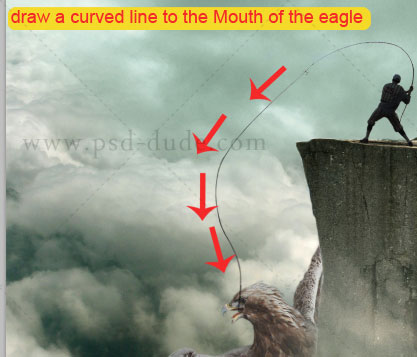
Now draw a curved line to the eagle mouth, use the Pen Tool with Paths selected and then use the Stroke Path option using a small size round brush.
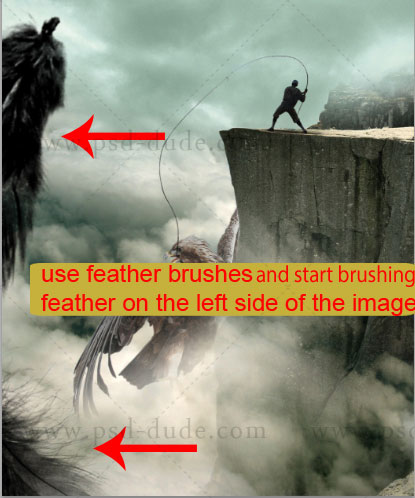
Now download the feathers brushes that you will use it in our image and set the size to 664 or bigger.
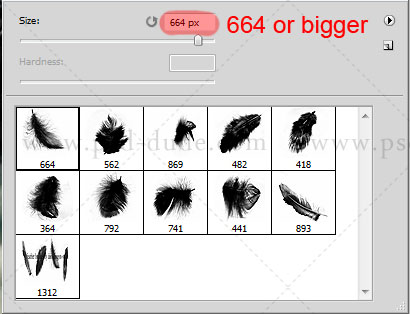
Create new layer rename it Feather and start brushing on the left size of the image as shown in the image below
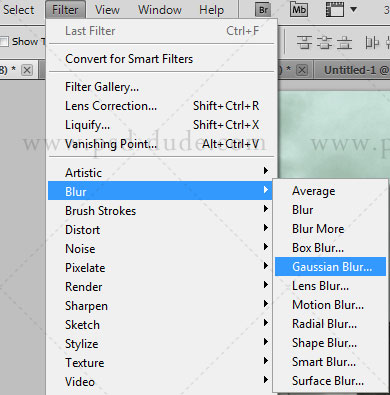
We're going to use the Gaussian Blur to the feathers to add blur to it Go to Filter > Blur > Gaussian Blur.
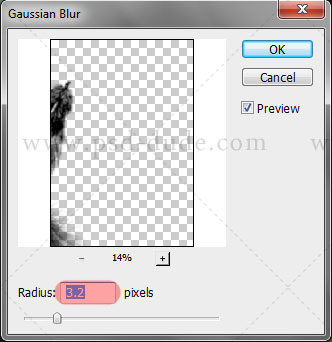
And use a Radius of 3.5px.
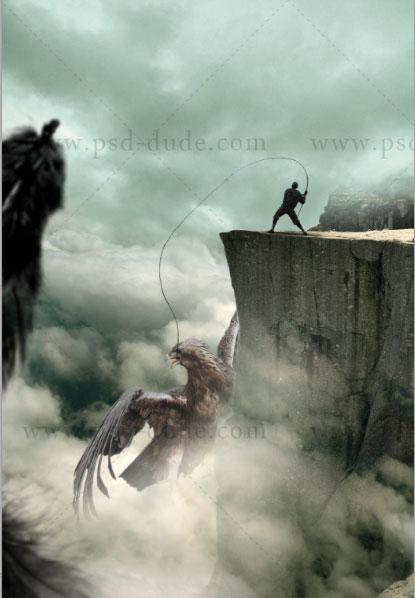
You will get this result as shown in the image below
Now we will add some adjustment layers so go Layer> New adjustment layer> Gradient map apply the settings as shown below
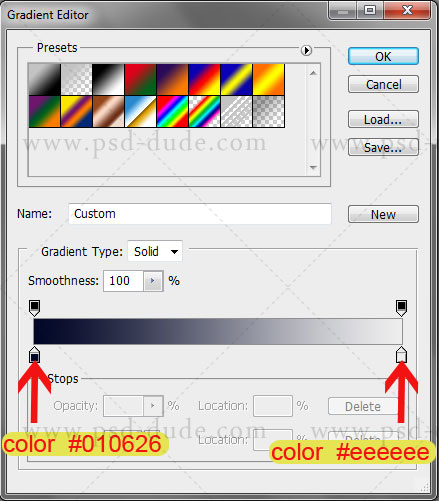
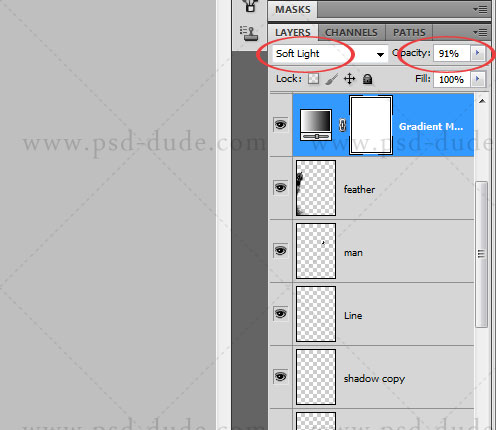
Change the blending mode of the gradient map layer to Soft Light and the opacity to 90% as shown below
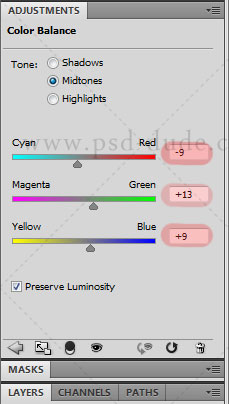
Go to Layer>New adjustment layer>Color balance and apply the settings as shown below
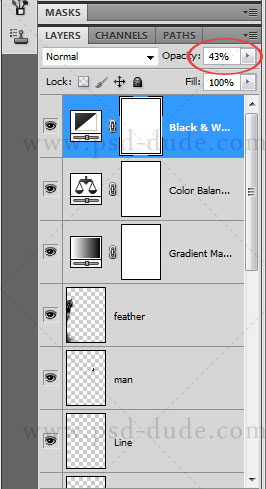
Go to Layer>New adjustment layer>Black and white and apply the settings as shown below
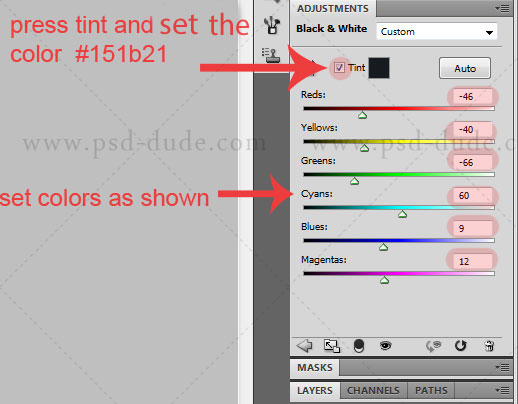
Change the opacity of the black and white to 43
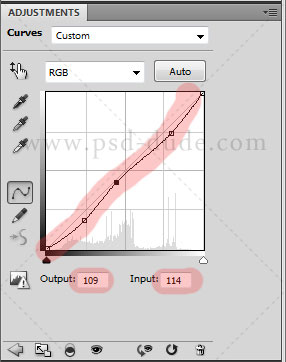
Go to Layer>New adjustment layer>Curves and apply the settings as shown below
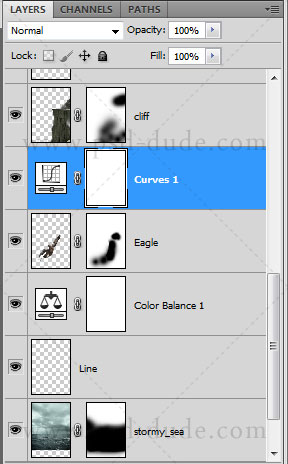
Place the curves layer above the eagle layer
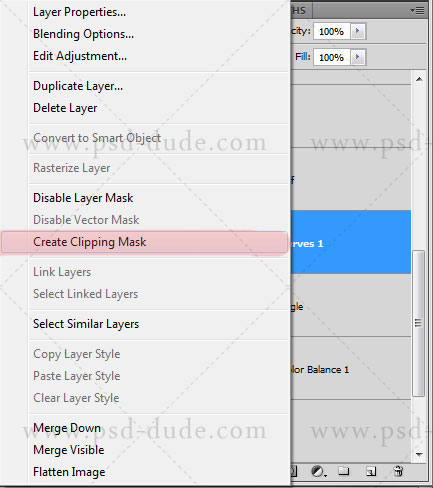
Now select the curves layer right click on it and select great Clipping Mask.
We almost done so we will add some light in the middle create a new layer and fill it with black color and select soft brush with white color and add some white color in the middle as shown in the image below
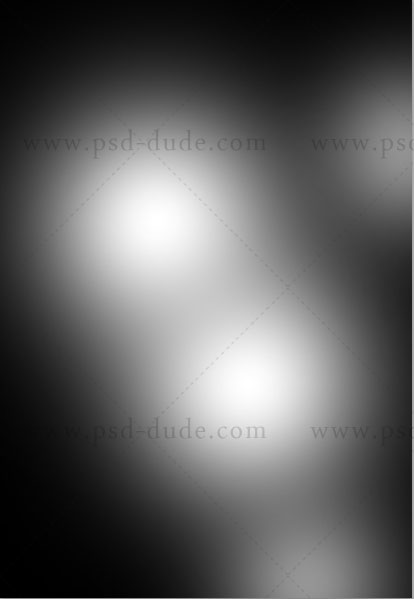
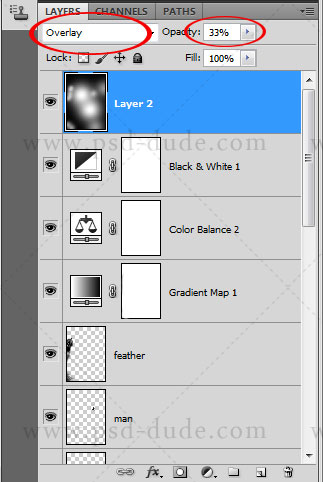
Now change the blending mode to Overly and the opacity to 33%
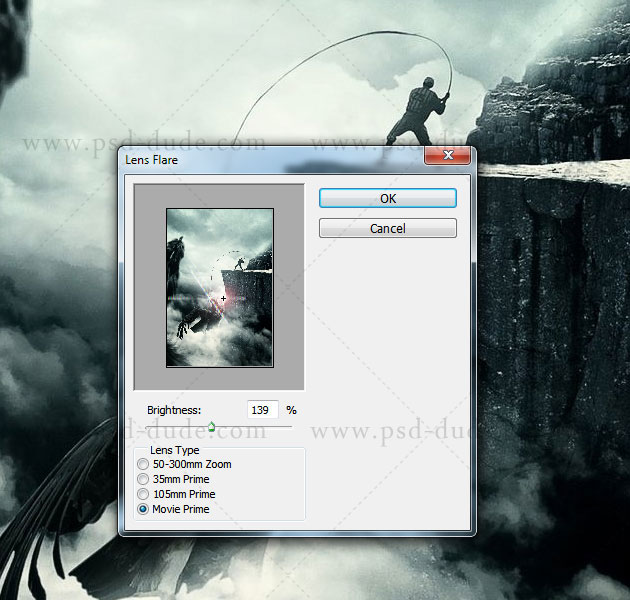
If you want you can add a cool light effect by using these lens flare brushes. Or you can create a new layer above all the other layers and go to Image>Apply Image. Then go to Filter>Render and choose Lens Flare with Movie Prime. Use drag and drop to place the lens flare near the eagle like in the image.
And if you want to change the color tones a little bit you can add a new adjustment by going to Layer>New adjustment layer>Photo Filter; use these settings or choose another color tone that you like:
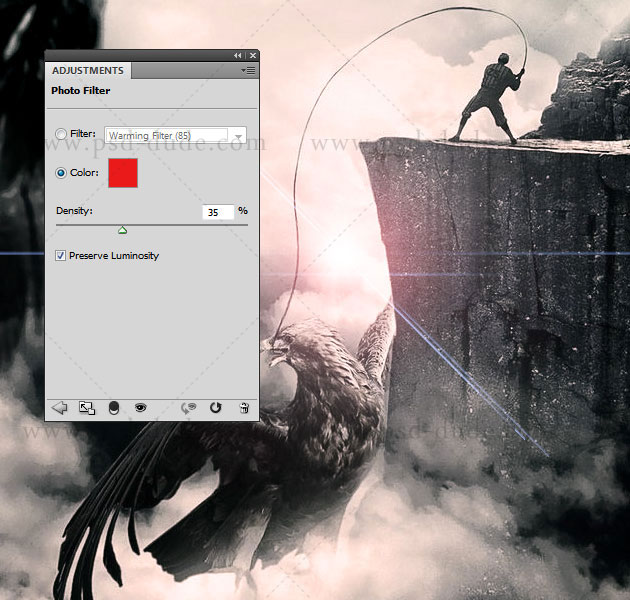
Here is the final result for the fantasy Photoshop surreal hunting scene photo manipulation that I hope you will enjoy.

About the Author
 Maryo is a 18 years old talented self-taught digital artist from Iraq. He loves to make digital artworks, photo manipulations, photo retouches, etc. He is
mainly working with Photoshop CS5 and also with Cinema 4D. You can find Maryo on his deviantArt page,
on his Facebook account.
7 comment(s) for "Fantasy Hunting Scene Photoshop Tutorial"
Thank you so much for sharing your knowledge with others. Much appreciated! Keep up the good work! reply