If you want to create a space battle you need some fire texture images and fire PNG images. And if you want to create a big fire explosion you can try these free explosion Photoshop brushes.
Star Wars is an American science-fiction franchise comprising movies, books, comics, video games, etc. The Star Wars fictional universe was created by George Lucas. It all began with the 1977 film and quickly became a worldwide pop-culture phenomenon.
If you want to learn more about the 1980s, check out my article about 80s font used in movie posters, video gammes, music album covers, etc.

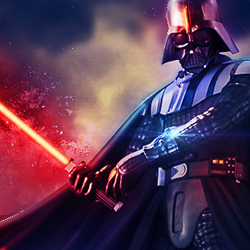
In this tutorial we are going to create a version of the Star Wars movie poster in Photoshop. Even if he is missing from the 2015 Star Wars: The Force Awakens, I choose Darth Vader as main character because is so scary and cool.
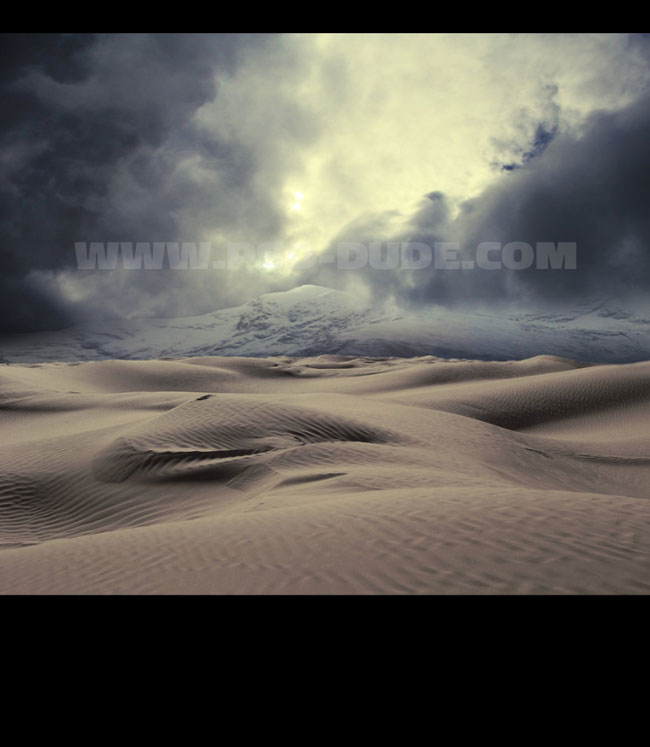
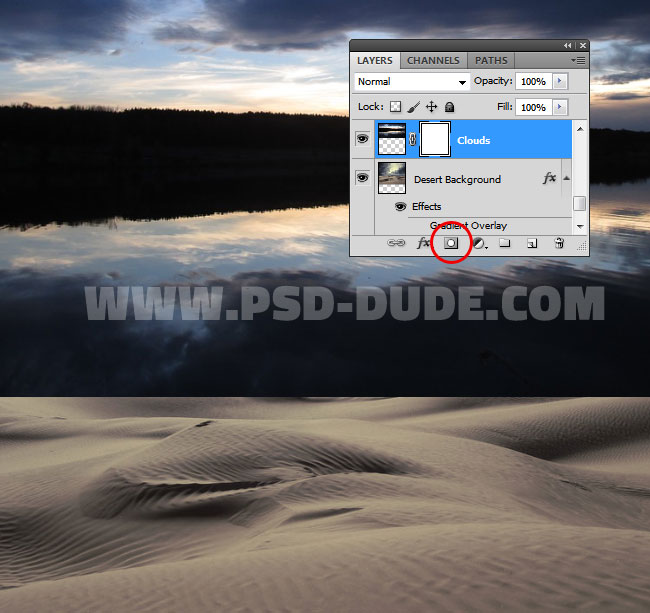
Create a new PSD file of around 900x1060px. You can make a larger canvas but I give you the sizes to have the width/height proportions. Create a new layer and fill it with black color. Copy this premade background in a new layer and call it Desert Background.
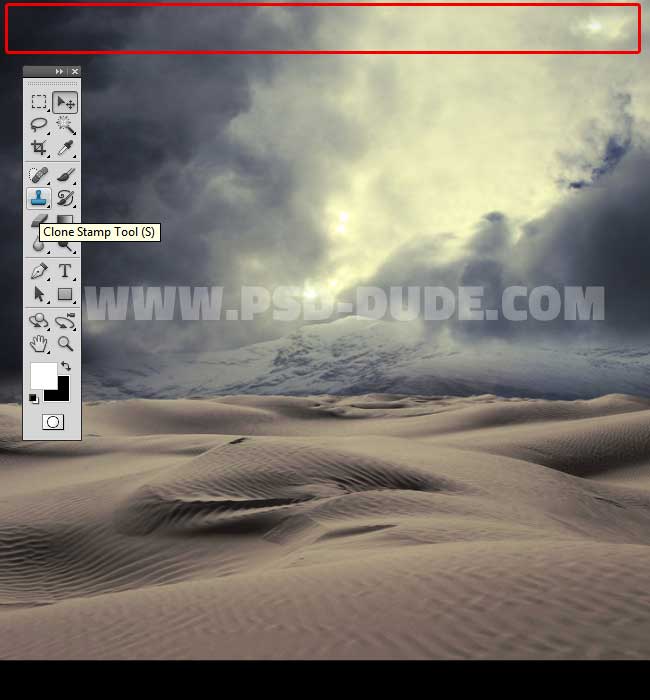
Use the Clone Stamp Tool to fill the upper area with more clouds. Hold down the ALT key and the cursor will change to a target. Click the point that you want to be the sample point. This will be used as the reference for cloning.
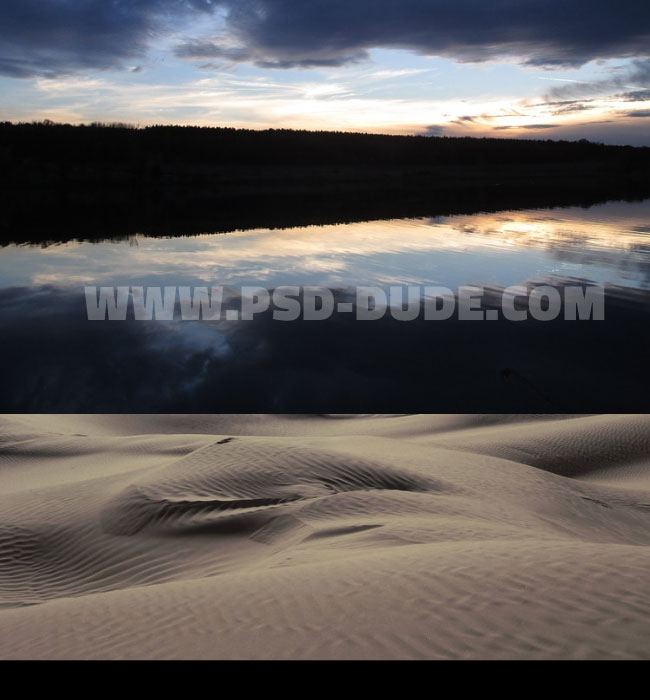
Create a new layer and copy this clouds image like shown in the preview. Call this layer, Clouds.
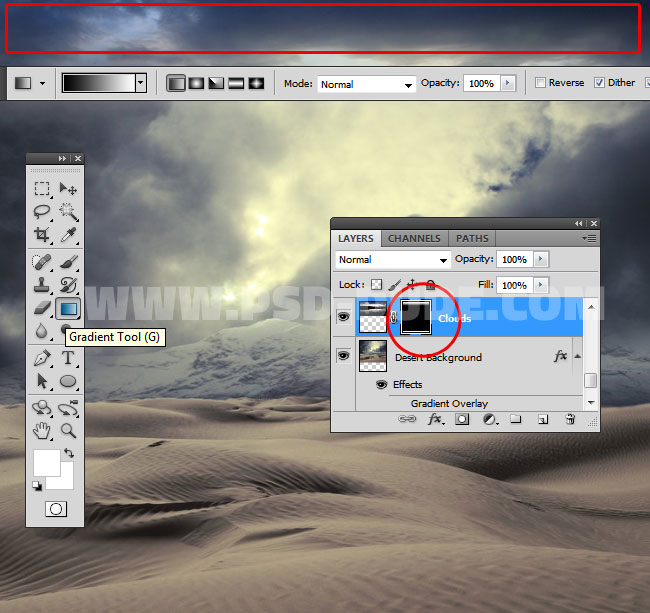
Add a layer mask to the Clouds layer. We use the layer mask to hide portions of the current layer and reveal the layers below. Masking layers is an useful compositing technique for combining multiple photos into a single image.
Pick the Gradient Tool and use a black and white gradient with 100% opacity. Make sure you have the layer mask selected (click on the layer mask thumbnail). With the Gradient Tool selected, click and drag across the image like shown in the preview. A short drag creates a short gradient and a long drag produces a smoother more longer gradient.
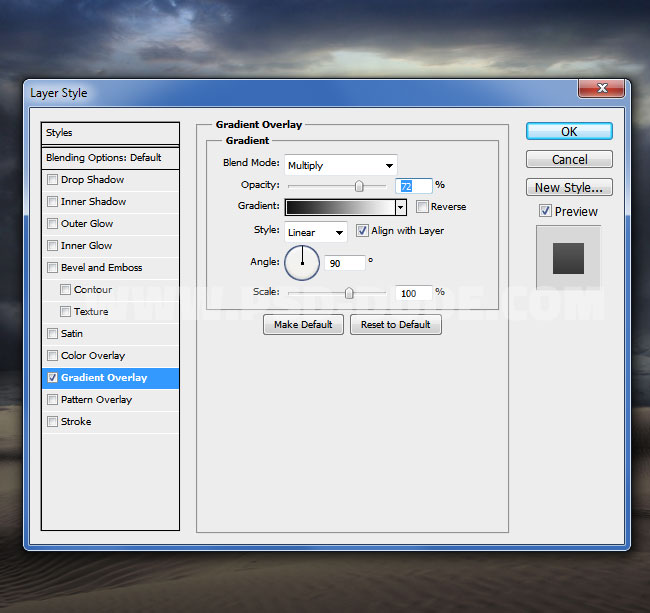
Return to the Desert Background and add a Gradient Overlay layer style to darken the bottom area of the image.
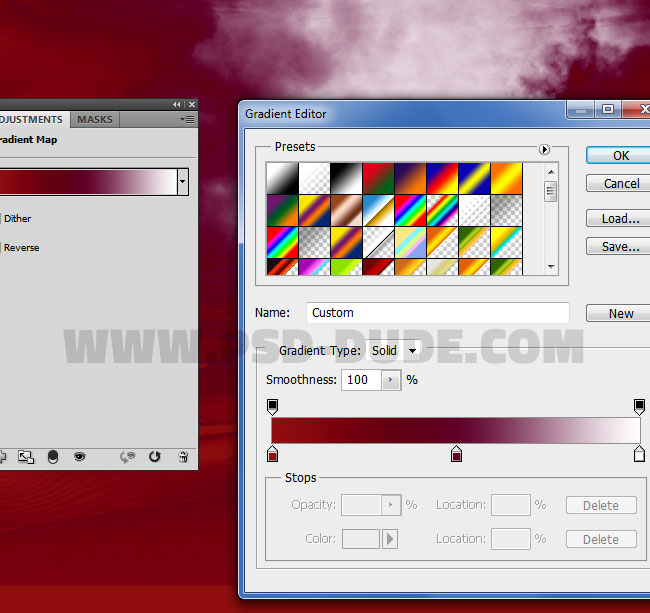
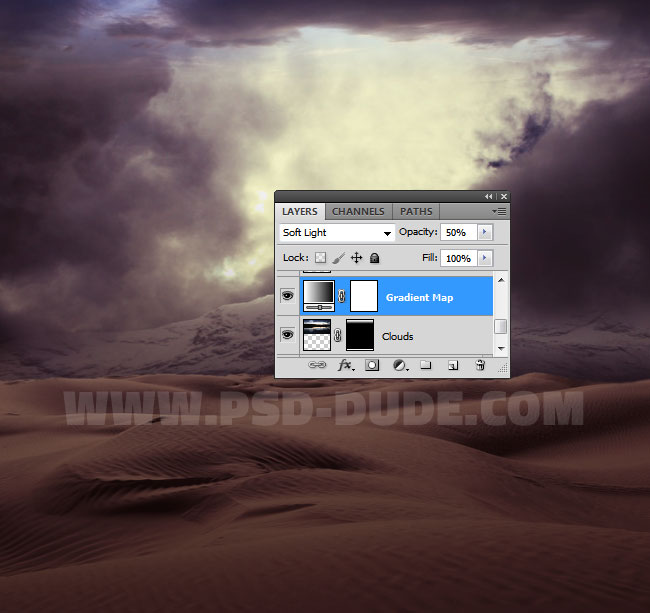
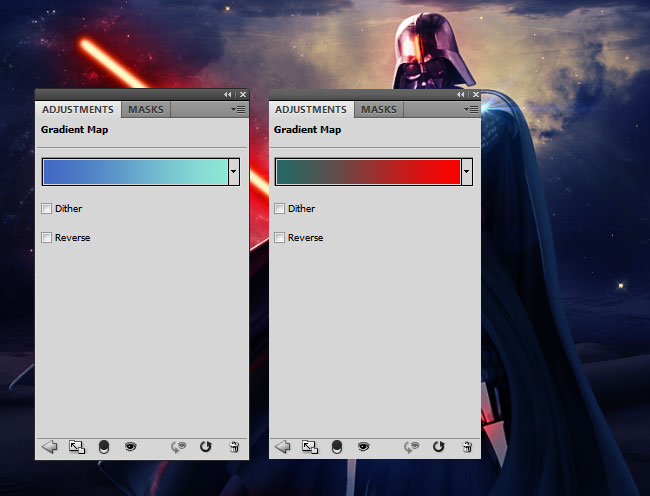
Add a Gradient Map above all of the current layers. This is an adjustment so, you can find it on the Image > Adjustments menu. How it works: it applies a gradient of color to your image depending on the tones in the image. So, where the image is darker will receive the tones from the left of the gradient and where the image is lighter will receive the tones from the right of the gradient. The midtones are colored with the color in the middle of the gradient.
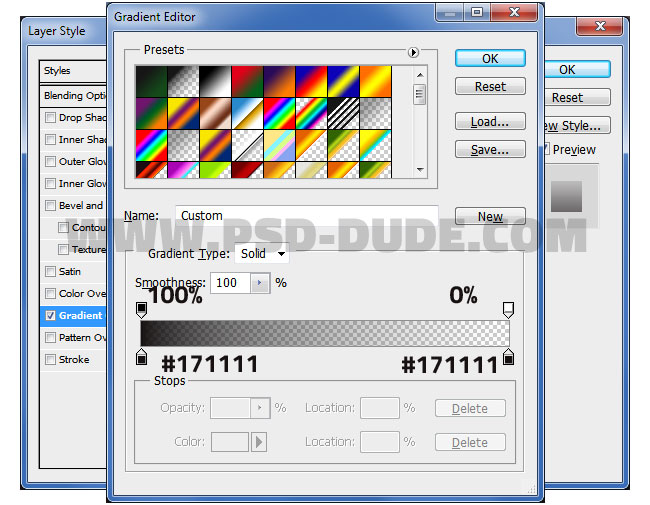
Double click on the Gradient Map thumbnail to change the settings. Click on the gradient to set the gradient color tones: #8f0e0d, #600029 and #ffffff
Change the blend mode of the Gradient map adjustment layer to Soft Light, opacity 50% and you should get this result.
To make the background look more like a sci-fi landscape we will add this galaxy photo in a new layer. Set the blend mode to Screen, opacity 100% .
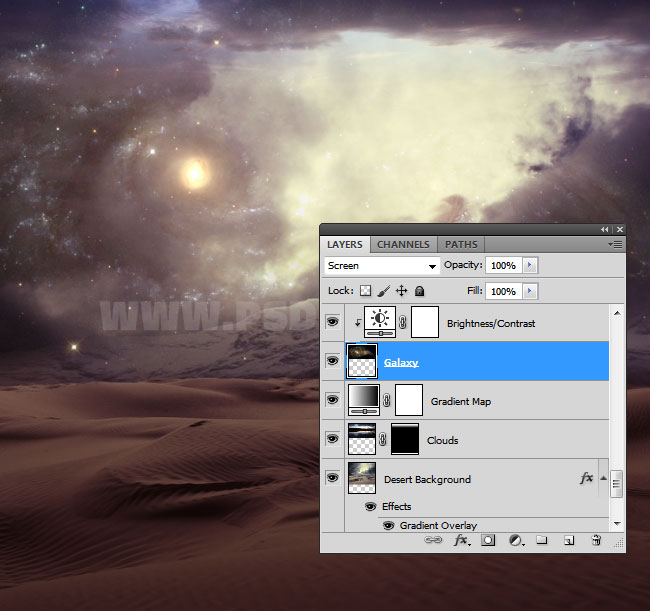
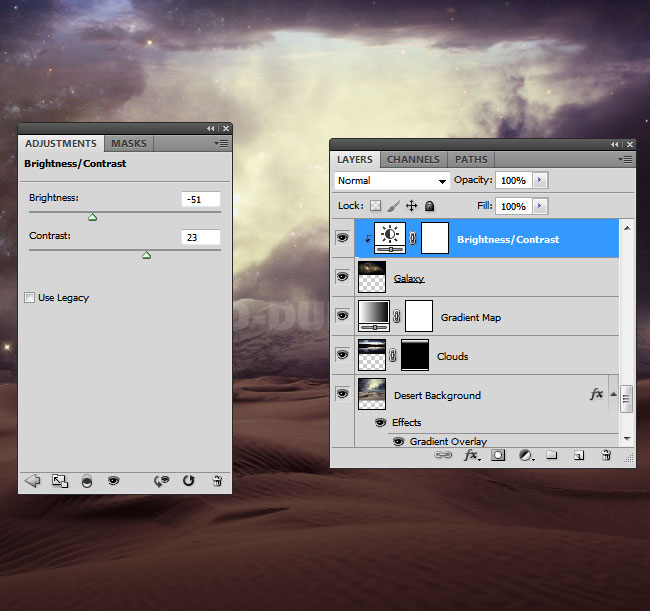
Now add a Brightness/Contrast adjustment layer just for the Galaxy Layer using a clipping mask.
As an alternative you can use this Galaxy Premade Background for this photo manipulation of for other projects.
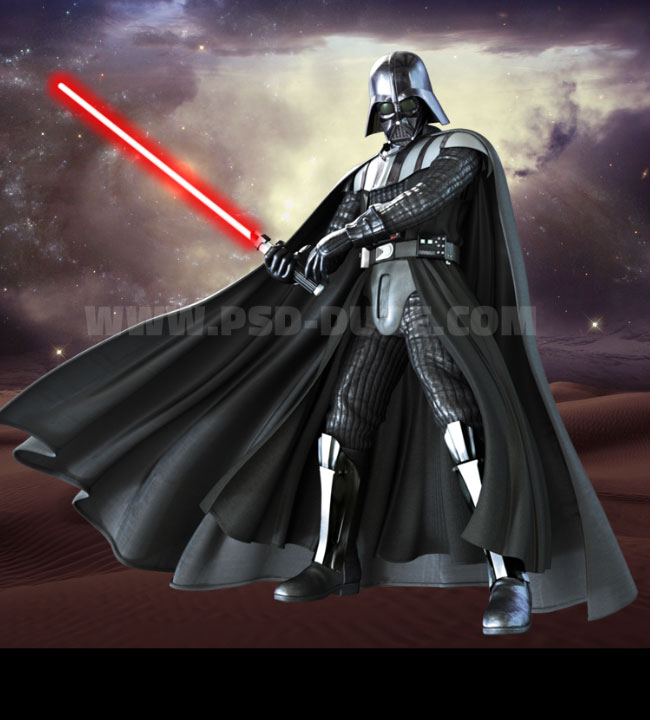
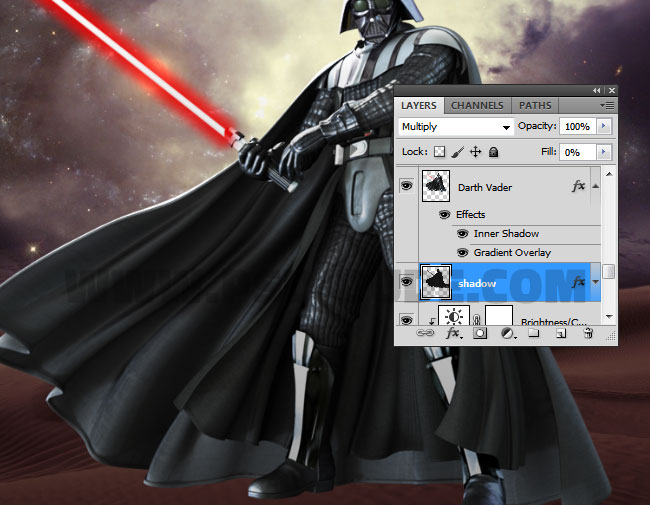
Use this Darth Vader render and add it in a new layer called Darth Vader of course.
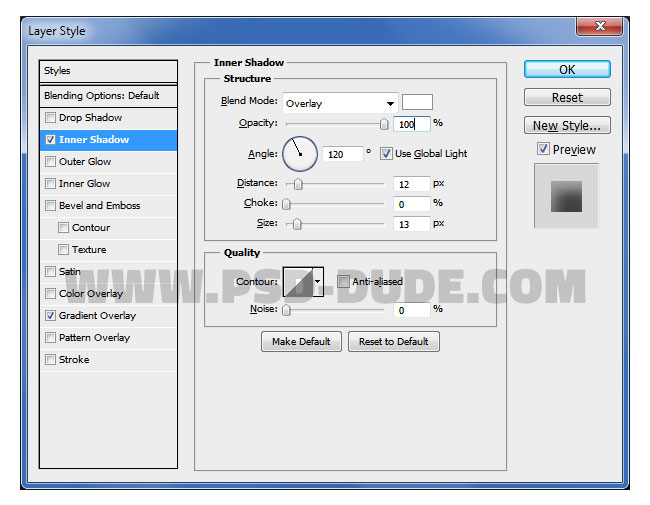
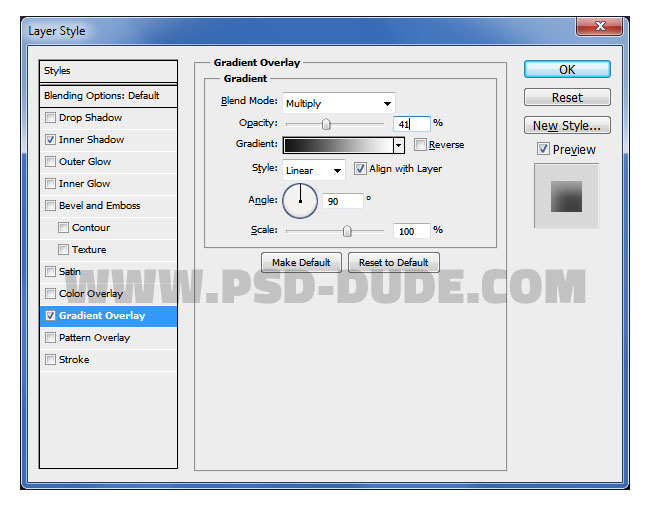
Add a Gradient Overlay and an Inner Shadow layer styles to the Darth Vader character.
Duplicate the Darth Vader layer and place it behind the original one. Right click on the layer and choose Clear Layer Styles. Call this layer Shadow.
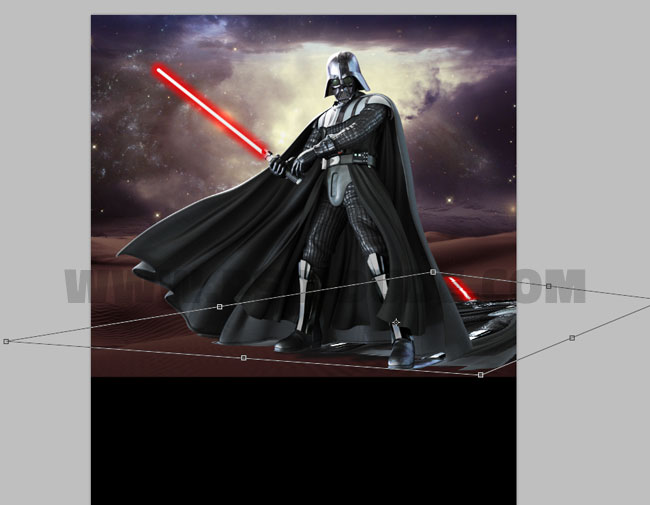
Go to Edit > Transform Menu and choose the Distort Tool to change the shape of the shadow. Drag a handle to distort the image. Then press Enter or Return to apply the distort transformations. Distort tool stretches an item in all directions.
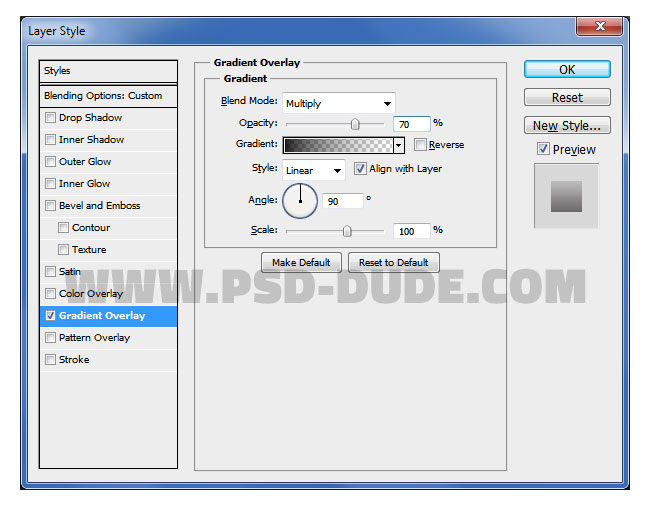
Set the Fill of the layer to 0% and add a Gradient Overlay layer style with the following settings. You can learn more about how to cast shadow in Photoshop from these tutorials for beginners.
Now we'll add some highlights and color effects to the character. Create a new layer and use the Brush Tool to add some lines with #e5e6e5 color. Use a soft round brush and paint the highlights. With the Smudge Tool, soft round brush and Strenght around 70% you can easily create smooth edges for the lines.
- Photoshop Smudge Tool
- The Smudge Tool simulates the effect you see when you drag a finger through wet paint. The tool picks up color where the stroke begins and pushes it in the direction you drag. Read more...
Set the blend mode to Overlay. You can add as many layers you want to create highlights and add a more dramatic effect.
Create a new layer and again pick the Brush Tool, use a soft round brush and color #0098e2 to paint over this area.
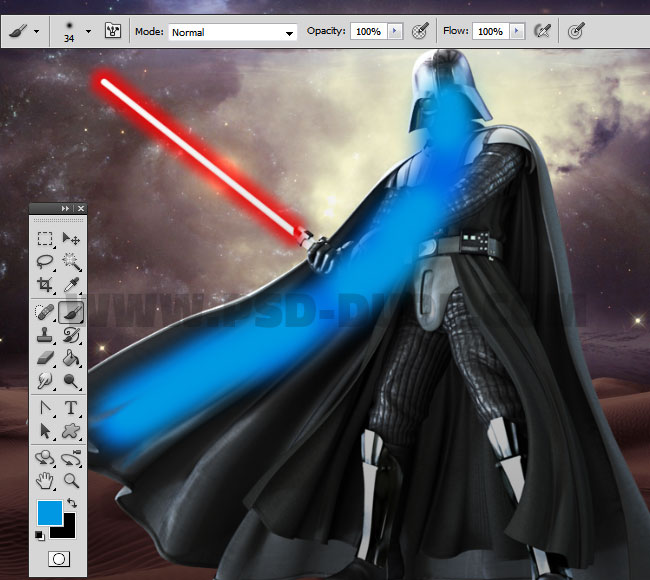
Set the blend mode to Color.
Create yet another layer and again pick the Brush Tool, use a soft round brush and color #e00101 to paint over some areas. Use different brush sizes and opacities.
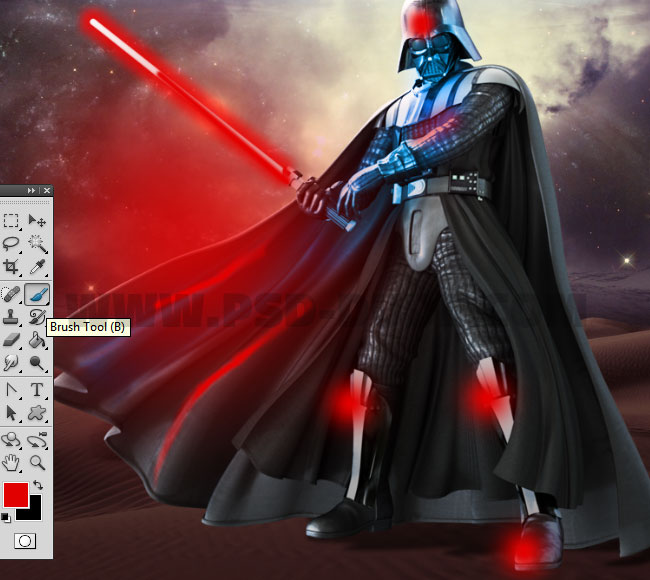
Set the blend mode of this layer to Color.
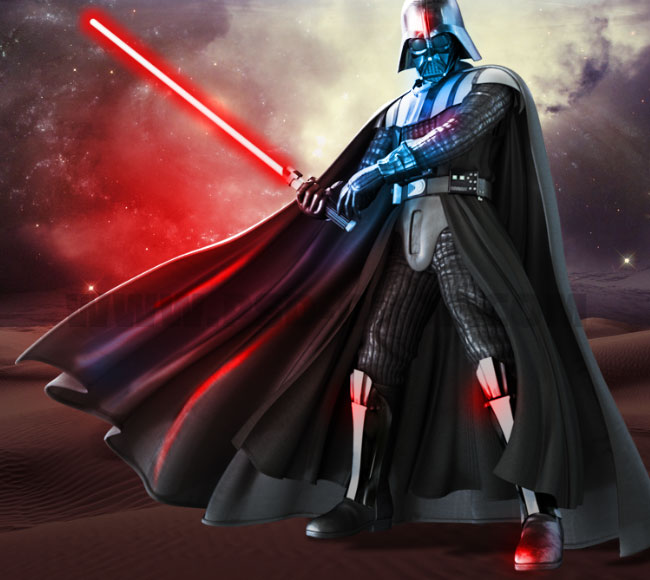
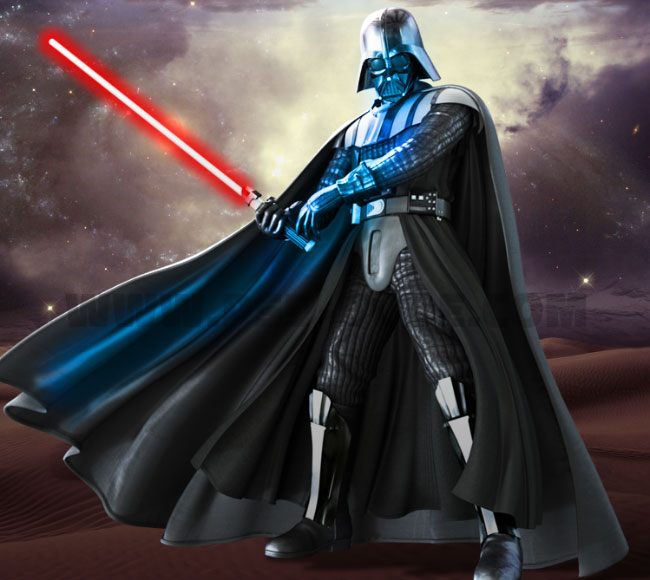
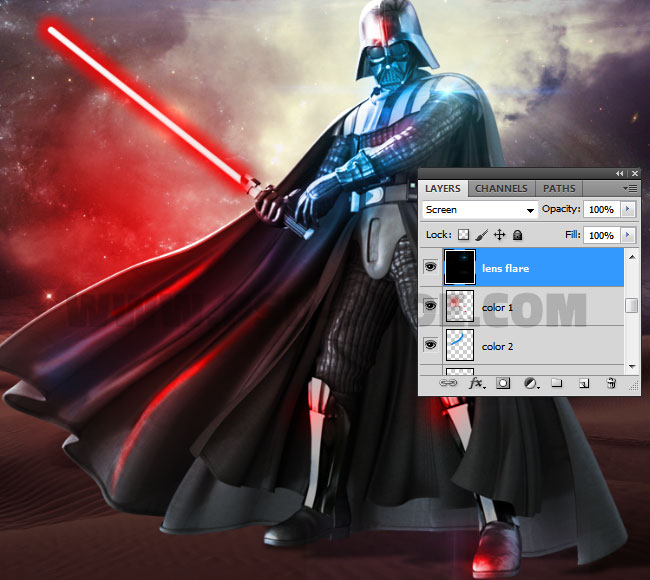
In a new layer add some lens flare textures that you like and set the blend mode to Screen or Lighten.
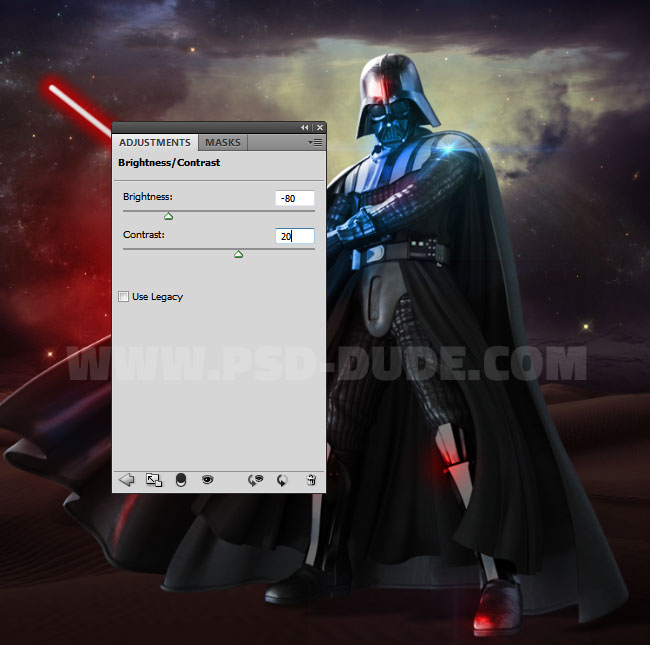
Add a Brightness and Contrast adjustment layer using these settings.
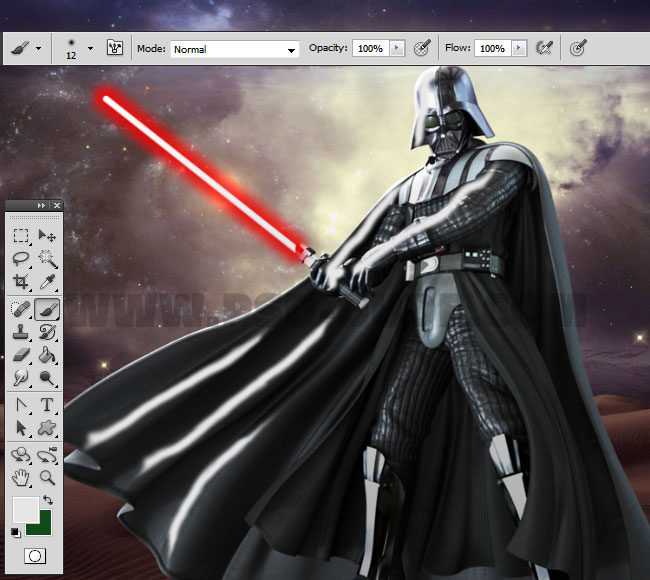
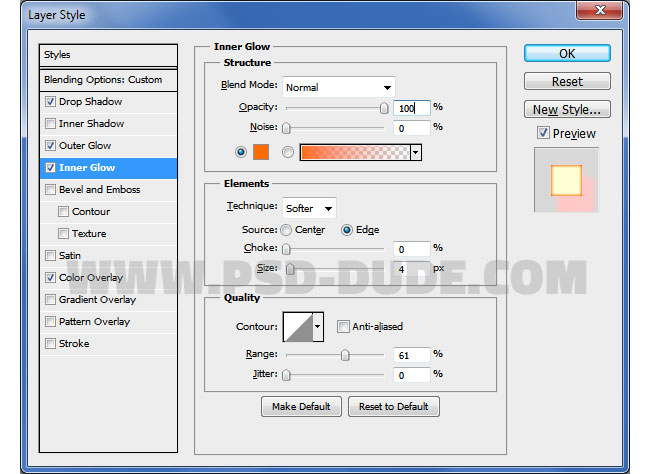
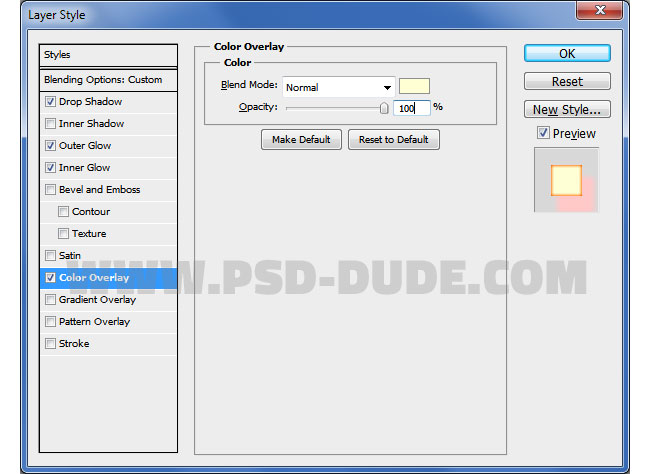
Create a new layer and call it Laser Light. Use the Brush Tool and a soft round brush to paint over the laser and other spots like shown in the image (the green lines). Use any color because we are going to change it by adding layer styles.

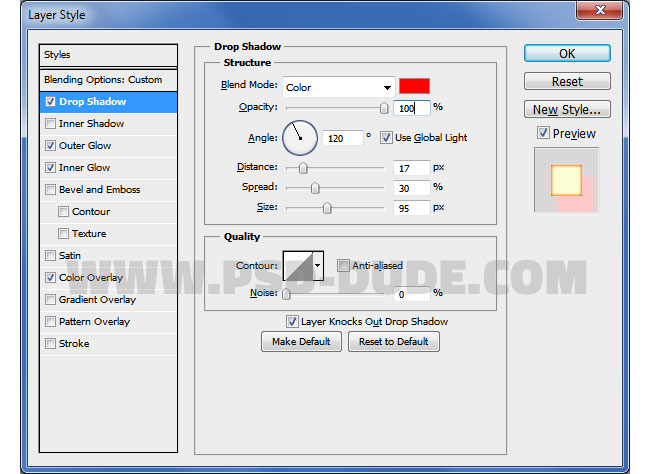
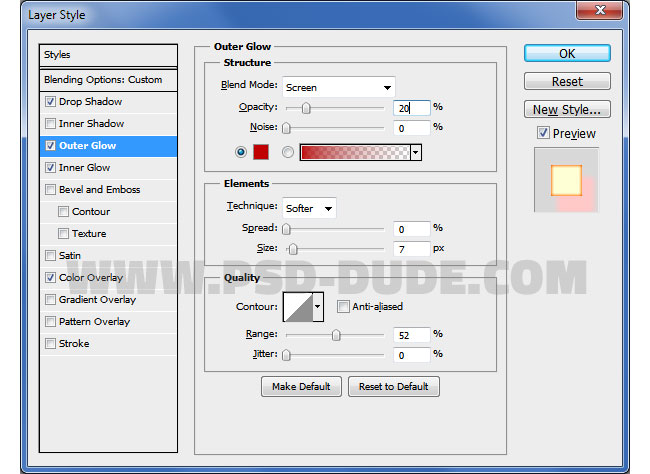
Now let's add some glow layer styles to the Laser Light. First set the Fill of the layer to 0% and than add these styles: Drop Shadow (color #ff0000), Outer Glow (color #), Inner Glow (color #ff6c00) and Color Overlay (color #ffffd4) .
For faster results you can try this laser beam texture overlay with Screen blend mode.
Add Meteor Shower Effect in Photoshop
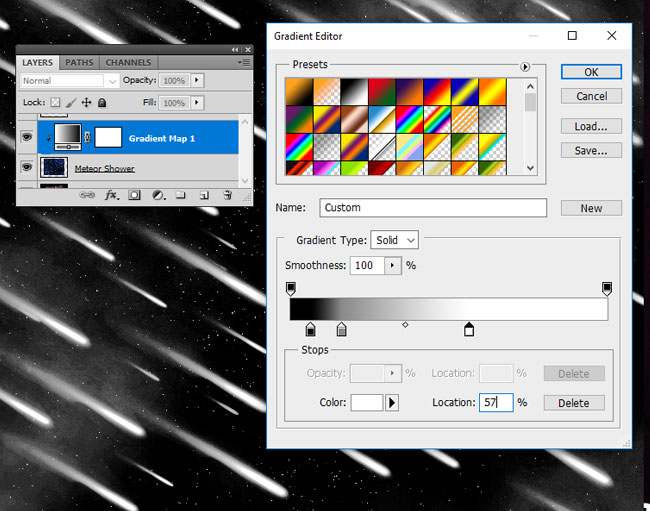
You can also add falling comets or other outer-space light effects; use this meteor shower texture in a new layer and set the blend mode to Screen. Press Control-T and set the Horizontal scale to -100% . Use the Eraser Tool to keep only some meteors.
Add a Gradient Map adjustment layer with Clipping Mask. For the gradient use the colors #000000 (location 7%), #8a8a8a (location 16%) and #ffffff (location 57%)
To make it look like a real movie poster I added the footer from the original Star Wars poster. Use the Eraser Tool and a soft round brush to create a nice transition.
Add Color Adjustments in Photoshop
For the final touches I added more lens flares and 2 Gradient Map adjustments:
- Gradient Map 1: blend mode Soft Light, opacity 100% and colors #4168c2 and #8de7d6
- Gradient Map 2: blend mode Soft Light, opacity 175% and colors #256765 and #fb0101
Add the Movie Poster Title
In the end use the High Pass filter to sharpen the image. If you want to add another title you can use this free Star Wars font - learn how to install font in Photoshop from this quick tut.
The Star Wars font generator is an online tool that you can use to create a PNG image using this font type. It's easy to use and you can import the text PNG into Photoshop or any other graphic design software.
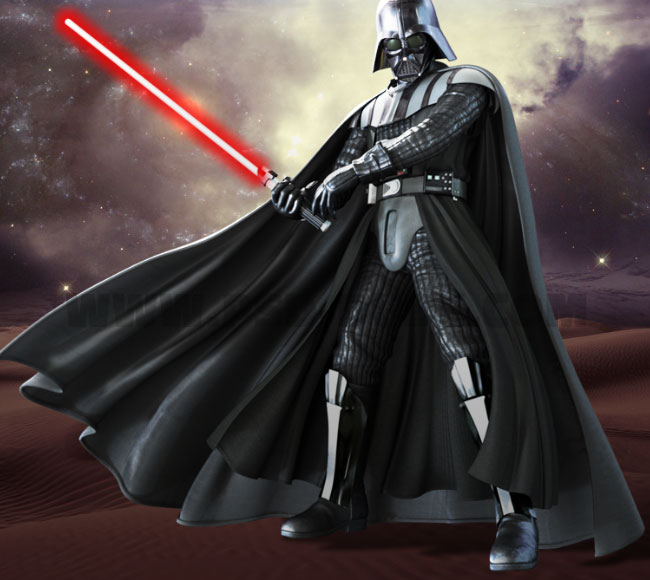
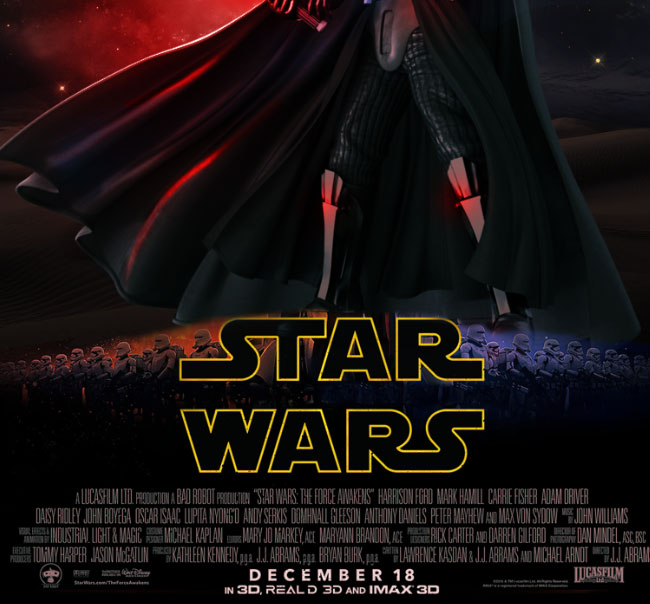
So here is the final result for the Star Wars Movie Poster Photoshop tutorial; instead of Darth Vader you can use any other character from this popular sci-fi movie.

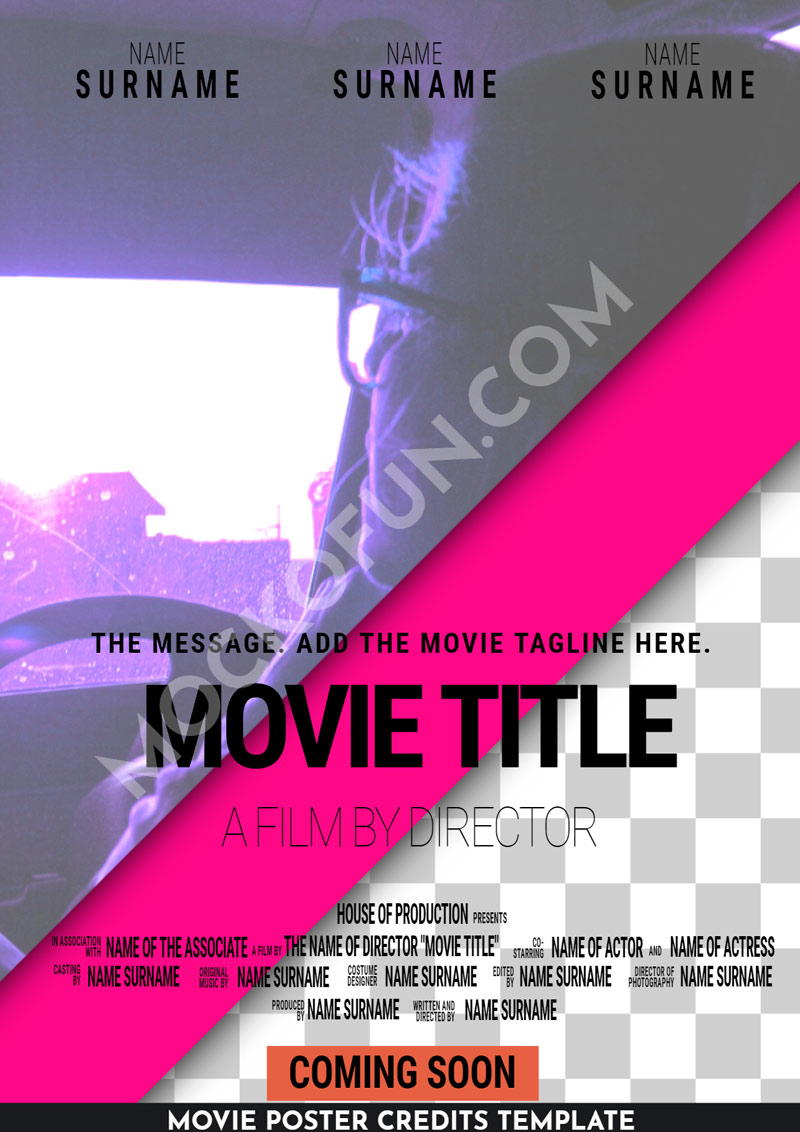
Add Movie Poster Credits
If you are an indie movie producer, or just want to give a proffessional look to your movie posters, the movie credits need to follow certain rules. Check out this movie poster credits PNG template that can be easily customized online: background image and color, text and font for the movie title, cast and other information.
Movie Poster Credits PNG Template Online
You can also try these awesome Photoshop actions.
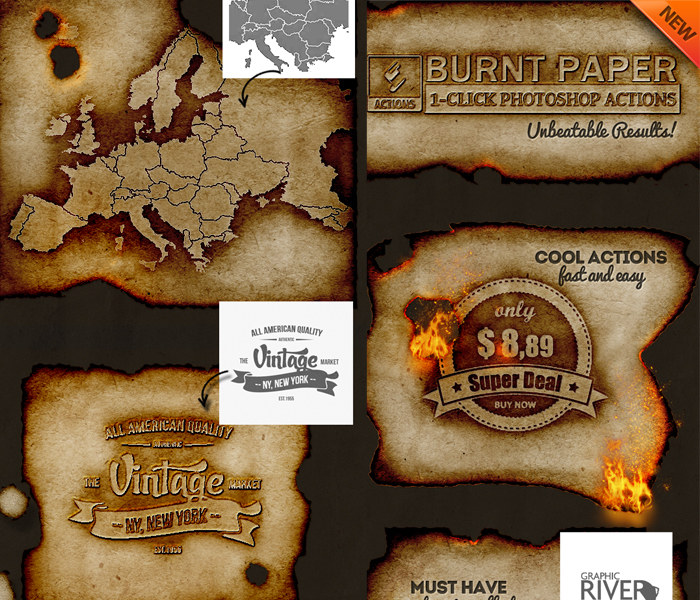
Burnt Paper with Fire Effects in Photoshop
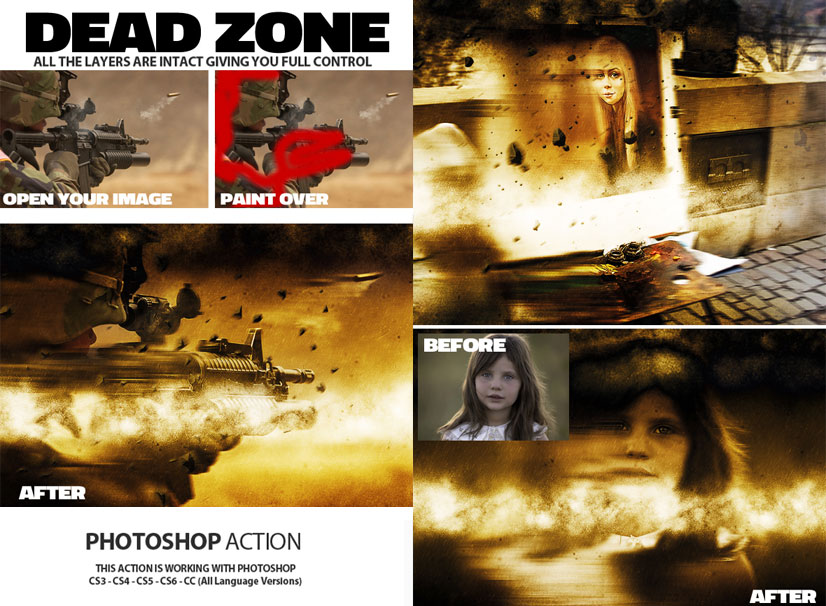
Apocalypse Effect Photoshop Action
Fire Effect Photoshop Action Download
Related Articles
- Fire Photoshop Brushes | Free Brushes
- Fire Text Effects | Tutorials
- Fire Texture Collection | Free Textures & Backgrounds
10 comment(s) for "Star Wars Movie Poster Photoshop Tutorial"
http://blog.spoongraphics.co.uk/tutorials/how-to-create-a-grungy-star-wars-propaganda-poster-in-photoshop
Thank you for your time!
. reply
But you can use the Star Wars font if you want to write something else.
reply