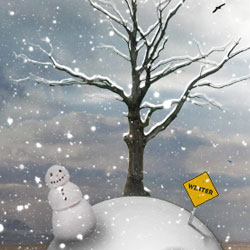

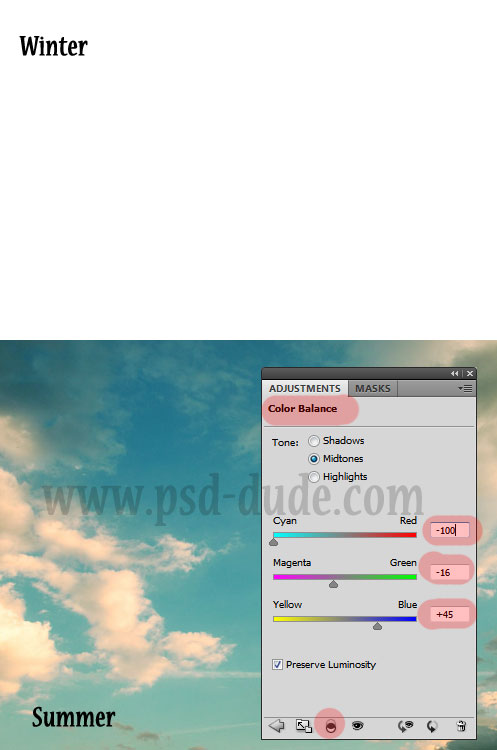
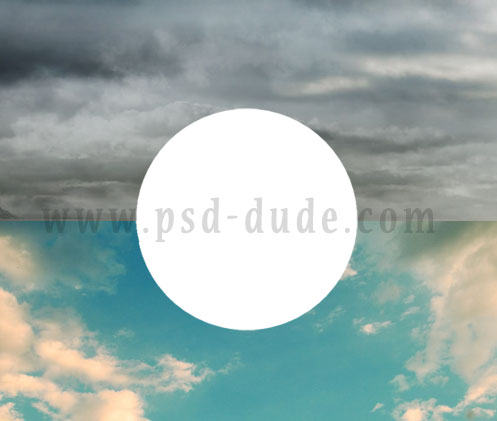
In this tutorial we'll create a two season Photoshop manipulation inspired by this beautiful artwork called Seasons Photo Manipulation made by Andrzej a digital artist from Poland.. I will create both winter and summer season using a floating spheric island. And we will start by creating the two side sky, one for summer time with vibrant blue color tones and one for the winter time with dark color tones. So use this beautiful sky clouds and use a Color Balance adjustment layer to change the color tones. Set the adjustment as clipping mask
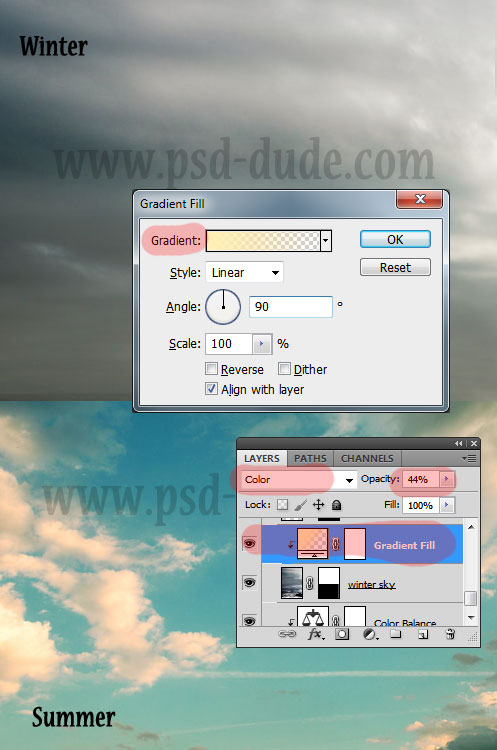
Now let's add the other half of the sky, using this winter clouds stock image. Add a Gradient Fill adjustment using color #fff0b6 for the gradient and 100% to 0% opacity. Set the blend mode of the gradient fill layer to Color 44% opacity.
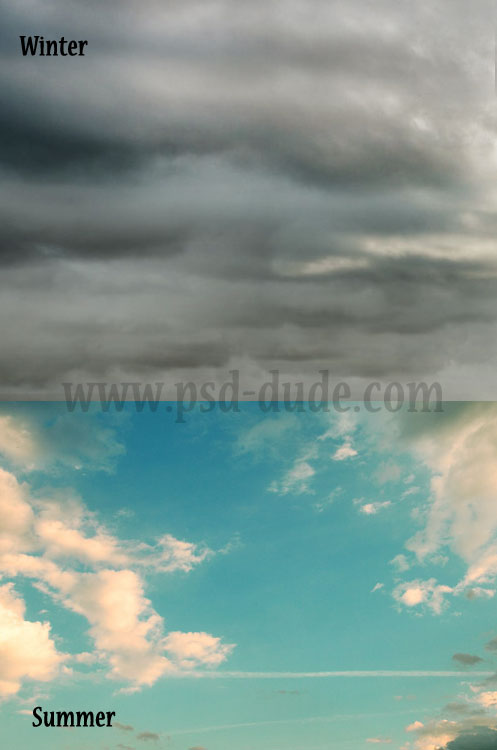
Use another clouds texture and place it over the previous one. Set the blend mode to Soft Light and also lower the saturation of this layer. So now we have a two sided sky; we we work on the image later on to make the transition seamless.
Add in a new layer a circle shape using the Ellipse Tool.
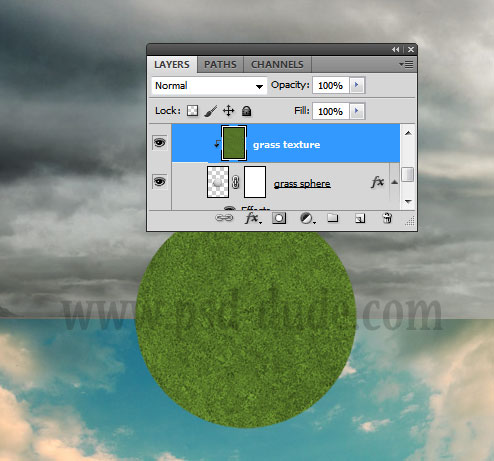
Use a grass texture for the circle shape. Add the texture above the Circle Layer and turn it into a clipping mask.
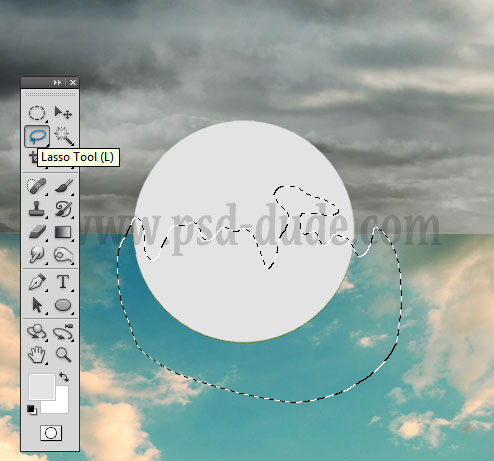
Duplicate the Circle Layer, and add it a #e3e3e3 Color Overlay. Call this layer Snow Surface. Use the Lasso Tool to make a selection like shown in the image.
Use the selection and add it as a layer mask to the Snow Surface layer.
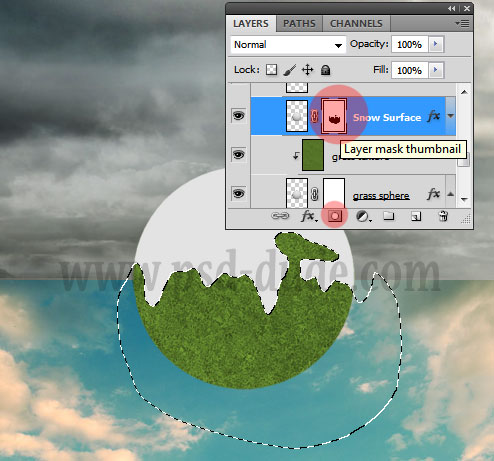
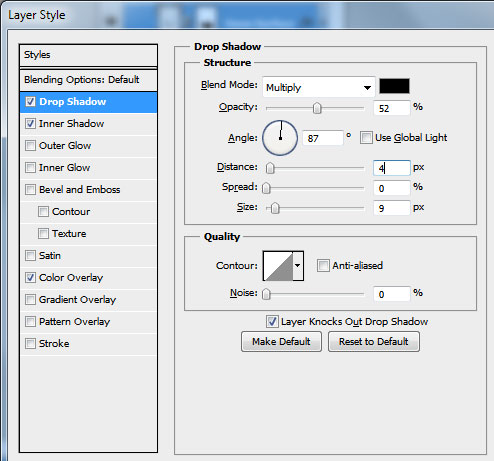
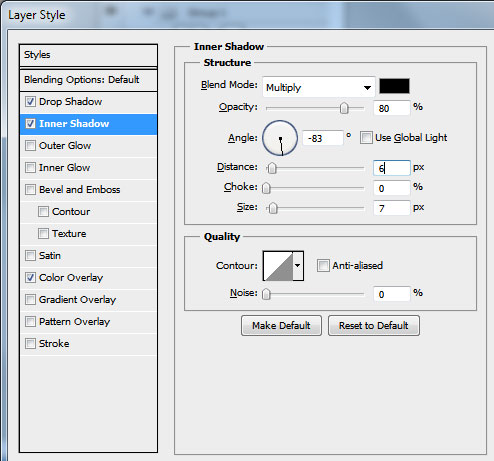
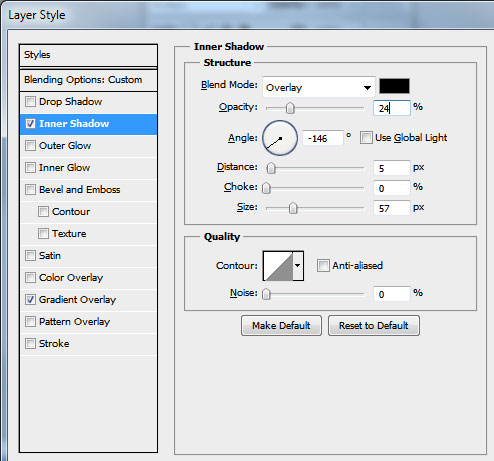
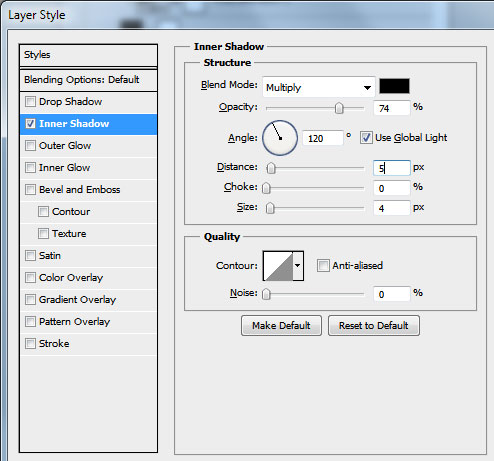
Open the layer style window of the Snow Surface layer and add Drop Shadow and Inner Shadow effects.
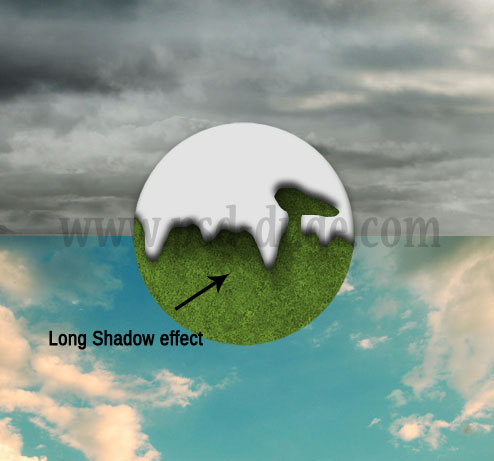
Create a new layer below the Snow Surface layer and call it Shadow. Use the color black and the Brush Tool to paint a long shadow effect. Use different opacity levels for the brush and also use the Gaussian Blur filter to make a smooth surface.
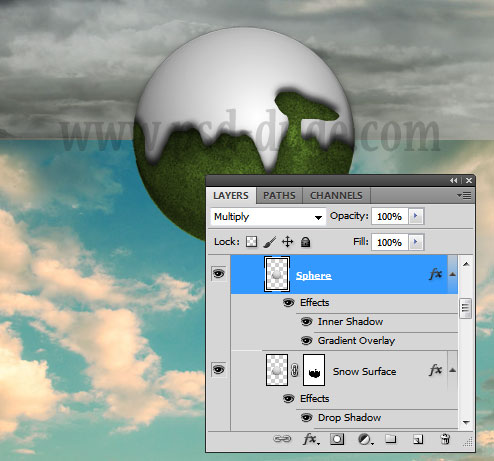
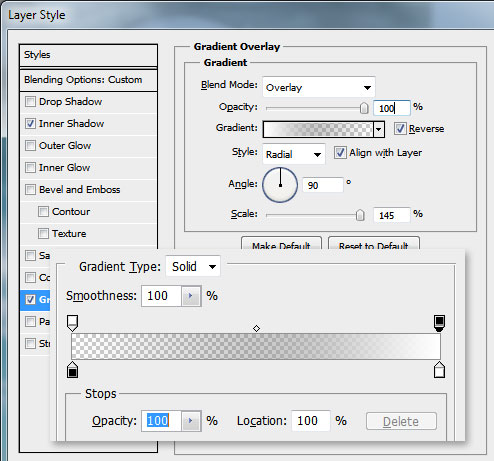
Place this shpere over all the circle layers. Set the Blend mode to Multiply and add an Inner Shadow and Gradient Overlay styles.
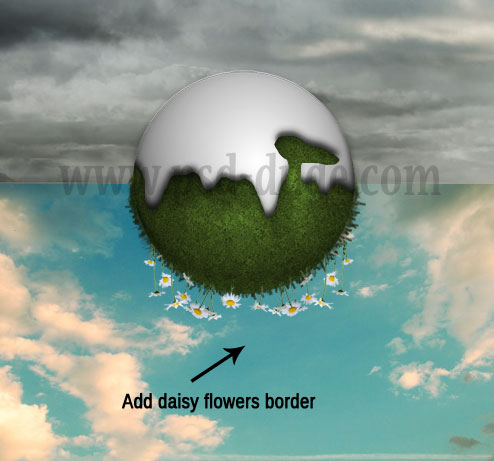
Create a new layer below the Circle Layer and call it Grass Border. Make a path using the Circle layer and use a grass brush and a dark green color to make a grass border. Use the Eraser Tool to delete the area that surrounds the snow surface.

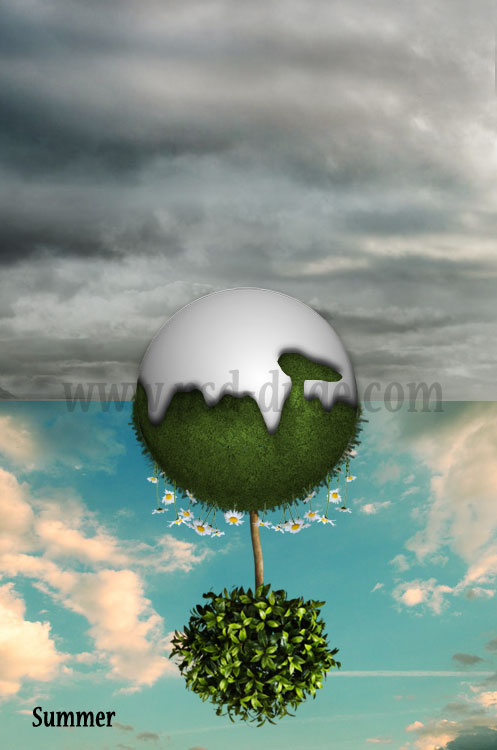
Now we are going to create the two seasons and I will start with the summer season. Ww will have to work upside down so every item you will have to Flip Vertical. So first add this daisy flowers PNG stock image. Resize it and flip it on the vertical scale. Use the Eraser Tool to blend the daisies with the grass surface.
I will now add a tree using one of these alive trees from the PNG stock image.
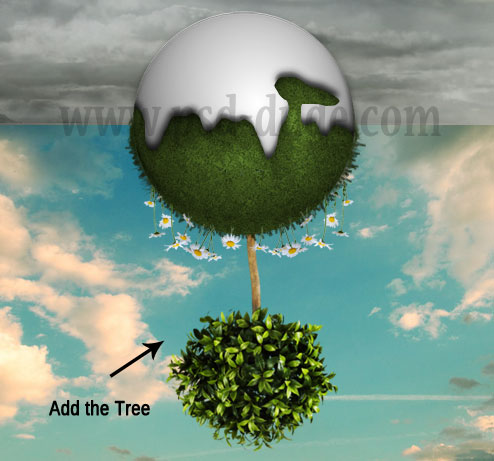
Because the tree looks a little flat I will add a Inner Shadow effect.
So the summer winter seasons photo manipulation should now look like this.
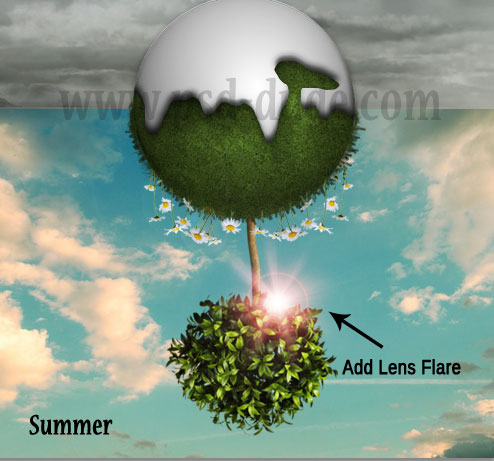
To make the image look more interesting I will add a sunlight effect; use this lens flare Photoshop tutorial and add a sunt lens flare effect like in the image.
Now let's create the winter season; add a dead tree. You can also take a look at these tree brushes but I will use the PNG stock image.
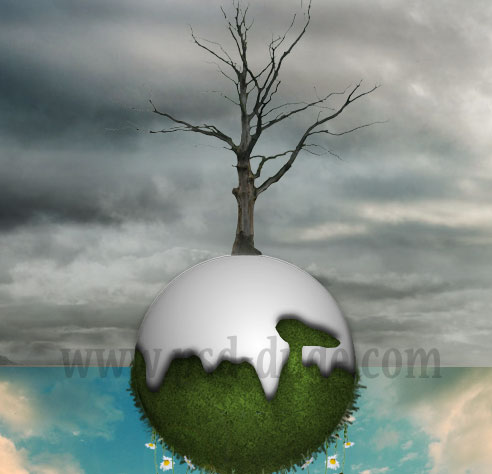
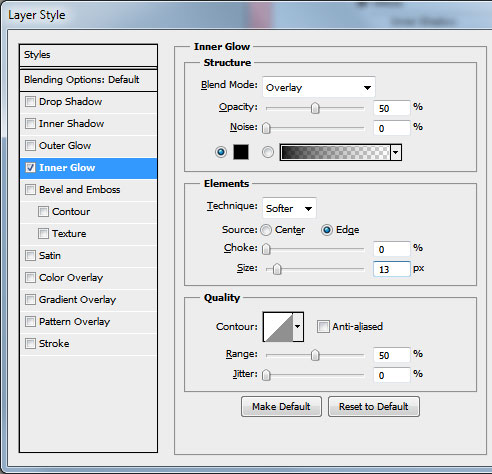
Add a Inner Glow layer style to the Dead Tree Layer
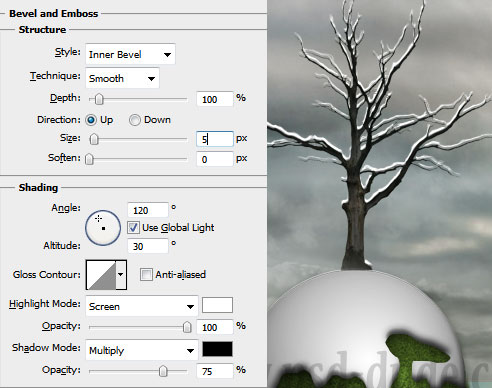
Duplicate the Dead Tree Layer and call it Tree Snow and place it below the previous one. Move the layer up(the move size depends on your canvas size), I will use 3px. Make this layer color white. Delete from this layer the shape of the Dead Tree layer. Also add a Bevel and Emboss layer style.
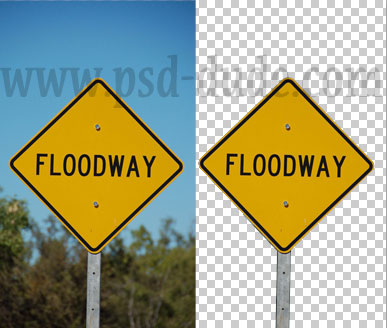
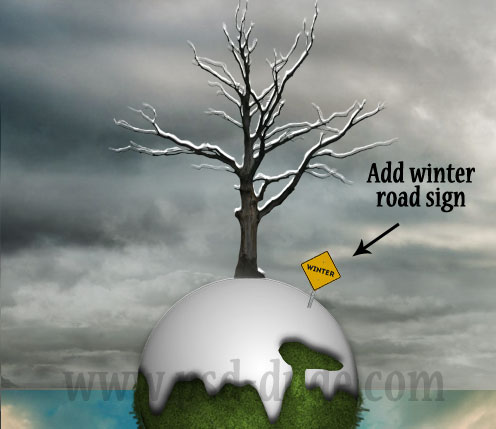
Let's add this road sign stock images. All you have to do is to remove the background and keep only the road sign. For removing the background you can use one of these Photoshop selection tool methods.
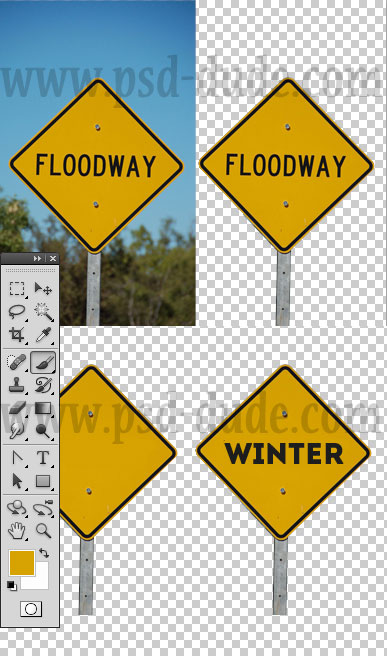
Use the Brush Tool, pick the color of the road sign and paint over the text. Write a new text, I will type "WINTER" using the intro free font. Learn how to install font in Photoshop from this quick tutoial for beginners.
Resize the image, rotate it a little and put it in place like shown in the image.
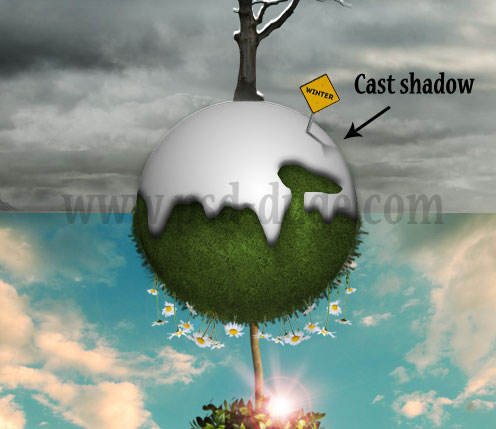
You will now have to cast shadow for the road sign. Use the Distort Tool and a black gradient overlay with transparency.
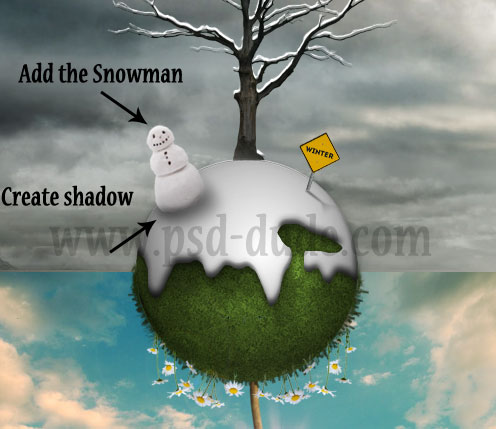
Add this snowman PNG image. Resize it, rotate and place it like in the image. You will have use the Brush Tool color black opacity 50% to create a shadow beneath the snowman. Use the Gaussian Blur to obtian a soft shadow.
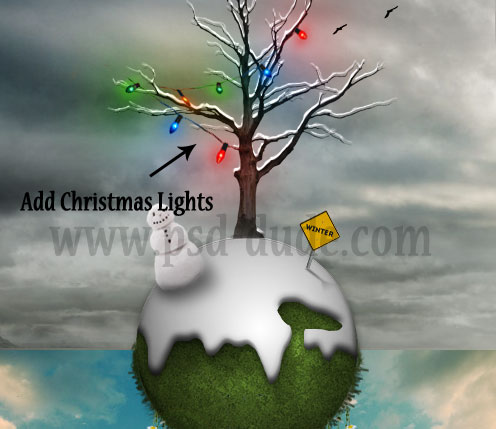
You can use these Christmas lights PNG images and wrap them around the dead tree. Resize the image, roate and use the distort tool, the warp tool to create this effect
How to Create Falling Snow Effect in Photoshop
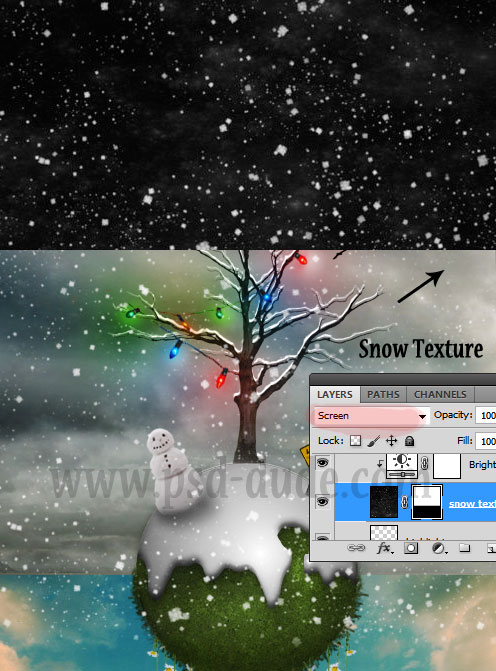
If you want to add falling snow effect you can add the falling snow texture and set the blend mode to Screen. You can use these textures snowfall 1 and snowfall 2 with Screen blend mode. Also you can download this snow brushes and add snow using the Brush Tool and color #ffffff.
Here are some more snowfall textures that you can use with Screen blend mode.
So here is the final result for the Winter Season Photoshop manipulation tutorial; you can of course customize the image, adding your own ideas, other winter and Christmas elements that I did not used. As always I am curious to see you photo manipulations inspired by this tutorial so please upload them in our comments section.
Online Christmas Card Maker
Did you know you can use online tools like MockoFun to make Christmas cards? Combine Christmas vector shapes with text and create some amazing Christmas cards. MockoFun provides pre-made templates for making Christmas cards online in just a few minutes.
Check out this awesome list of over 50 Christmas fonts that you can use online or download for free to use in Photoshop. Combine Christmas fonts with text symbols like a star symbol for example.
Check out this tutorial on how to use the online Christmas Card Maker and all the awesome features that MockoFun has to offer.

17 comment(s) for "Winter Season Photoshop Manipulation Tutorial"
Problem with the link: ">Christmas lights or it is just with me ? reply
I replaced the link I hope now it is ok ! reply
Everything made of current events for me today (France, Saint-Etienne...Under a lot of snow !)
Cliquez ici pour voir mon image reply
I just got one problem. Just like the guy in the last comment my winter and summer scene don't blend in well. Just like in the picture where you explain the snow texture, I have a line in the middle of my photo. Can you tell me how you made that smooth transition?
Thanks! reply
Thanks for your answer! I still didn't manage to do it. But I tried and tried and tried.. And finally I figured out I had to make the two backgrounds bigger. I think I went wrong somewhere in the tutorial!
Thanks again for the tutorial, very educational! reply
I am glad that overall you liked the tutorial :) reply
the best way to make smooth transition between two images is to use a layer mask with a black and white gradient.
You can learn how to create transitions between two or many photos from this quick tutorial - layer mask in Photoshop. The section "2. Use Photoshop Gradients in Layer Mask" is the one that will help you achieve this effect! reply