In this new tutorial I will tell you everything that I know about Photoshop mask, what is and how you can add a layer mask in Photoshop.
What is a Layer Mask?
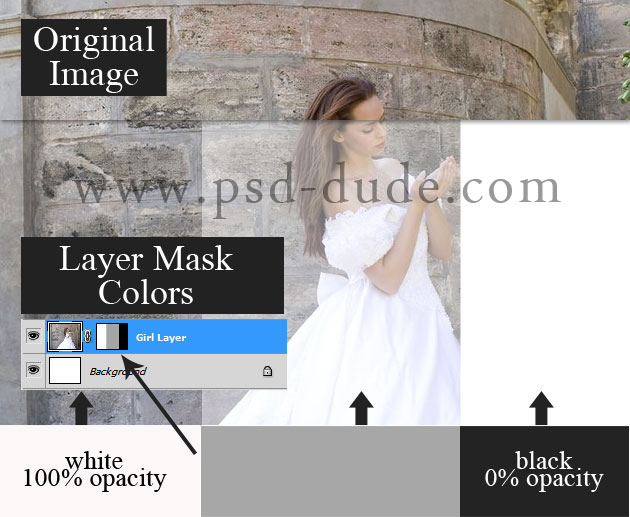
A layer mask is actually a gray scale image that acts like a mask for the its layer(meaning that it hides areas from that layer so you can see the layer below). This grayscale image has white, black and all tones of gray in between; white means the layer area is 100% visible and the black color means the layer area is transparent 100%. So you can play with this grayscale image to obtain transition or fade effect like the one presented further on in this tutorial.
The good thing is that you can actually add a Photoshop mask to any type of layer, like text, shape, smart object or any other layer that you can think of. Creating a mask over multiple layers it is possible but only if you group these layers, with other words you can add layer mask to groups of layers.
Think of a layer mask as an Eraser Tool that it is not permanent, meaning that you can remove the layer mask, or adjust it without worring about the original image contained by the layer. And of course that the Eraser Tool can be used only for rasterized layers.
How to add Layer Mask in Photoshop
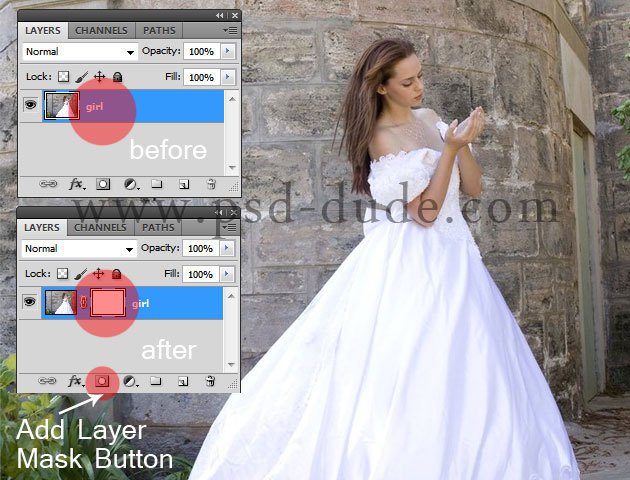
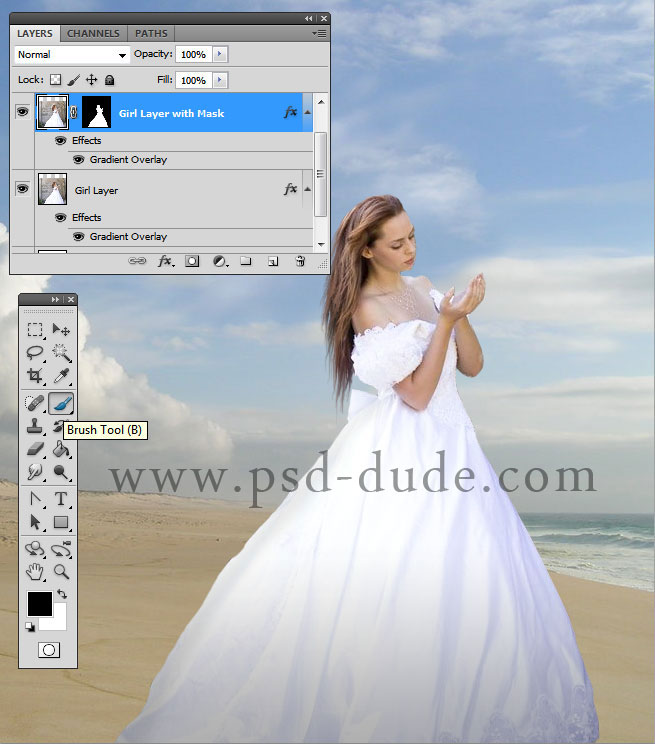
You can add a layer mask to any type of layer or even to a multiple layers gathered in a group. To mask layer in Photoshop you simply have to be on that layer and press the Add Layer Mask button found on the layers tab. As you can see it adds a white layer mask meaning that the entire image is visible. You can use the Brush Tool, color black, to hide parts of the image. I have used this beautiful stock image for the preview.
Another way in which you can add a mask is to use the Photoshop menu; go to Layer, Layer Mask menu and choose one of the two available choices. Choose Reveal All for adding a mask filled with white or choose Hide All for adding a mask filled with black color. It is up to you if you start with an white or black mask; usually if you want more percentage of the image to be hidden, you start with a black filled mask and vice versa.
How to Use a Layer Mask
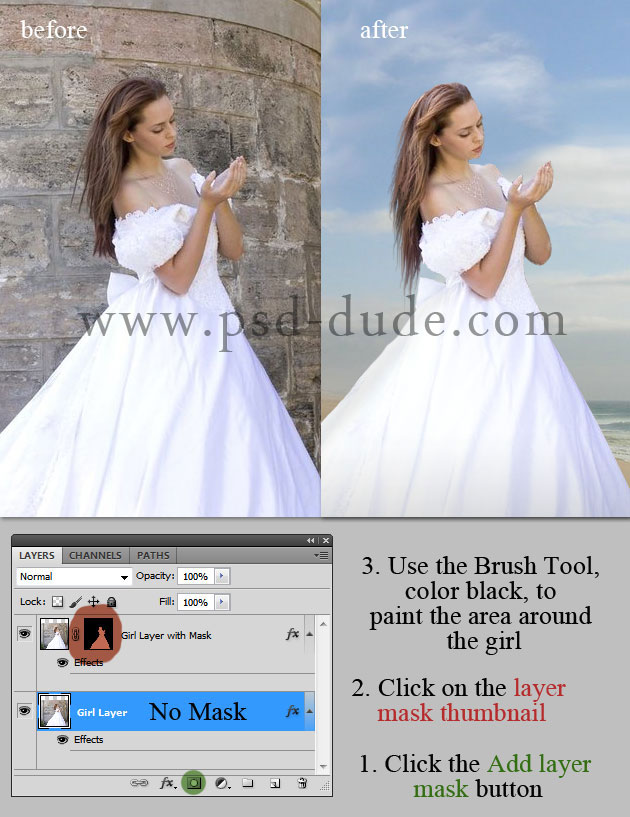
So in the previous step I showed you how to add a layer mask and now I am going to tell you how to use it. First you have to make sure you are in the layer mask(click on the layer mask thumbnail). Than depending on what type of effect you want to obtain fill the layer mask using the Brush Tool for example. You can actually use any Photoshop Tool(brush, smudge, eraser, selection, etc) like in a regular layer, you can use Filters, Gradients and so on. The only restriction is on the colors that are only grayscale colors.
So let's pick the Brush Tool and with the color black paint the area around the girl to hide it. As you can see in the image below I have added a beach image so that when the girl background is hidded we see the beach background.
Photoshop Tools and Filters Used in Layer Masks
As I said in the previous section there are lots of tools that can be used in a layer mask and each creates a different effect. I will show you the most used tools and filters in layer masks and the after effect.
1. Use the Brush Tool in Layer Mask
The Brush Tool is used mainly for obtain the crop image or remove/replace background effect. In the previous step you saw how easy it is to replace a background using a Photoshop mask.
2. Use Photoshop Gradients in Layer Mask
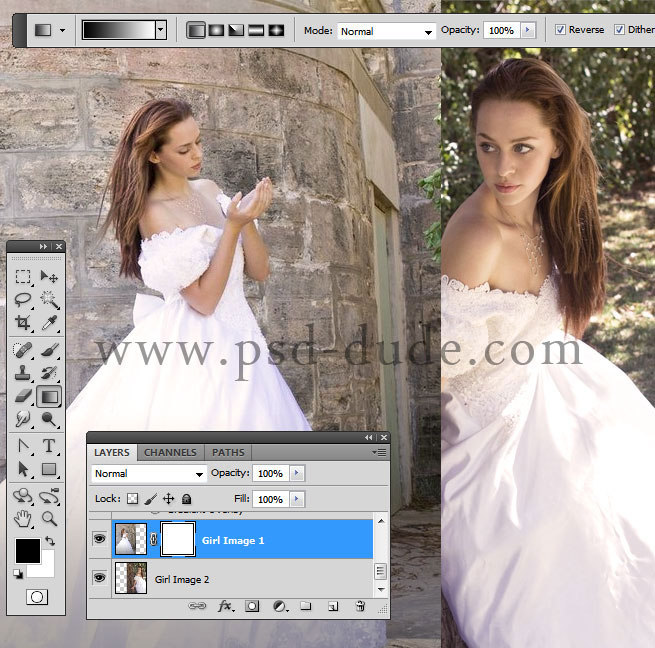
A Photoshop gradient is used for transitions between two or many photos. Let's say we have two images that we want to blend girl image 1 and girl image 2. Place the girl photo 1 above the girl image 2 and add a layer mask to the girl image 1 layer. Pick the Gradient Tool and choose a black 100% to white 100% gradient like shown in the image.
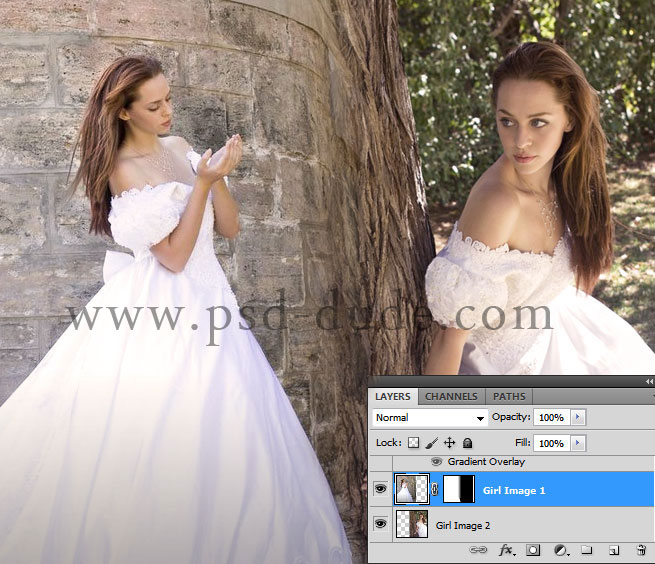
In the Layer Mask use the Gradient Tool so that you fill the right area of the girl image 1 layer with black like in the image. You can see that we obtain a beautiful and soft transition between the two images. This Photoshop fade effect can be useful when creating photo albums, photo collage, wedding photo albums, scrapbooks and so on.
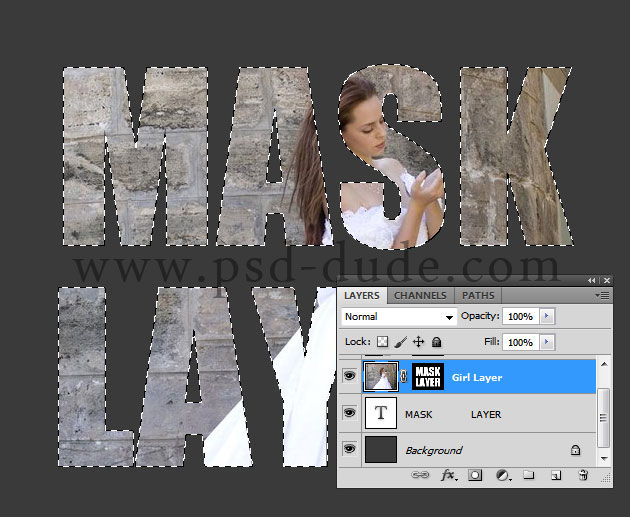
3. Use Text and Shape as Layer Mask
You can use a text layer to add it as a layer mask but you need to make a selection out of this text first. Simply keep the CTRL key pressed and click on the text layer thumbnail to make a selection. Return to the girl image layer and press the Add layer mask button. The same effect can be obtained using clipping mask but I will explain that in another tutorial.
4. Use Selection as Layer Mask
You can make a selection out of any layer, not only text layer and you can add it as layer mask as you saw in the previous step. So you can create mask from layer in Photoshop using the selection Lasso Tool for example. You can obtain a quick mask in Photoshop using shapes, rasterized layers, etc.
5. Use Filters as Layer Mask
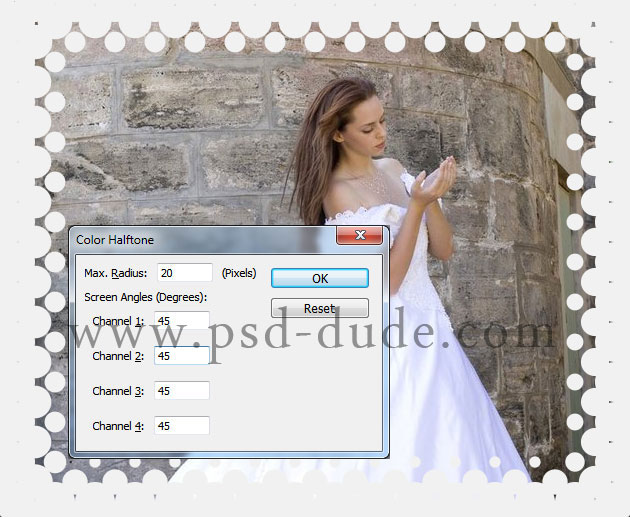
You can use Photoshop filters to obtain hundreds of beautiful and interesting effects; you can make frames and borders, create a grungy effect, add halftone pattern and so on. It depends on your creativity and your curiosity to discover new Photoshop effects. For example, make a rectangle selection in the Girl Layer and press the Add Layer Mask button. Now the image is much smaller, a part of it is not longer visible. Now make sure you have the layer mask selected(click its thumbnail) and go to Filter, Pixelate and choose Color Halftone with the following settings:
You will obtain a beautiful halftone border that you can use to decorate your photos. And remember that the good thing is that it is only a mask, you can remove it at any time and replace it with another one.
Other Layer Mask Options
After you added a layer mask you can edit it by painting inside it with grayscale colors as we will see in the following steps. But if you right click on the layer mask you will see that you have other options that are available:
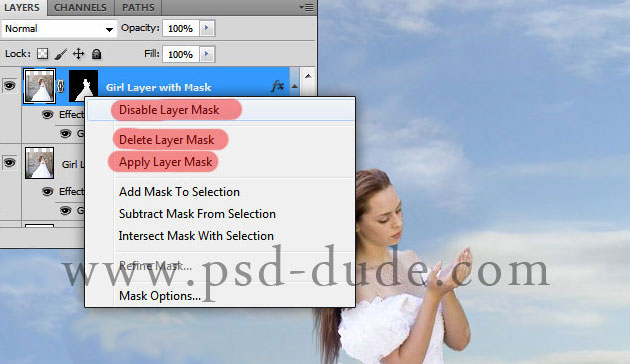
1. Disable Layer Mask to temporary hide the layer mask; with a simple click you can enable layer mask again.
2. Delete Layer Mask to remove the mask completely; once that mask it is removed it will no longer be available.
3. Apply Layer Mask to merge the layer with the the layer mask; meaning that the layer mask effect and the layer get rasterized or flatten.
4. Other mask options like the selection option Add Mask To Selection; if you make a selection on the layer image, the layer mask selection will also be added on that selection, and so on.
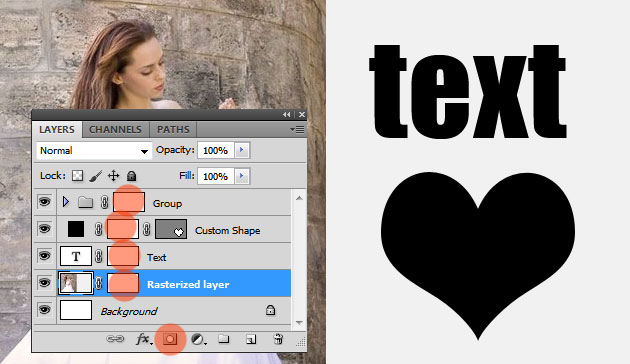
Types of Layers that Support Layer Mask
You can add a quick Photoshop mask to any layer: text layer, custom shape layer, rasterized layer, smart object and so on. You can create a layer mask for multiple layers but you have to gather them in a group first, so you can add layer mask to groups.
Create Mask From layer in Photoshop
It is possible to create mask from layer without using selection tools or layer mask, with the help of another Photoshop option that is called Clipping Path.
When working with complex layer masks your Photoshop might become slow. Using vector masks or less complicated layer masks might help, but there are a number of other things you can do to make Photoshop faster. Check out what causes Photoshop lagging and how to fix it.
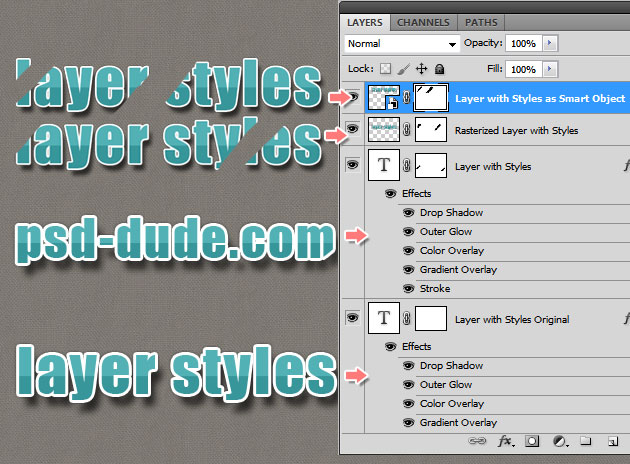
Do Layer Mask Applies to Layer Styles?
If a layer has layer styles like Outer Glow, Drop Shadow and so on, the layer mask doesn't apply to these layer styles. You have to rasterize or flatten the layer with the layer styles first or you can convert it in a smart object.
Well that is all about layer masks in Photoshop, all that I know. I guess it is the most complex layer mask tutorial and if you have any questions I will be more than happy to give you an answer. This tutorial is mainly for Photoshop beginners and I decided to write it because I use layer masks a lot in my tutorials and sometimes the newbies have trouble working with these masks.
5 comment(s) for "Layer Mask in Photoshop"
The pin it share icon covers up the text on the left side, could it be moved up or down or to the right side? reply
I am glad you like the tutorial. And about the pin it share box you are not the only one that suggested that so I decided to remove it so that you can see the content better!
reply
http://www.webdesignerdepot.com/2010/09/editing-opacity-with-layer-masks/