
What is a Lens Flare?
Lens flare is the light scattered in lens systems. Flare is particularly caused by a very bright light sources either in the image - which produces visible artifacts - or shining into the lens but not in the image - which produces a haze. Most commonly, this occurs when shooting into the sun (when the sun is in frame or the lens is pointed in the direction of the sun)
Lens flare typically manifests as several starbursts, rings, or circles in a row across the image. Lens flare patterns typically spread widely across the scene and change location with the camera's movement relative to light sources, tracking with the light position and fading as the camera points away from the bright light until it causes no flare at all. Source
In this quick tutorial I will show you how to create realistic lens flare effects for your photos and images. I will show you two useful methods in which you can add sun lens flare in Photoshop in a non destructive way for your images.
Method 1: Create Lens Flare Image Texture
Open a new PSD file size 1000x1000 px for example if you want to create a big lens flare image. Fill the layer with color black. Go to Filter>Render and choose Lens Flare.
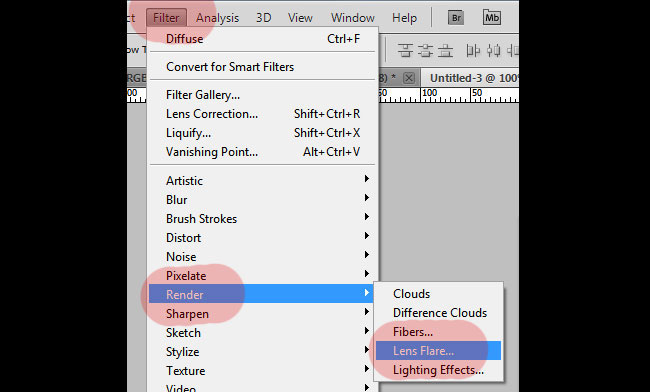
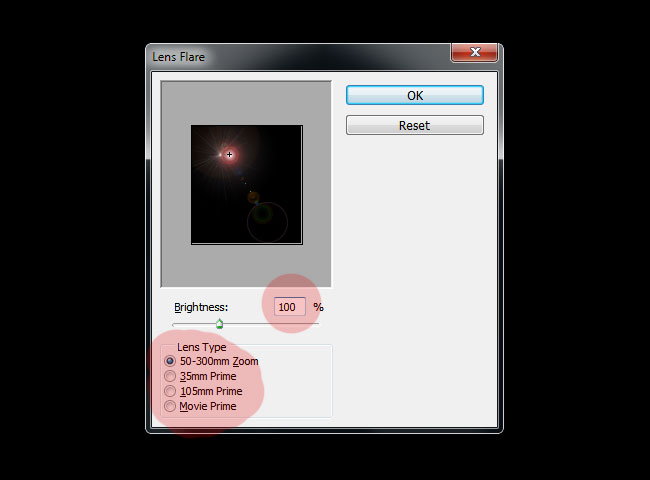
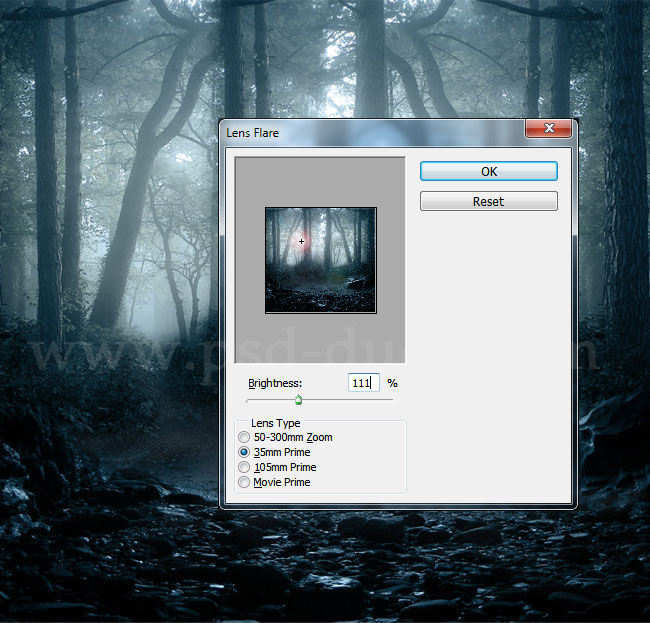
You will open the Photoshop Lens Flare dialog box that allows you to add lens flare Photoshop effect to your image/photo. You can choose from one of four different types of lenses (50-300 mm Zoom, 35mm Prime, 105mm Prime, and Movie Prime) in the Lens Type section. Also you can choose the Lens Flare Brightness. In the mini preview you can see the sun flare effect that is generated. Use the mini preview and drag the flare with the mouse to change the distance and direction.
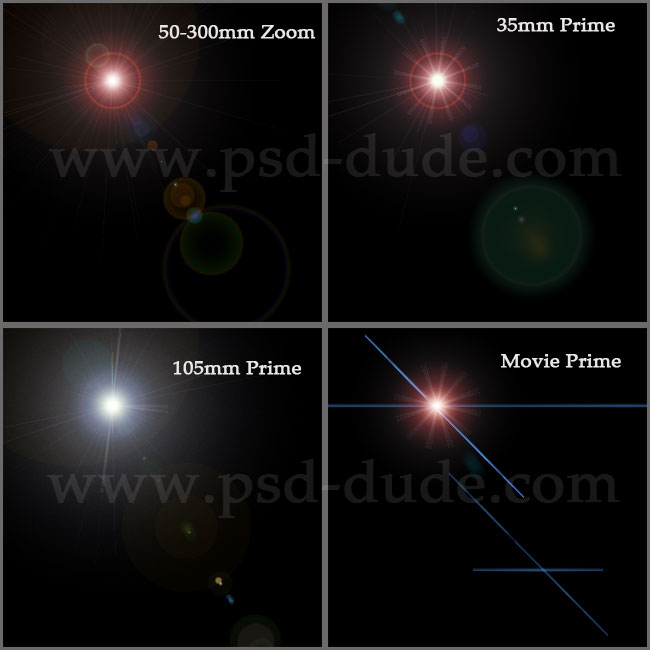
I will show you a preview of each type of lens flare: 50-300 mm Zoom, 35mm Prime, 105mm Prime, and Movie Prime; you can choose the one that you like best. As you can see you now have obtained some interesting lens flare textures similar to these ones.
I have used this technique to create my lens flare brushes; all you have to do is to press CTRL+I to Invert the image and than to Define Brush Preset.
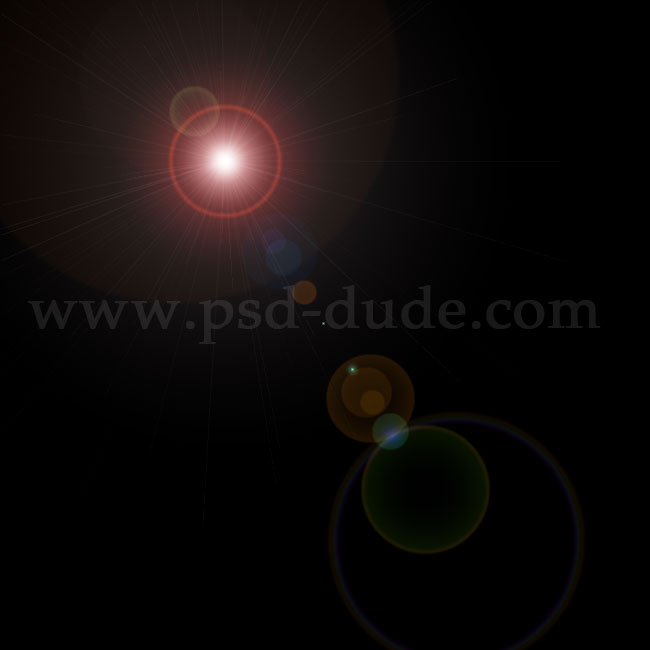
I will pick the 50-300 mm Zoom Lens Flare type for this tutorial. So here is the result applied to our black color background.
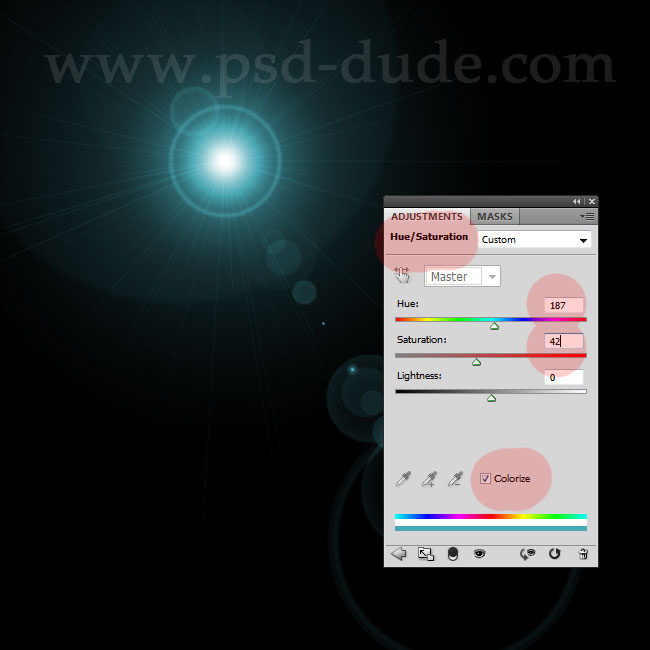
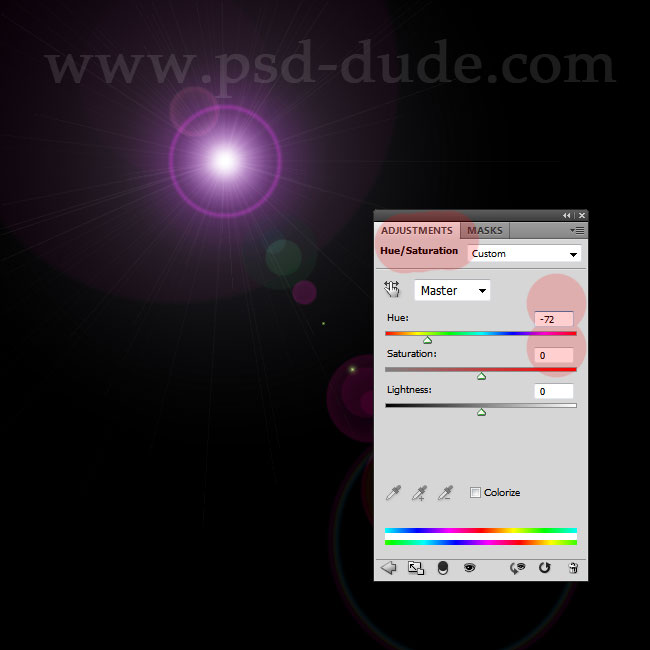
Now you can make some Photoshop adjustments to this sun lens flare image. You can add for example Hue/Saturation adjustments with the following settings to change the color of the lens flare. Make sure you add the adjustment as clipping mask for the layer.
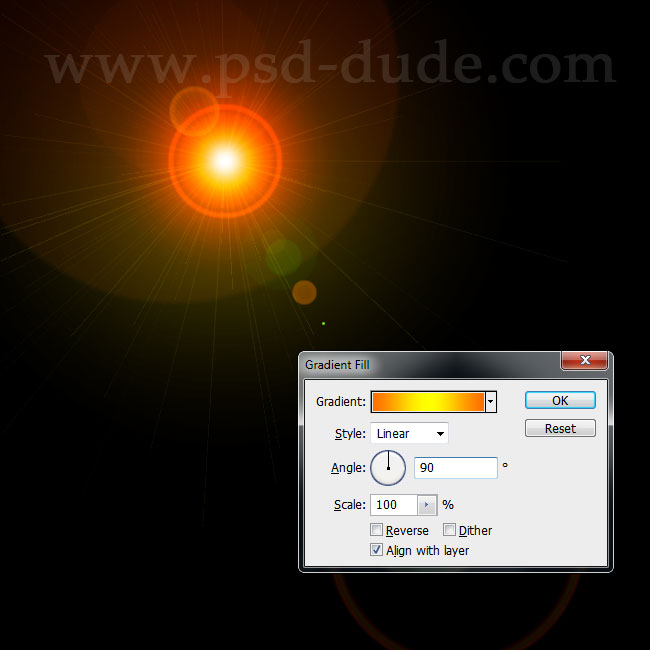
To change the color tones and make the flare texture more interesting you can use a Gradient Fill adjustment layer. You can see from this tutorial how to colorize an image using Photoshop Gradient Map
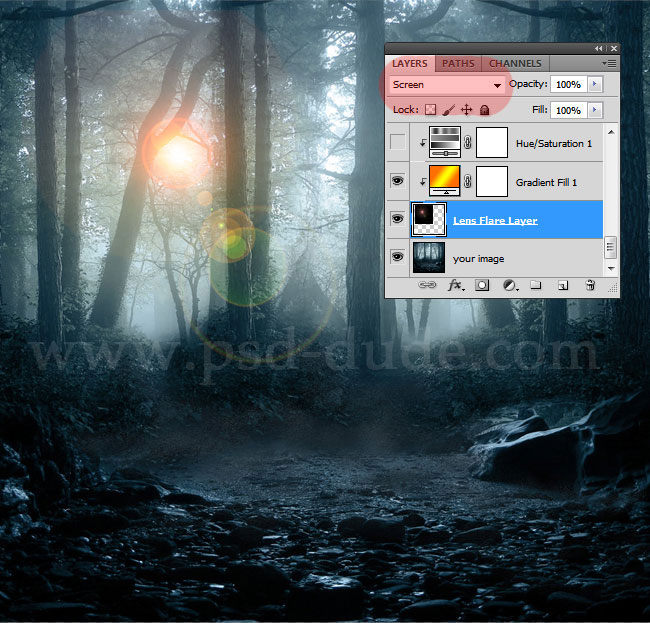
All you have to do is to add your image/photo below the lens flare layer and simply change the blend mode of the lens flare layer to Screen. You can create the texture in another PSD file, resize it to a smaller size and place it over your photo. You can save the image as JPG file and use it as lens flare texture in your next photo manipulations. The image used in the preview you can find it here
Method 2: Add a non destructive Lens Flare Filter to Your Photos
You can use another method to add lens flare effects to your images; this next method is an easier one but not as versatile in terms of color settings as the previous one. All you have to do is to open your image in a new PSD file. Convert the image layer into a smart object.
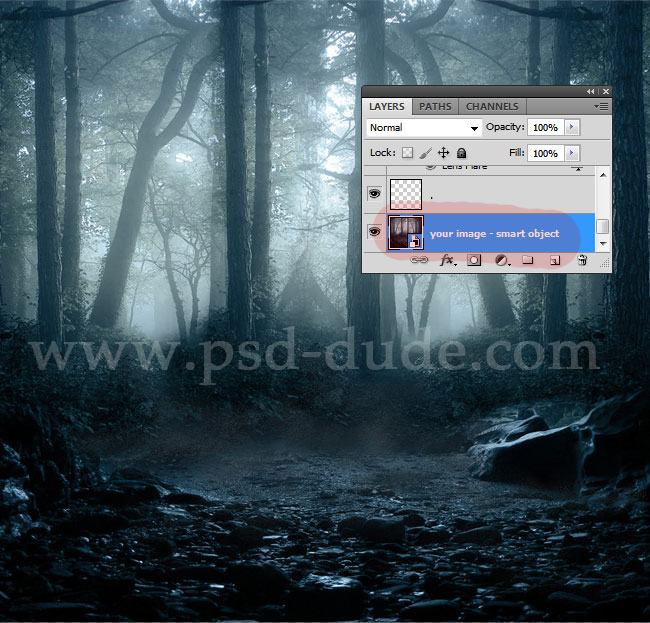
Go to Filter>Render and choose Lens Flare again. You can see in the preview that instead of the black background from the previous step, tou now have your image. Pick any type of lens flare any click ok.
You can see that the smart object has now attached a Lens Flare smart filter that you can edit without affecting the original image. That way you can easily change the lens flare type, brightness, etc and even replacing your photo with a new one.

6 comment(s) for "Create Lens Flare in Photoshop"
If I use the Lens Flare as Smart Filter I can not resize the lens flare effect which is not good :) reply
Create a New Layer, fill it with black color. Convert the layer into a Smart Object. Add a Lens Flare Smart Filter to this smart object. Set the Blend Mode to Screen. reply
http://www.digitalartsonline.co.uk/tutorials/photoshop/lens-flare-reborn/