Designing an Event Poster: A Comprehensive Guide
Designing a poster for an event can seem overwhelming, especially if you're doing it for the first time. However, with the right guidance and tools, anyone can design a captivating and effective event poster. This guide will explore practical tips and tricks for designing the perfect event poster, with a special focus on using Photoshop.
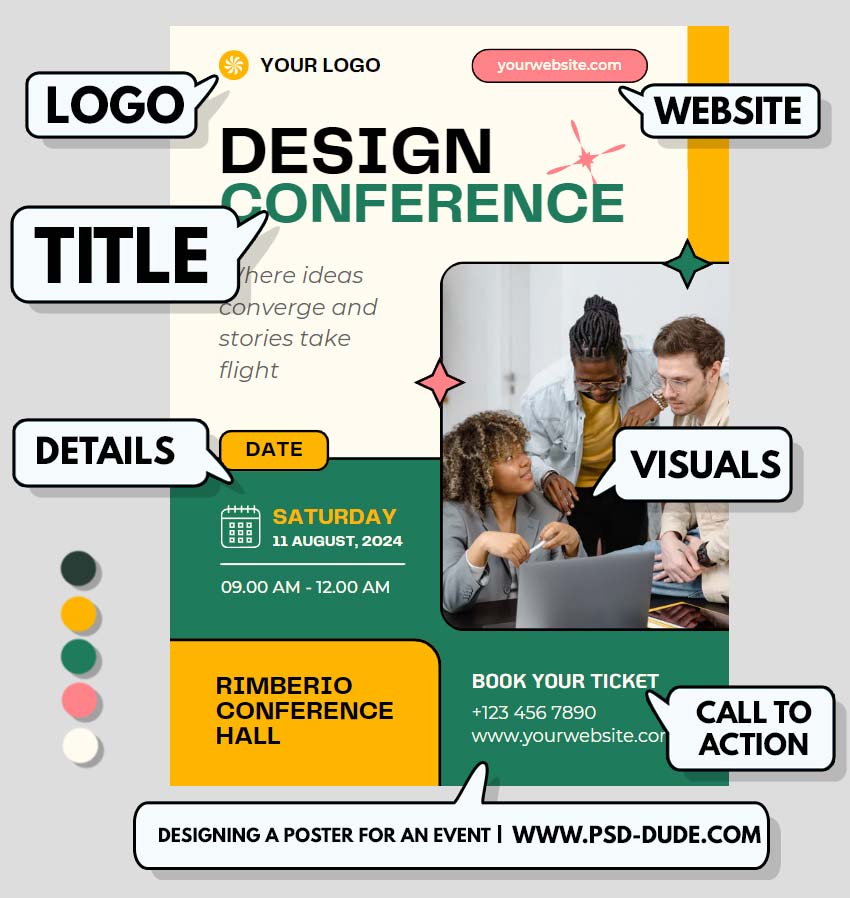
So, let’s find out together how to design a poster for an event in an effective way.
1. Understand the Event Theme
Before diving into the design, take a moment to determine the purpose and goals of your event poster.
- What is the event about? What message do you want to convey? Who is your target audience? Are you promoting a charity event, announcing a music concert, or advertising a seminar? The event type will shape the design elements and the message you want to convey.
2. Choose the Event Poster Size
Large posters are the number one choice when it comes to advertising or promoting events, and they are primarily designed for outdoor settings.
- Decide on the size and orientation of your poster. Common poster sizes are 11x17 inches, 18x24 inches, and 24x36 inches. Portrait or landscape orientation depends on your design and content.
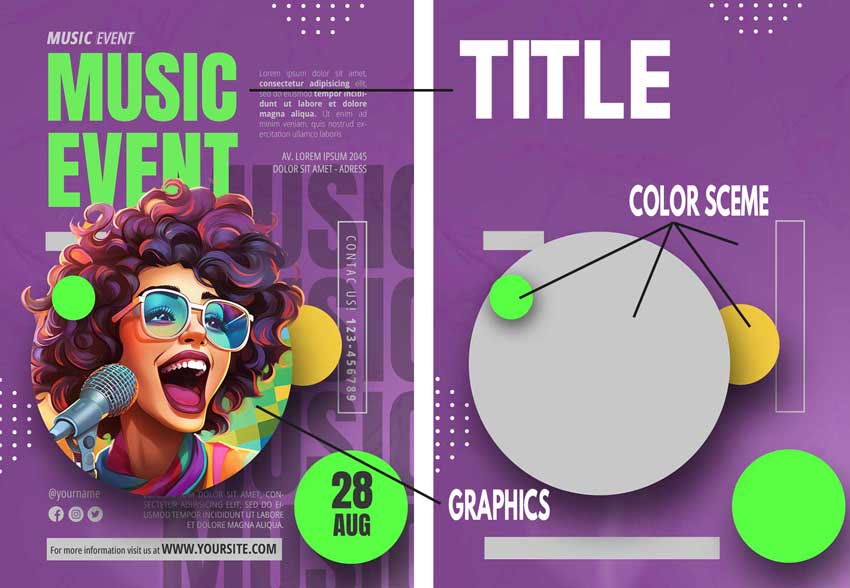
3. The Power of Visual Hierarchy
To start designing your event poster, visit site and browse through the templates to get a good idea of the visual hierarchy of an effective poster. Visual hierarchy is the arrangement and presentation of design elements in order of their importance. It ensures the most critical information is seen first and helps guide the viewer’s eye through the poster.
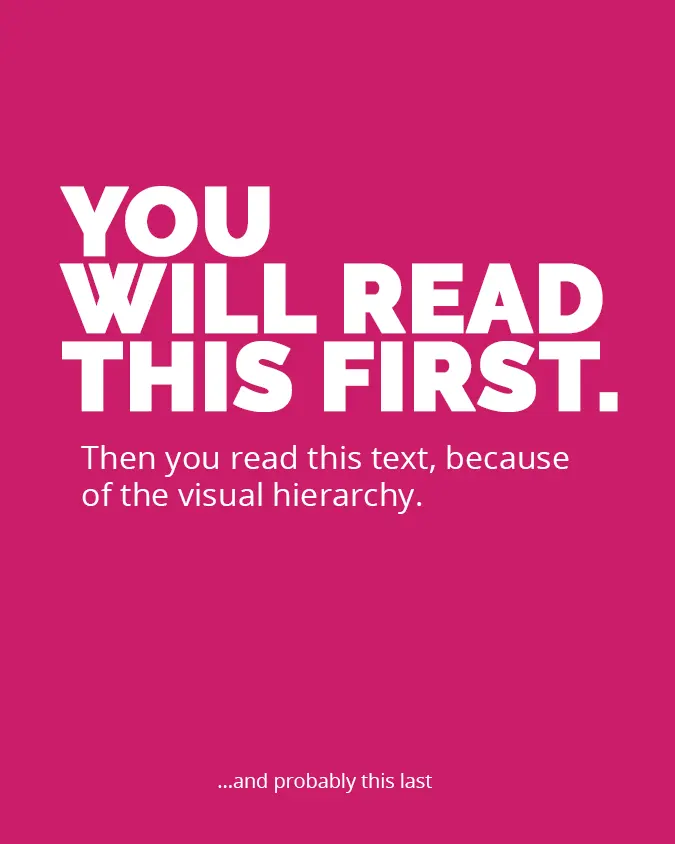
Use larger fonts, bold styles, and contrasting colors for key details like the event name, date, and time. Here’s how to establish a clear visual hierarchy:
- Primary Information: This includes the event name, main performers or speakers, or the main selling point. This should be the largest text on your poster.
- Secondary Information: Details such as date, time, and venue. This information is crucial but doesn't need to be as large as the primary info.
- Tertiary Information: Additional details such as ticket prices, sponsors, and contact information. This can be smaller still but should remain legible.
4. Typography Is Important
Select legible and visually appealing event poster fonts. The choice of fonts can make or break your poster. Learn how to combine letters and different font types from this article. Here are some tips for creating poster typography:
- Limit Font Varieties: Stick to 2-3 complementary fonts. Use this simple design tip, and your event poster design will have a clean and cohesive look. Use a combination of fonts for headings, subheadings, and body text.
- Font Size: Adjust font sizes according to the visual hierarchy.
- Font Color: Ensure it contrasts well with the background for maximum readability.
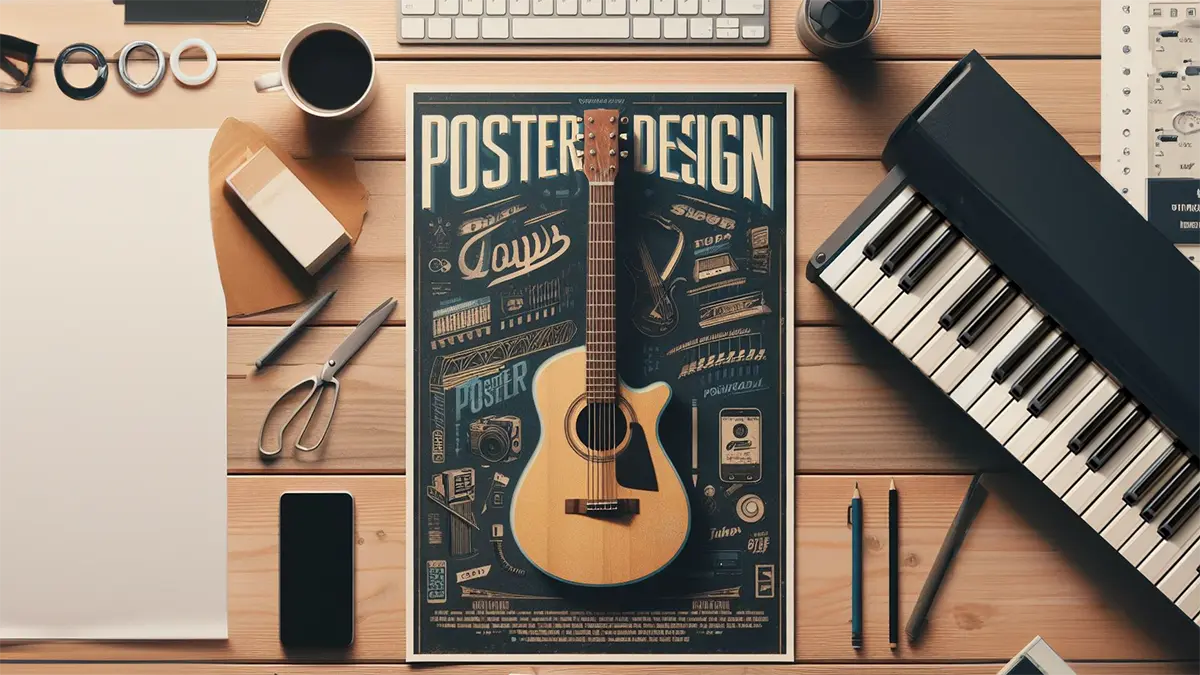
5. Choose Imagery & Graphics
Incorporate images or graphics that represent your event. High-quality visuals can be eye-catching and help convey the event's theme.
- Relevance: Images should be relevant to the event. For a music concert, consider using images of the performing artists. For a seminar, an abstract design or an image of the speaker could work.
- Quality: Always use high-resolution images. A blurry or pixelated image can turn a professional-looking poster into an amateur one.
- License: Make sure you have the rights to use the images. Use stock images if you don't have custom photography.
6. Define The Poster Color Palette
The poster color scheme depends on various factors, including your event or message, target audience, and your brand's colors if applicable. Here are some tips to choose the color palette for a poster:
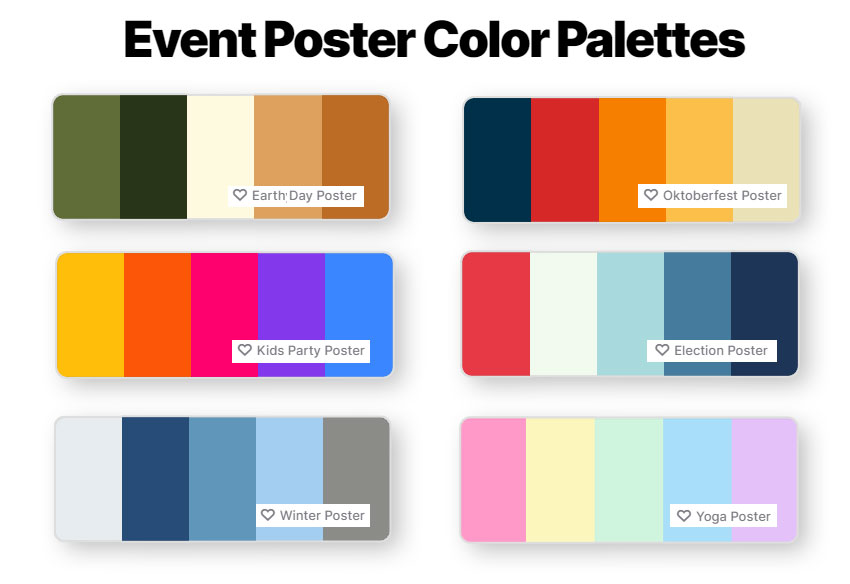
- Theme-Related Colors: The color scheme should align with the event's theme. For example, an Earth Day event might use greens and browns, while a Winter Gala could use blues and silvers.
- Contrast: Use contrasting colors for text and background to ensure readability.
- Trendy Colors: Consider current design trends but be cautious. What’s trendy today might look outdated tomorrow.
7. Design The Event Poster Layout
Plan the layout of your poster. Ensure a balanced composition, leaving enough white space for readability and visual appeal. Place important information in prominent positions. Knowing the design principles basics will help you create the best designs. A well-organized layout ensures that all elements are harmoniously placed:
- Grid Systems: Using a grid helps align elements, creating a cohesive look.
- Whitespace: Don't be afraid to leave spaces empty. Whitespace can highlight important elements and make the poster look less cluttered.
- Symmetry vs. Asymmetry: While symmetric designs can look polished and balanced, asymmetric designs can be more dynamic and eye-catching. Choose based on your event's vibe.
8. Include Event Details
Don’t forget the basics. Add all the essential event details in a clear and concise manner. Ensure that the text is easy to read and not cluttered. Collect all the essential information about the event, such as the event name, date, time, location, ticket information, a brief description, and contact details. Include only the important information into your event poster.
- Date and Time: Clearly mention when the event is taking place.
- Venue: Specify where the event will be held. Consider adding a small map or landmarks if it's in a tricky location.
- Contact Details: Offer a way for interested attendees to reach out, whether it's a phone number, email, or website.
QR Code on Poster
You can also add a QR code to your poster so people can quickly open the full event article on their phone. It’s a simple way to share more details like the schedule, location, or updates without crowding the design. Anyone interested can just scan it and get all the information in one place.
On PSDDude we have a random QR code generator that you can use to create empty blank QR codes. If you want something truly unique, create custom shape QR codes and add them on your poster for better engagement.

9. Add a Call to Action (CTA)
Call to action (CTA) is a marketing term for any design to prompt an immediate response or encourage an immediate sale.
- Encourage viewers to take action. Here are some CTA examples for your event poster: Buy Tickets, Register, Join Us, Save Your Spot, Discover More, Donate Now, etc. Use action words and provide contact information or a website.
10. Look for Feedback
Before finalizing your design, gather feedback:
- Peer Review: Other designers can offer invaluable insights. They might spot mistakes you missed or offer a fresh perspective.
- Target Audience: If possible, show your design to a few people from your target audience. They can provide insights about the appeal and clarity of the design.
Use the feedback to make revisions. Sometimes, multiple iterations can lead to a refined, polished final product.
11. Make Final Checks
Before sending your poster off for printing or sharing digitally:
- Proofreading: A typo or incorrect date can be disastrous. Double-check all text elements.
- Print Test: If you’re physically printing the poster, always do a test print. This will help you see if colors print as expected and if text sizes are legible.
- File Format: For digital sharing, JPEG or PNG are standard. For printing, a high-resolution PDF is typically preferred.
- Bleeds and Margins: Ensure you have added bleed areas if the design reaches the edges. Also, maintain a safe margin to avoid crucial information getting cut off during printing.
12. Keep the Digital World in Mind
In today's digital age, your poster might be shared on social media or viewed on a website:
- Optimization: If sharing digitally, ensure your image is optimized for the web. This means maintaining a balance between image quality and file size.
- Variations: Consider creating different versions for platforms like Instagram, Facebook, or Twitter, where image dimensions vary.
How to Make an Event Poster in Photoshop
Adobe Photoshop is a powerful tool for designing event posters. Here are some practical tips for beginners on how to make an event poster in Photoshop.
Step 1: Set Up Your Document
Open Adobe Photoshop. There are lots of Photoshop versions to choose from, including some free alternatives. If you don't know a thing about this tool, check out my article How Long Does It Take To Learn Photoshop.
Go to File > New to create a new document. Set the dimensions to match your desired poster size. A4 or US Paper are good choices for an event poster size.
The most common standard poster sizes are 8.3 x 11.7 (A4 size), 18x24, 24x36, and 27x40 inches, but you can choose different sizes based on your needs. Choose a resolution of 300 dpi (dots per inch) to ensure high-quality printing.
Step 2: Choose Color and Theme
Maintain a consistent color scheme and visual theme that aligns with the event's purpose.Adjust the overall color tone using adjustment layers if needed.
Step 3: Design Your Poster Background
Create a background for your poster. You can use a solid color, a gradient, or an image related to your event.
Step 4: Add The Poster Text
Add the event's title at the top or in the middle. Choose a font that fits the theme of your event.
Include the date, time, location, and any other important information. Make sure the text is clear and legible.
Use text layers and layer styles to add effects like drop shadows, bevels, or gradients to make the text stand out.
Creative typography like curved text might come in handy for creating event posters, so check out how to curve text in Google Slides if you want to transform this project into a broader design project that also includes a presentation for the event.
Step 5: Add Images and Graphics
Add relevant images, illustrations, or graphics to your poster. These should complement the event's theme and add visual appeal. Use layer masks to blend images seamlessly with the background.
Step 6: Prepare for Printing
If you plan to print the poster, make sure to set up the document in CMYK color mode, as this is suitable for printing. You can change this in Image > Mode > CMYK Color.
Set up your document with proper bleed and margins if you're having it professionally printed. Bleed ensures that your design extends slightly beyond the trim edge to avoid white borders when it's cut.
Step 7: Save Your Poster
Once you're satisfied with your poster design, go to File > Save As to save the file. First, save it as a PSD editable file. Then, save it in a print-ready format, such as TIFF or PDF.
AI Poster Generator
The future belongs to AI. So, graphic design tools like Photoshop, Canva, MockoFun or Fotor, are rapidly including AI image generator technology inside their software.
In the near future we will only have to describe what event poster we need and the AI will do all the hard work for us. But, until then it is better to know how to create one from scratch.
Now you know how to create an event poster.
With a clear roadmap, the right tools, and attention to detail, you can create an event poster that captures attention and conveys your message effectively. Photoshop, with its versatile toolkit, can be a game-changer for those looking to take their design to the next level.
No comment(s) for "Designing a poster for an event"