Tutorial Assets
For this tutorial you will need these stock images, textures and other resources.
- Christmas background
- girl photo
- red deer
- Christmas tree
- moon stock image
- icicle image
- fairy sparkles
- fairy magic dust
- galaxy stock image
- space vortex
- snowfall 1 and snowfall 2
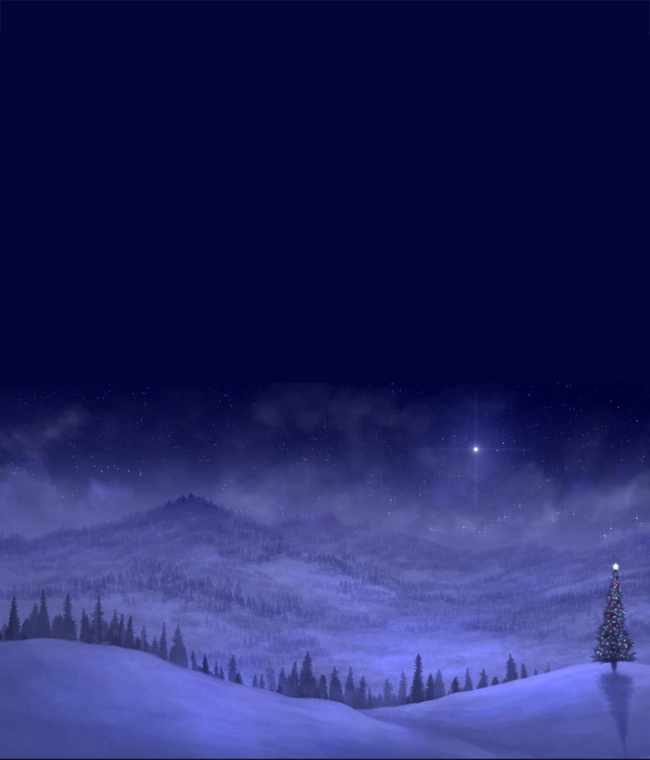
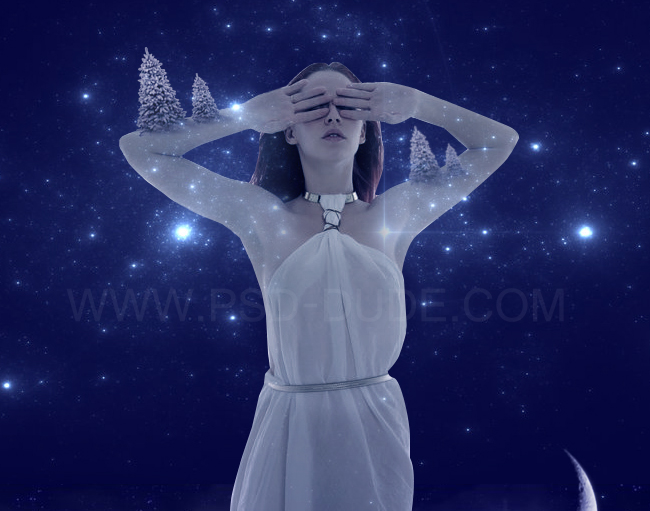
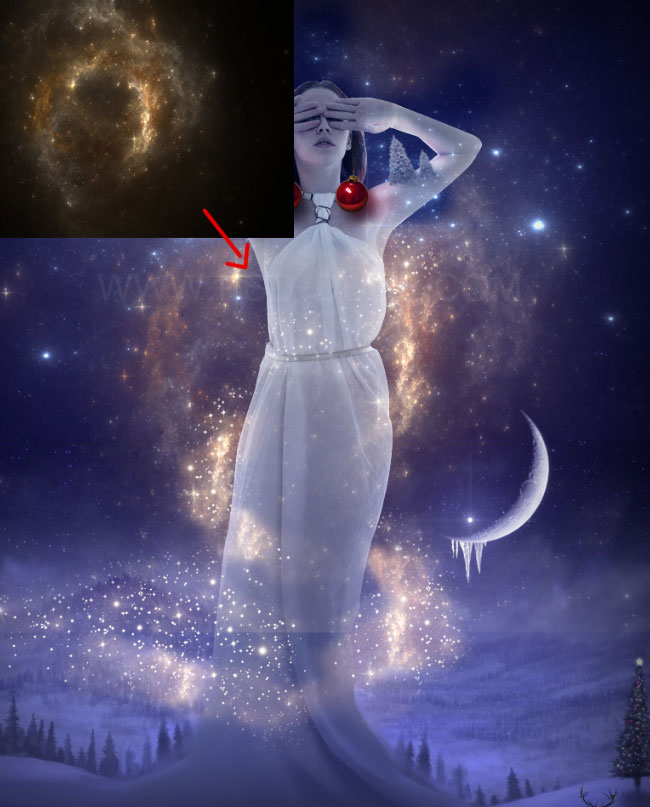
Let's start with this beautiful Christmas Background which is a free premade background. If the background is to small in height you might have to fill the empty space with #020339 color.
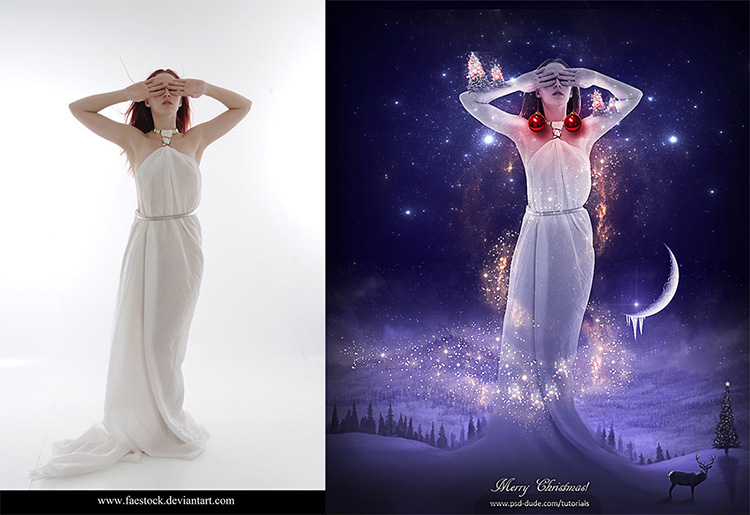
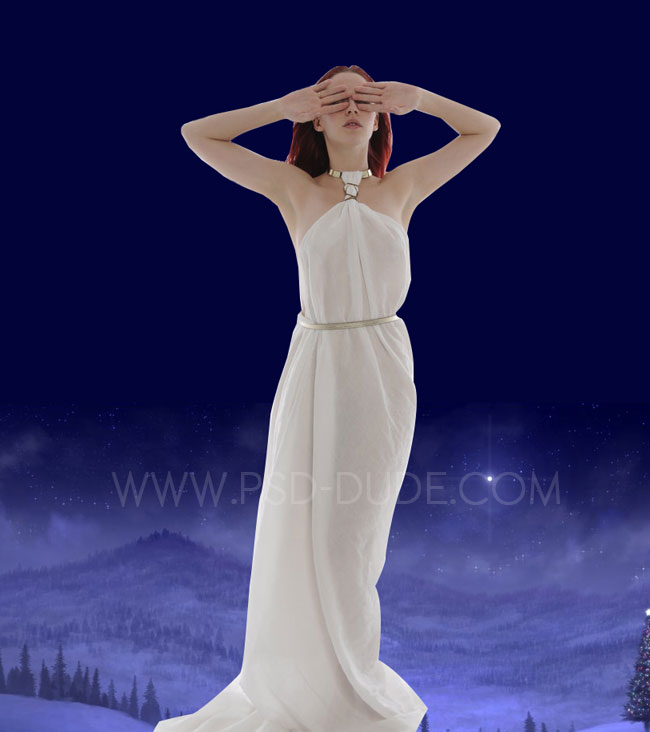
Because we want to makea a fantasy photo manipulation I decided to create a winter goddess character. So use this girl stock image and place it like shown in the image. Use the Pen Tool to remove the background.
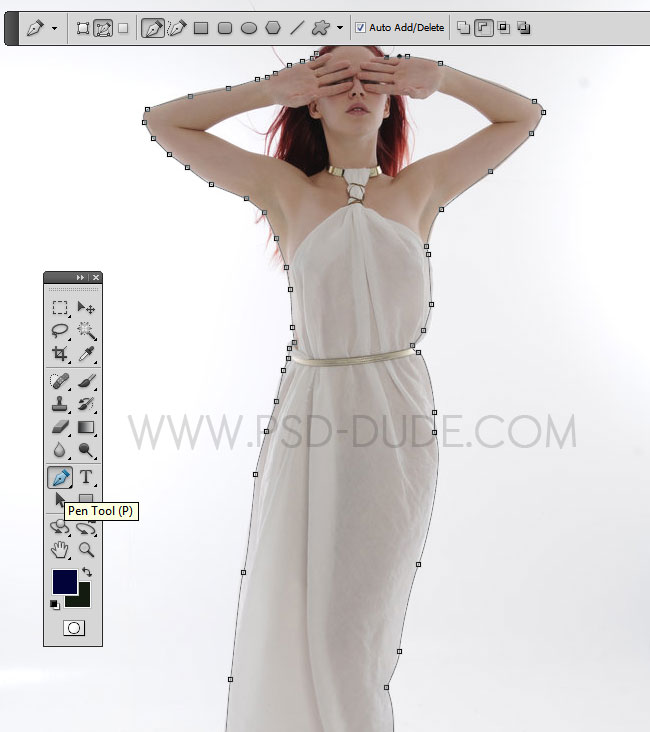
After removing the background the image should look like this:
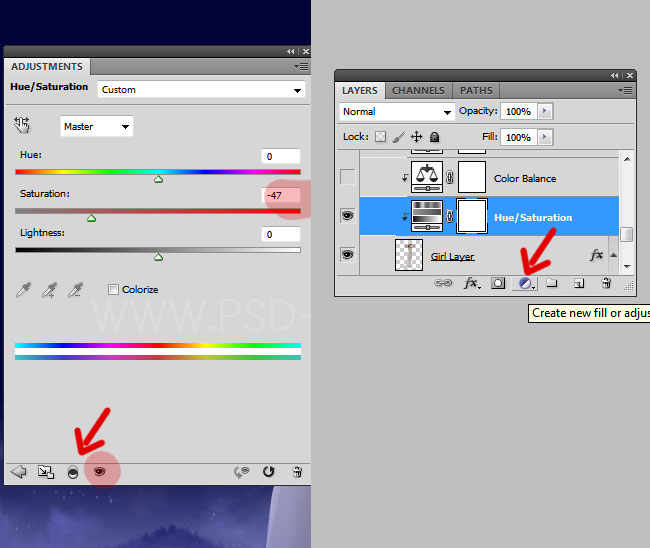
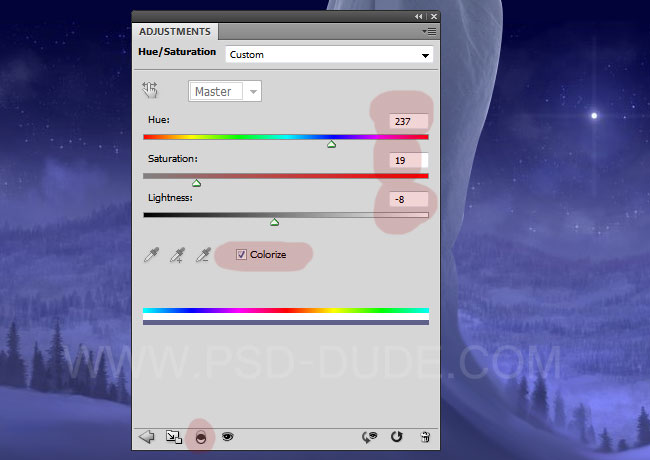
As you can see there are some differences between the color tones/saturation/brightness of the Girl Layer and the color of the Christmas Background Layer. To fix that you will have to add some adjustment layers and we'll start with a Hue/Saturation adjustment. Make sure you add the adjustment as Clipping Mask using the "Click to clip to layer" button like shown in the image.
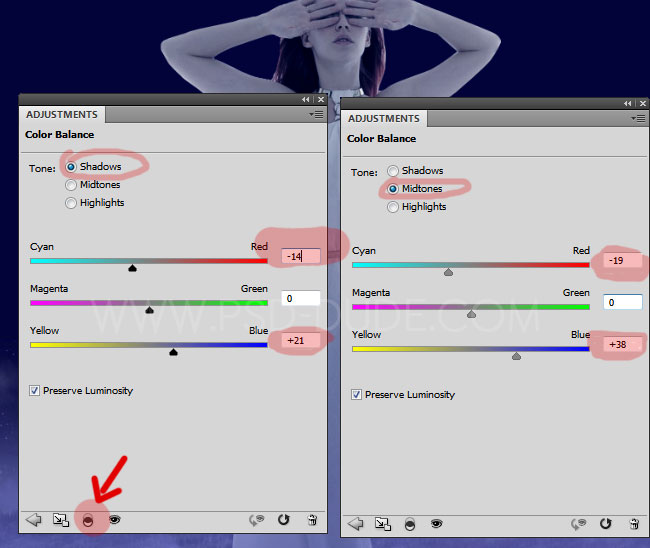
Now add a Color Balance adjustment. Make the following settings on the Shadows and the Midtones ; don't forget to press the "Click to clip to layer" button.
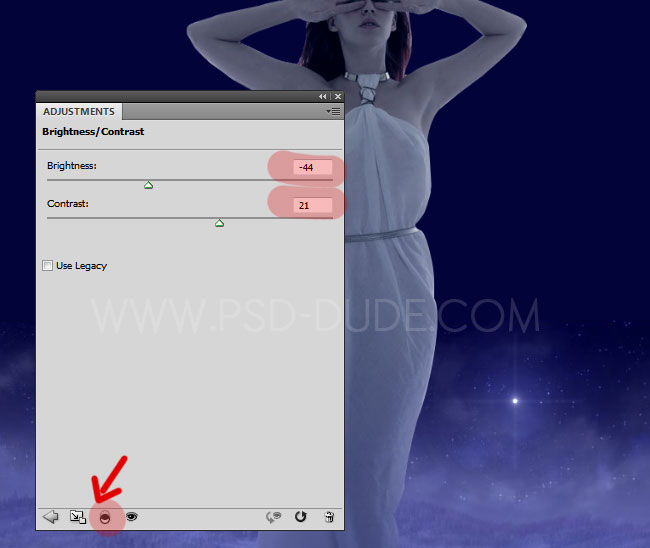
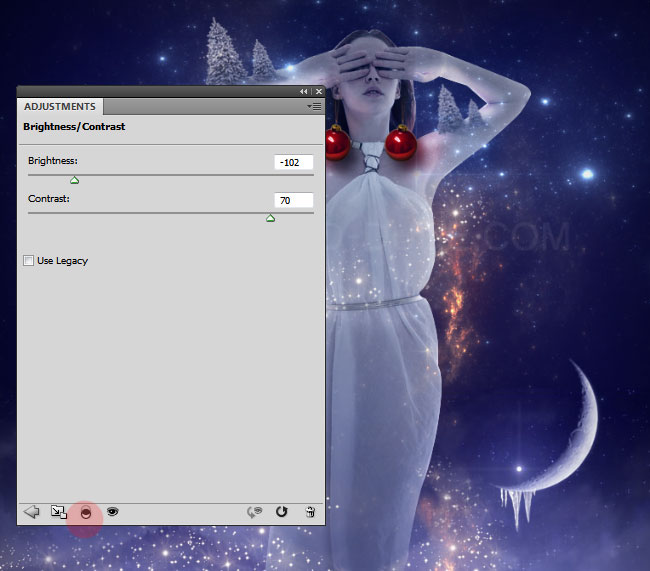
Add a Brightness/Contrast adjustment with these settings:
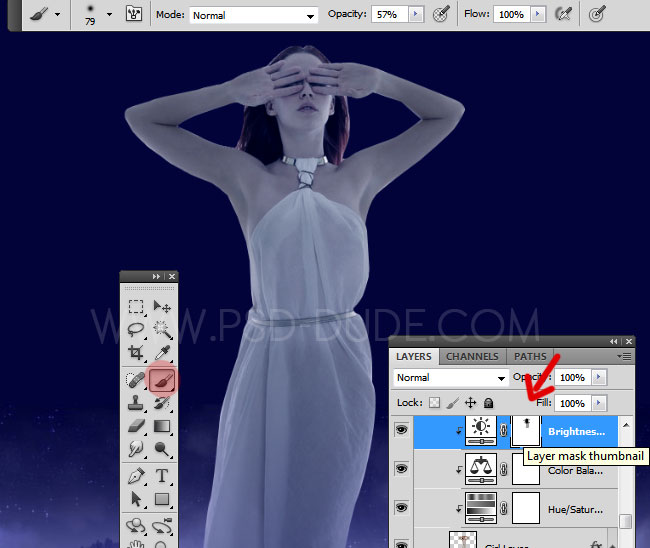
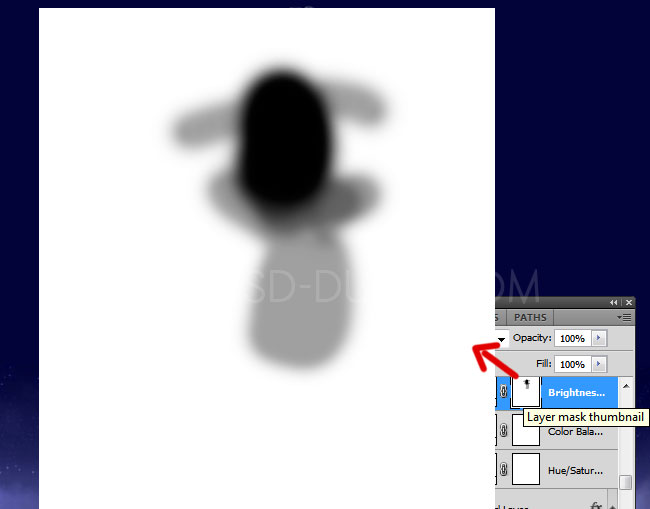
In the layer mask of the Brightness/Contrast adjustment layer use the Brush Tool to paint over the girl face and shoulders area. Use the color black and a soft round brush with different opacity levels.
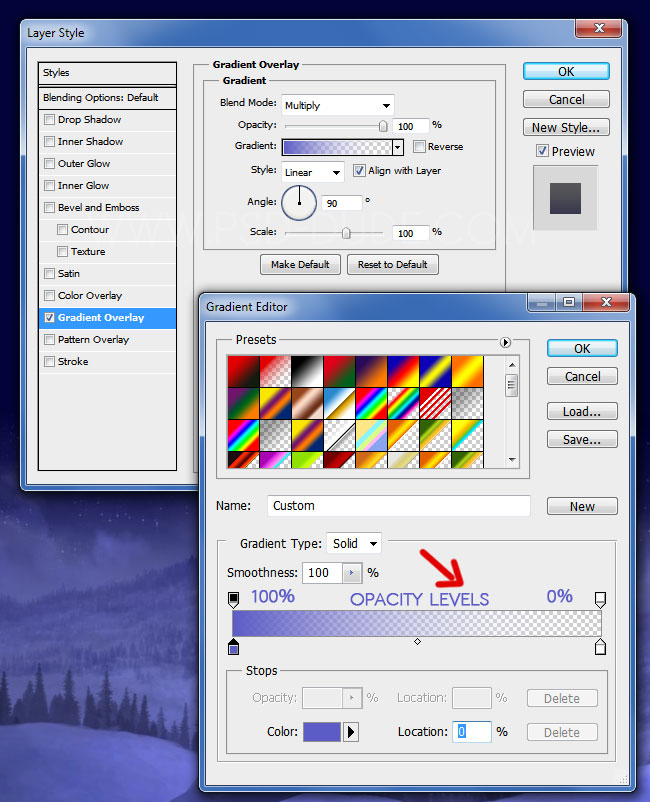
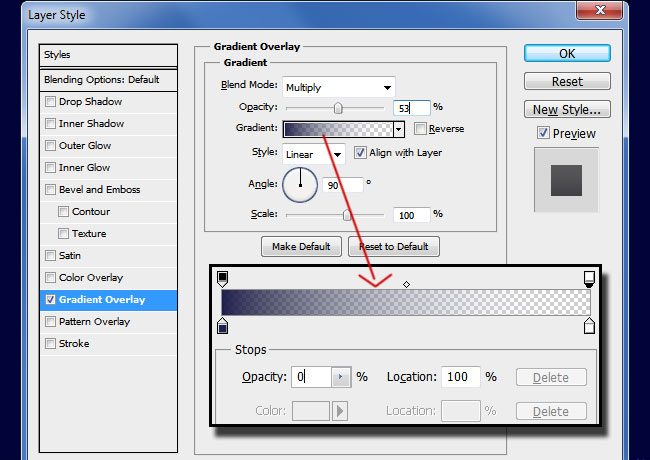
Add a Gradient Overla style to the Girl Layer to darken this area. The colors for the gradient are #5c5cc6 and white.
Select the Girl Layer and its adjustments, duplicate and merge them. Keep the original ones in a group and hide it. From this point we'll work on the duplicated layer. Let's call it Winter Goddess layer.
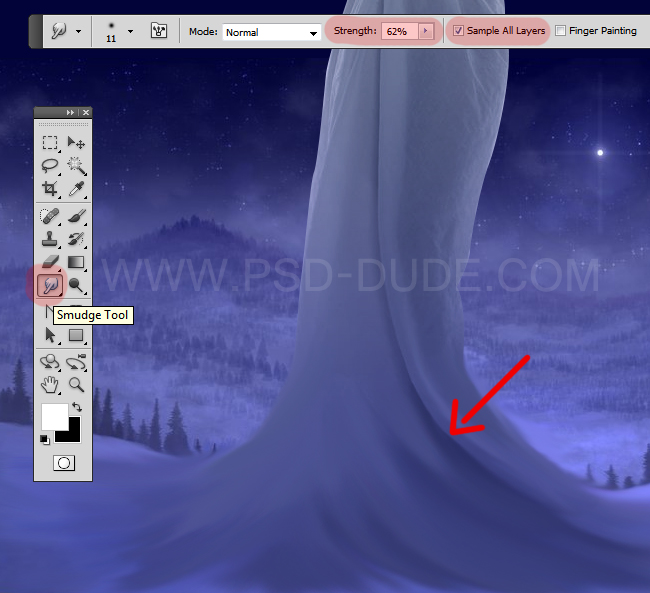
Now we'll use our painting skills to blend the bottom area of the dress with the snow. Use the Smudge Tool for this task. Check the Sample All Layers option to blend the images better. You have to take your time and make sure you obtain the best results. It is easier to do that with a graphic tablet but I used the mouse for this tutorial so it is doable.
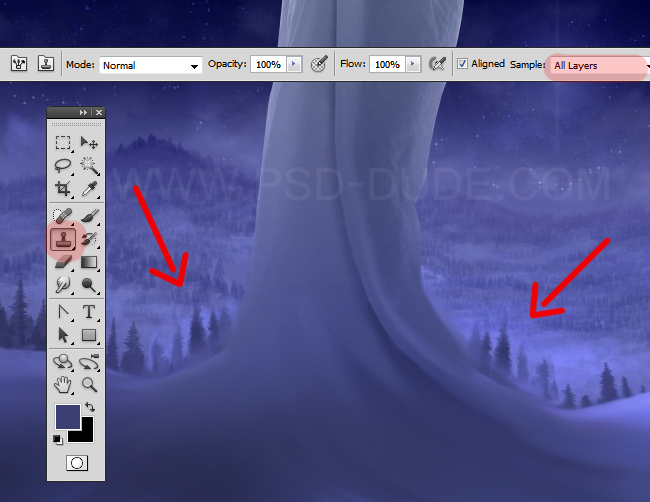
For a smooth result you can create a new layer above and use the Brush Tool to piant over the dress. Use a soft round brush; pick a color from the snow using the Eyedropper Tool. Set the opacity to 50%.

Create a new layer and use the Clone Stamp Tool to make some tree copies like shown in the image. Place the tree copies on the girl dress.
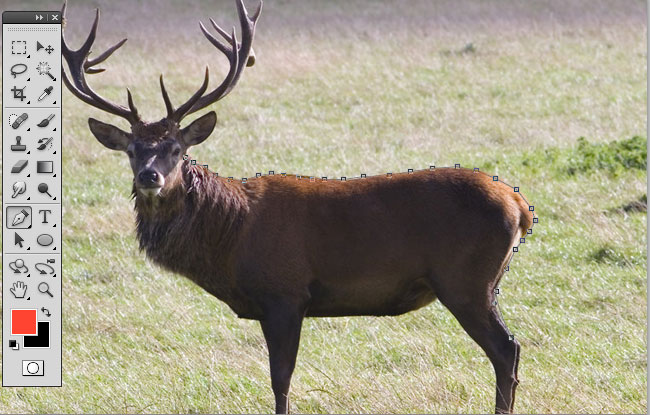
For this step I will use this Red Deer stock image. YOu have to remove the background and the best tool for cutout images is the Pen Tool
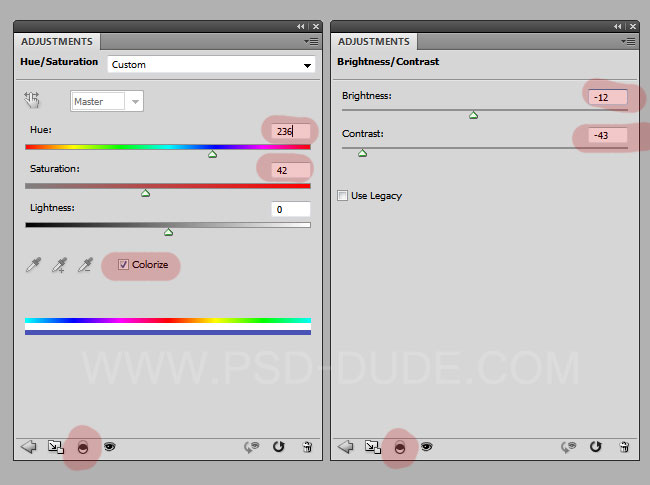
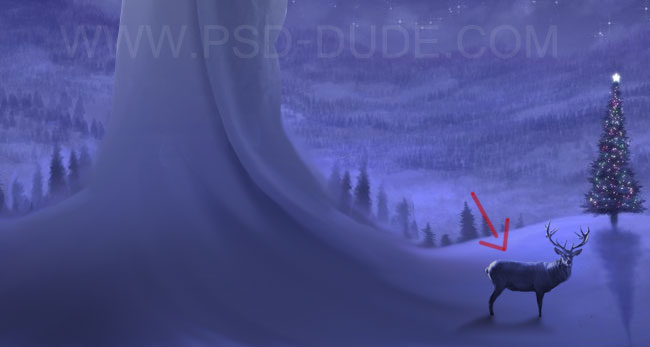
Resize the image and place it like shown in the preview. Make a duplicate of this layer and call the original Reindeer Layer and the copy Shadow Effect. First we have to adjust the color tones so for that we'll add a Hue/Saturation and a Brightness/Contrast adjustment layers. Make sure you create this adjustment as clipping mask only for the Reindeer Layer.
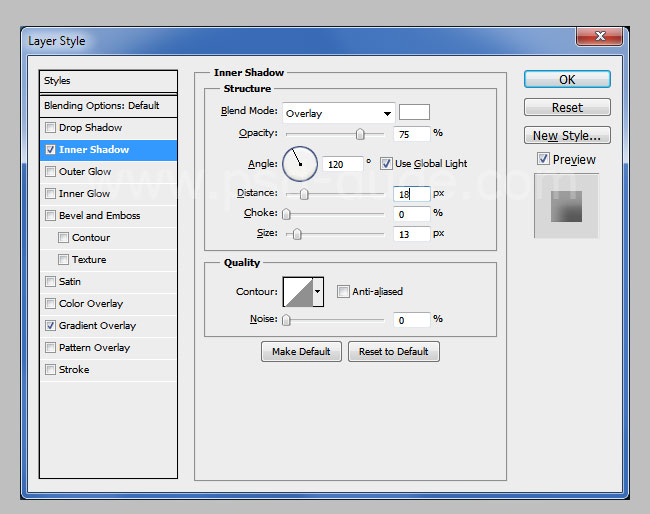
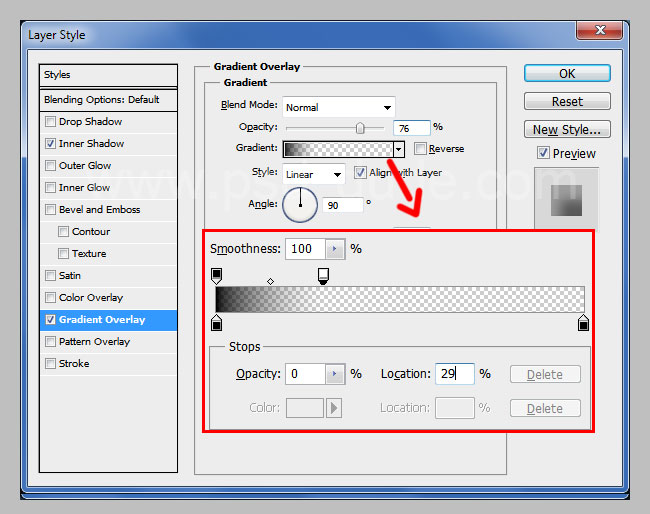
Add these layer styles to the Reindeer Layer to create some shadow and lightning effects.
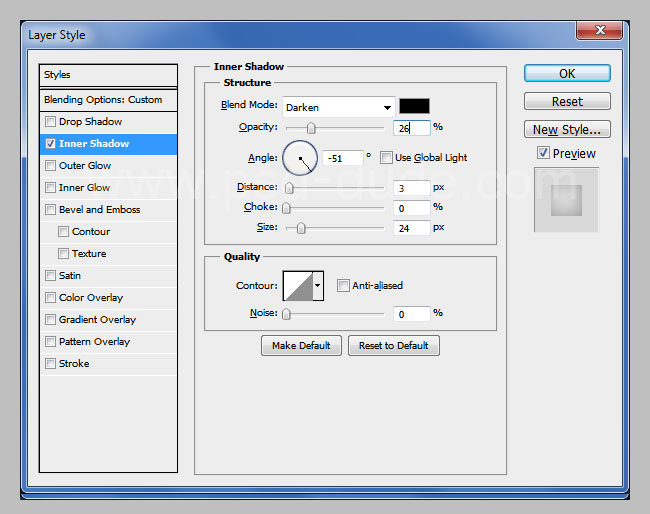
Go to the Shadow Effect Layer and reduce the Fill to 0%. Add an Inner Shadow effect like shown in the image.
Create a new layer and call it Cast Shadow Effect. Use the Brush Tool and color black with different opacity levels to paint the shadow effect like shown in the preview.
Create a new layer and add this Christmas tree png image. This image has a transparent background so you don't have to waste time removing the background. First we have to adjust the color tones. Add a Hue/Saturation adjustment just for this layer with the following settings. .
Add a Gradient Overlay layer style using the color #1e204f and white for the gradient.
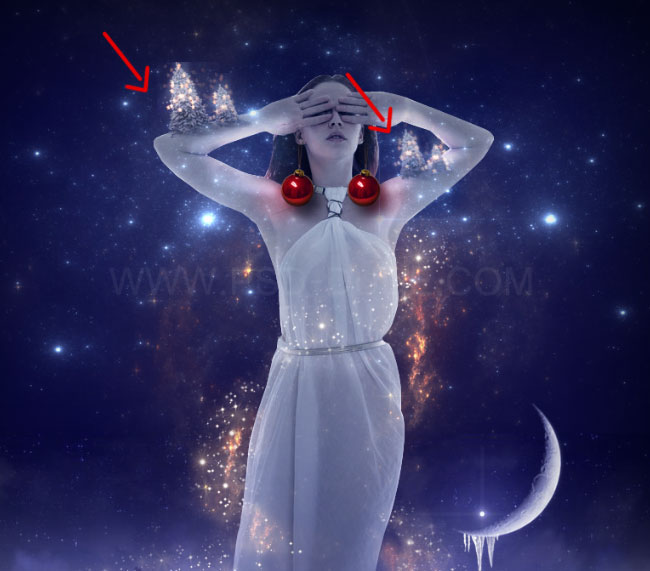
Convert the Christmas Tree Layer into a smart object and make 3 copies; resize, roate and place them as shown in the image.
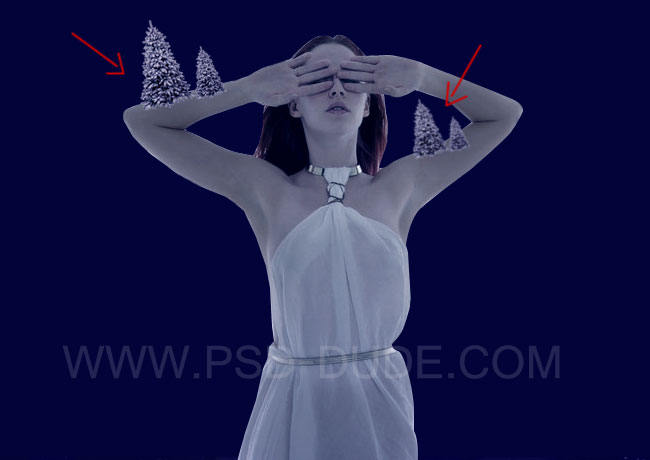
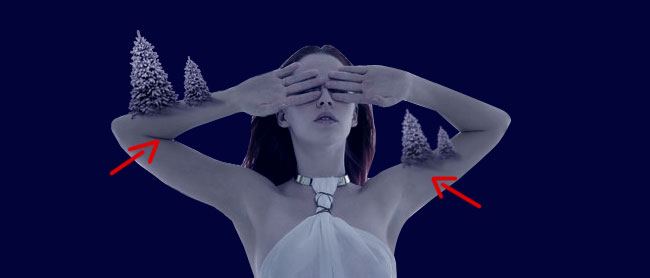
You will have to create a cast shadow effect for each tree like in the preview. You can use the Brush Tool to paint the shadow or you can use any other cast shadow Photoshop technique.
In this step I will add the moon stock image to the photo manipulation. Simply copy the image in a new layer and set the blend mode to Screen. Also add a Hue/Saturation adjustment layer to adjust the color tones. Make sure you click the Clip to Layer button and also to check the Colorize option.

Let's add some frozen icicle on the moon image. I use this icicle stock image but you can of course use any icicle you like. Remove the background of the icicle, resize it and change its color to match with the other elements.

Add this stars galaxy stock image in a new layer. Set the blend mode to Screen. Add a non-destructive layer mask to the Stars Galaxy Layer and paint with black around the girl face like shown in the image.
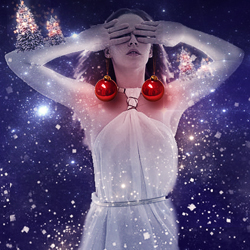
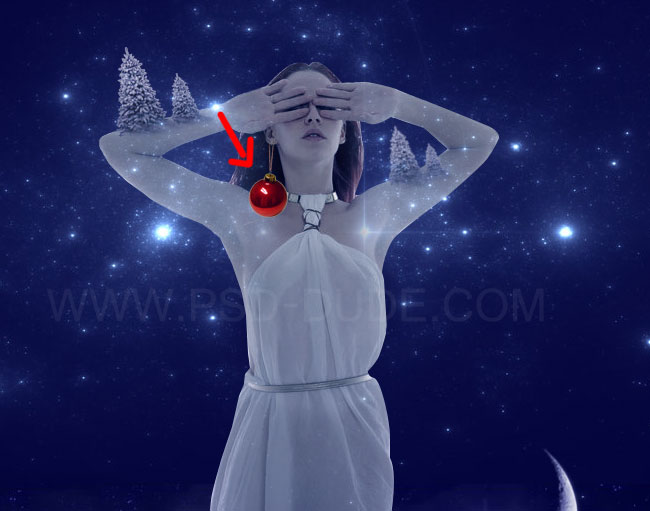
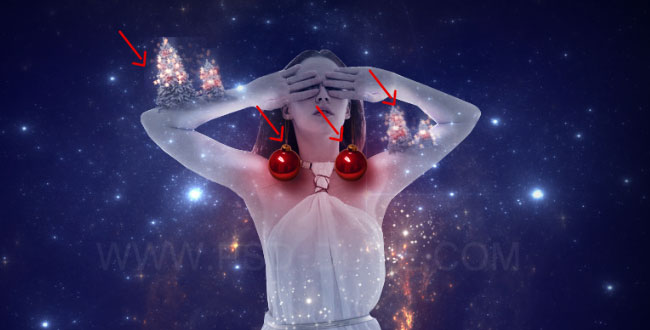
Add this Christmas ornament on the girl ear like shown in the image.
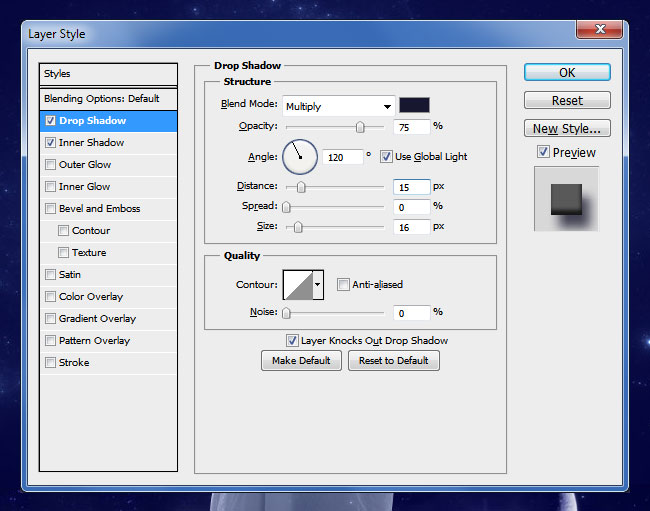
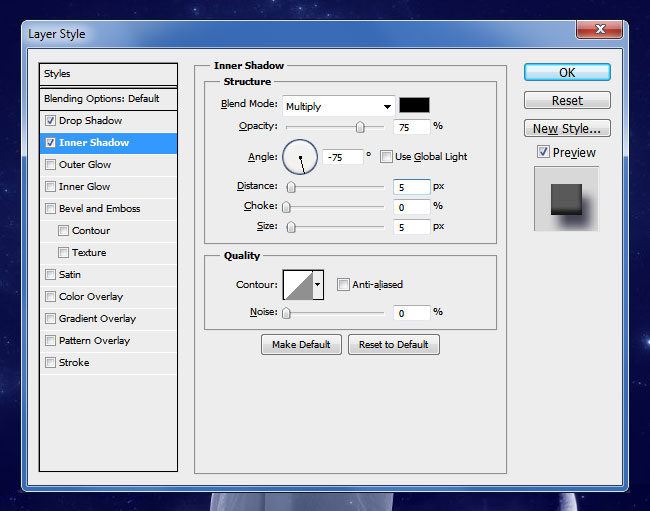
Open the layer style window of the Christmas Ornament Layer and set the Drop Shadow and Inner Shadow layer styles.
Duplicate the Christmas Ornament Layer and place it on the other ear. Now the Christmas balls are the erarings for our winter queen.

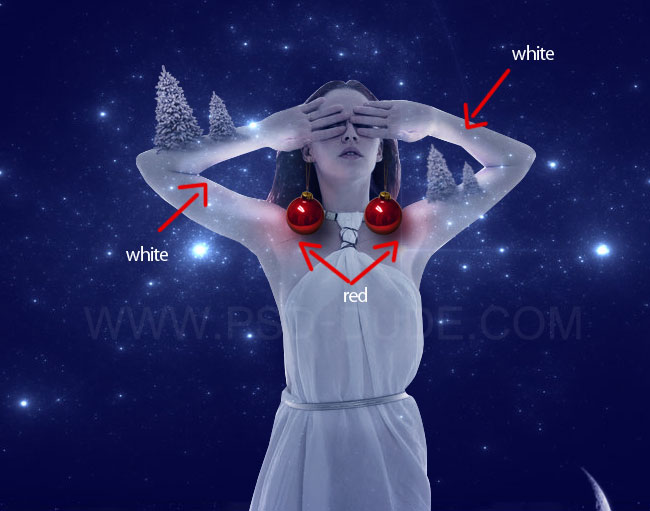
I will now add some highlights and soft color effects to create shadow and light effects like shown in the image. Here is an amazing tutorial on how to Improve Your Artwork by Learning to See Light and Shadow .
Create 2 layers right above the Girl Layers and call them Highlights. Set the blend mode to Overlay and use the Brush Tool to add light effects like shown in the preview. Use a soft round brush and color white. Don't forget to set the opacity to around 60% ; we don't want the light to be too intense.I also used a red clor tone #e40000 for the brush, with low opacity levels to add some colored highlights.
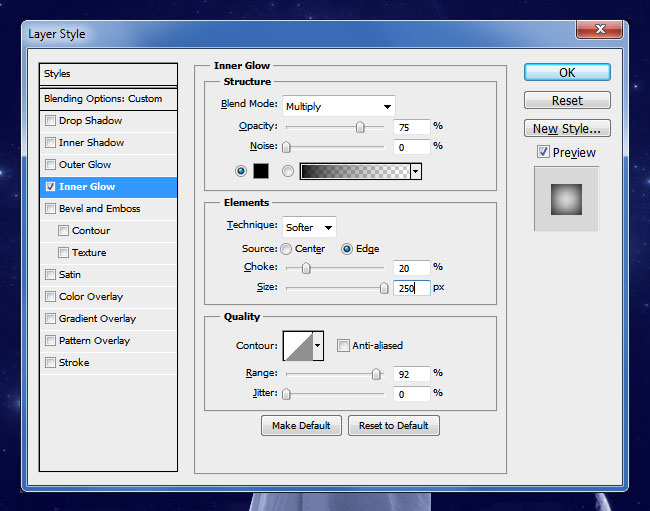
Create a new layer above all the existing layers and call it Vignette. Set the Fill to 0% and add an Inner Glow layer style.
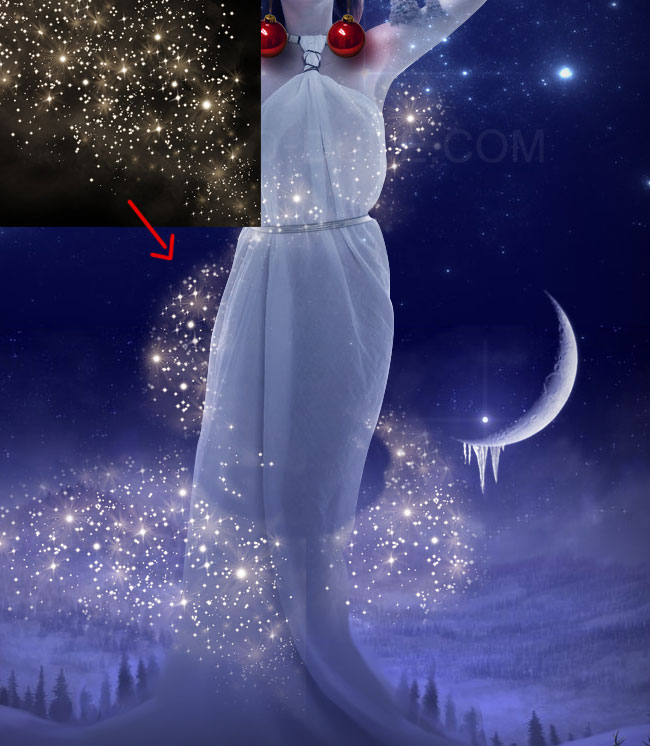
The original image is no longer available so you can use this fairy sparkles and this fairy magic dust instead.
Set the blend mode to Screen. Use the Clone Stamp Tool to create a light trail like in the preview. Add a layer mask and gently hide the unnecessary areas.
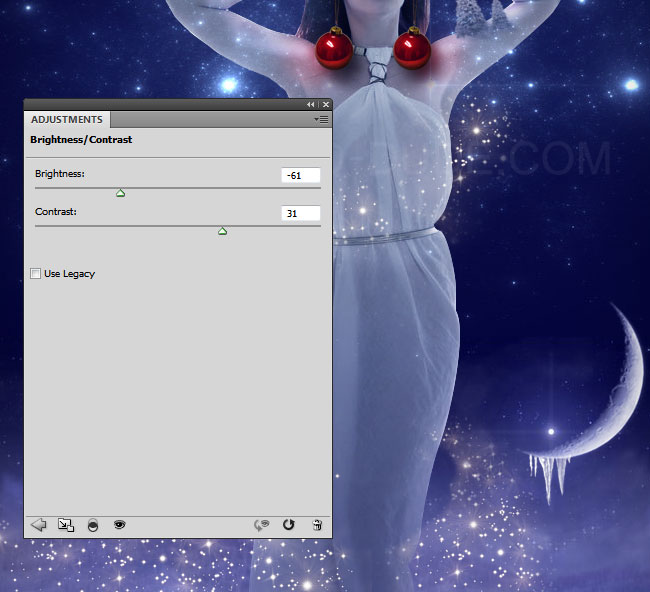
Add a Brightness/Contrast adjustment just for the Fairy Sparklers Layer.
Use this beautiful galaxy stock image to add some color effects. Set the blend mode to Screen. You might have to resize, rotate and to use the Clone Tool to obtain an interesting light trail.
If you want you can also use this space vortex but you have to change the colors tones using a Gradient map.
Add a Brightness/Contrast adjustment just for the Galaxy Layer with these settings.
To create some colorful lights around the Christmas trees I will use this Star Bokeh ; set the blend mode to Screen and add the star bokeh in these spots.
You can find more Bokeh lights here, if you want more sparkle effects.
Add color effects in another layer above all the other layers. Set the blend mode to Color and use a soft round brush to paint over these areas. Choose a tone of red for the brush.
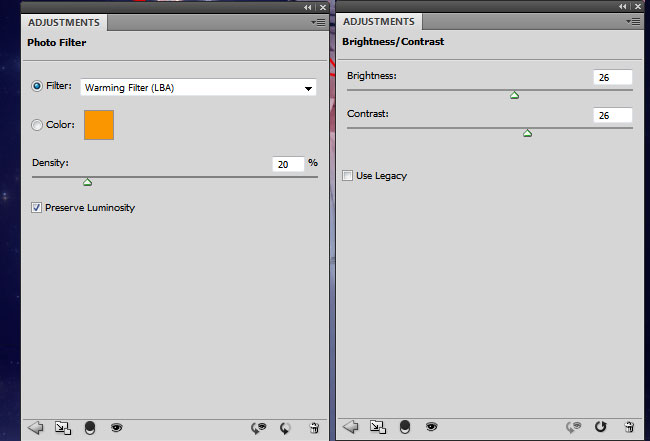
For the final touches let's add a Photo Filter and a Brightness/Contrast adjustments.
If you want to add falling snow effect you can add the falling snow texture and set the blend mode to Screen. You can use these textures snowfall 1 and snowfall 2 with Screen blend mode. Also you can download this snow brushes and add snow using the Brush Tool and color #ffffff.
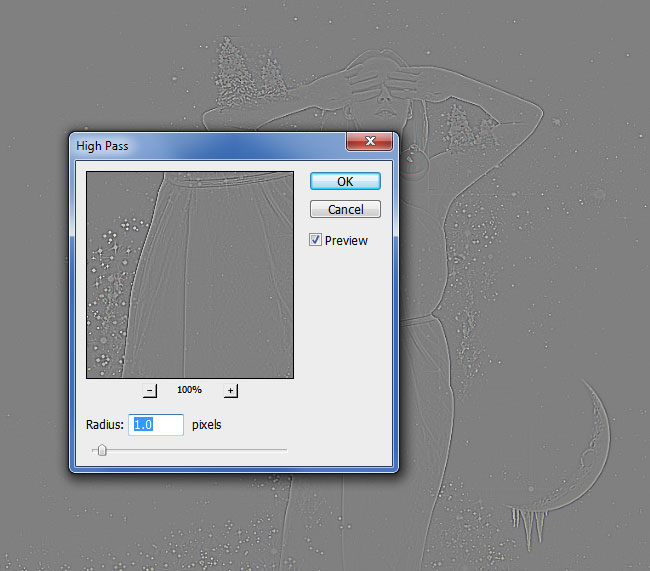
In the end you can use the High Pass Filter to sharpen the image.
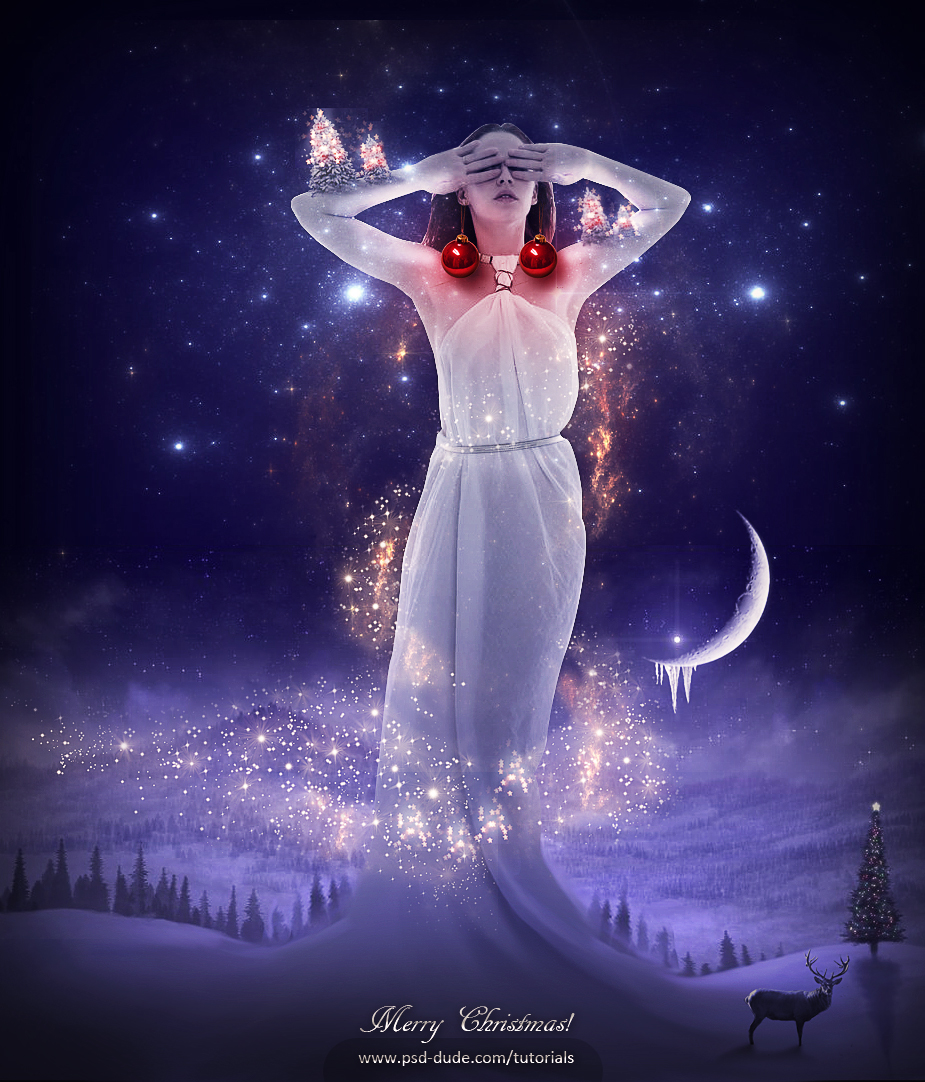
Here is the final result for our surreal Christmas Tale Photoshop manipulation tutorial.
Online Christmas Card Maker
Did you know you can use online tools like MockoFun to make Christmas cards? Combine Christmas vector shapes with text and create some amazing Christmas cards. MockoFun provides pre-made templates for making Christmas cards online in just a few minutes.
Check out this awesome list of over 50 Christmas fonts that you can use online or download for free to use in Photoshop. Combine Christmas fonts with text symbols like a star symbol for example.
Check out this tutorial on how to use the online Christmas Card Maker and all the awesome features that MockoFun has to offer.

9 comment(s) for "Christmas Fantasy Tale Photoshop Manipulation Tutorial"
PS: I added the link to my realization, as it was displayed any blur on your site.
http://cartes-mireilled.eklablog.com/photomontage-merry-christmas-fantasy-a113976240
http://kerensaw.deviantart.com/art/WINTER-ANGEL-531730457 reply