
Tutorial Assets
For this tutorial you need the following stock images and textures.
- desert woman
- stone sphere
- Lovecraft's Diary Font
- dark grungy texture
- human eye texture
- lens flare texture
- sand dust explosion
- smoke dust cloud
- electric lightning texture
I will create a new PSD file, size 750x610px. You can create a larger size canvas but with the same ratio. Add this desert woman stock image in a new layer and. Resize the image to have only this part of the image in focus.
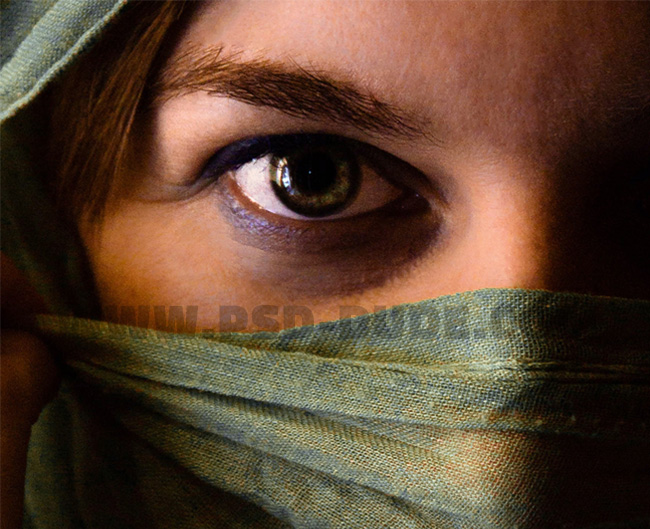
Go to Filter > Liquify and use the Forward Warp Tool to raise the eyebrow in arch to create an evil eye look.
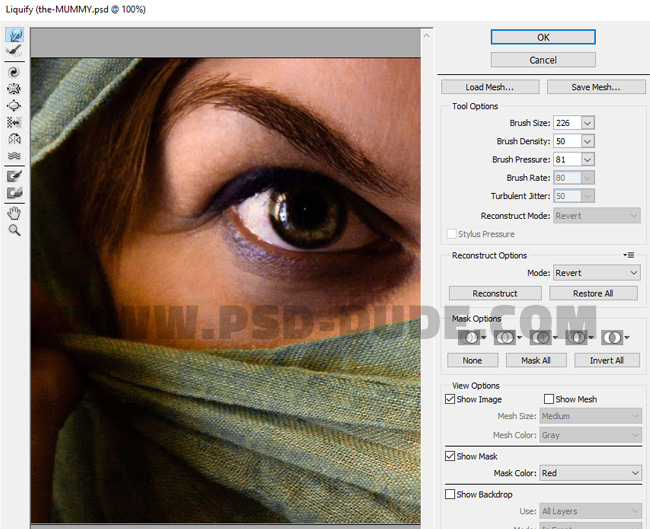
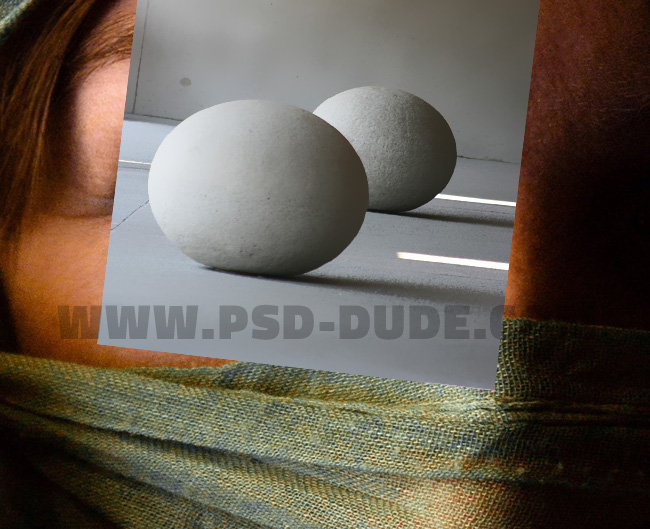
Copy this stone sphere in a new layer, resize it and rotate it like shown in the preview. Place it over the woman eye.
Add a Layer Mask to the Stone Sphere layer. Press CTRL-I to invert the colors of the mask from white to black.
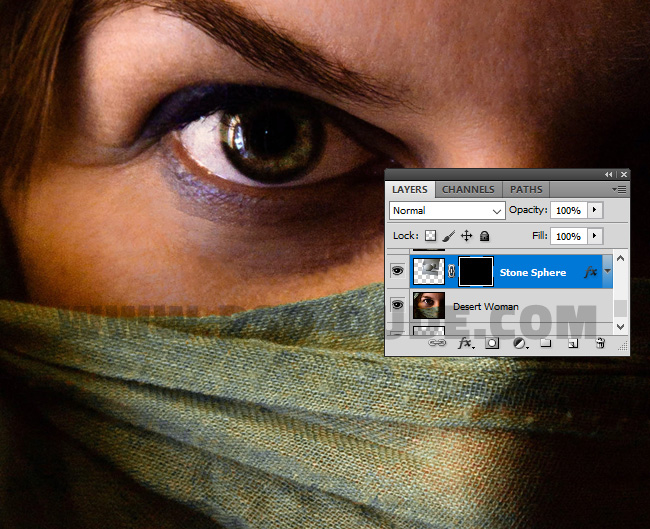
Pick the Brush Tool and with a soft round brush(color white), paint over the eye; make sure you have the Stone Sphere layer mask selected and not the layer.
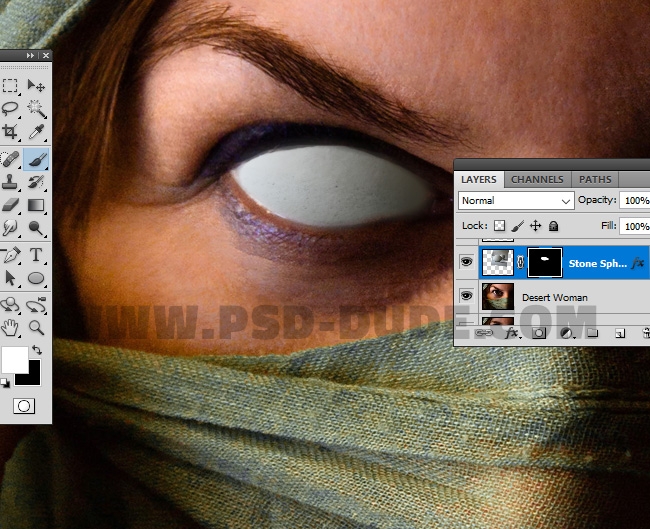
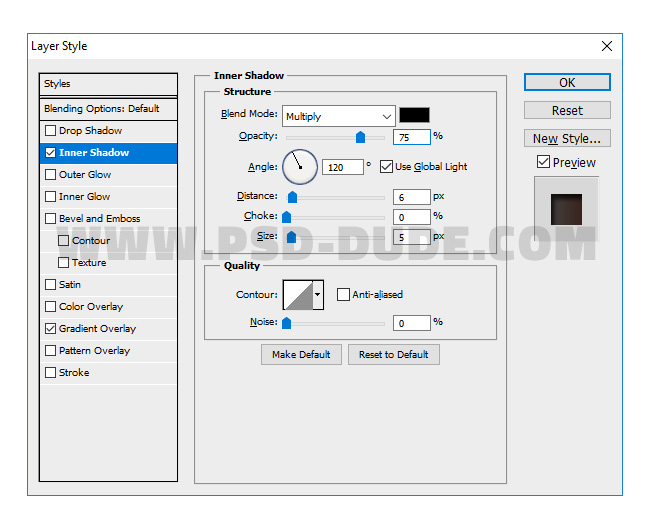
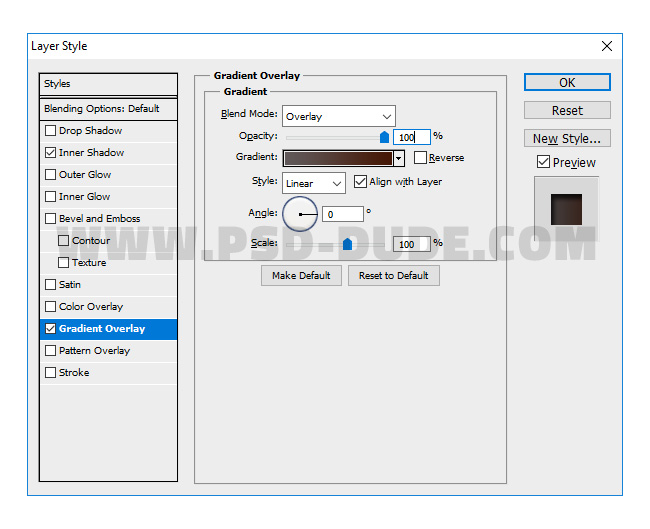
Add an Inner Shadow and a Gradient Overlay (colors #5f5858 and #461807) to the Stone Sphere layer
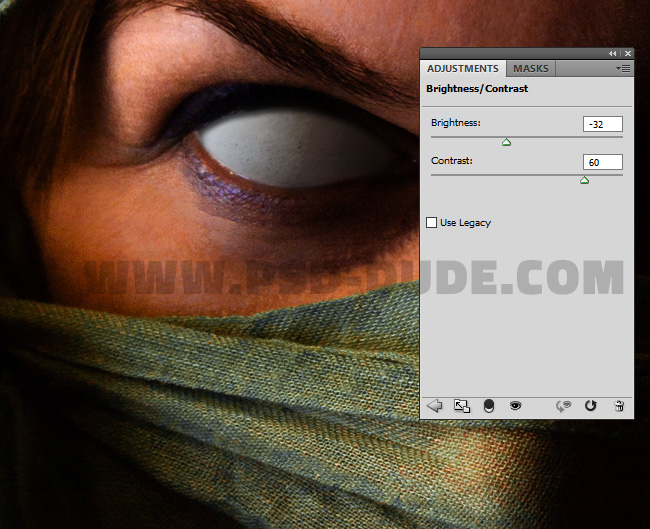
Add a Brightness/Contrast adjustment.
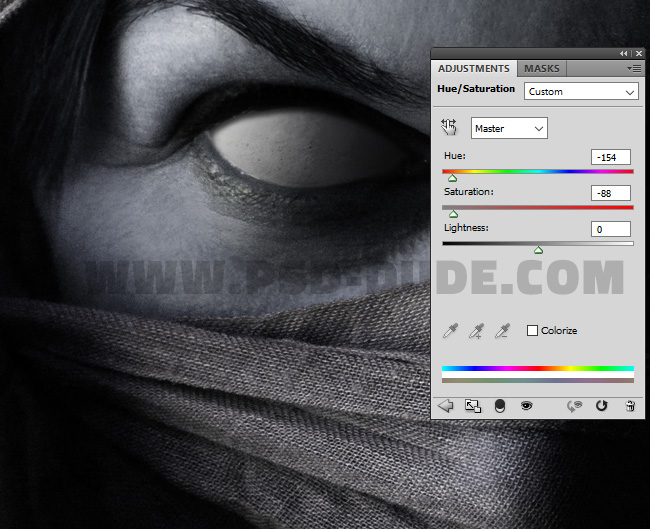
Add a Hue/Saturation adjustment.
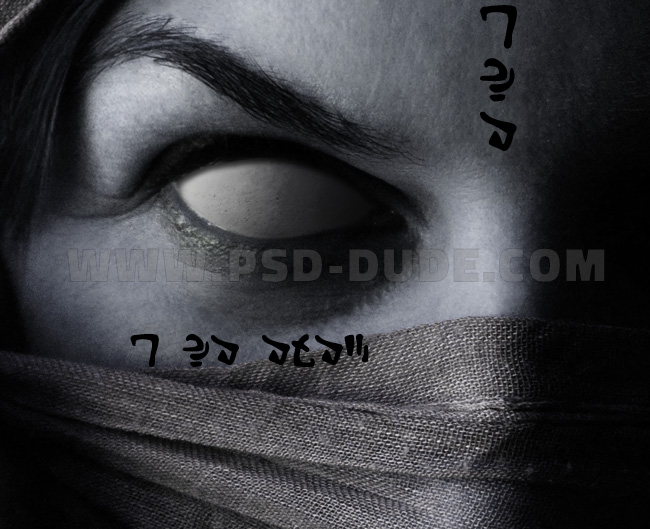
Download the Lovecraft's Diary Font or any other ancient symbols font. Install font in Photoshop and add some text like shown in the screenshot.
Alternatively you can check out this list of free to download fonts from movies to use as a replacement for the fonts in this movie poster.
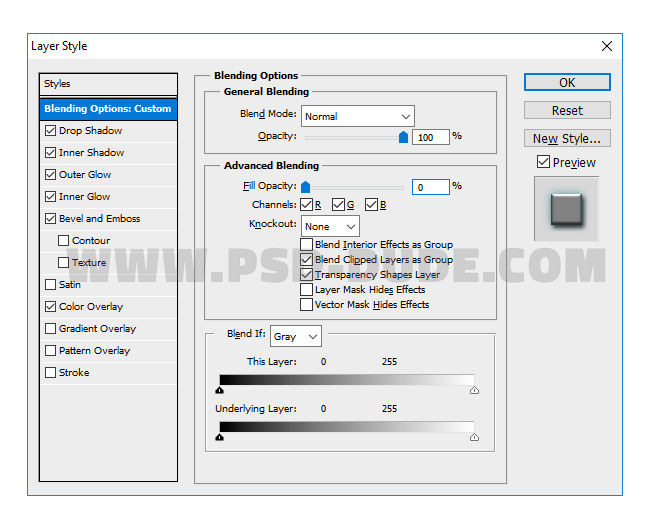
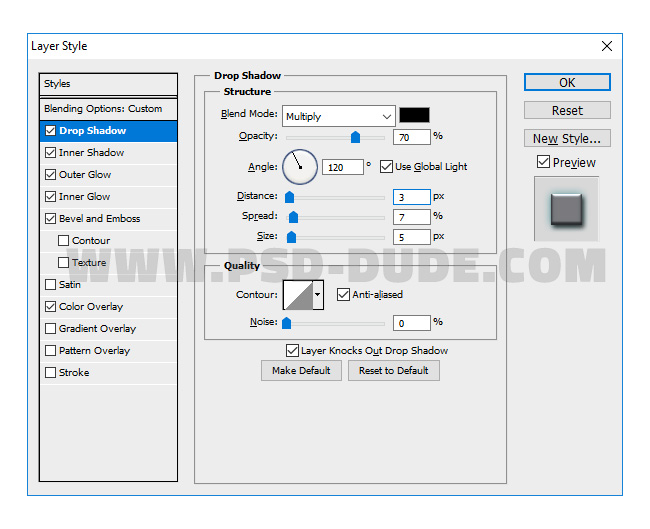
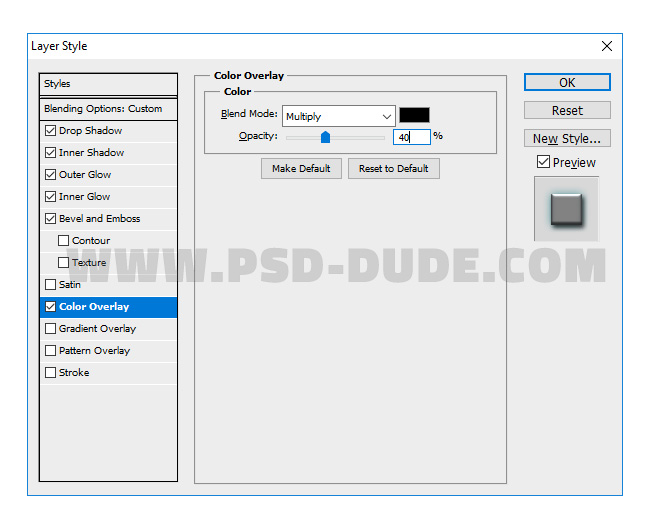
Add this layer style to the Ancient Symbol Text layer to look similar with the mummy face writings.
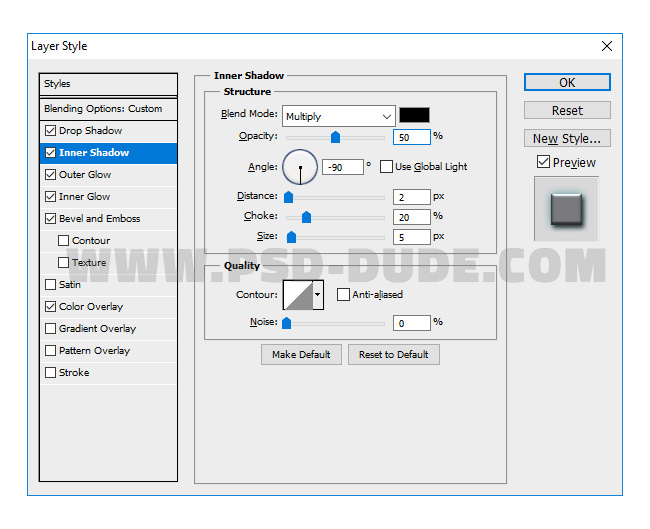
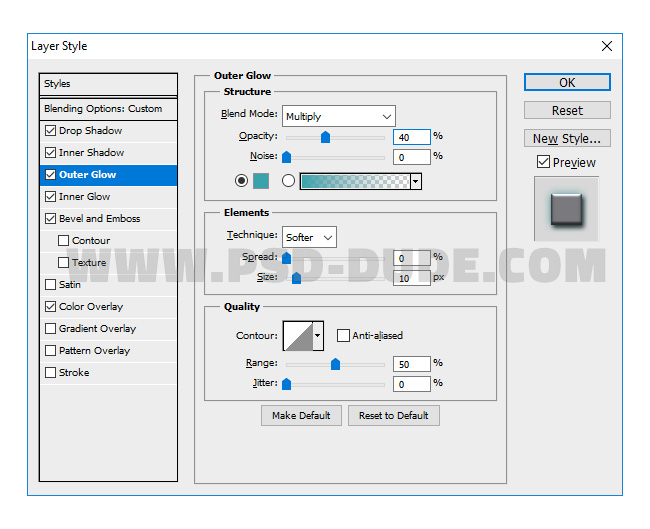
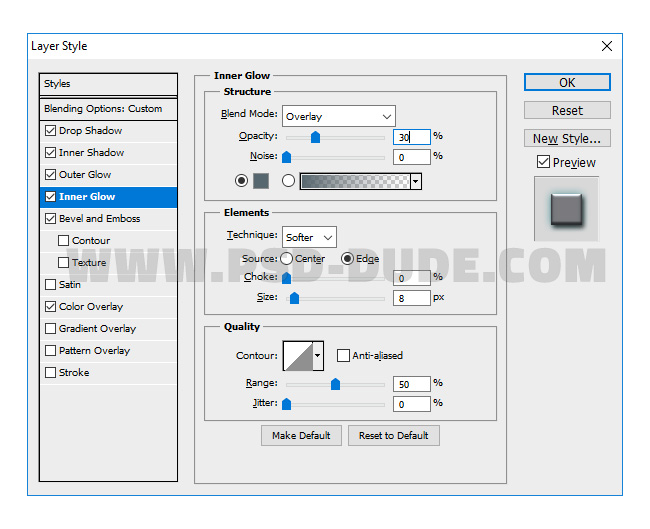
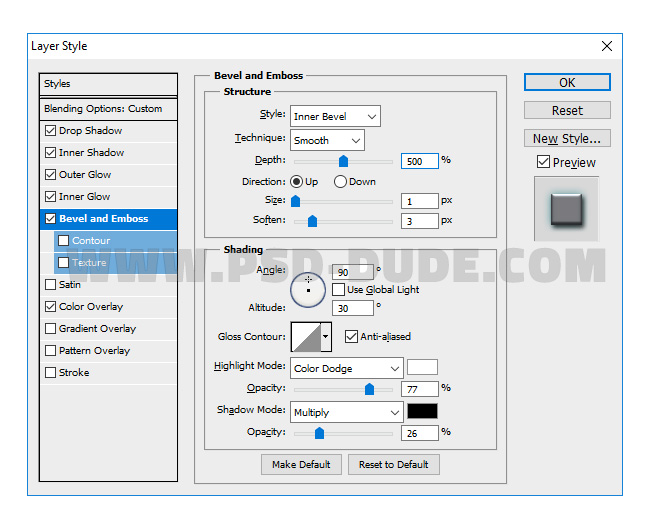
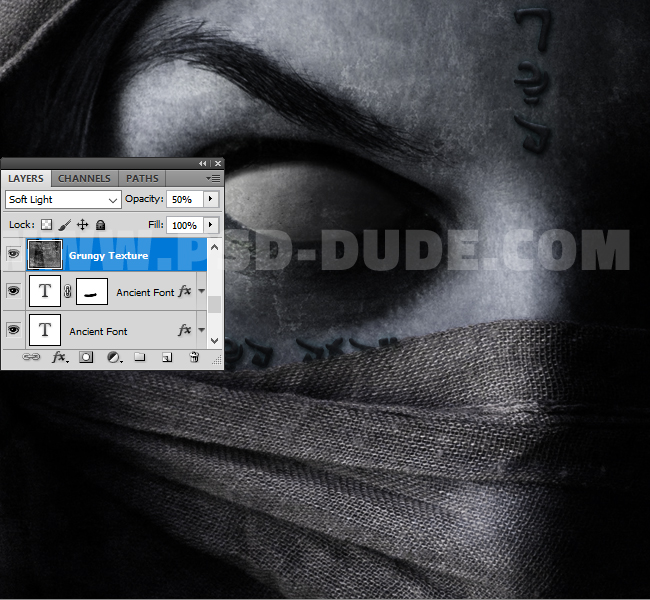
Add this dark grungy texture in a new layer and set the blend mode to Soft Light, 50% opacity level.
Create an Eye in Photoshop
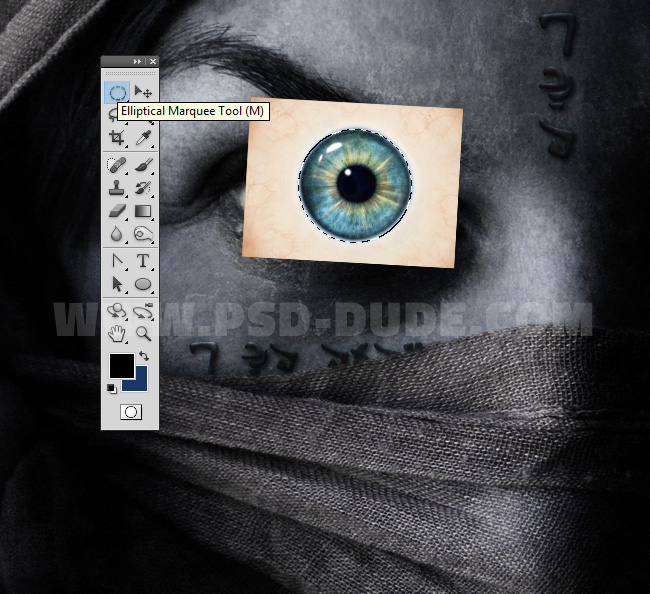
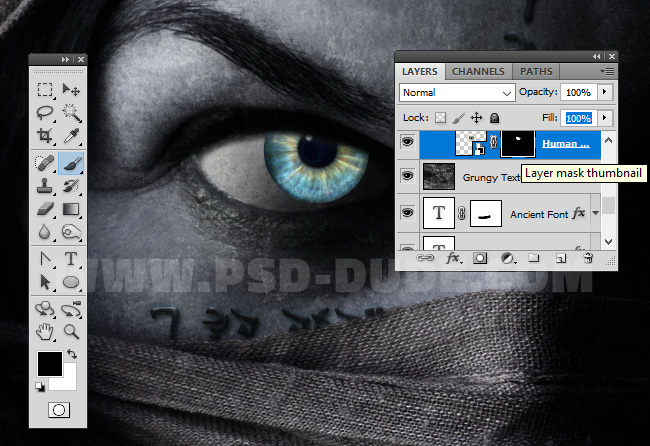
Add this human eye texture in a new layer. Use the Elliptical Marquee Tool to make a selection.
Press the Add layer mask button.
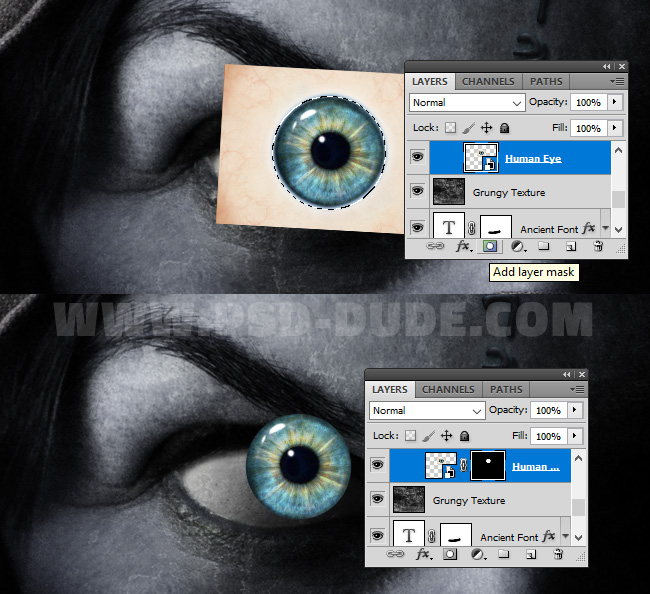
Use the Brush Tool and color black to paint inside the mask to hide part of the iris eye.
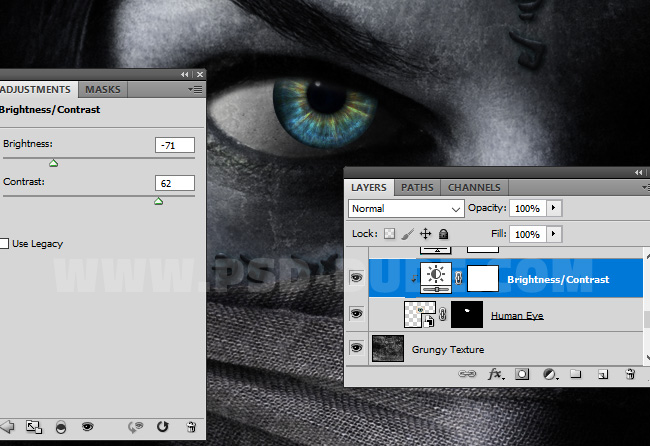
Add a Brightness and Contrast adjustment layer just for the Human Eye layer using a Clippinhg Mask.
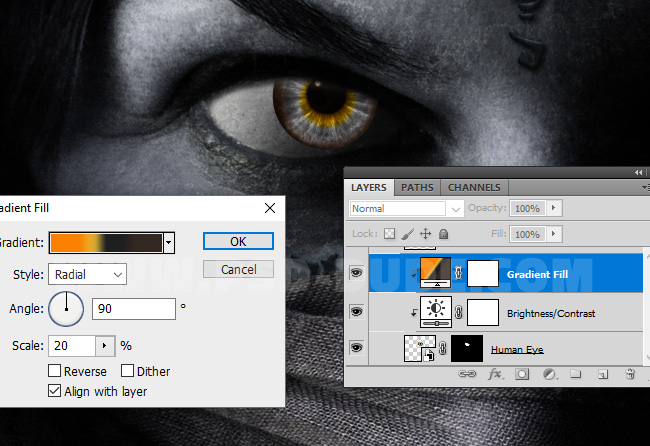
Add a Gradient adjustment layer just for the Human Eye layer using a Clippinhg Mask; set the blend mode to Color. The colors for the gradient are: #f98100 (location 25%), #d4a832 (location 39%), #1f1f1f (location 50%) and #332821 (location 76%).
Create Two Pupils in One Eye Effect in Photoshop
Select the Brightness and Contrast adjustment layer, the Gradient adjustment layer and the Human Eye layer. Right click and choose Convert to Smart Object. Rename the smart object HUman Eye and duplicate it. Resize the copy layer to around 75% and place it like shown in the screenshot.
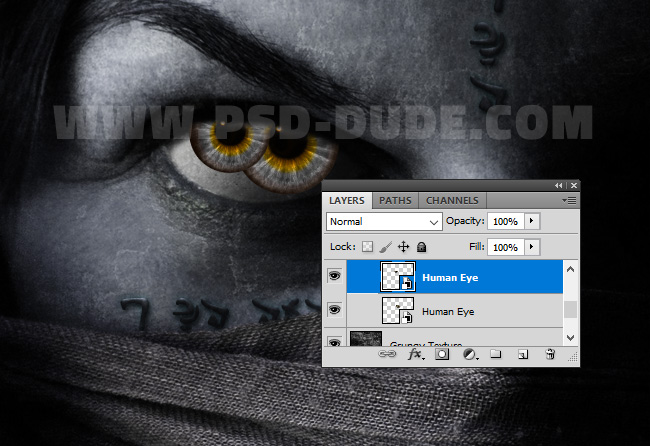
Add a Layer mask to the eye copy and use the Brush Tool and color black to hide some areas.
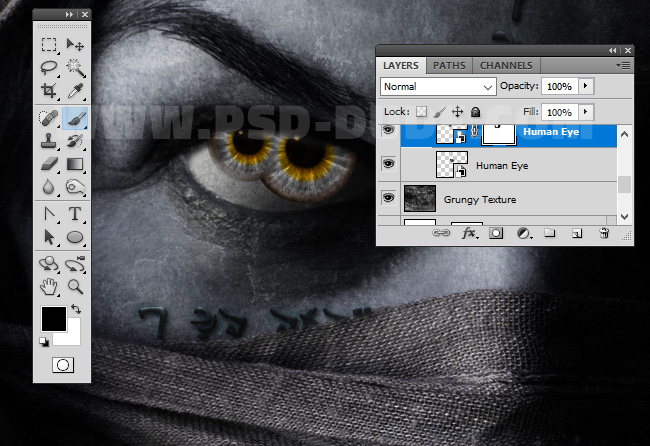
Create Glowing Eye Effect in Photoshop
To create the glowing eye effect we will add multiple layers for color and lighting effect. So create a new layer and use the Brush Tool, color #dcad5a and a soft round brush to paint over the image. Use different opacity levels.
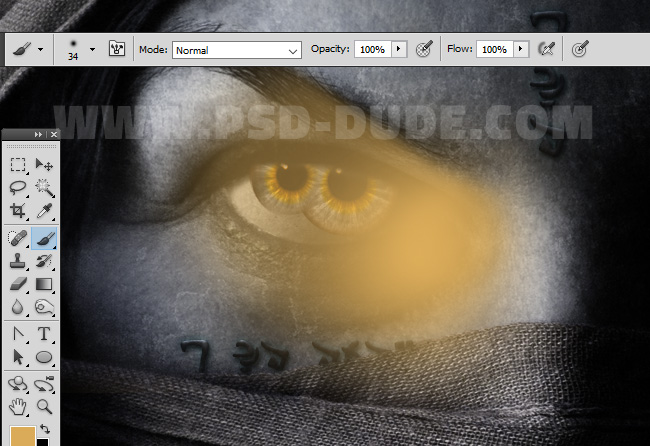
Set the blend mode of this color layer to Overlay.
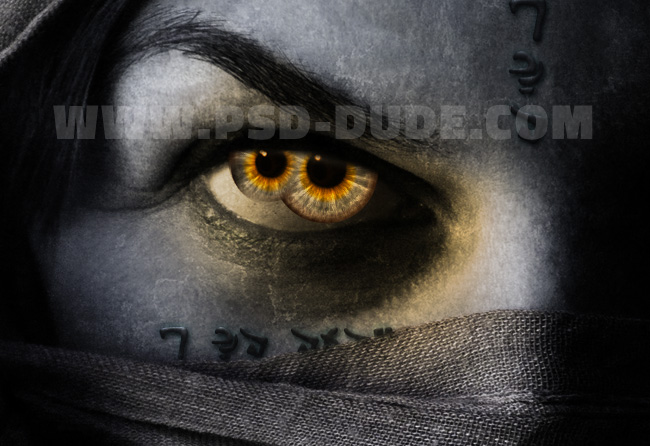
Create a new layer and use the Brush Tool, color white and a soft round brush to paint over the eye. Use different opacity levels to create this effect.
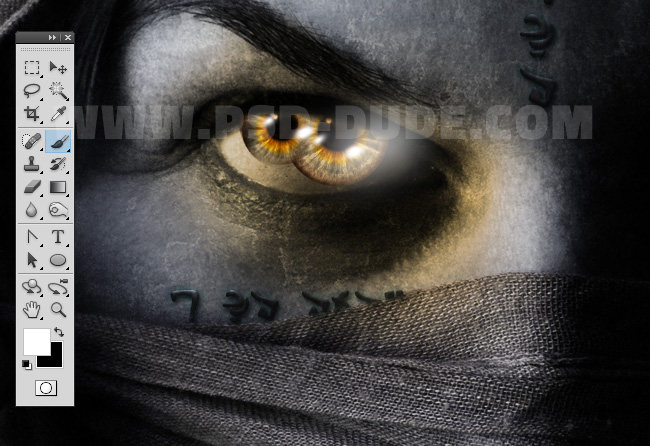
Set the blend mode of this layer to Overlay.
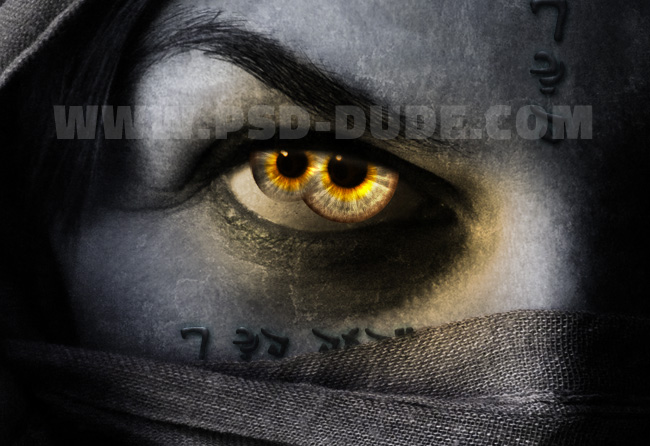
Create a new layer and use the Brush Tool, color white and a soft round brush to paint over the eye to add lighting effect. This time we will leave the blend mode to Normal.
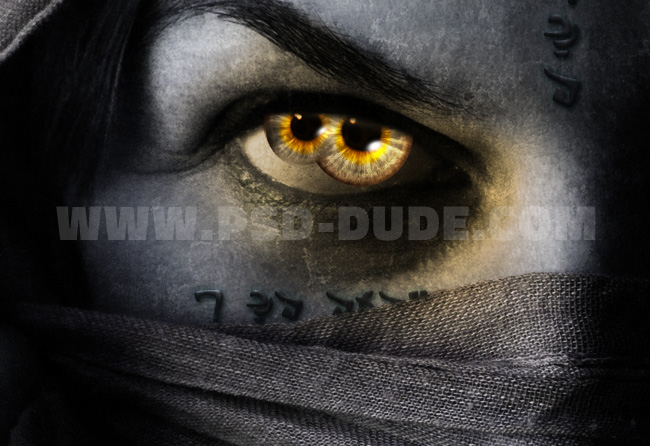
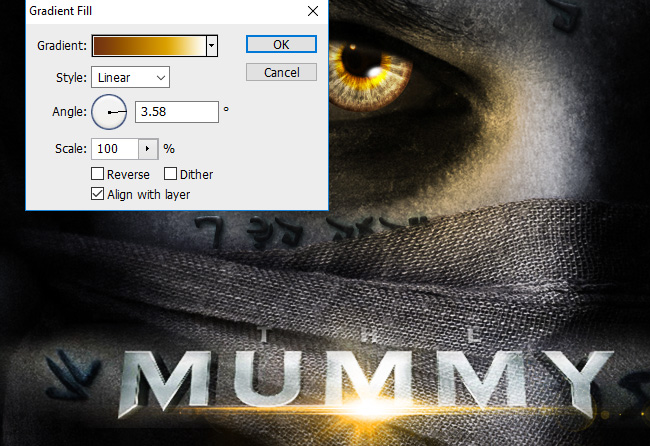
For a more realistic effect I have added the original Mummy title in a new layer. Create a new layer and add this lens flare texture overlay and set the blend mode to Screen. Add a Gradient adjustment just for this layer and set the blend mode to Hue. The colors for the gradient are: #703112 (location 0%), #d99f00 (location 64%) and #ffffff (location 100%).
Sand Dust Explosion in Photoshop
Use this sand dust explosion texture overlay to create sand effect in Photoshop. Set the blend mode to Screen and duplicate it to cover different areas.
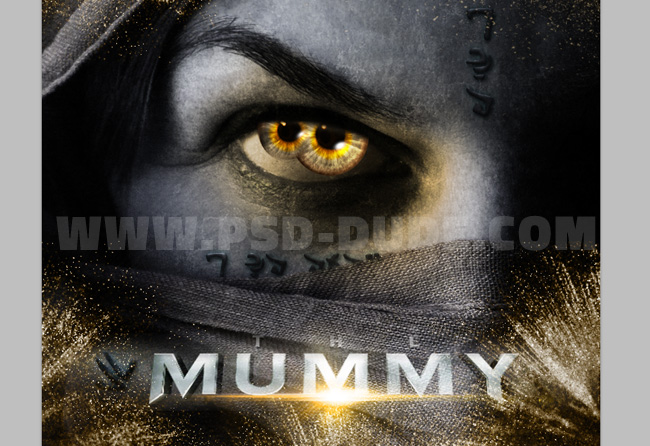
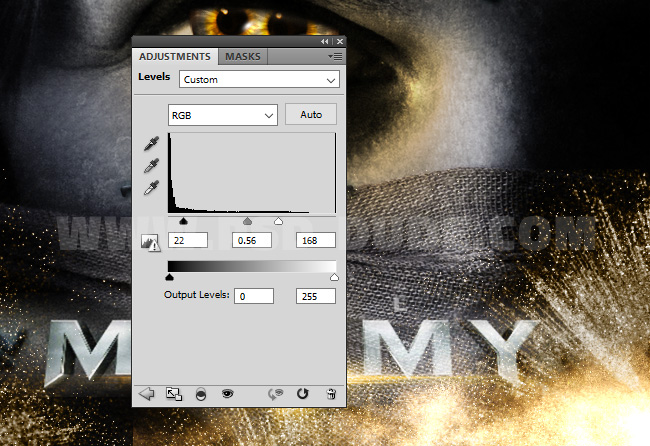
Copy this smoke dust cloud in a new layer and set the blend mode to Screen. Add a Levels adjustment just for this layer.
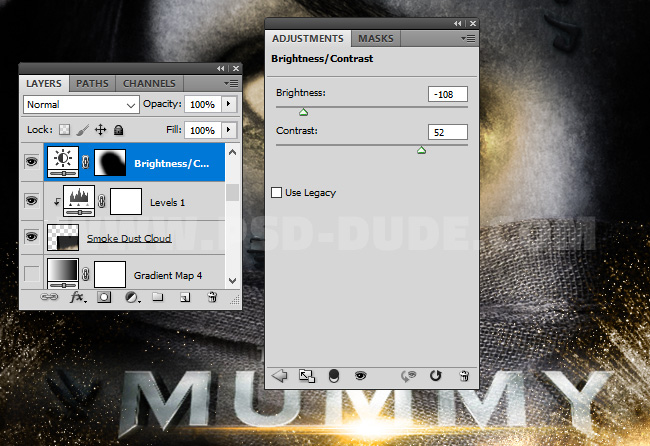
Add a Brightness and Contrast adjustment layer above all the layers. Use the Brush Tool and a soft round brush with color black to paint inside the layer mask to lighten some areas.
Add Electric Lightning Effect in Photoshop
To add more lighting effects I used this electric lightning texture and I set the blend mode to Screen. To change the color of the lightnings I added a Gradient adjustment just for this layer with the blend mode Color. The colors for the gradients are: #ffae00 (location 0%) and #fd7c00 (location 100%). Use the Eraser Tool to delete some areas.

Sharpen Images in Photoshop
To create a sharpen photo effect you can use the High Pass Filter. Learn how to sharpen photos in Photoshop using the High Pass filter.
Congratulations, you made it!
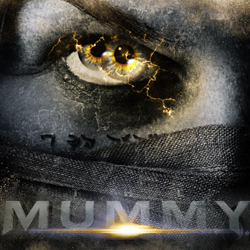
So here is the final result for The Mummy Movie Poster Photoshop tutorial. I hope you enjoyed practising this new Adobe Photoshop tutorial.


If you are an indie movie producer, or just want to give a proffessional look to your movie posters, the movie credits need to follow certain rules. Check out this movie poster credits PNG template that can be easily customized online: background image and color, text and font for the movie title, cast and other information.

No comment(s) for "The Mummy Movie Poster Photoshop Tutorial"