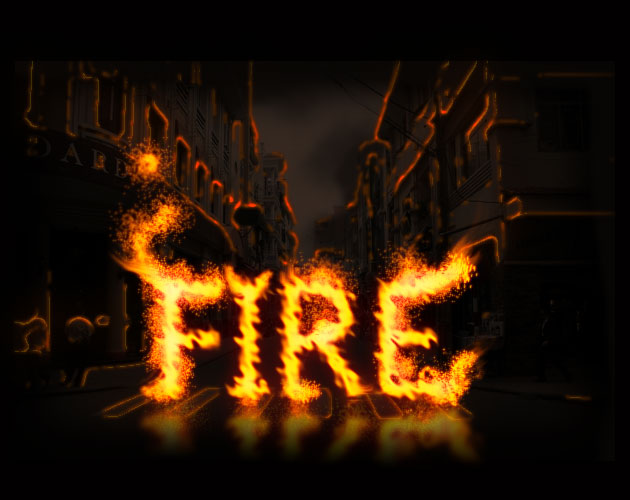
In this new photo manipulation tutorial I will show you an easy way to work with fire effect in Photoshop using PS actions. I have recently posted a fire text action on actions4photoshop and I will now use it to create a quick photo manipulation that includes fire effects and fire brushes as well.
Fire is an element that is often used in Photoshop artworks and it is really important to know how to work with it. Many people tend to use fire brushes that are really popular; if you want to know how to use a fire brush check out the tutorial.
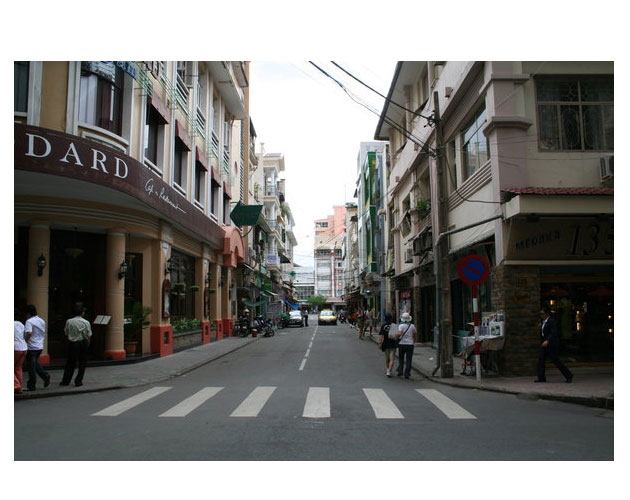
Let's start this tutorial. First you need to open this Street Image in Photoshop. As you can see from the preview I have made the canvas with a bigger size. I will show you how to adjust the image to cover the entire canvas later on. Call this layer Street Layer.
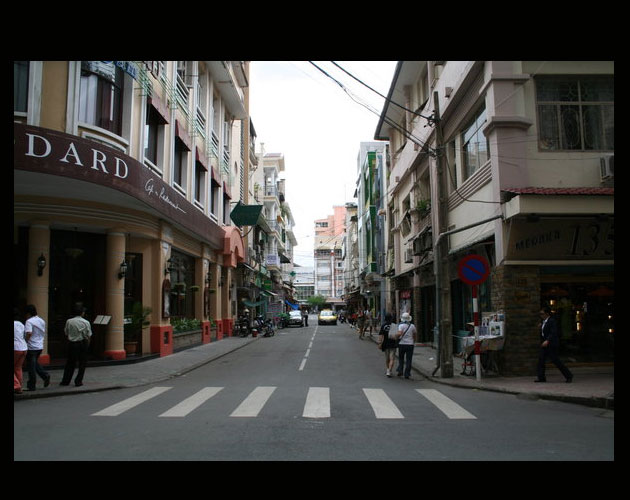
Create a new layer behind the Street Layer and fill it with black color. Call thi layer Background Layer.
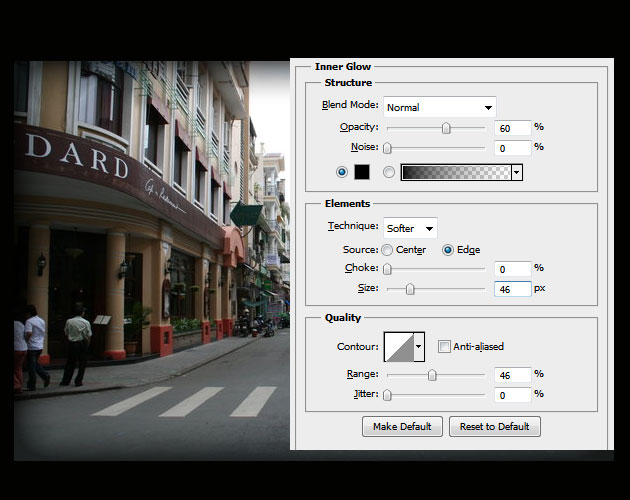
To blend the image with the black background I will first add an Inner Glow effect to the Street Layer like shown in the image.
Make a selection using the Rectangular Marquee Tool like in the image below; before making the selection set the feather to 20px.
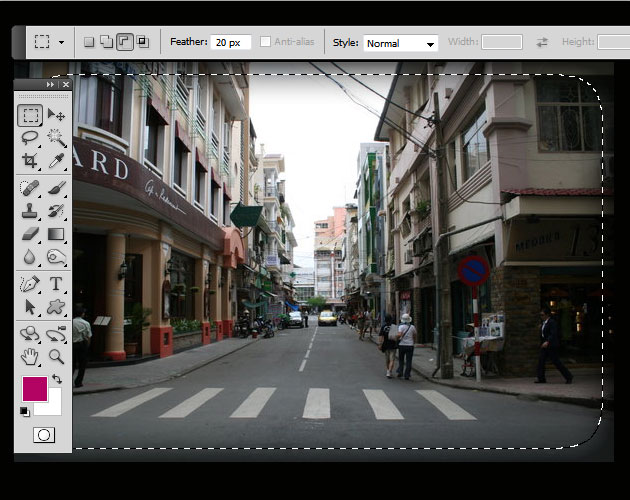
Add the selection as layer mask for the Street Layer. If you don't know how to do that read the layer mask guide for beginners.
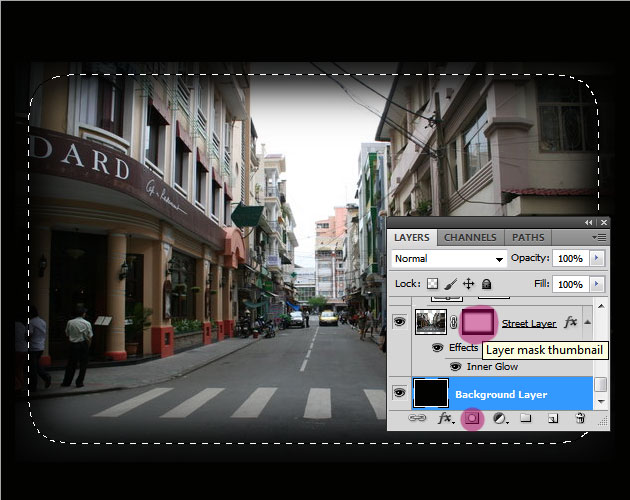
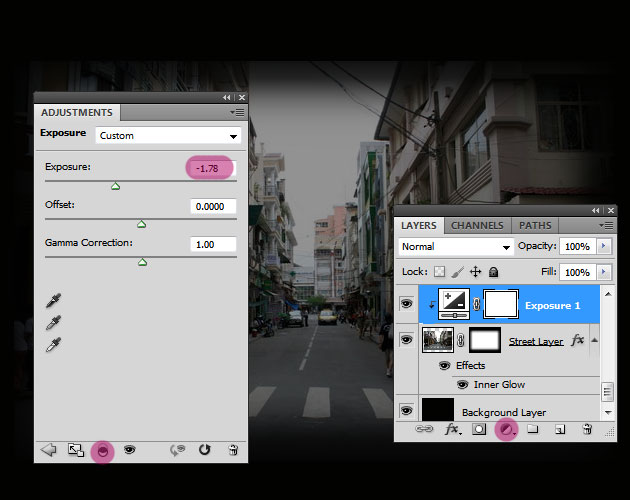
Add a Exposure Adjustment Layer to the Street Layer; press clip to layer to affect only one layer. If you are not really sure how to work with Photoshop adjustments you must read the adjustment layers guide for beginners; it will be really useful in working with Photoshop.
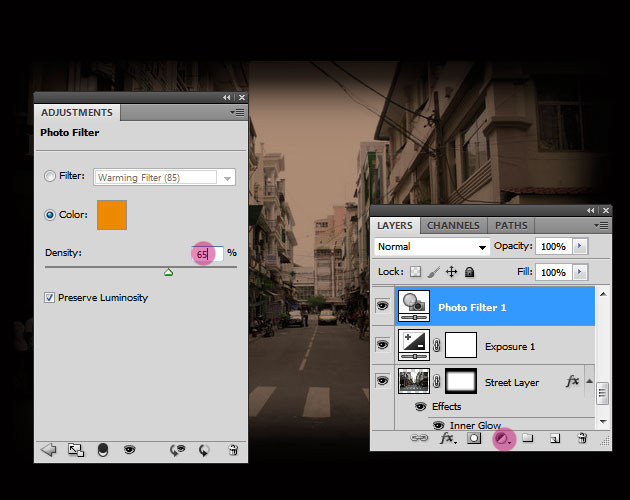
Time to add a Photo Filter adjustment layer with the following settings:
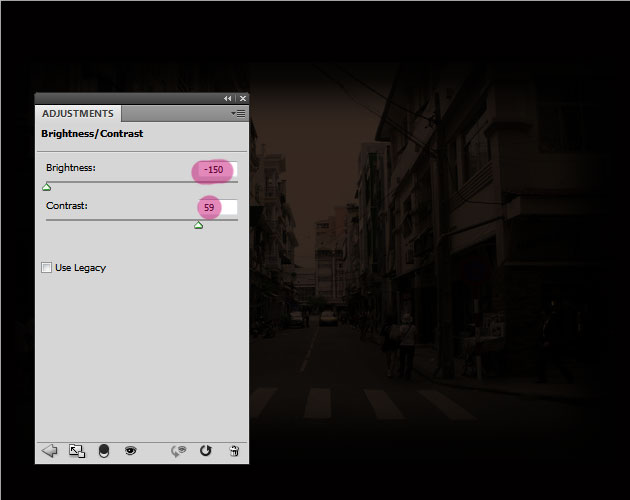
Add a Brightness/Contrast adjustment layer and decrease the brightness of the photo. Don't worrry if it looks to dark. we will adjust it later on.
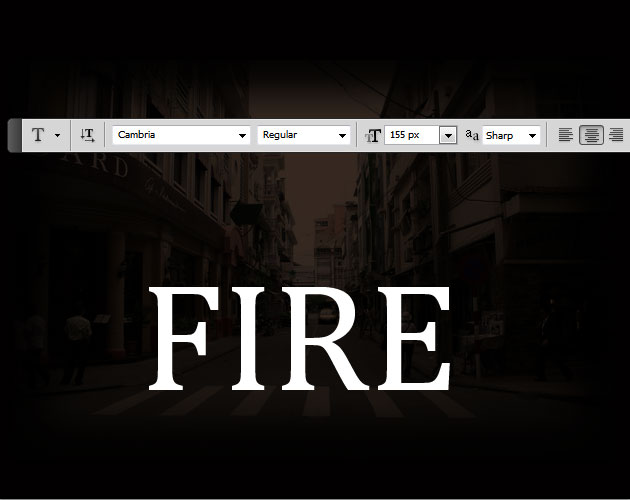
I will now add a fire text right in the center of the image. Use any font you like but it looks better if you use a thin font.
Now download this fire text action and use it to transform your text. It is better to run the action in a new layer that contains only the text. Use the second action from the pack.
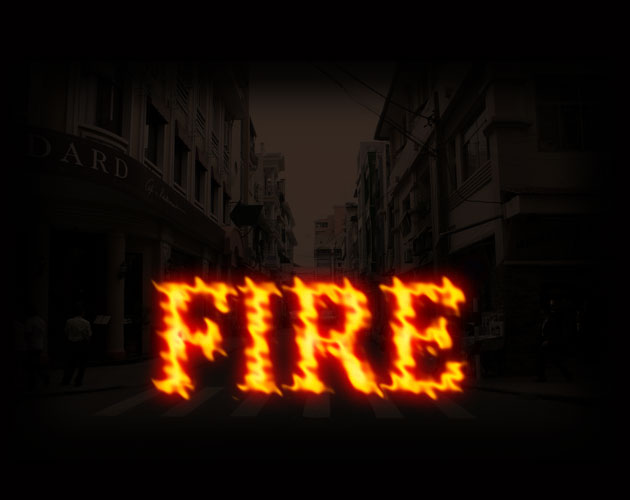
After the action is ended copy in the main file the Fire 1 and Fire 2 layers. Reduce the Opacityof the Fire 2 layer to around 35%.
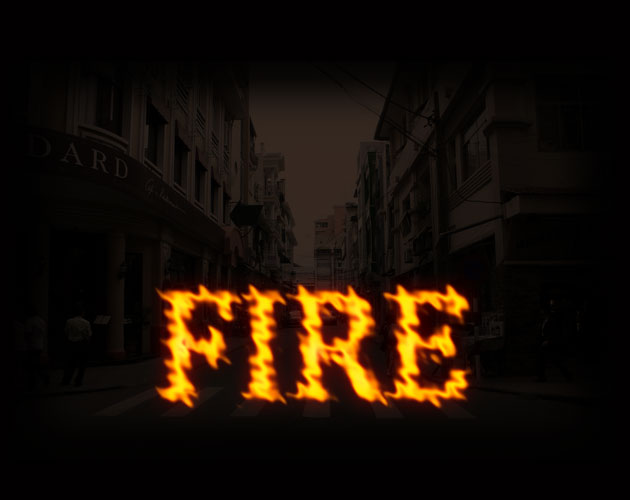
To make the fire text look more interesting pick the Smudge Tool and use it in the Fire 1 layer. Set the strenght to around 80% and pick a Spatter brush for this tool. Or you can use any brush you like. Start creating interesting effects.
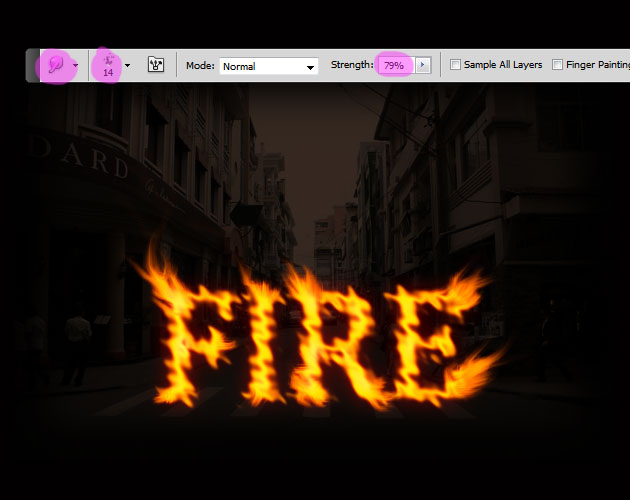
Another thing that you can do is to pick the Brush Tool and use it in the Fire 1 layer but also in the Fire 2. Use the color white with different opacity levels. As for the brush you can choose again the Spatter brush or any other that you like.
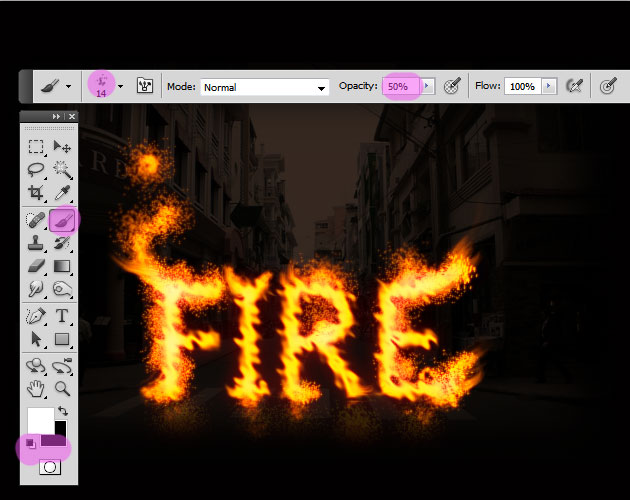
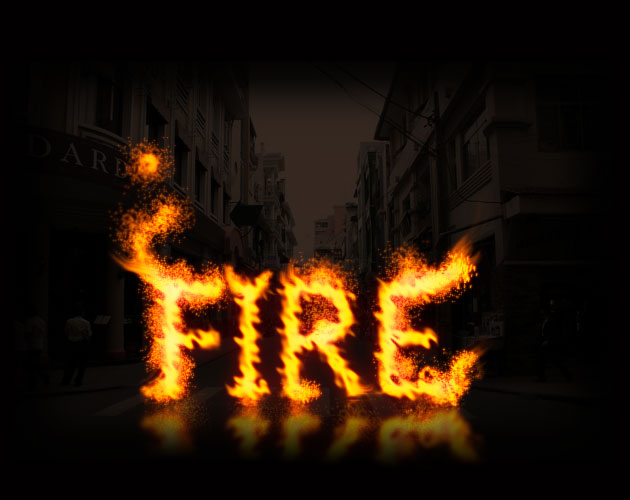
To make the effect more realistic you can add a text reflection; simply duplicate the text and rasterize it in a single layer. Flip the duplicated layer vertical and add a layer mask to hide half of the text. Reduce the opacity of the reflection layer to around 65%. If you are not really sure how to do it you can learn how to add a reflection in Photoshop by reading this easy to follow tutorial.
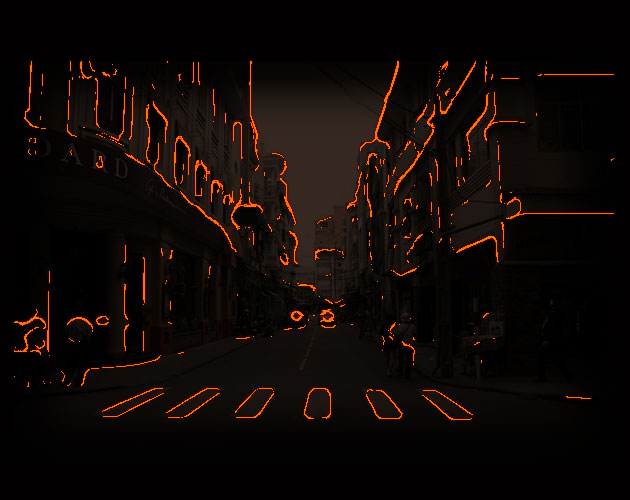
For the final touches I will highlight the background edges to make the effect more realistic. To do that you have to duplicate the Street Layer and remove the layer style and also the layer mask. Desaturate the image and go to Filter>Stylize and choose Glowing Edges like in the image:
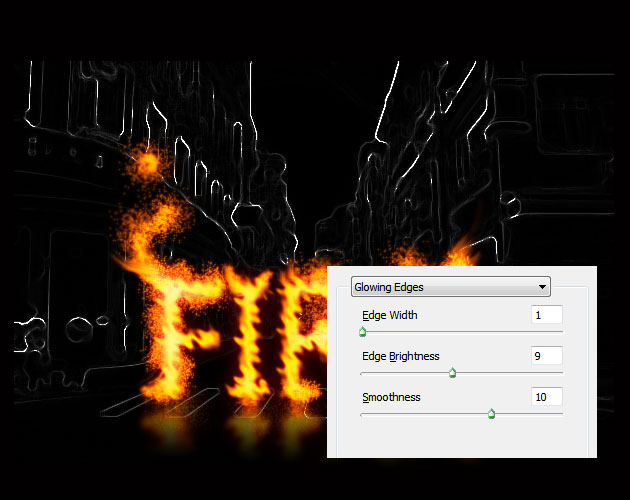
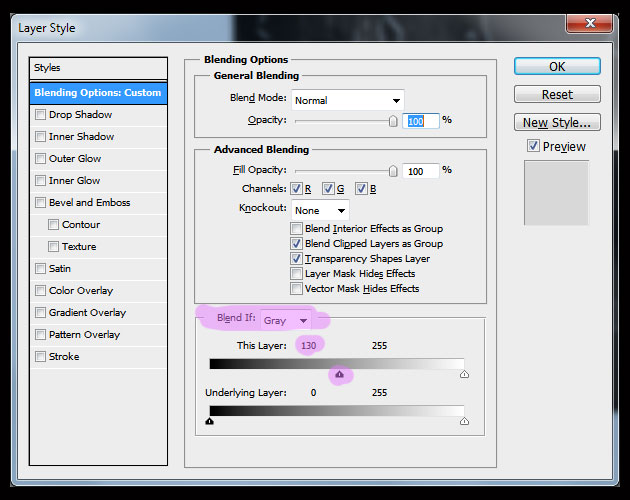
Open the layer style window of the Street Layer Copy and make the black areas transparent by adjusting the Blend If section like shown in the image.
Now I want to add some layer styles to this layer; but first we have to rasterize the effects. For that you have to make a new blank layer above the Street Layer Copy and to merge the two layers. Copy the layer styles from the Fire 1 layer and paste it to the merged Street Layer Copy.
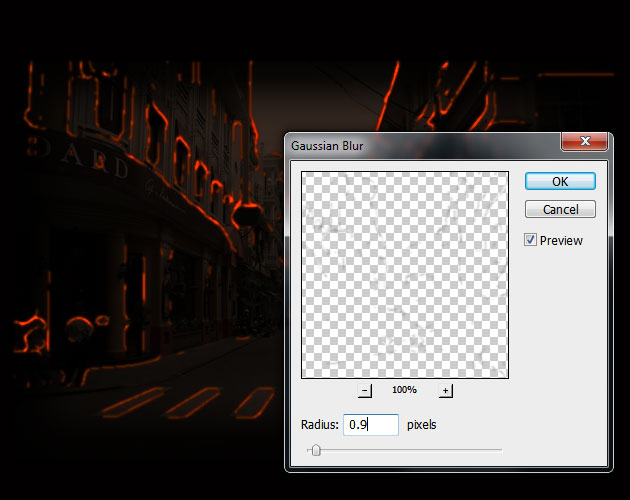
To obtain a more softer look you simply have to add a Gaussian Blur effect.
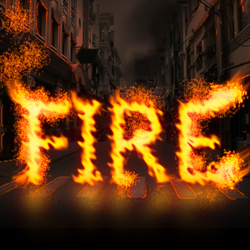
Once you make the fire text visible you might have to adjust the Street Layer Copy opacity, Outer Glow color and so on to make it look more subtile. So here is the final result for this fire text effect create in Photoshop using free PS action. You can of course play with the result and choose one of these fire brushes; or you can choose my fire brush set.

No comment(s) for "Create a Fire Text in Photoshop Using Actions"