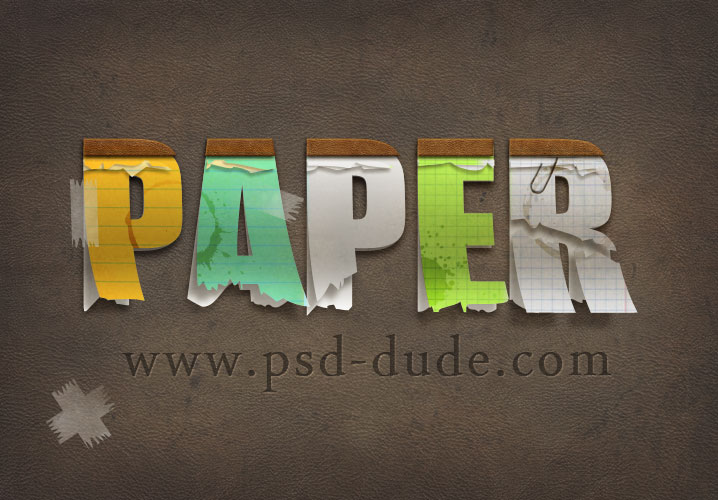
In this tutorial we will create a paper text effect in Photoshop using torn paper shapes and paper textures. This paper text will look like a notebook with leather cover. The final result will be a vector shape so you can resize it to any size without losing the quality.
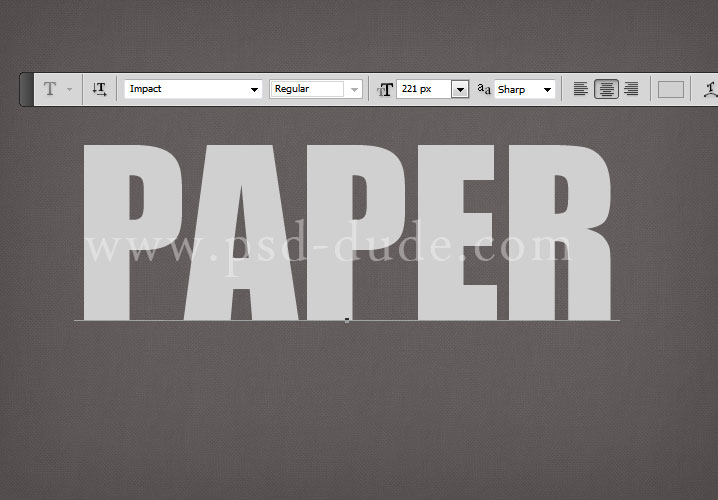
Let's start with a simple text, font Impact, the size is not important depends on how big is your canvas size. The color for the text is #d0d0d0
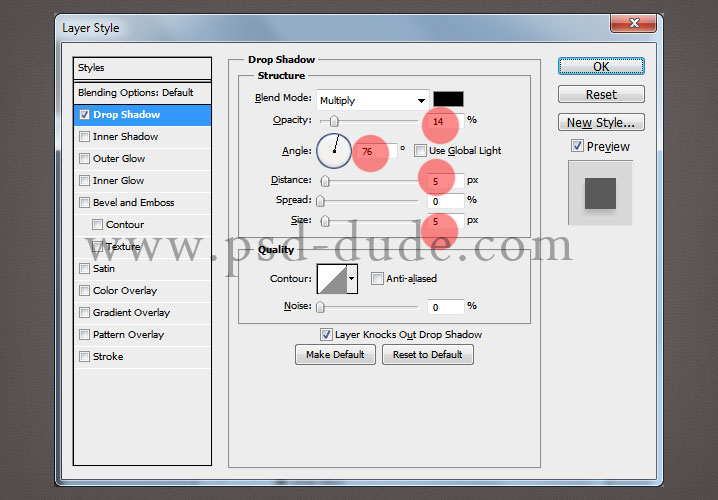
Call this first layer Text Paper 1 and duplicate it; call the second layer Text Paper 2. Open the layer style window of the Text Paper 1 and add a simple Drop Shadow. Be careful when you make the settings, especially the Angle.
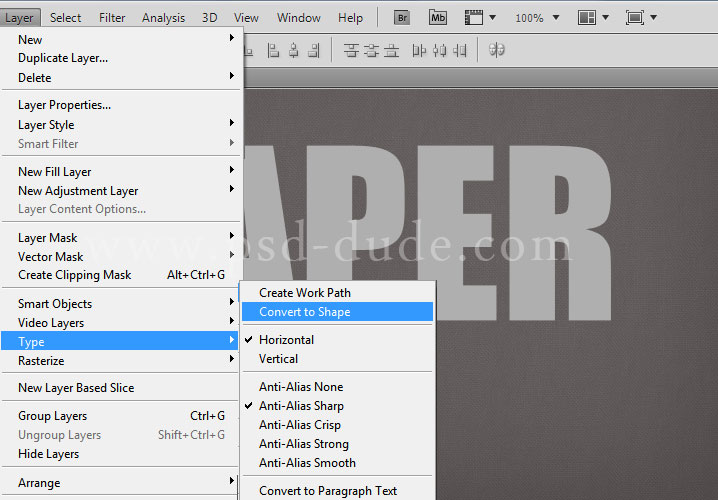
Hide the Text Paper 1 for now and let's work with the Text Paper 2. Right click on the layer to convert the text in shape; or you can use the Photoshop menu as shown in the image. If you don't know how to do it read this quick tut on how to turn text in shape in Photoshop.
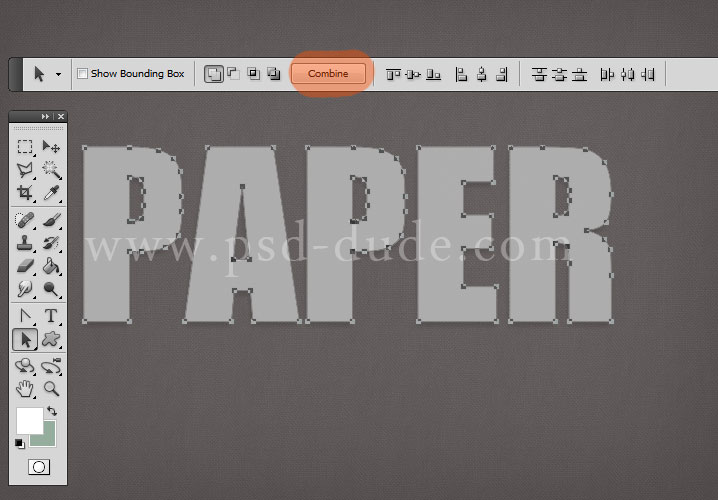
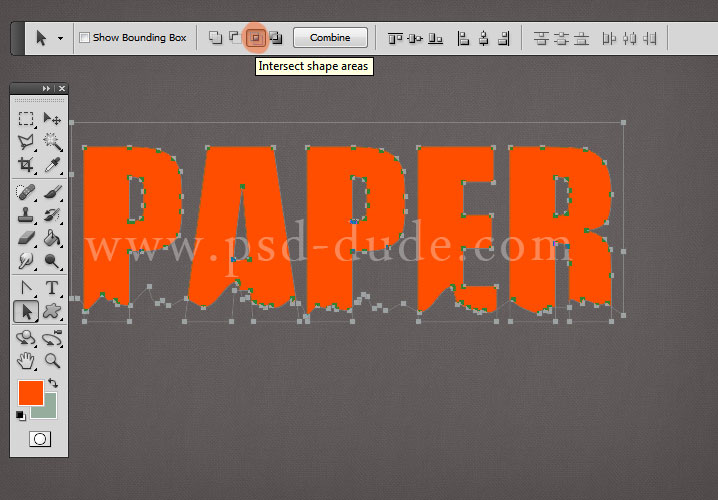
This step is really important! Pick the Path Selection Tool and select all the letters from the paper text, and press the Combine button.
Method 1 - for advanced Photoshop users
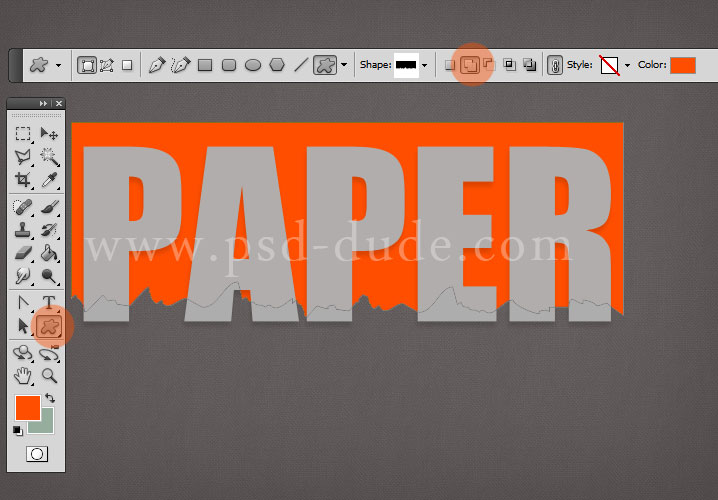
Now let's create the torn paper effect; for that you need to download these torn paper shapes. In a new layer add some torn paper shapes; use the Add to shape area to add all the shapes in a single layer. Make sure that the torn paper covers the paper text except the bottom area like shown in the image.
Select the paper text using the Path Selection Tool; press CTRL+C to copy the shape. Go to the torn paper shape created in the previous step, and press CTRL+V to paste the text shape.
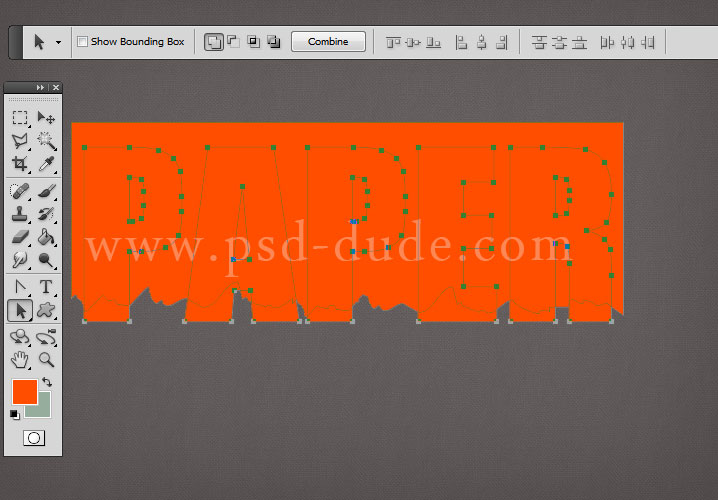
Press the Intersect Shape Areas from the Path Selection Tool menu. The result is a torn paper text. Press the Combine button to combine the two shapes.
Method 2 - for beginner Photoshop users
If you are not familiar with vector shapes drawing you can simply rasterize the text layer and use the Lasso Tool to create the torn paper selection by hand. Use the selection and delete it from the rasterized text layer.
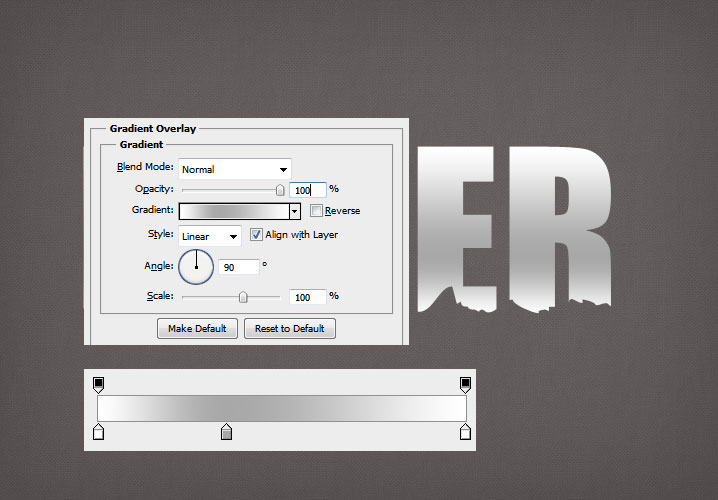
Rename the new shape layer Text Paper Shape 1 and delete the old Text Paper 2. Add a Gradient Overlay for the Text Paper Shape 1; use a combination of light gray and white for the gradient.
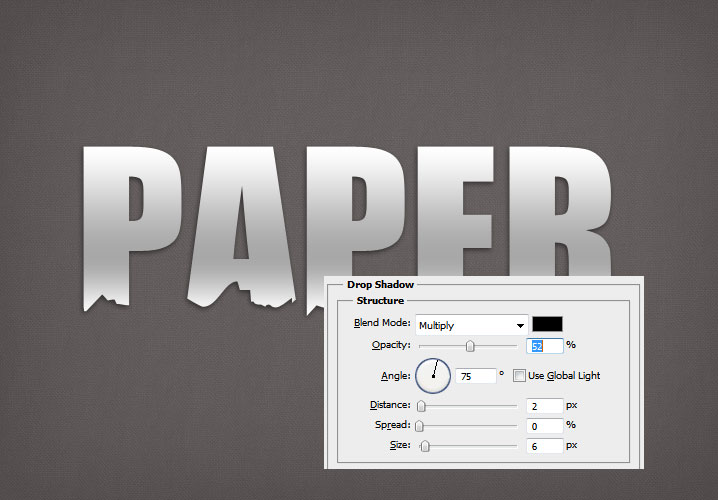
Add also a Drop Shadow effect like shown in the image.
In a similar way create another torn paper text. Duplicate it and call the original shape Shadow and the copy layer name it Text Paper Shape 2. Add a Gradient Overlay to the Shadow layer.
Rasterize the layer style effect of the Shadow layer and apply a Gaussian Blur filter like shown in the image.

For the Text Paper Shape 2 layer add a Gradient Overlay similar to the one used for the Text Paper Shape 1. Also use the Edit>Transform Path>Warp Tool like shown in the image.

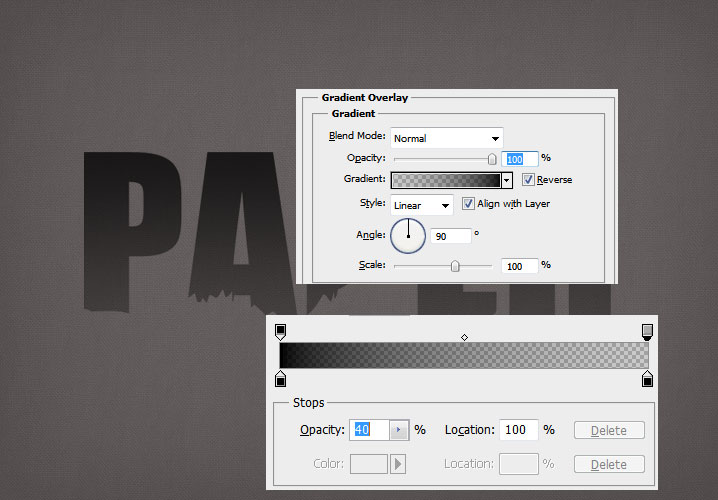
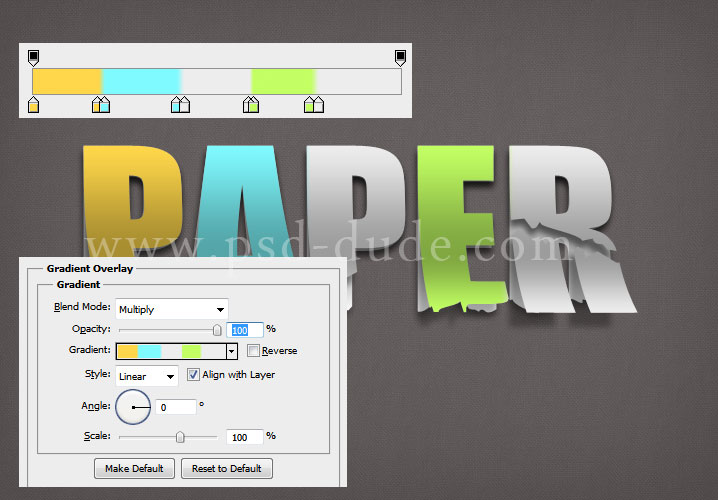
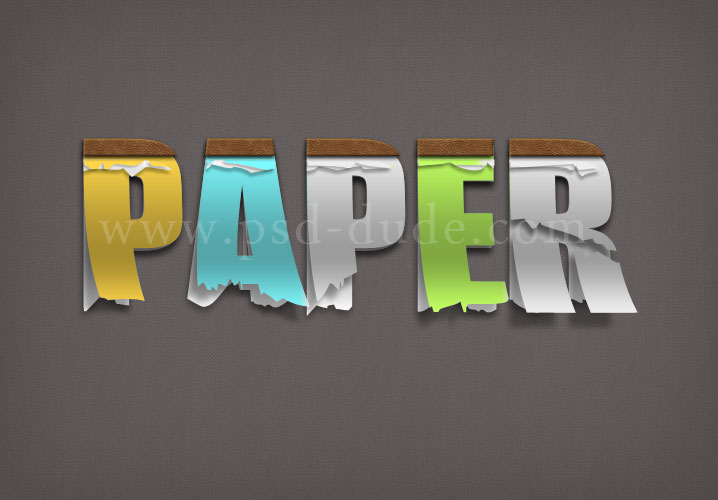
Duplicate the Text Paper Shape 2 and change the old Gradient Overlay with this new one presented in the image below. The idea is to add some color to the letters. Use whatever colors you want but be careful when you place the color locations.
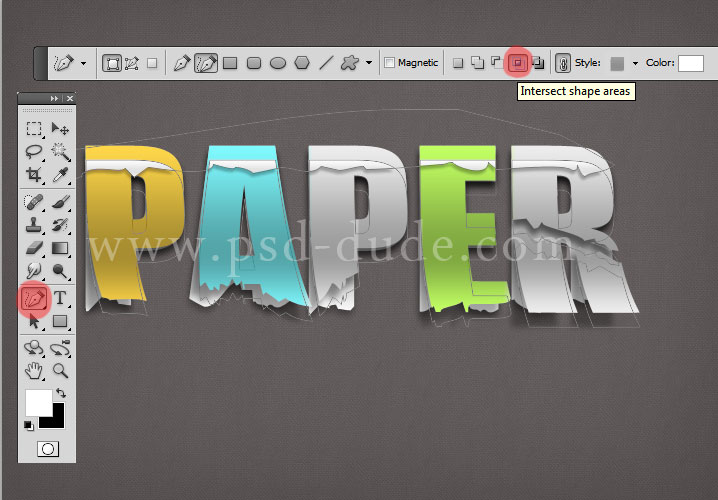
To make the paper text effect more realistic I have duplicated the Text Paper Shape 2 two times and I used the Freeform Pen Tool to create the torn paper effect; make sure you check the Intersect Shape Areas button before you begin.
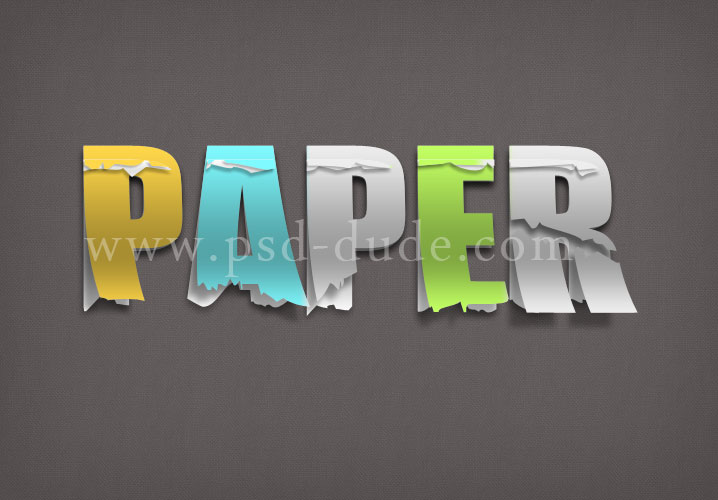
As you can see one paper page is colored and one is white; I did that to obtain a nice looking effect and contrast. This is how the paper text looks after adding the two little torn paper layers.
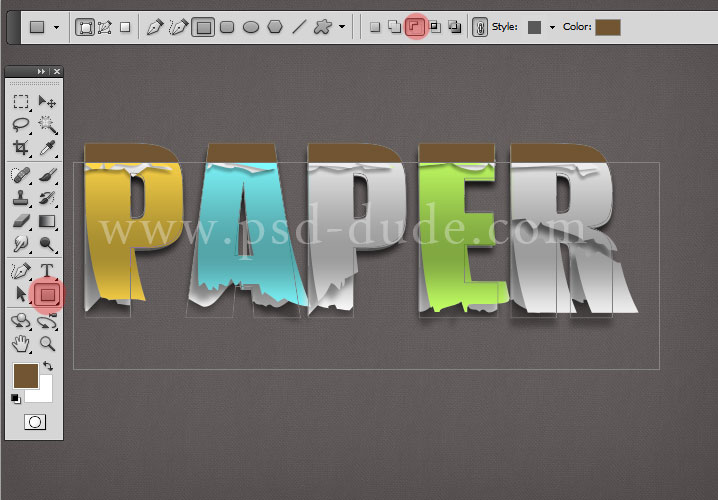
Let's create a notebook cover for our paper text. To create the notebook cover first duplicate one of the text paper layers and use the Rectangle Tool to substract the rectangle from the paper text area like shown in the image.
I will uyse a leather texture for this cover; because I want to use a leather pattern as pattern Overlay I will choose this seamless leather.
Open the layer styles window and add the following Photoshop styles: Drop Shadow, Bevel and Emboss, Color Overlay and Pattern Overlay. All the settings can be changed and adjusted to match with your text effect and background color.
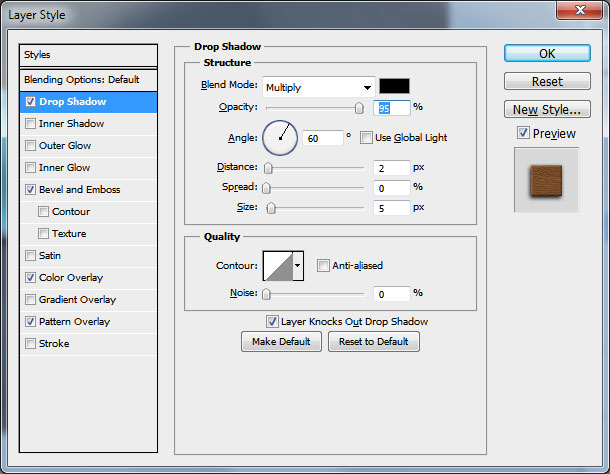
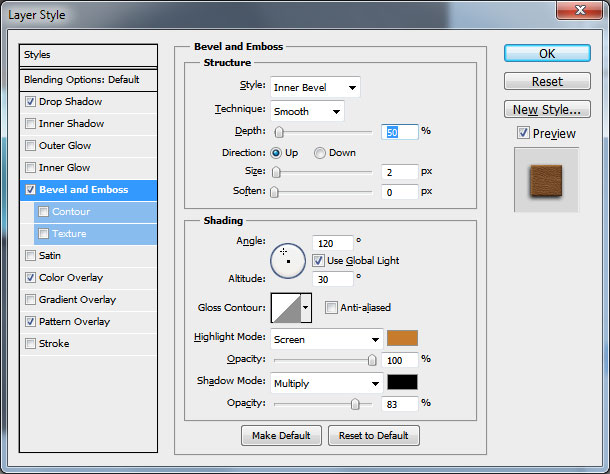
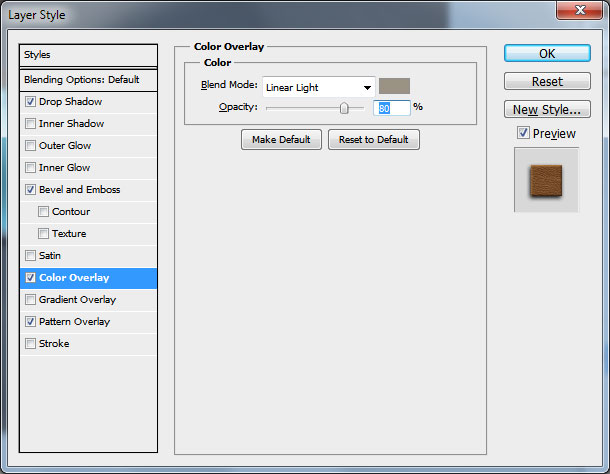
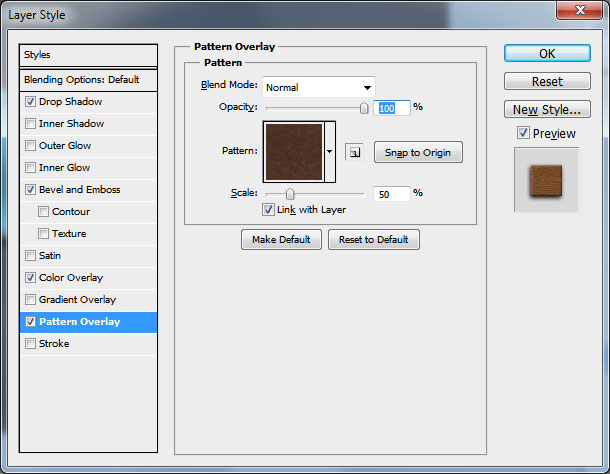
You can of course choose another leather texture for the cover; this is how your result should look so far:
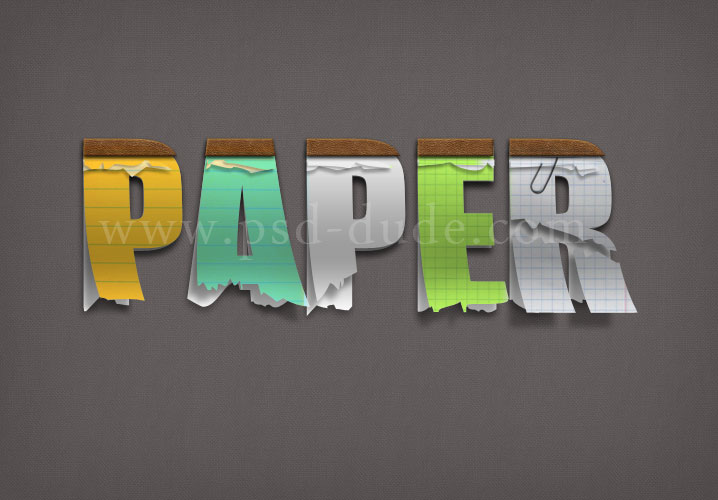
For the final touches you can add a notebook pattern for each letter or you can even find a nice notebook texture.
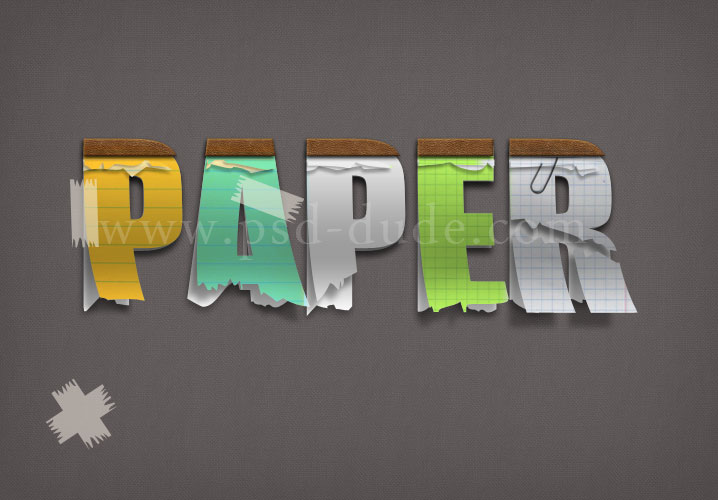
I have also added these scotch shapes to the paper text. I have used vector shapes instead of the usual scotch tape brushes because our text is a vector based shape, so it is better to make all the items vector.
Use the color #f5efe4 for the scotch tapes and the opacity of the layer around 50%.
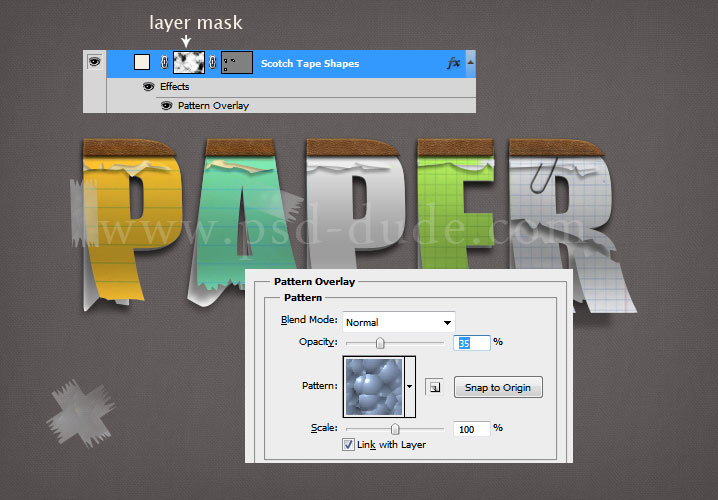
To make the scotch tape look more realistic I have added a Pattern Overlay and also a layer mask using Filter>Render>Clouds filter with black/white as foreground/background colors. If you don't know how to add Photoshop mask you can read this Layer Mask Guide for Beginners.
You can make the text look vintage and old if you add some stain vector shapes, blend mode Overlay; you can add again a layer mask to obtain opacity variations. And in the end add an old paper texture. So here is the final result for the paper text created in Photoshop using only vector shapes.
If you want you can download the torn paper Photoshop style. This PSD file is not the source file of this tutorial. It is a mockup file that you can use to create torn paper text effects in Photoshop very easily.
Click to Download the Torn Paper Text Style PSD
Torn Photo Corner Photoshop Action
Torn Paper and Tear Effects Photoshop Actions
Old Photo with Torn Ripped Effect Photoshop PRO Action
Newspaper Letters [Online Fonts]
If you are looking for newspaper letters, cut out letters or magazine letters, you can use these online text effects.

28 comment(s) for "Create a Paper Text in Photoshop"
I am working with CS6 and having problems when I get to the "Press the Intersect Shape Areas from the Path Selection Tool menu. The result is a torn paper text. Press the Combine button to combine the two shapes."
Thanks in advance for your help and I absolutely love your website. reply
I always glad when people appreciate my work :) so thank you!
I am using CS5 for this tutorial but I am not really sure why it is not working with CS6 .... please explain me what does not work...which button is inactive; what is the result that you obtain after this step
You can add a printscreen using the "Upload your fan art" button to see the problem
Or you can try another method, to use the Freeform Pen Tool and create the torn paper effect without using the torn paper custom shapes. Make sure you press the Subtract from Shape Area button before you begin.
see the image attached
byby
reply
you can try using the Freeform Pen Tool and create the torn paper effect yourself; see the image attached at the comments section. It is really easy and you can obtain a better result! reply
If you have the Path Selection Tool selected on the tool panel you have a Combine shapes button. If the combine shapes is not active it means that you didn't selected the shapes you want to combine. For that you have to click on the Vector Mask Thumbnail that is attached to the shape layer.
See the image attached for combining shapes in Photoshop.
---
I don't know how to practice this tutorial because the instructions are not very clear. reply
I love your tutorial. But i do have a problem with the below step
Press the Intersect Shape Areas from the Path Selection Tool menu. The result is a torn paper text. Press the Combine button to combine the two shapes.
When I do this step it comes as this.
ps i am using CS6
I think that you didn't combine all the text letters into one vector shape. Before you copy/paste the text into the torn paper layer you have to:
- select all the text letters with the Path Selection Tool
- press the Combine button reply
First of all I am glad you like my blog, thank you!
Second, I will answer your questions and hope it helps:
- You have to make selections for each letter with different pattern and to create a new layer from that selection called Notebook Pattern Layer.
- Open the layer style window of the Notebook Pattern Layer and add Pattern Overlay with the settings highlighted in the preview image.
Thaank's a loot
I didn't find the '' combine button in photoshop CS6 Extended ?! reply
So i hope that u can make video tutorial about this.
thank you so much!!! reply
First of all, let me say great site!
I am using CS6, and I am able to complete all steps up until the one where is says, "For the final touches you can add a notebook pattern...." I have the different notebook patterns installed, but I am not sure how to: (1) add the pattern on top of the letters, and (2) make each letter a different pattern. Not sure what I am overlooking. Please help!
Thanks,
Paul reply
You have to rasterize the text before erasing the selected area otherwise you will get this message:
"Could not complete your request because the pixels in a type layer cannot be edited without first rasterizing the layer." reply
At the end of the tutorial I've added a link to the Torn Paper Photoshop Style PSD that you can download for free. reply