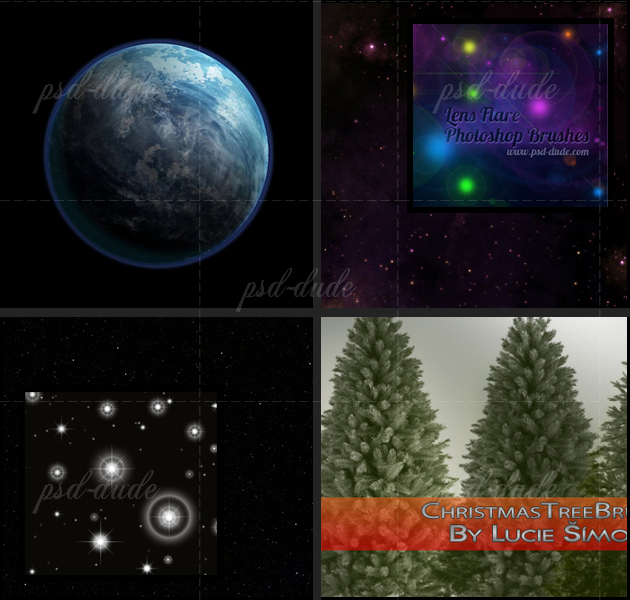
Resources Needed for This Tutorial
Before we start let's download all the resources that we need for this photo manipulation. So copy the stock images and install the Photoshop brushes from the following links:
- gift box PNG
- Space Vortex
- Lens Flare Overlay
- Starfield Texture
- Starfield Seamless Pattern
- Earth Planet
- Christmas Tree Brushes
- Lens Flare Brushes
Here are the best photography resources that you can use for your cool photo manipulation artworks.
There are many resolution sizes, so we have to make different wallpaper sizes for example 1600x1200, 1920x1080, and so on. Create a PSD file with 1920x1200 pixels size. That way, since most people's resolutions are that size or smaller, the wallpaper comes out looking good. It's always better to shrink it than to try and stretch it.
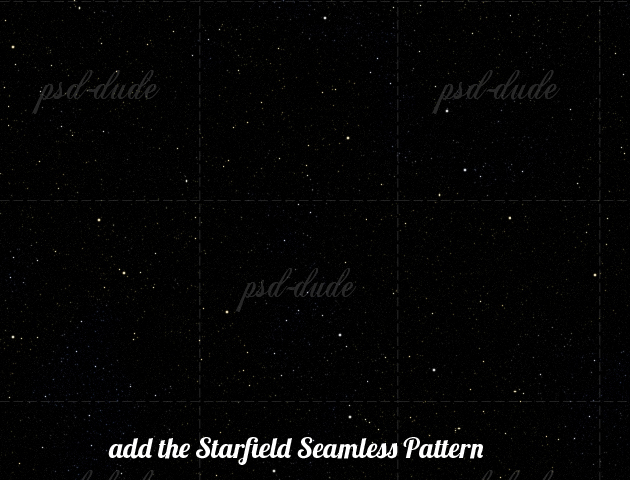
Use a seamless pattern for the background, so that if you need a bigger image you can easily add extra pixels.
Create a Starfiled Wallpaper Background
So open a PSD file, size 1920x1200 and copy the Starfield Pattern as your first layer. Make sure you copy the big size image (2048x2048) that will cover the entire canvas. If you want to use the small size image you can save it as pattern because it is a seamless texture.
There are too many stars on this texture, so we will make some adjustments to obtain fewer stars. Go to Image, Adjustments, Levels and make the following settings.
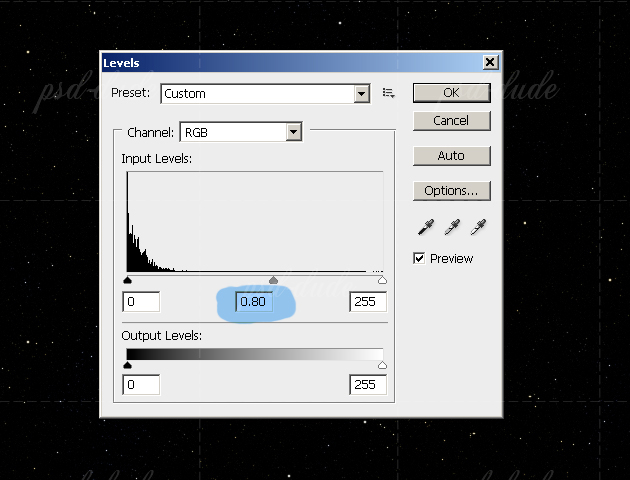
Using Levels you can adjust brightness, contrast, and tonal range of your image by specifying the location of complete black, complete white, and midtones in a histogram. We have a simple image with only black and white tones, so you can easily see the changes. If you want to find out more about Levels you can check out this tutorial, Levels in Photoshop.
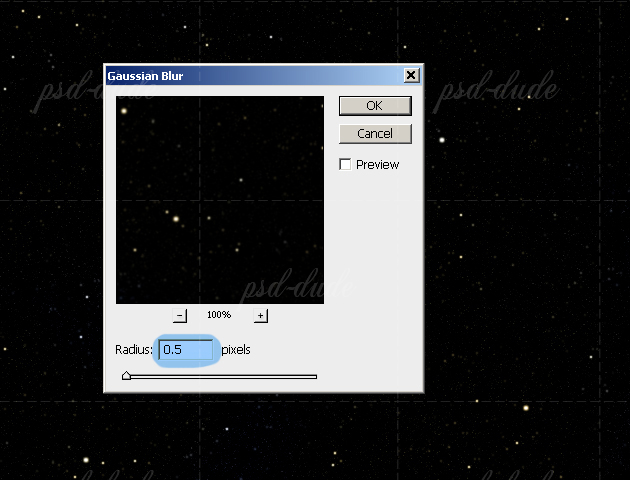
To soften the stars I decided to apply a Gaussian Blur Filter, small radius size 0.5 pixels.
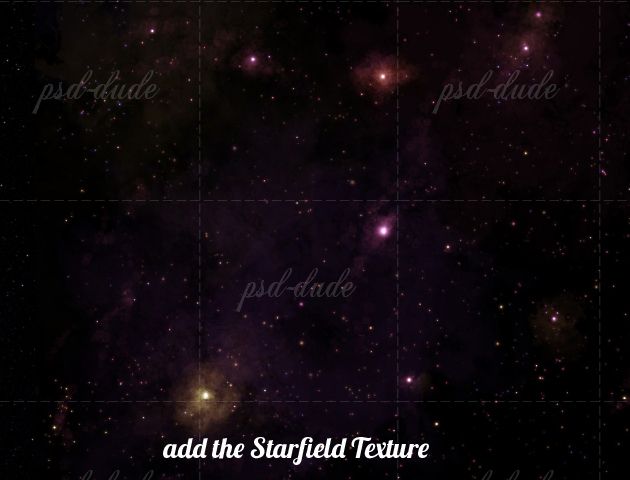
Add the second Starfield Texture to make our background look more like a colorful galaxy. It seems that the author made this texture himself and it really looks great. If you are interested in making space landscapes from scratch and you want to learn how to create realistic galaxy in Photoshop, you can check out this collection of tutorials
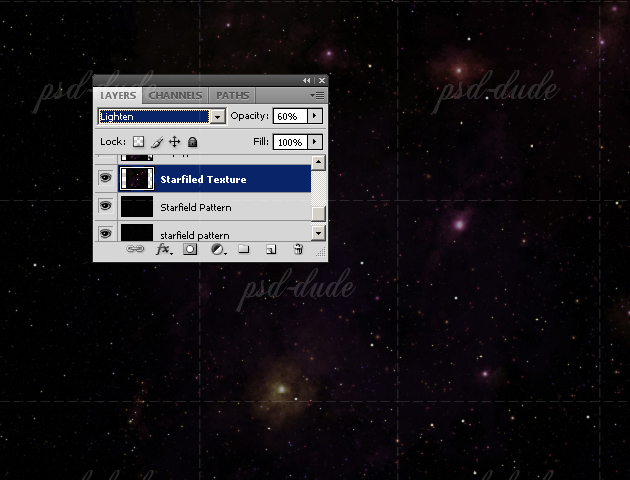
Change the Blending Mode of this layer to Lighten and set the opacity to 60%. We are making this adjustment because the focus point is the planet and not the background.
Add a Planet in Photoshop
Add the Earth Planet and place it in the center of the canvas. You can see that the image already looks like a real planet with shadows and highlights added. All we have to do is try to blend it with the rest of our image.

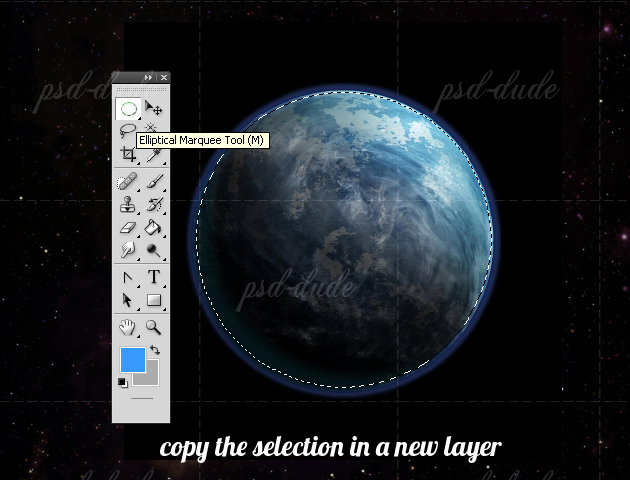
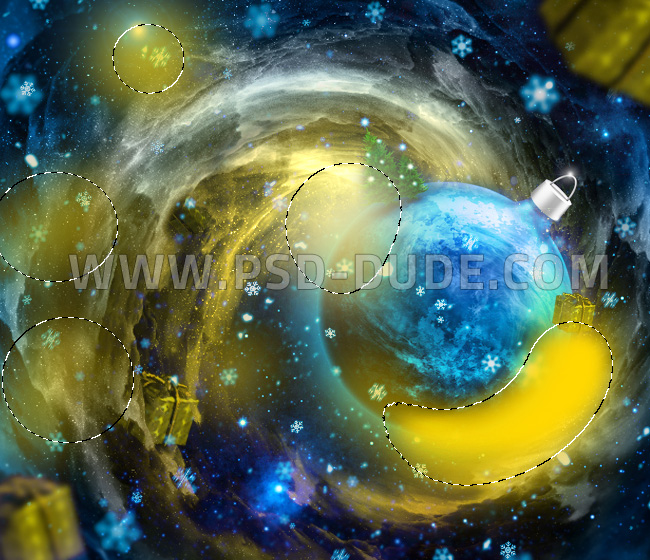
Use the Elliptical Marquee Tool to make a round selection. To obtain a perfect circle keep the SHIFT key pressed. Copy the selection in another layer.
To copy a selection in another layer, first make the selection. Next, right click and choose Layer via Copy or Layer via Cut from the list. Another way is to go to the Layer menu and from the submenu New choose again Layer via Copy or Layer via Cut.
 The same effect can be obtained using shortcuts. The key combination for Layer via Copy is CTRL+J and for Layer via Cut is SHIFT+CTRL+J. Try always to use shortcuts, it will
make your life much easier.
The same effect can be obtained using shortcuts. The key combination for Layer via Copy is CTRL+J and for Layer via Cut is SHIFT+CTRL+J. Try always to use shortcuts, it will
make your life much easier.
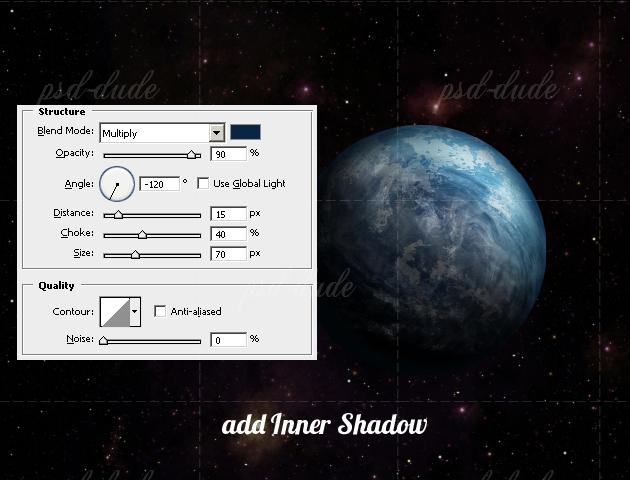
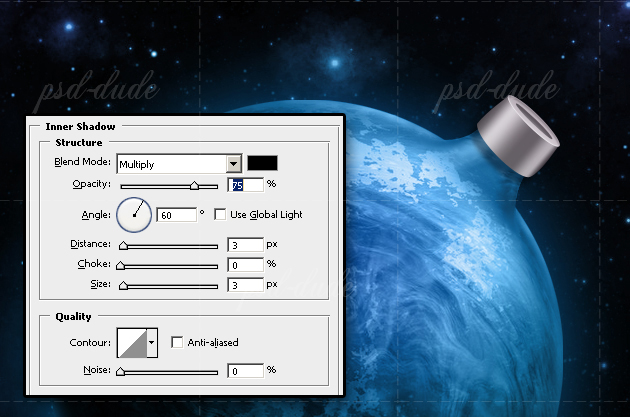
Resize the planet to 85% and let's add some layer styles. We will start by adding Inner Shadow; the color for the shadow is #092541.
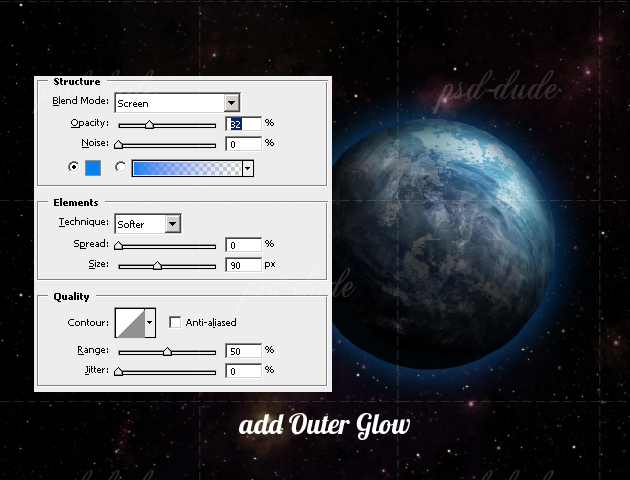
Add Outer Glow; the color for the glow is #0a80ee.
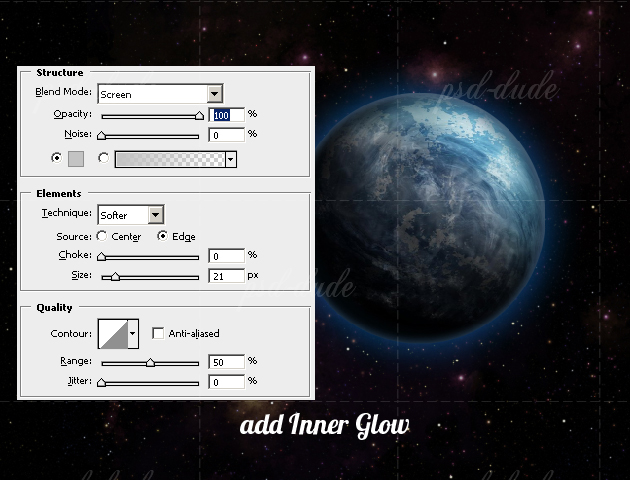
Add Inner Glow like in the image below. The color for the Inner Glow is #c3c3c3 .
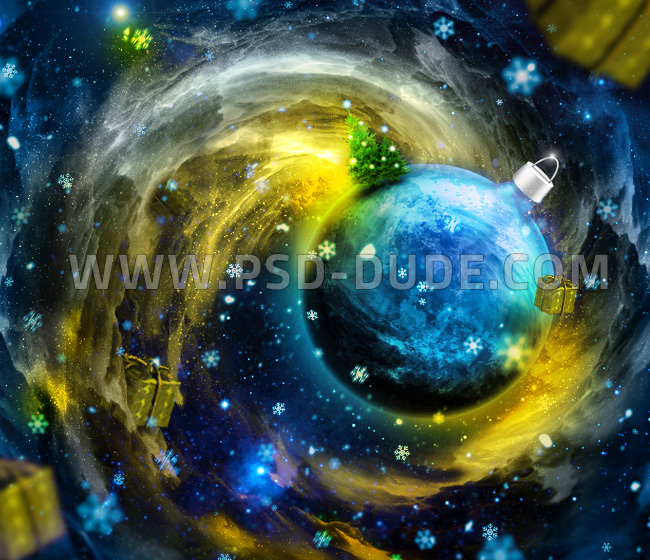
Create a Christmas Ball Decoration
We have to flatten the Planet Layer first. To rasterize and flatten the entire layer content, hide all the layers except the Planet layer. Create a new layer called Christmas Ball. Go to Edit menu and choose Apply Image. You can see that the layer effects are no longer separate and editable but the image looks exactly the same.
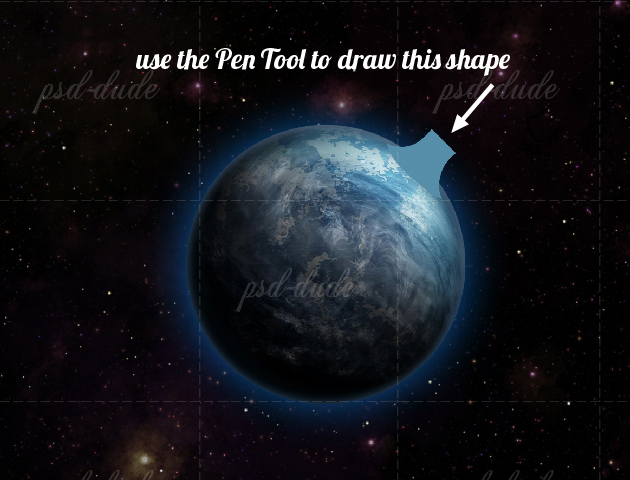
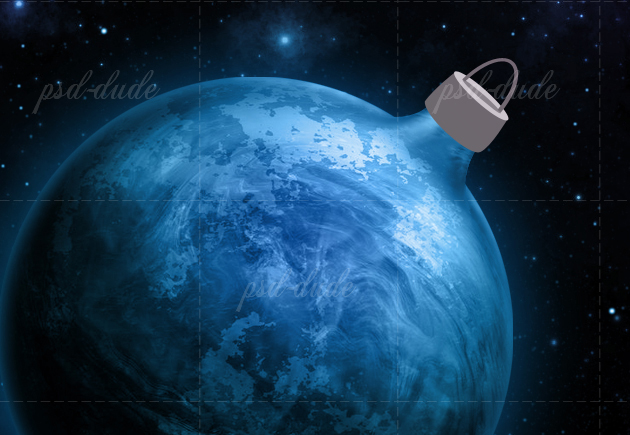
In this step I will transform the planet into a Christmas ball. With the Pen Tool draw a similar shape to this one.
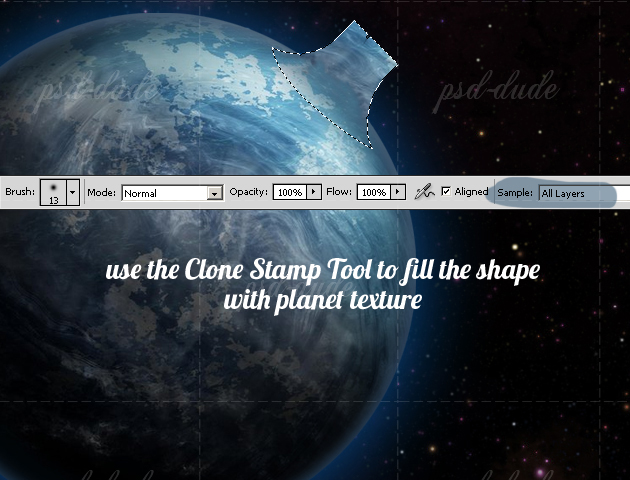
Select the shape and make a new Layer via Copy from the Christmas Ball layer using this selection. Use the Clone Stamp Tool and try to fill the gap with areas from the Planet texture. Make sure you have the shape selected. And also make sure to choose Sample All Layers from the Clone Stamp Tool bar.
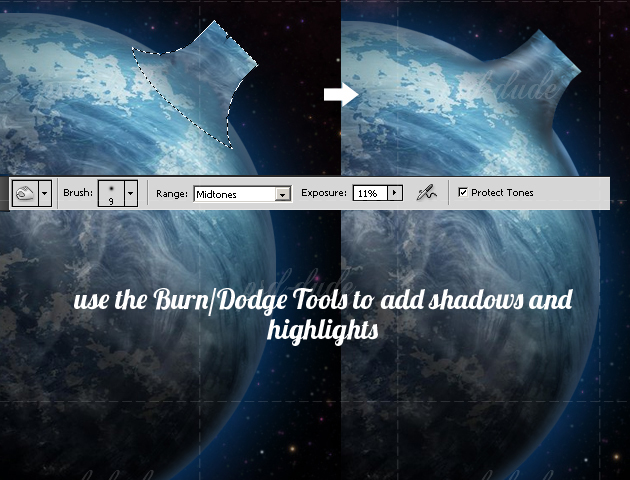
Use the Burn Tool and the Dodge Tool to create shadows and highlights on the new added surface. You can also add some light and shadow to the Christmas Ball surface. For a more realistic look use a graphic tablet and pay attention to every detail.
Use Gradient Fill to Colorize the Image
Before we complete the transformation of our Christmas ball, we need to make a color correction. As you can see the planet has beautiful tones of blue and the background has tones of purple. To fix that I will add a Gradient Fill. Click on the Create New Fill or Adjustment Layer button from the bottom of the Layers Tab and choose Gradient.
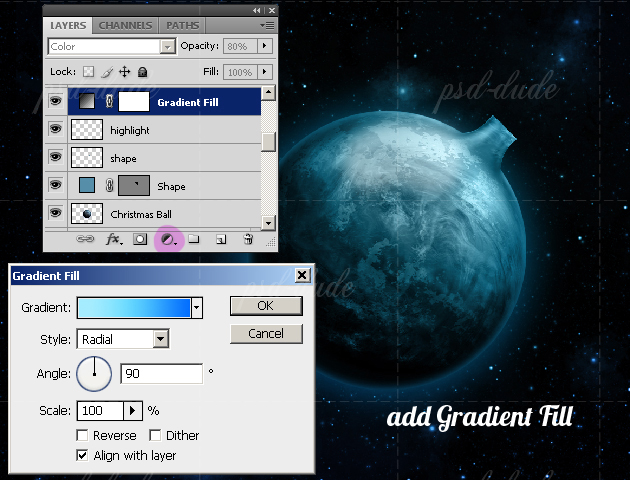
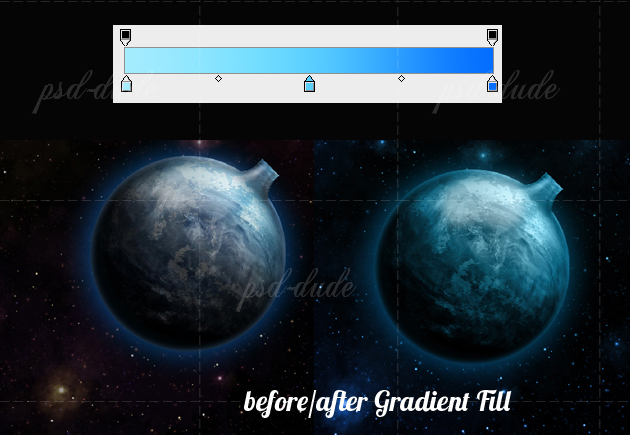
You can always modify the gradient with a single click and add new and beautiful colors without affecting the layer behind the gradient. There are so many beautiful gradients available for free on the internet. You can choose from this huge Photoshop gradients collection.
Add a Christmas Ball Hook
To complete the Christmas Ball create a shape above the Gradient Fill layer. This shape will become the Christmas Ball Metal area. Use the Pen Tool to create the following shapes:
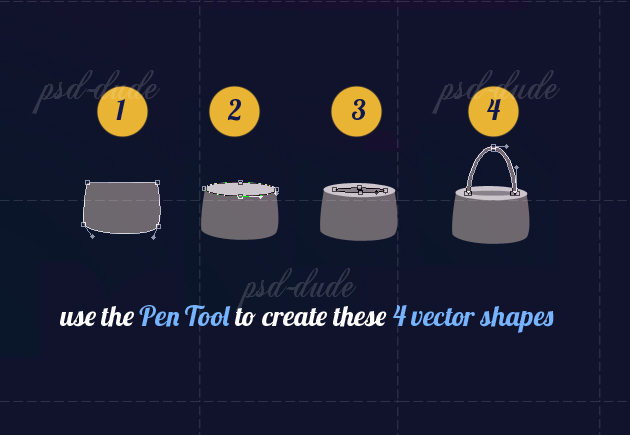
Put all the 4 shapes in a group and connect the metal part with the rest of the Christmas Ball by rotating it to fit.
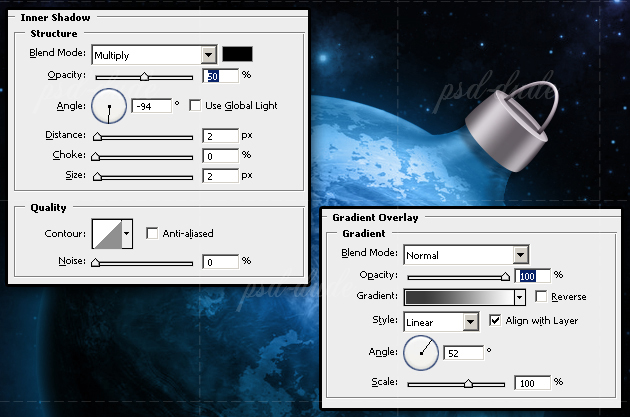
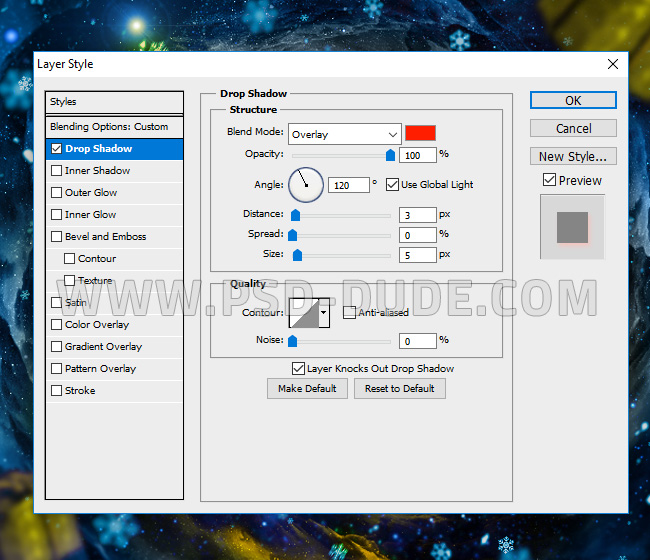
The next step is to add layer styles to each shape to give it a 3d look. We start with the first step and add Drop Shadow, Inner Shadow and Gradient Overlay like shown in the image:

Go to the second shape and add Inner Shadow, Inner Glow and Gradient Overlay.
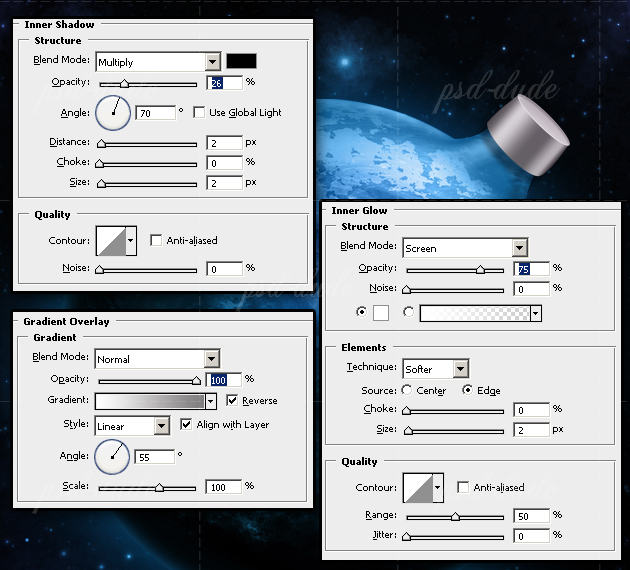
The third shape has only one layer style, Inner Shadow:
The fourth shape has an Inner Shadow and Gradient Overlay added:
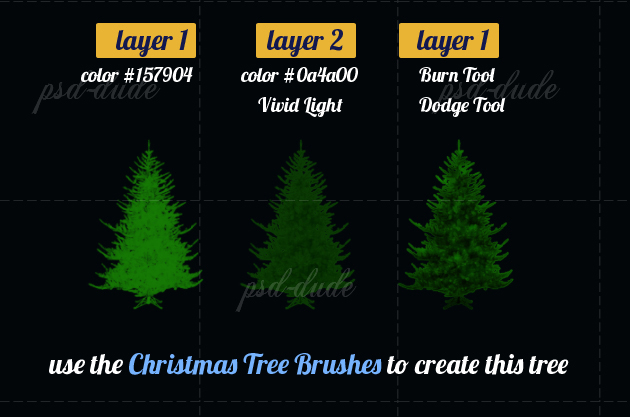
Use the Christmas Tree Photoshop Brushes
Create another layer above all the existing layers and call it Christmas Tree. Pick the sample brush 6 from the Christmas Tree Brushes and click three times in the same place using a brush size of around 160 px. The color is #157904.
Create another layer above this one called Christmas Tree. Use the same brush, same size, same location to draw another tree. This time pick the color #0a4a00 and draw only one time. Change the blending mode of this layer to Vivid Light.
For the final touches, use the Burn Tool and the Dodge Tool to add light and dark areas on the Christmas Tree Layer.
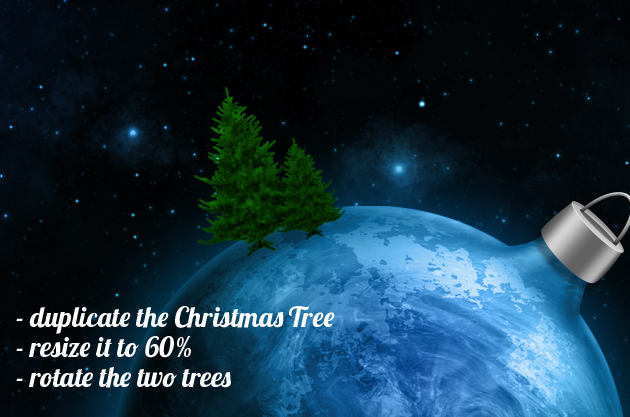
Put all the layers in one group. Duplicate this group and resize it to 60%; rotate the two trees and place them on the Christmas Ball surface. You can make small changes so that the trees don't looks identical.
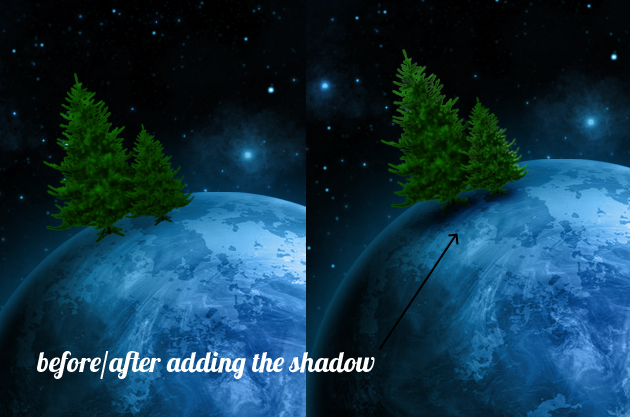
I will add a shadow on the Christmas Ball surface otherwise the trees don't blend with the rest of our image. Use a soft rounded brush, color black to create the shadow. Change the blending mode to Soft Light.
Sparkle and Glitter Brushes
Now it's time to add light effects like glitter and sparkles to our Christmas photo manipulation. Create a layer under the Gradient Fill layer, called Sparkle Effect Layer. You can use this Sparkle Overlay image with Screen blend mode or you can use this Free Sparkle Brushes set. See how to Create Sparkle Brushes in Photoshop from scratch. Use the first type of sparkle brush, the simplest one with white color to add sparkles.
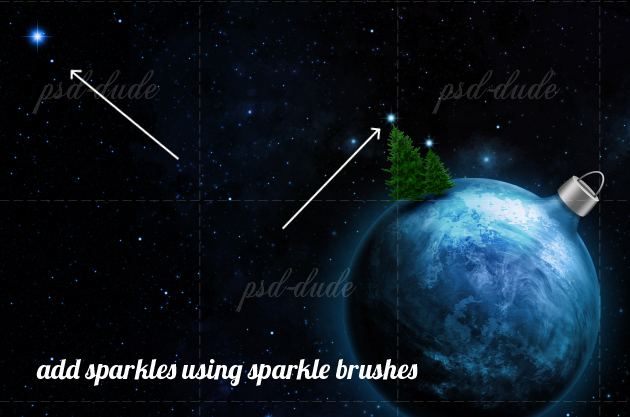
In the same layer, add lens flare brushes using the color #269697.
Go now to the Sparkle Effect layer and with the same lens flare brushes(color white) add sparkles on the Christmas ball. Add also random sparkles on the sky but not too much because less is more.
Add the falling snow texture and set the blend mode to Screen. You can use these textures snowfall 1 and snowfall 2 with Screen blend mode. Also you can download this snow brushes and add snow using the Brush Tool and color #ffffff.
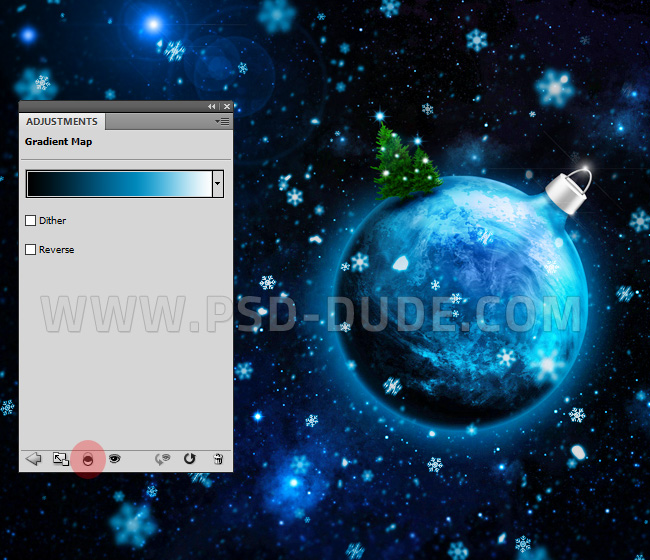
Add a Gradient Map adjustment layer above the Falling Snow layer. Right click and choose Create Clipping Mask or click on the Clip to Layer button to apply the gradient only to the snowing effect layer. The colors for the gradient are: #000000(location 0%), #0088ba(location 58%) and #ffffff(location 100%).
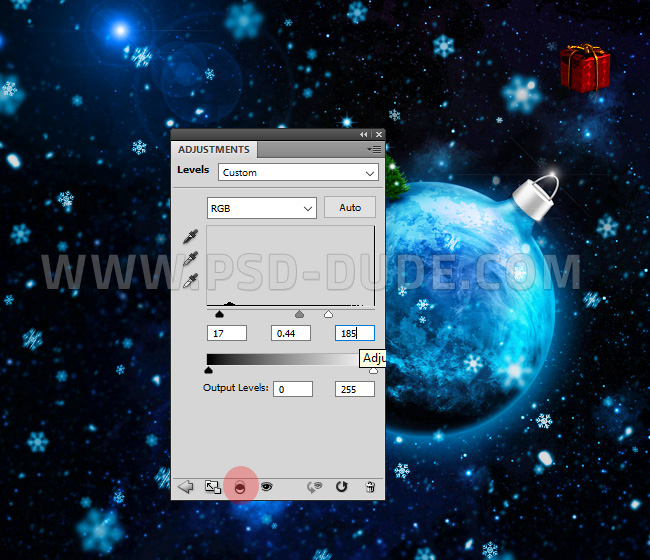
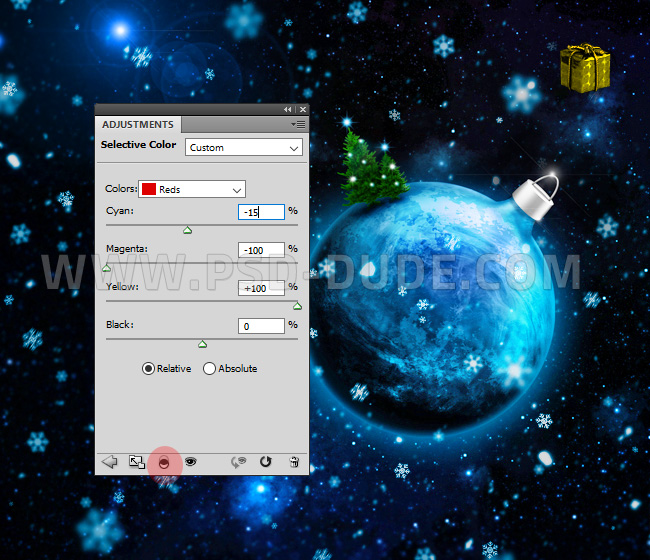
Add this gift box PNG in a new layer below the Falling Snow layer(s). Add a clipping mask Levels adjustment to increase the contrast. Add a clipping mask Selective Color adjustment to change the color of the gift box.
Make more copies of the Gift Box layer. Rotate and resize like shown in the preview. For the foreground boxes you can add a soft Gaussian Blur or a Motion Blur.
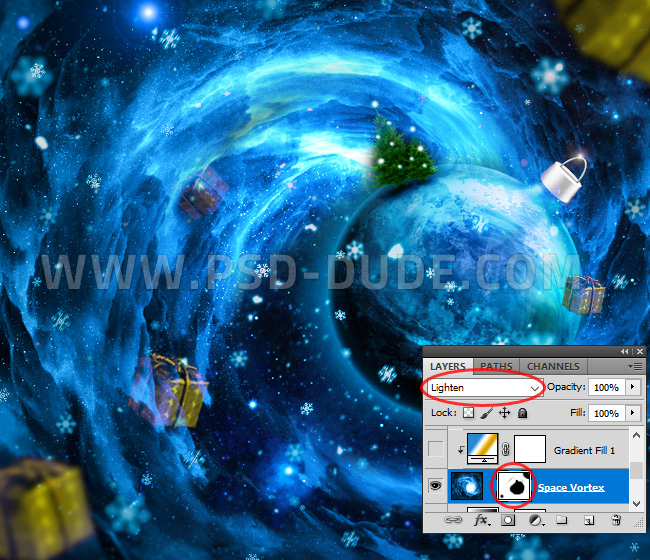
In a new layer above all the other layers, add this Space Vortex image. Set the blend mode to Lighten. Add a Layer Mask to the layer and use the Brush Tool and color black to paint inside the mask to hide some areas.
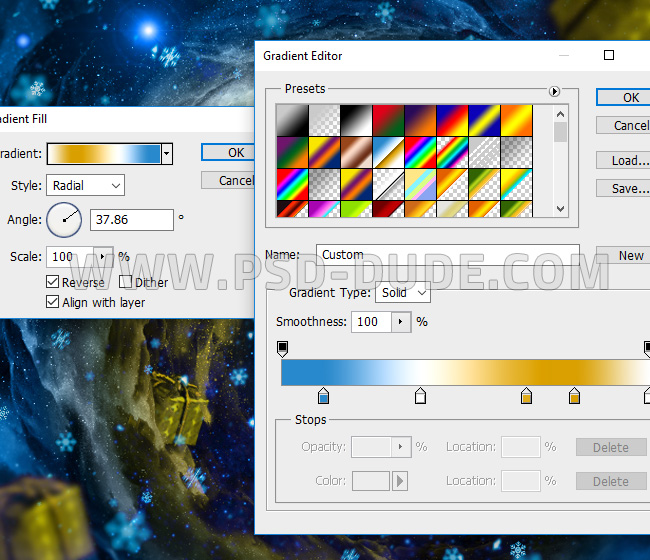
Add a Gradient Fill adjustment layer with clipping mask, to colorize the vortext. Set the blend mode to Color, opacity 80%. For the gradient colors here are my settings: #2989cc(location 11%), #ffffff(location 38%), #e1ac1b(location 66%), #d99f00(location 80%) and #ffffff(location 100%).
Add a Levels adjustment
with clipping mask, to increase the contrast.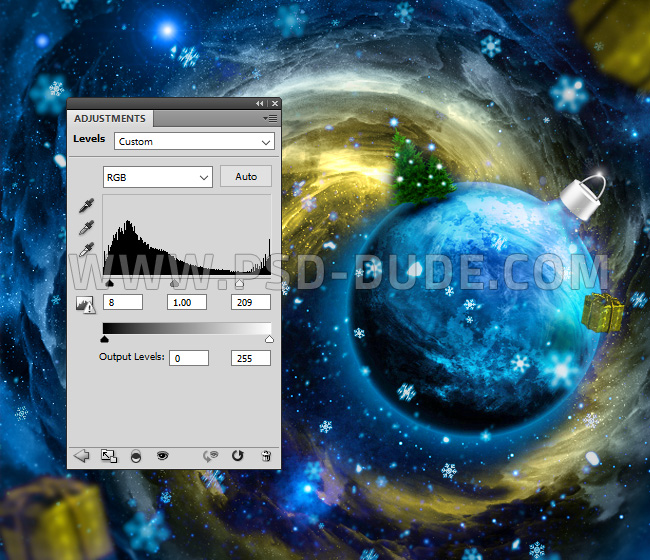
Create a new layer and use this yellow color tone #f6d106 to piant over some areas. Set the blend mode to Color.
Create new layers and use yellow color tones to piant over some areas to create highlights. Use for the blend modes Overlay and Screen with 55% opacity.
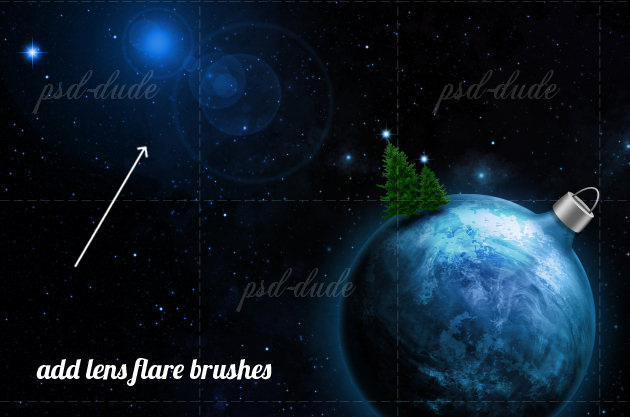
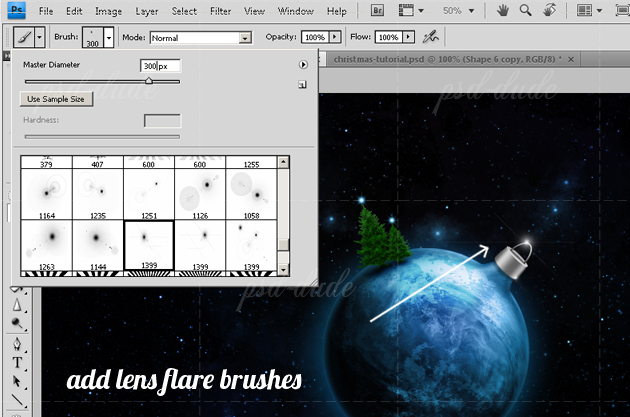
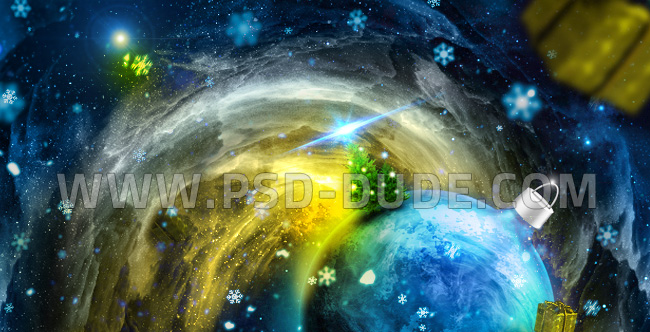
Add this Lens Flare Overlay and set the blend mode to Screen.
How to Create RGB Color Split in Photoshop
Press Shift-Control-Alt-E to create a copy of all the visible layers merged. Set the layer opacity to 65%. Add a Drop Shadow layer style uisng color #ff1e00 which is a bright red color tone.
Add a Layer Mask to this layer. Go to Edit > Image > Apply Image.
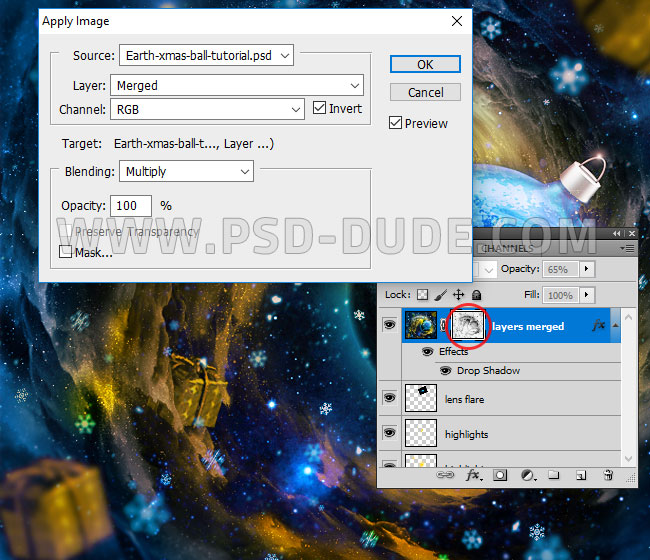
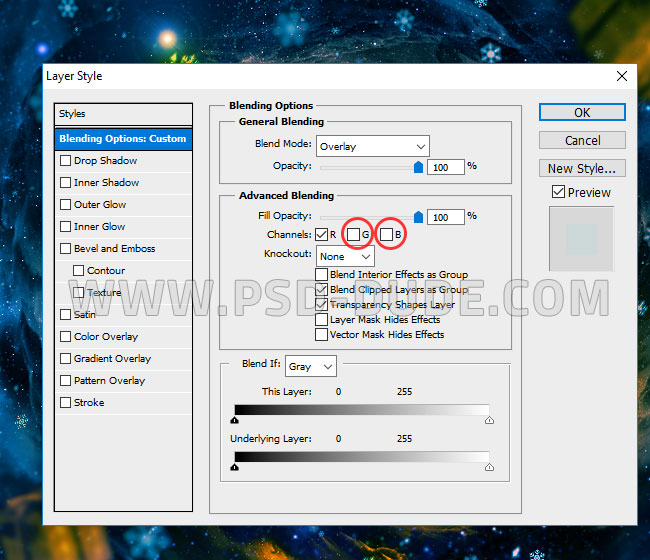
Press Shift-Control-Alt-E to create a copy of all the visible layers merged. Set the blend mode to Overlay. Open the layer style window and uncheck the Green and Blue channels.
You can download the initial Large Resolution Christmas Wallpaper to use as background.
Congratulations, You Made It!
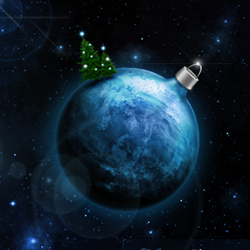
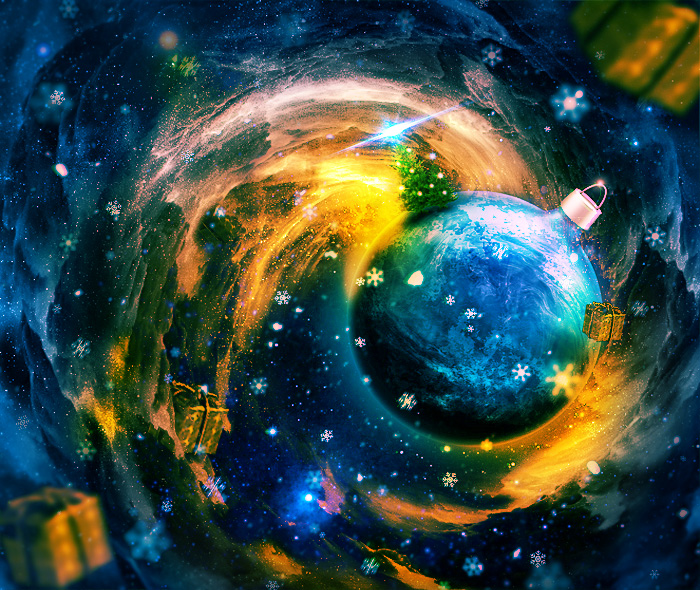
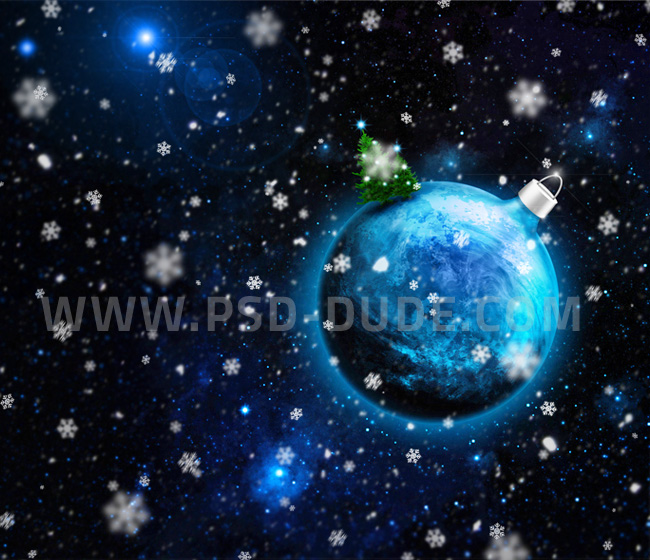
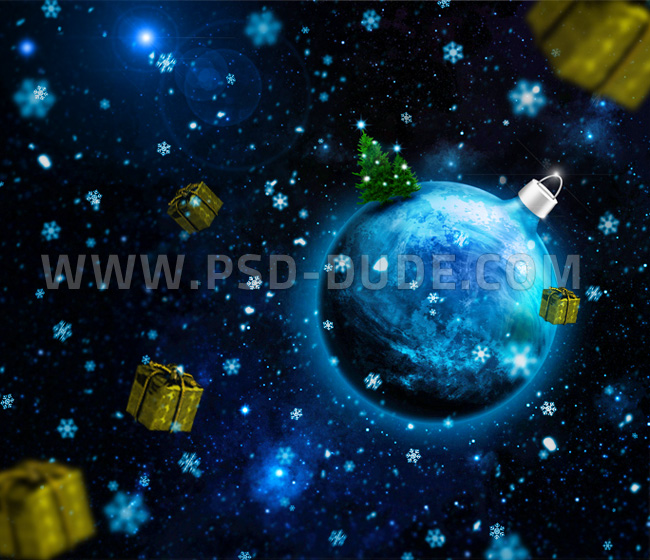
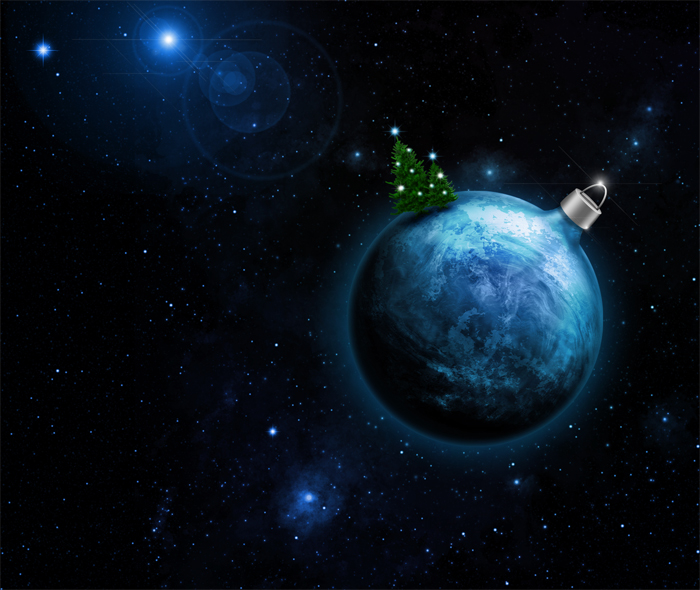
So here is the final result for our Christmas space galaxy background made in Photoshop. Making the Earth planet as a Christmas ball decoration is a pretty cool idea and it looks great. I hope you give it a try!
Online Christmas Card Maker
Did you know you can use online tools like MockoFun to make Christmas cards? Combine Christmas vector shapes with text and create some amazing Christmas cards. MockoFun provides pre-made templates for making Christmas cards online in just a few minutes.
Check out this awesome list of over 50 Christmas fonts that you can use online or download for free to use in Photoshop. Combine Christmas fonts with text symbols like a star symbol for example.
Check out this tutorial on how to use the online Christmas Card Maker and all the awesome features that MockoFun has to offer.

27 comment(s) for "Christmas Wallpaper Photo Manipulation Tutorial"
I would really love to download the wallpaper. Do you have a link where I can find it?
Thanks reply
esta imagen si a subido a la primera, gracias por tus consejos!!!!!
un abrazo.
un abrazo a ti tambien amiga!!!
reply
If you are making a selection and contract that selection with 1 pixel what you describes it doesn't happen either.
Pliz take a clear example and explain all the steps that you are making and the result you are getting(and of course the result that you want to obtain)! reply
Merci pour votre site tr??s sympathique et tr??s bien expliqu??.
Voici ma cr??ation un peu transform??e :)
-----
Hello,
Thank you for your website very nice and very well explained.
Here is my creation turned a little :)
I am really glad when people appreciate my work and when they practice the tutorials I am even happier! Very good result :) reply
Joseph
reply