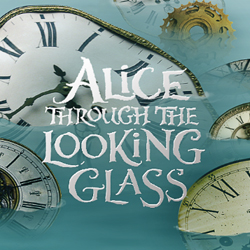
Learn how to create an Alice Through the Looking Glass movie poster inspired by the popular Disney movie. I will try to recreate one of the Alice Through the Looking Glass original posters. By adding new elements like the mirror, I will give it a personal touch.
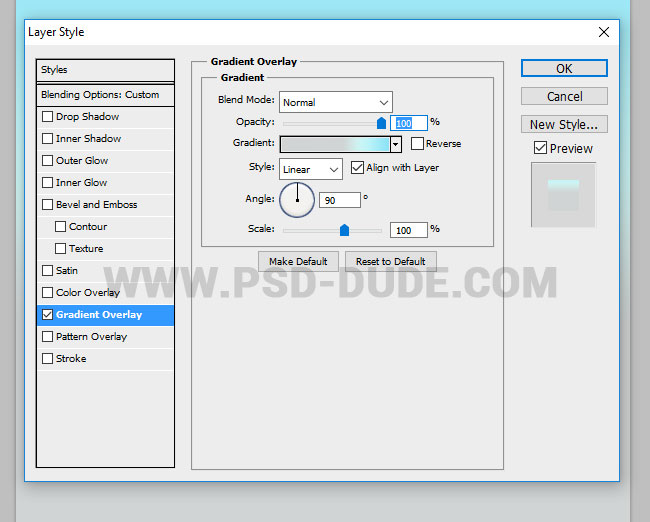
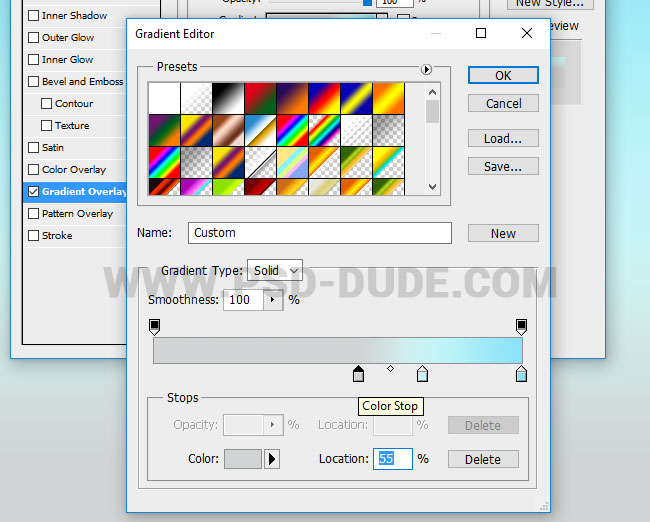
Create a new PSD file and add a new layer called Background. Add a Gradient Overlay to this layer and use this color tones: #d1d4d4 (location 55%) , #c9f4f5 (location 73%) and #8be1f7 (location 100%). All the colors have 100% opacity level.
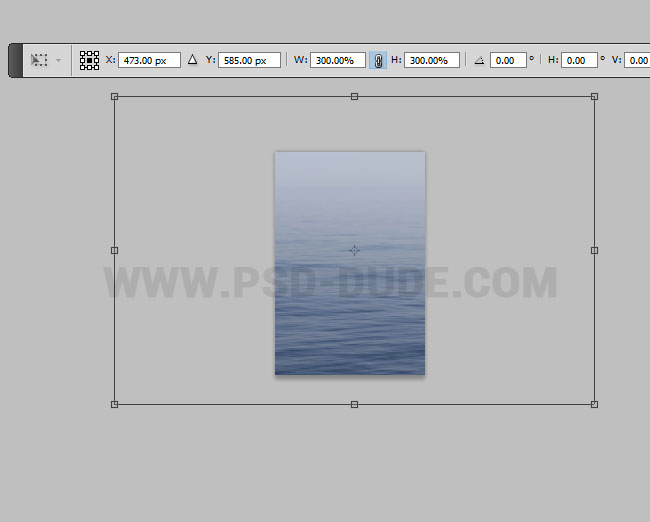
In a new layer add this water surface texture and scale it to around 300% to obtain larger waves and a soft blurry effect. Call this layer Water Surface.
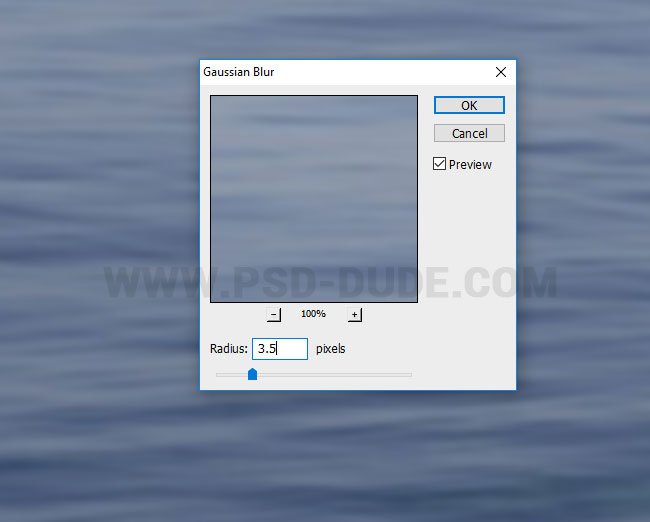
Go to Filter > Blur > Gaussian Blur and set the radius to around 3.5 pixels.
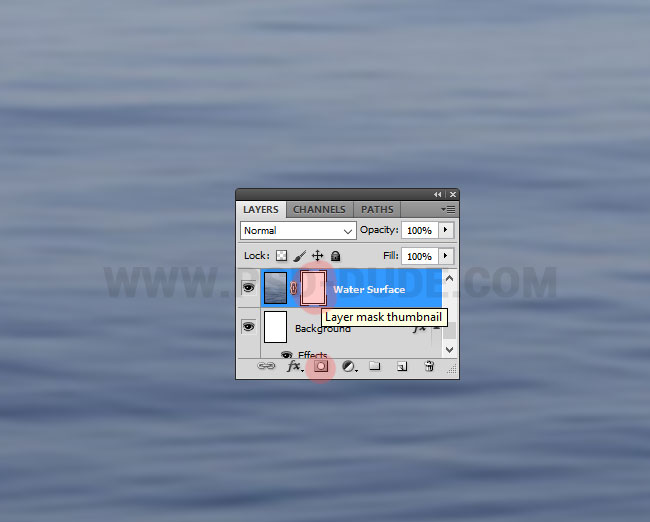
Add a layer mask to the Water Surface layer.
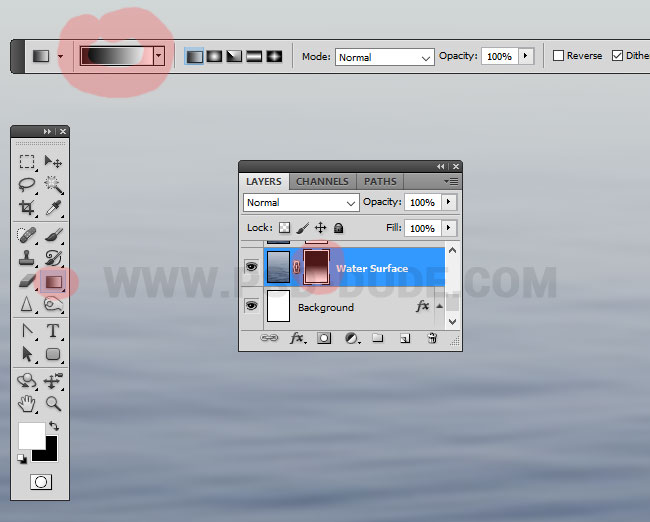
Pick the Gradient Tool and make sure the gradient is set to black and white colors, opacity 100%. Click on the layer mask thumbnail to make sure you add the gradient in the layer mask and not in the actual layer. Position the pointer in the image where you want to set the starting point of the gradient, and drag to define the ending point. To constrain the line angle to a multiple of 45°, hold down Shift as you drag.
- Gradient Tool
- The Gradient Tool creates a gradual blend between multiple colors. You can choose from preset gradient fills or create your own, you can choose the blending mode, the type of the gradient, etc. Read more...
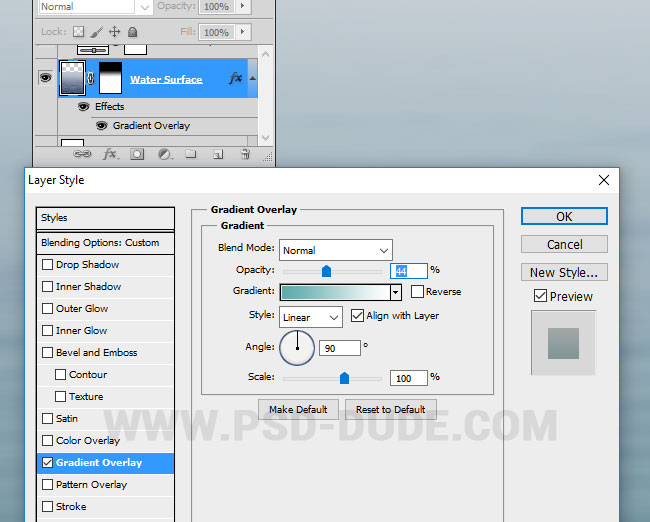
Reduce the opacity of the Water Surface layer to around 80% and add a Gradient Overlay layer style. The color for the gradient are: #5eaaab and #fefefe .
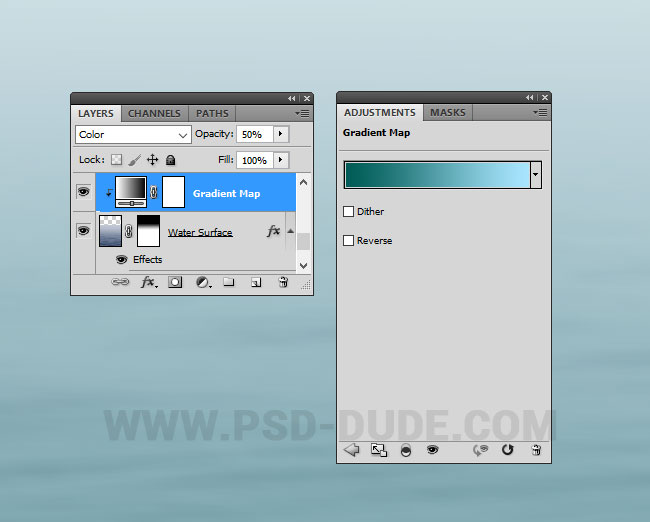
Add a Gradient Map for the Water Surface layer. Right click and choose Create Clipping Mask. Set the blend mode of the Gradient Map adjustment to Color, opacity 50% . The colors for the gradient are: #025c57 and #a8e5fe
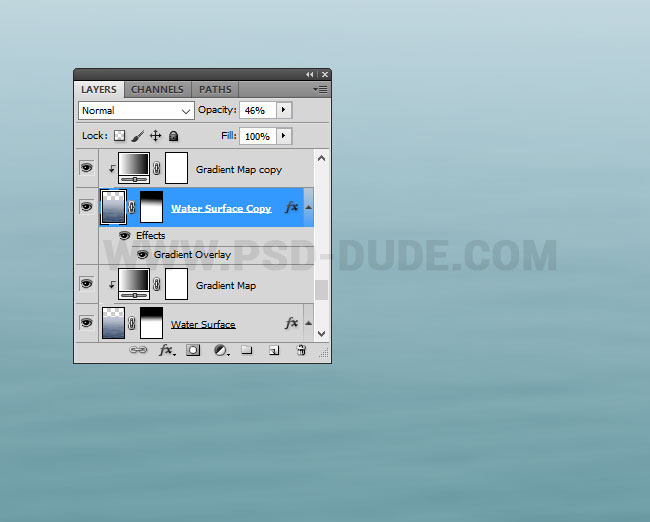
Select the Water Surface layer and the Gradient Map adjustment (keep the SHIFT key pressed). Right click and choose Duplicate Layers. Simply move the Water Surface Copy layer a few pixels to the right and down. Also lower the opacity to 45% or less.
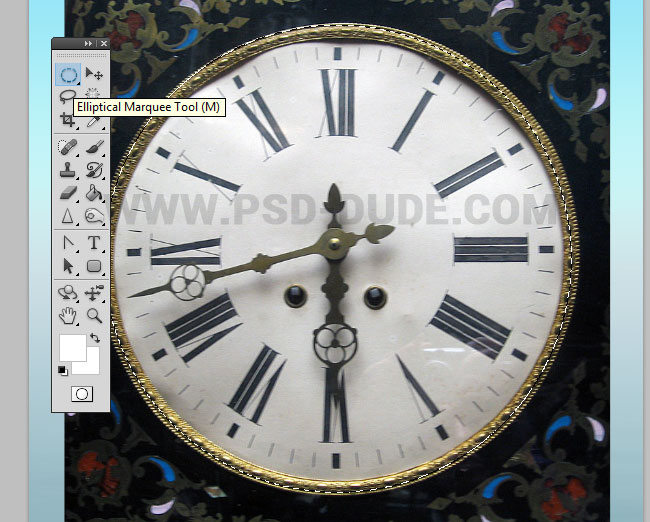
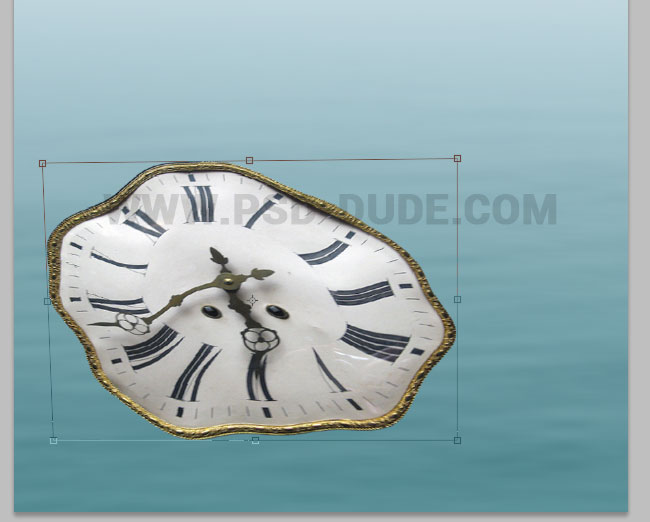
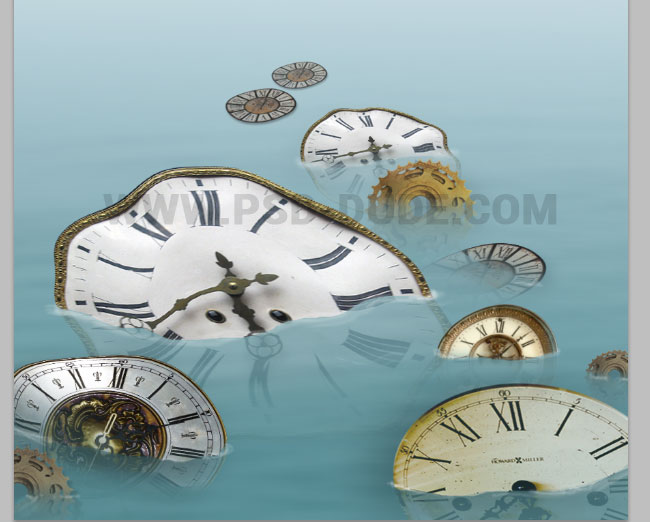
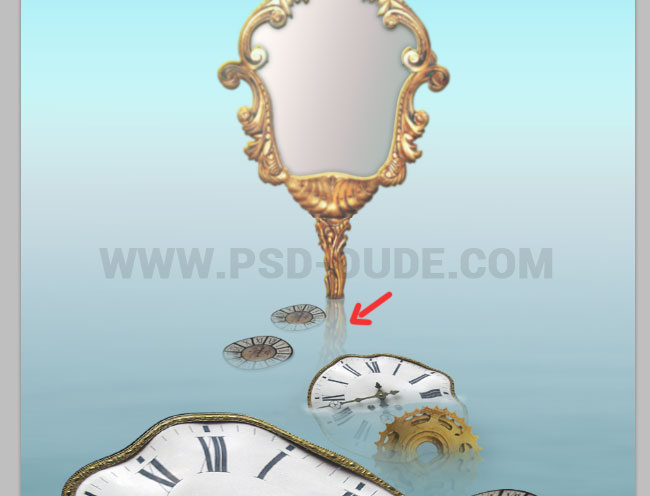
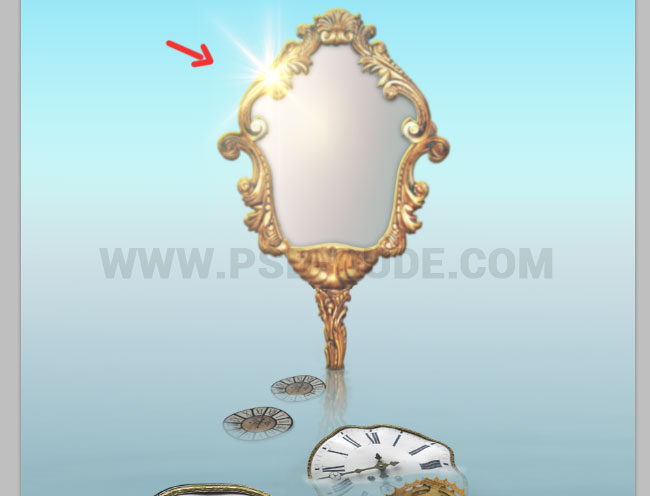
In the original movie posters there are many clocks floating on the water surface. So we have to find types of clocks that look both old, vintage and weird at the same time. Create a new layer and add the first clock using copy/paste. Use the Elliptical Marquee Tool to select only the clock. Press CTRL+J to make a layer via copy. Call this layer Clock 1.
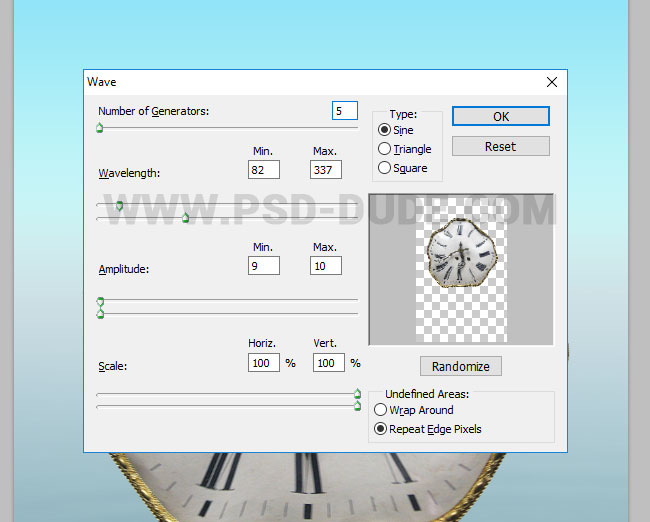
Go to Filter > Distort > Wave and add these settings. The Wave filter creates an undulating pattern on a layer or selection.
Go to Edit > Transform > Distort and change the clock perspective to make it inclined.
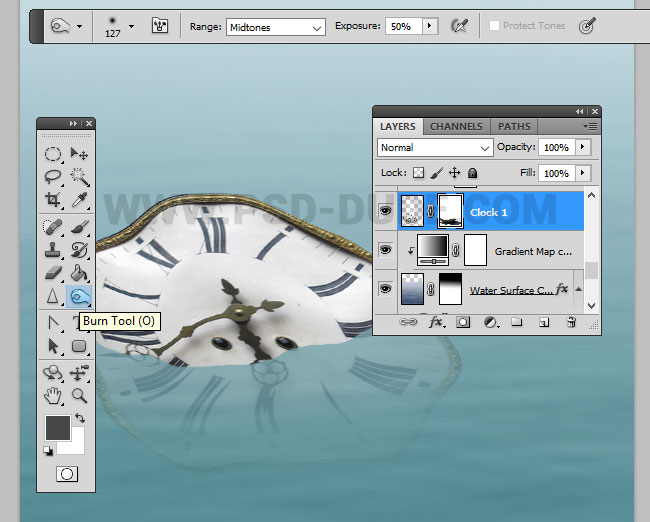
Add a layer mask to the Clock 1 layer. Pick the Brush Tool and set the Foreground color to #474747 . Use a hard round brush and simply draw over the clock to create a wave like shape. Fill the area below the wave with the same color. Make sure you are working in the layer mask (click the layer mask thumbnail to select it).

Pick a soft round brush and use the Burn Tool to darken the underwater area. Work also in the layer mask.
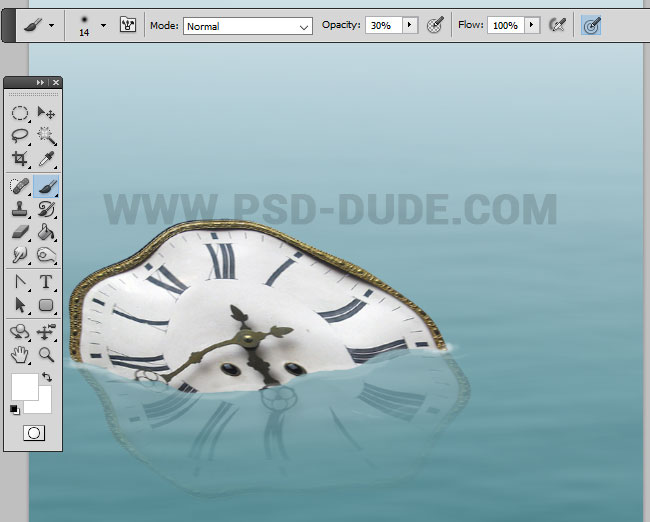
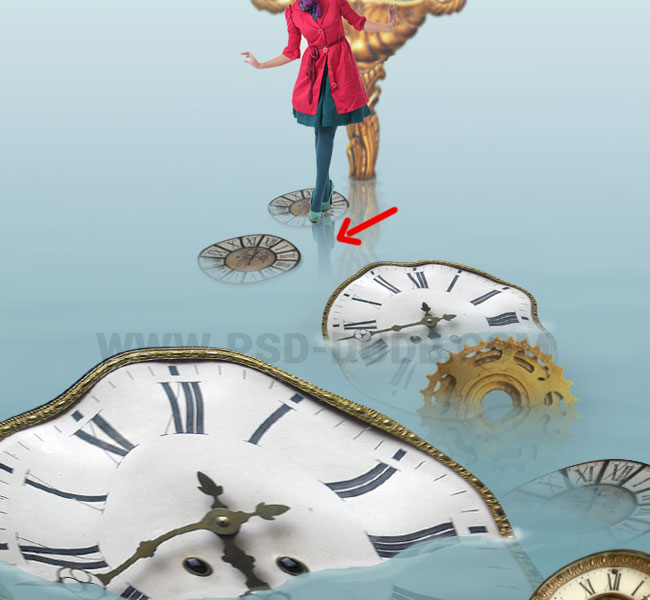
Create a new layer and use the Brush Tool, color white and different opacity levels to paint some wave foam where the water meets the object.
Using the same technique I have added all the other clocks and gears: clock 2 , clock 3 , clock 4 , clock 5 and gear .
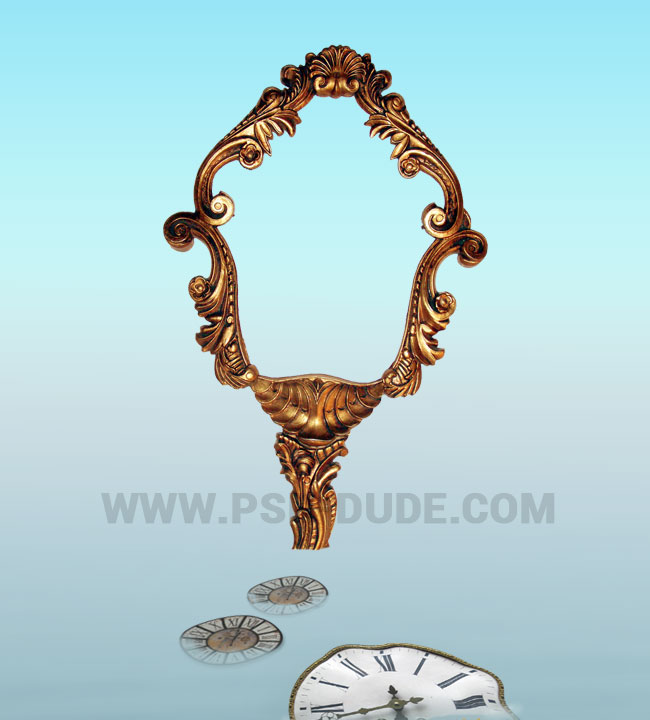
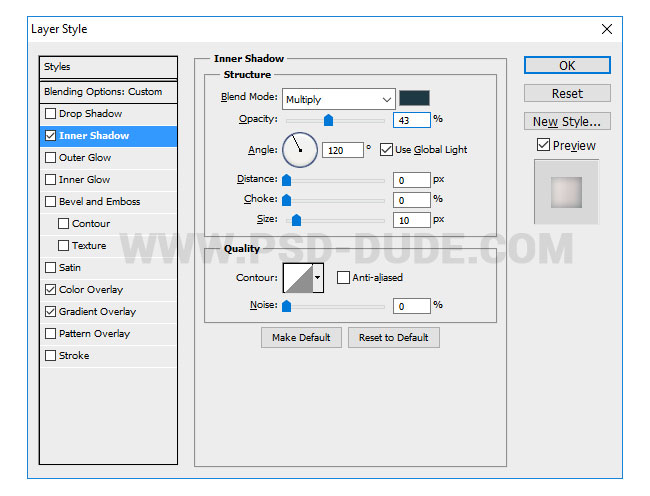
Create a new layer, add this vintage golden mirror and remove the white background. Use the Eraser Tool to delete the underwater area.
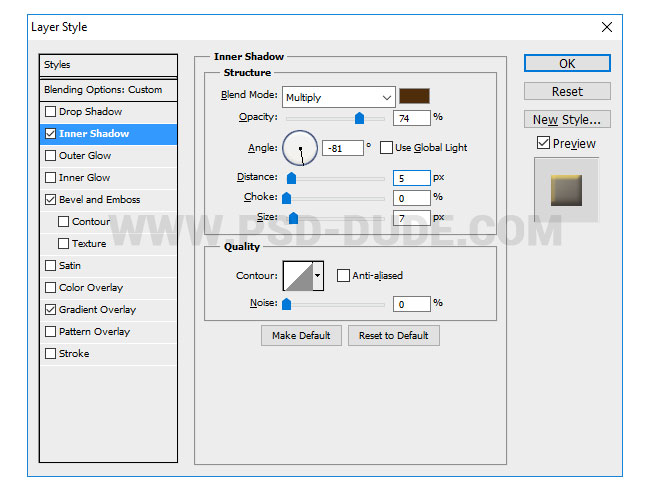
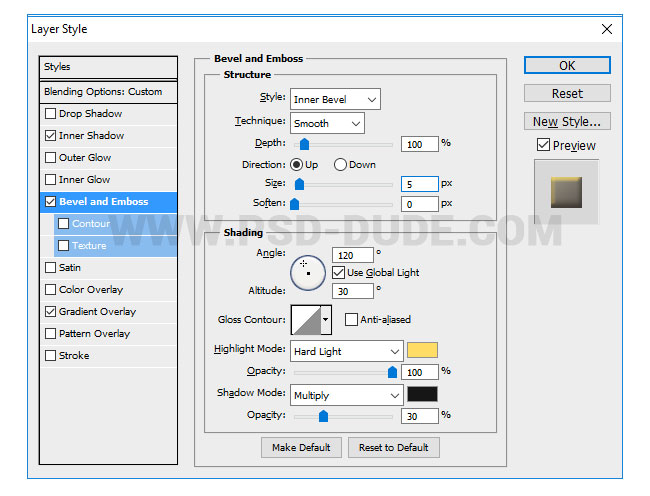
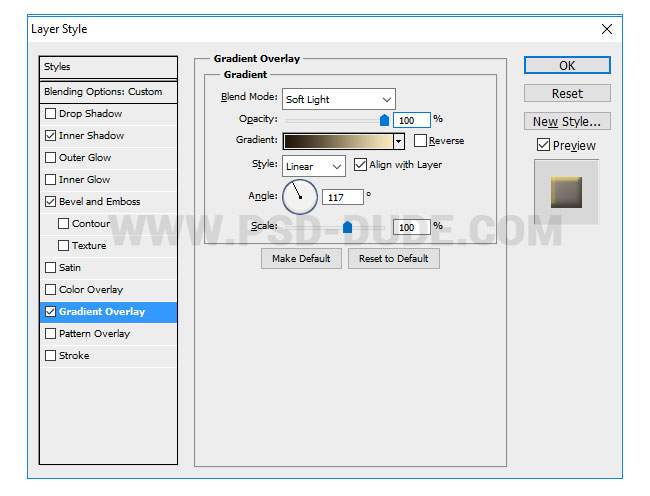
Add these layer styles to the Mirror Layer: Inner Shadow (color #4f2d0b), Bevel and Emboss (colors: #ffdd65 and #161616), Gradient Overlay (colors: #24170a and #f8e7bb). Set the opacity of this layer to 80% .
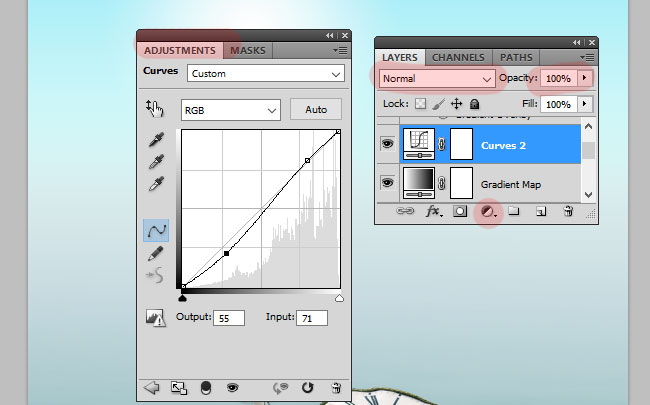
Add a Curves adjustment just for the Mirror Layer; right click and choose Create clipping mask. To add this adjustment, go to Layer menu > New Adjustment Layer > Curves.
- Curves Adjustment
- In the Curves adjustment, you adjust points throughout an image’s tonal range. Initially, the image’s tonality is represented as a straight diagonal line on a graph. When adjusting an RGB image, the upper-right area of the graph represents the highlights and the lower-left area represents the shadows. Read more...
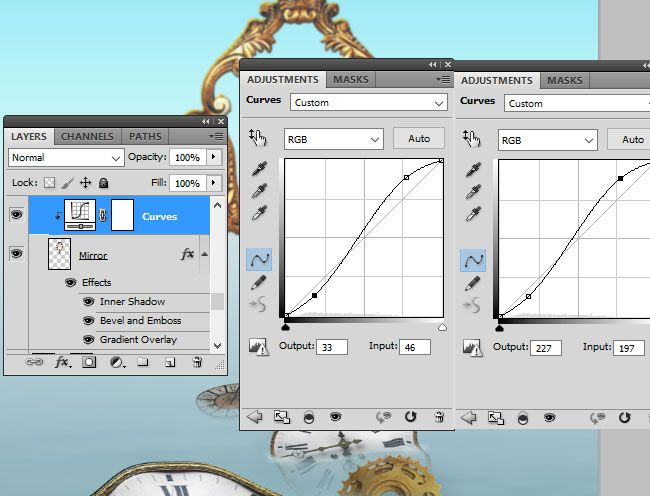
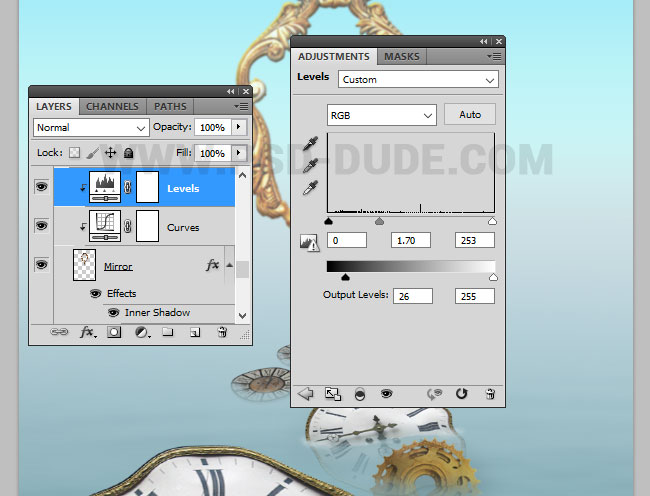
Add a Levels adjustment just for the Mirror Layer; right click and choose Create clipping mask. To add this adjustment, go to Layer menu > New Adjustment Layer > Levels.
- Levels Adjustment
- You use the Photoshop Levels adjustment to correct the tonal range and color balance of an image by adjusting intensity levels of image shadows, midtones, and highlights. Read more...
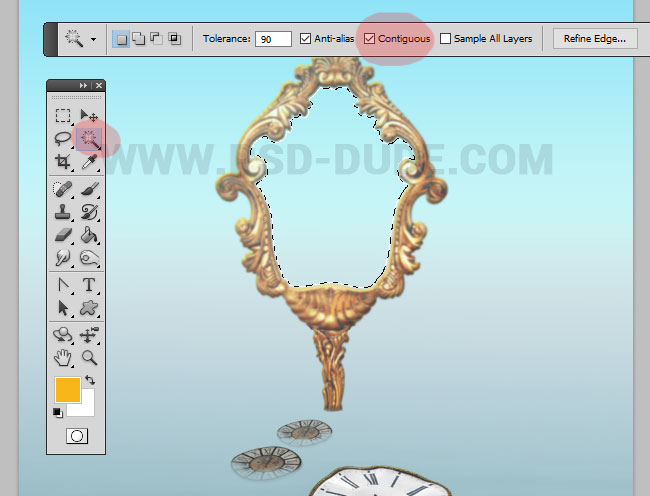
Use the Magic Wand Tool to make a selection; click inside the mirror glass area. Make sure you have the Contiguous option checked. With Contiguous selected, Photoshop will only select pixels that fall within the tone and color range(determined by the Tolerance option) and are united in the same area you clicked on.
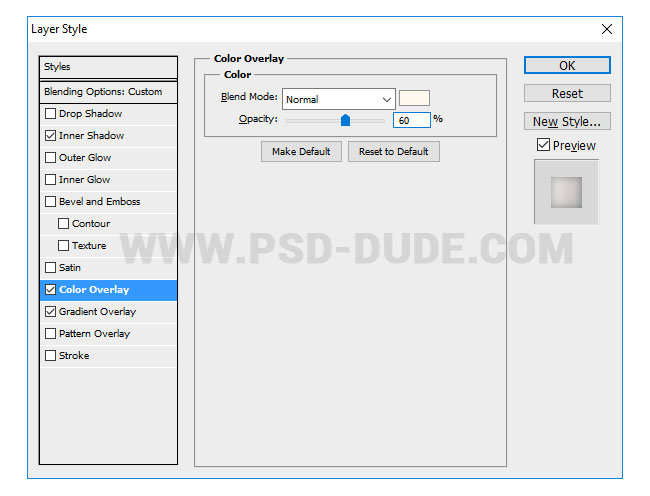
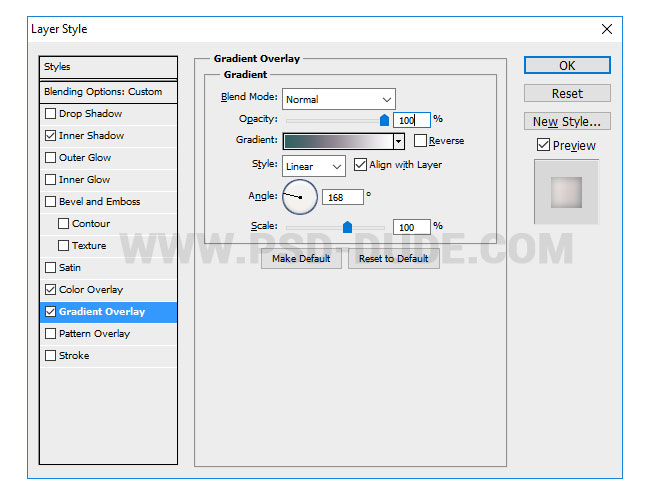
Click on the layer below the Mirror Layer. Press SHIFT+CTRL+N to create a new layer called Mirror Glass and fill the selection with any color you want. Press CTRL+D to deselect. Add these layer styles to the new created layer: Inner Shadow (color #1f3943), Color Overlay (color #fff7ef) and Gradient Overlay (colors #326161 and #fbfbfb).
Select all the Mirror Layers, including the adjustments. Duplicate these layers and merge them (you might have to right click on the new layer and choose Release clipping mask). Call the new layer Water Reflection. Flip Vertical the Water Reflection layer, reduce the opacity to 65% and use the Brush Tool, opacity 50% , to adjust the reflection. Here are some useful tutorials on how to create realistic water reflection in Photoshop like a pro.
Use a sun flare texture and add it on the mirror frame. Set the blend mode to Screen.
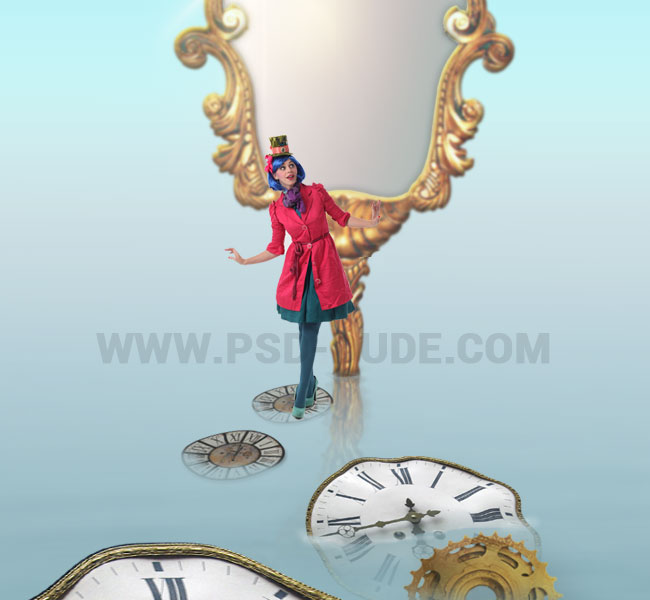
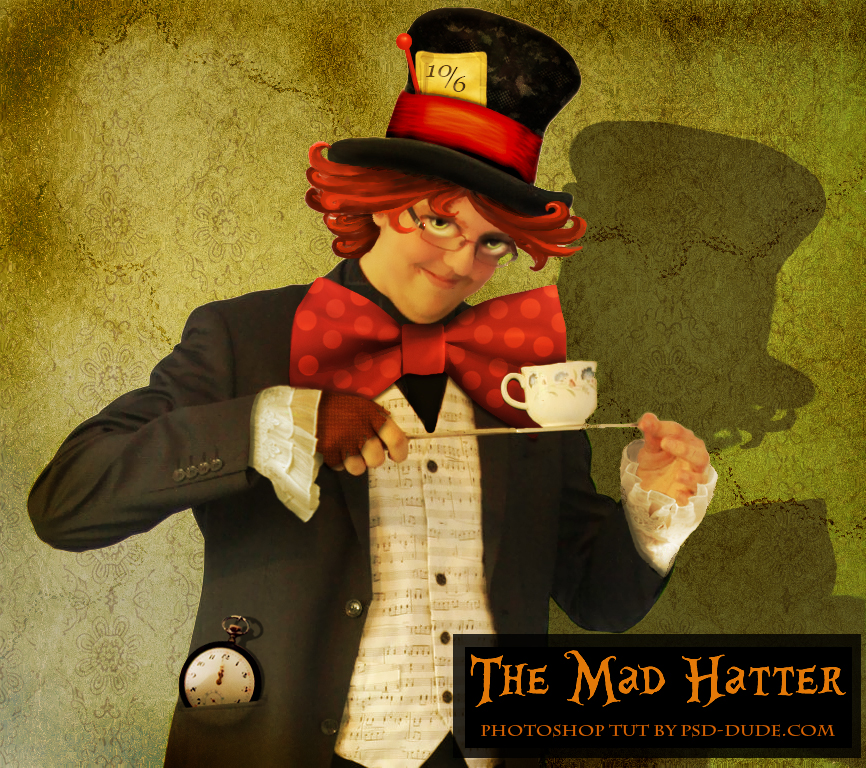
Time to add the final and most important element of our photo manipulation. The "Alice Through the Looking Glass" official movie poster has two versions, one with Alice and one with the Mad Hatter. I will use a combination of the two characters, a femenine version of the Mad Hatter. So copy the Mad Hatter stock image in a new layer and remove the background.
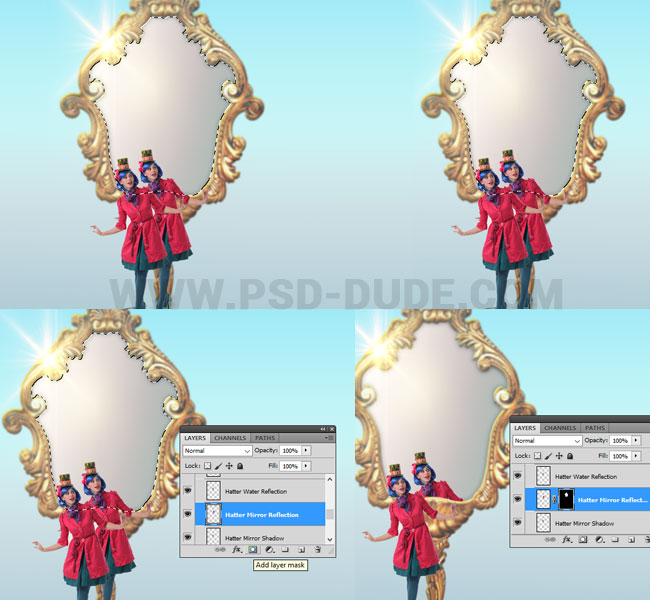
Duplicate the Mad Hatter Layer three times. Call this copy layers: Hatter Water Reflection, Hatter Mirror Reflection and Hatter Mirror Shadow. Place the three layers below the Mad Hatter Layer.
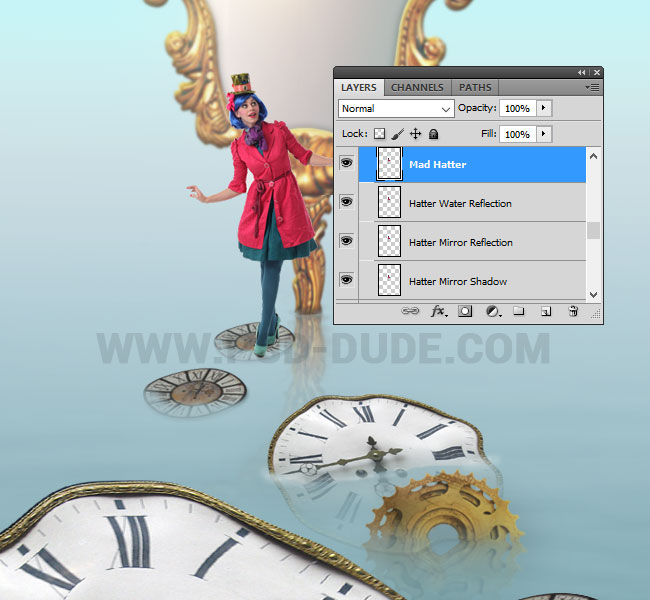
To obtain the Hatter Water Reflection you have to follow the same steps you did for the mirror water reflection.
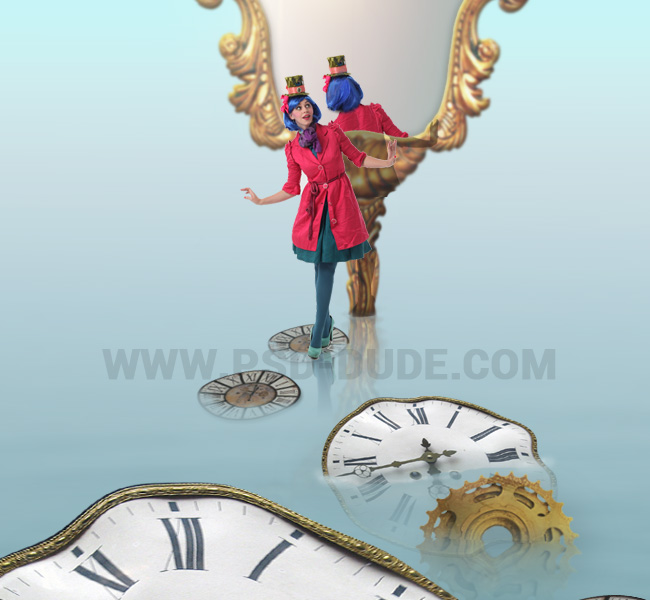
To create the mirror reflection you have to move the Hatter Mirror Reflection layer like shown in the preview.
Keep the CTRL key pressed and click on the Mirror Glass layer thumbnail to make a selection. Press the Add layer mask button.
Now comes the interesting part. The image that is visible in the mirror has to be the other side of the character. So I used this Hatter image and cut some hair and place it on the image to create a realistic look. You might have to use the Dodge Tool (protect colors option checked), the Smudge Tool and the Brush Tool to adjust the look.
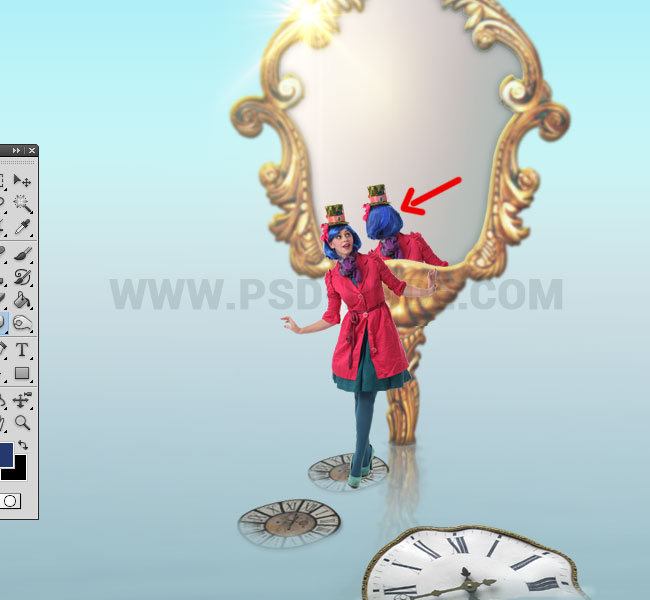
Do the same for the hat, the coat, etc. All you have to do is to use small size brushes and to pay attention to little details.
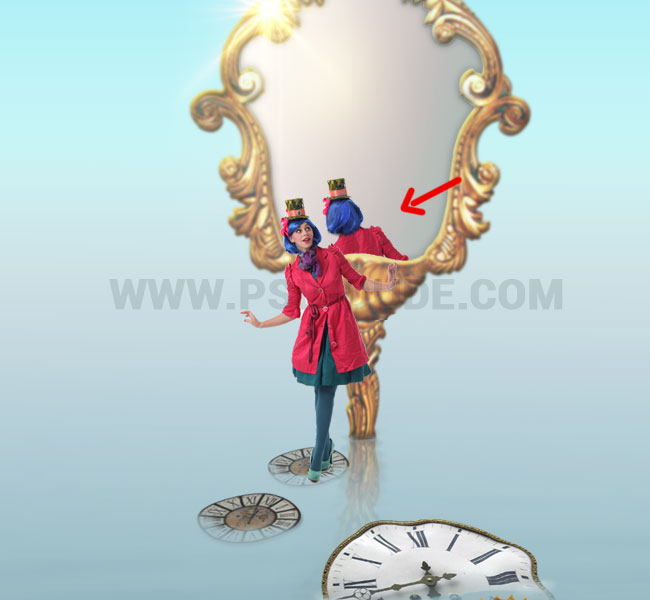
To create the mirror shadow you have to move the Hatter Mirror Shadow layer like shown in the preview. Keep the CTRL key pressed and click on the Mirror layer thumbnail to make a selection. Press the Add layer mask button.
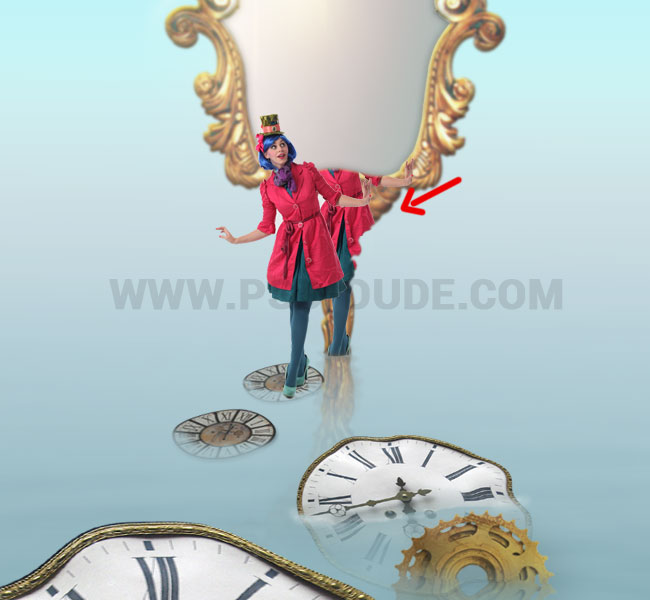
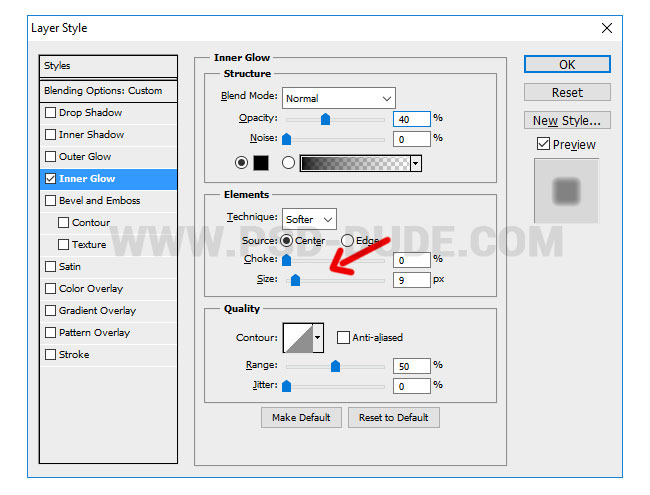
Set the Fill of the Hatter Mirror Shadow layer to 0% and add an Inner Shadow layer style with color black. The size depends on your layer/canvas size so it might differe from mine.
For the final steps add:
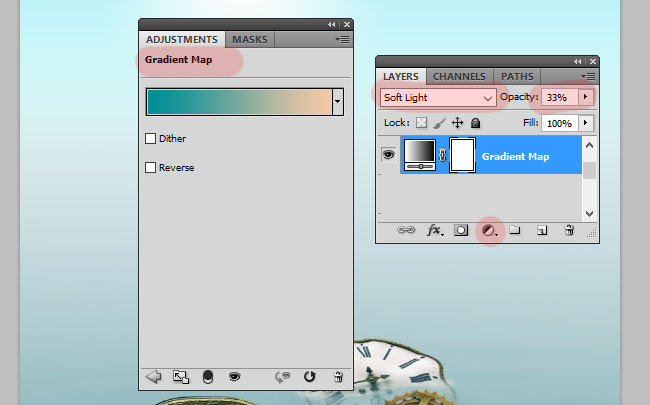
- Gradient Map above all the other layers. Set the blend mode to Soft Light and opacity 35%. The colors for the gradient map are: #008e97 and #f3c7a5 .
- Curves adjustment above all the other layers. Set the blend mode to Soft Light and opacity 35%. The colors for the gradient map are: #008e97 and #f3c7a5 .
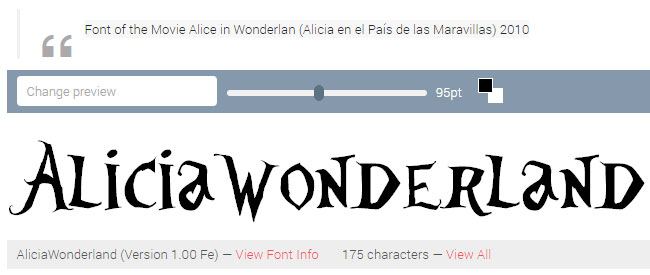
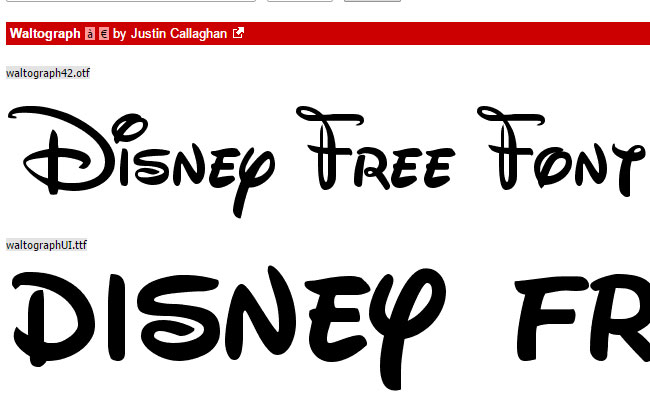
To make the result more realistic you can use similar fonts used in the original poster: Alice in Wonderland Font and Disney Font
Last step but equally important. Use the High Pass Filter to sharpen the image.
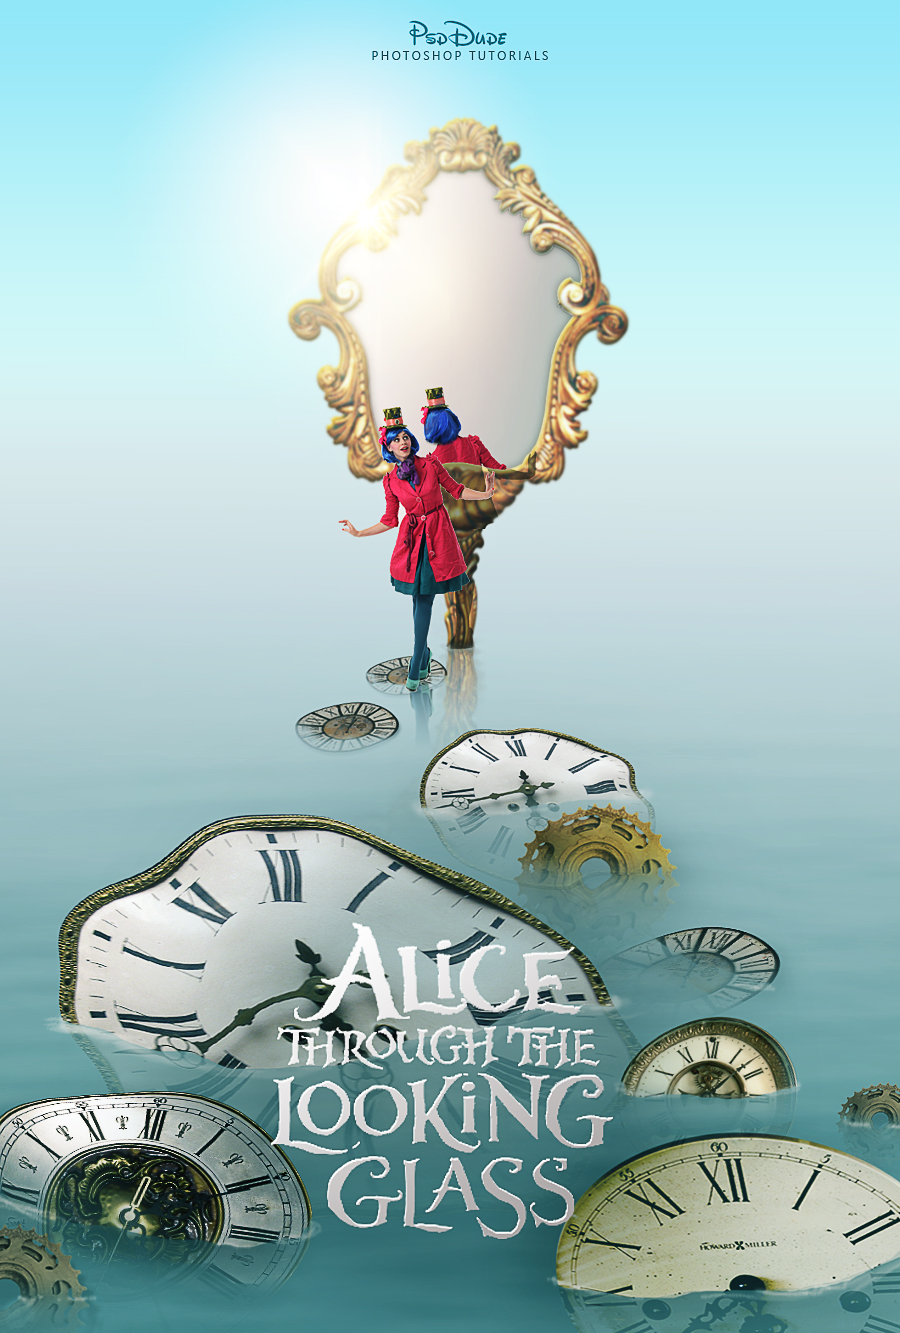
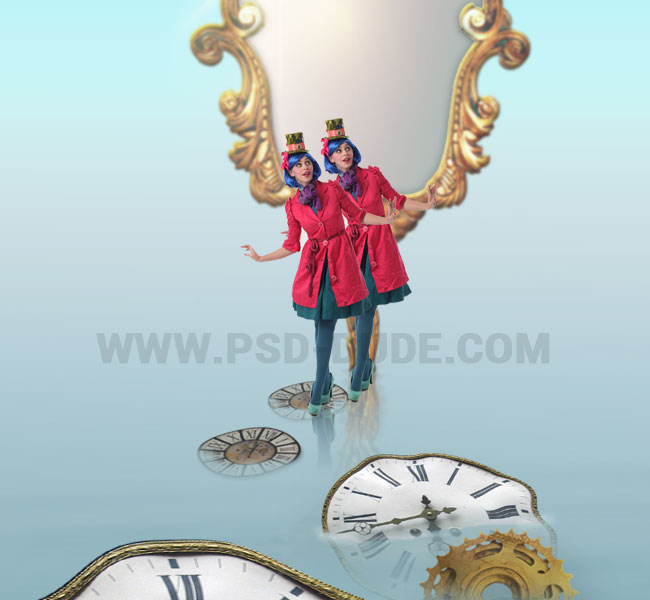
So after adding the color adjustments here is the final result for the Alice Through the Looking Glass Photoshop manipulation tutorial. I hope all the Alice fans will enjoy this lesson.
Other Alice in Wonderland Photoshop Tutorials

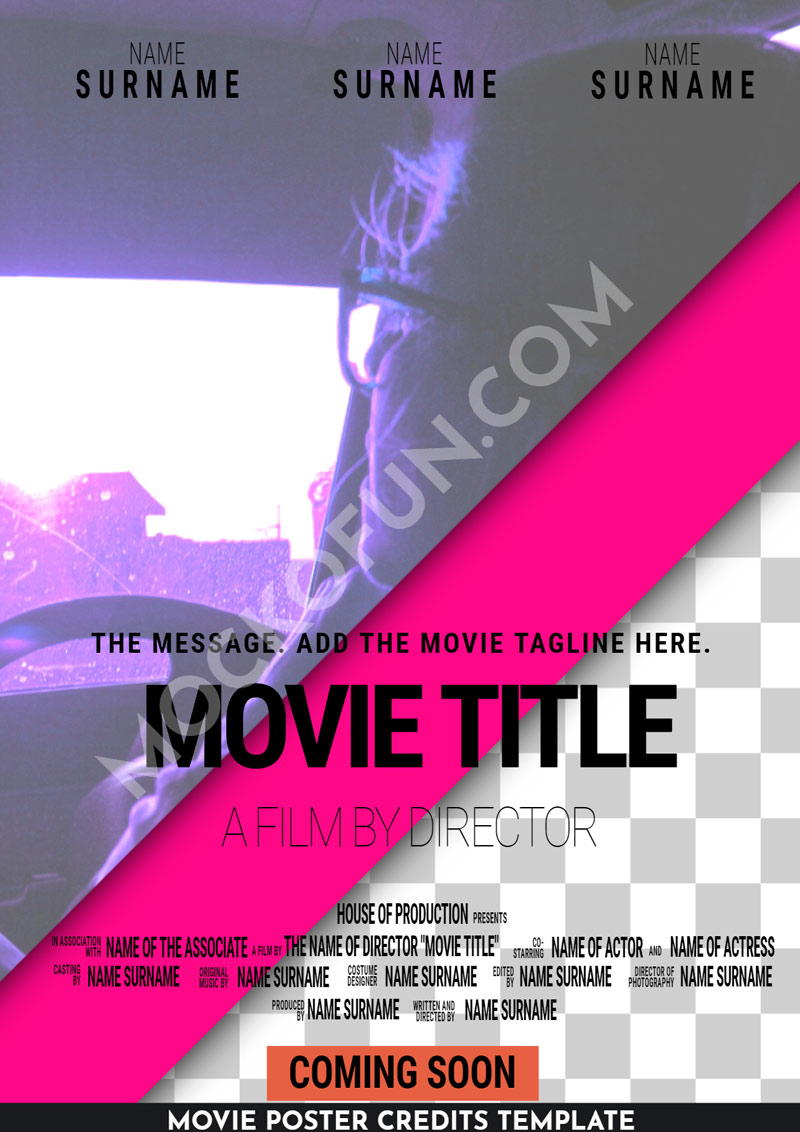
If you are an indie movie producer, or just want to give a proffessional look to your movie posters, the movie credits need to follow certain rules. Check out this movie poster credits PNG template that can be easily customized online: background image and color, text and font for the movie title, cast and other information.
Movie Poster Credits PNG Template Online
4 comment(s) for "Alice Through the Looking Glass Photoshop Tutorial"
As always, the sea of fantasy , impeccable style , new srih to help in the work . Thank you