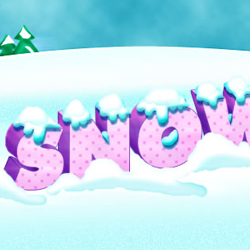
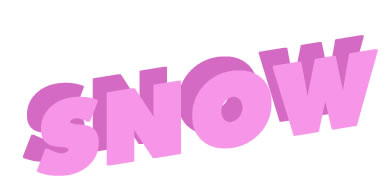
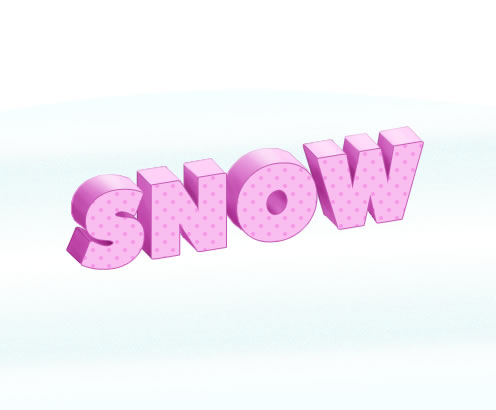
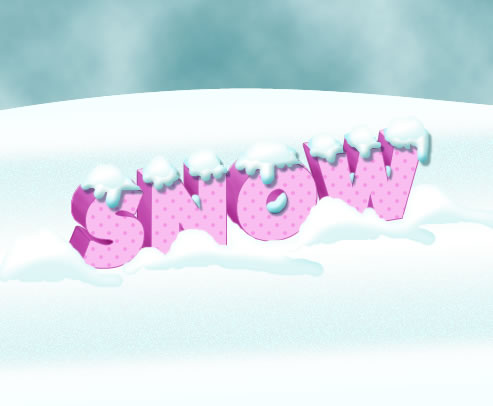
Let's tale a quick look at the snow text effect that we are about to create. The 3D effect is obtained in a rather difficult way so might want to take a look at a newer method for creating 3D effects in Photoshop. Or if you have the new CS6 Photoshop version you can use the 3D options.
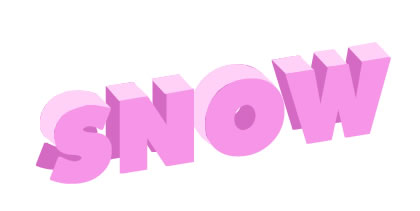
I will make this effect in a cartoon style just like I did in this other Christmas cards Photoshop tutorial. You might also want to check out this Snowman Christmas Card tutorial.
How to Write the text
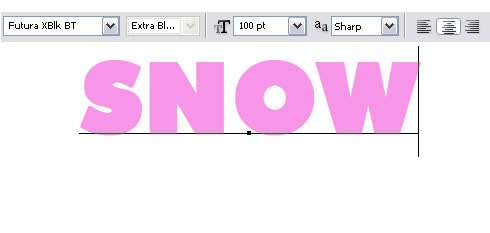
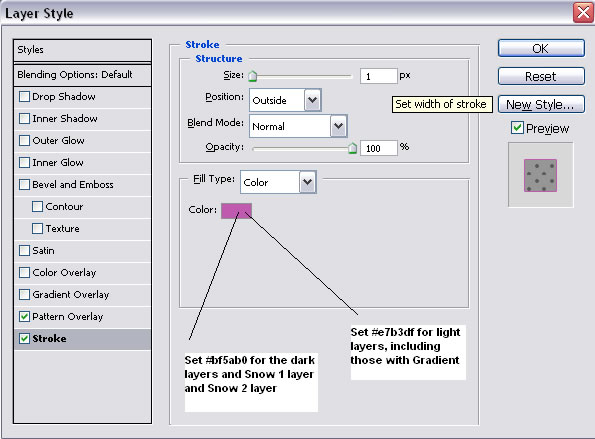
Write SNOW with the settings shown below, color #f796e8. Call the layer Snow Layer.
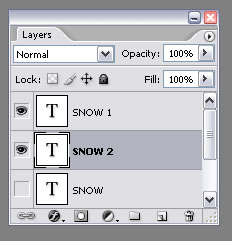
Duplicate the Snow Layer and call it Snow1 Layer. Hide the Snow Layer. Go to Edit - Transform - Skew and move the text like in the picture:

How to add 3D Effect
Duplicate Snow1 Layer. Change the new layer color to #d46ac4 and place the layer under Snow1 Layer. Call this layer Snow2 Layer. Move the Snow2 Layer like in the picture below.
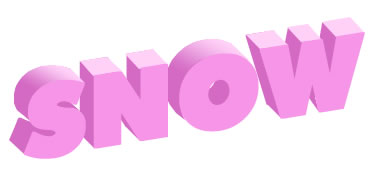
Set the foreground color to #ffd1f8. This will be the color for the light parts. With Pen Tool connect the two snow text to give a 3D look. It should look something like this:
Set the foreground color to #d46ac4. This will be the color for the dark parts. With Pen Tool connect the two snow text to give a 3D look. It should look something like this:

I have cheated a little; I didn't draw all the surfaces.I will use further on the Snow2 layer and Burn Tool to create those surfaces that I didn't draw them.
As you can see we have at leas 13 surfaces(3 for S; 4 for N;1 for O; 5 for W).
The red marked surfaces are the one that I've drawn and the blue marked are the ones that are false.
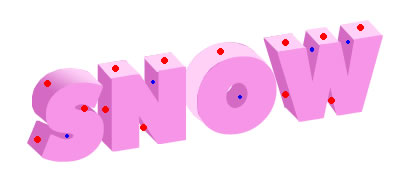
I advise you to put S surfaces into a group called "S", N surfaces into a group called "N" , O surfaces into a group called "O" and W surfaces into a group called "W"( Select the layers, go to Layer - New - Group from layers.) And put all 4 groups in one group called 3D.
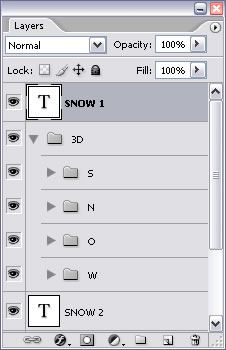
Place 3D group between Snow1 layer and Snow2 layer.
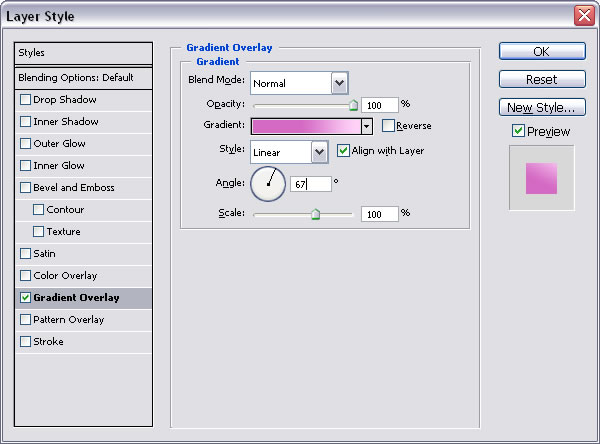
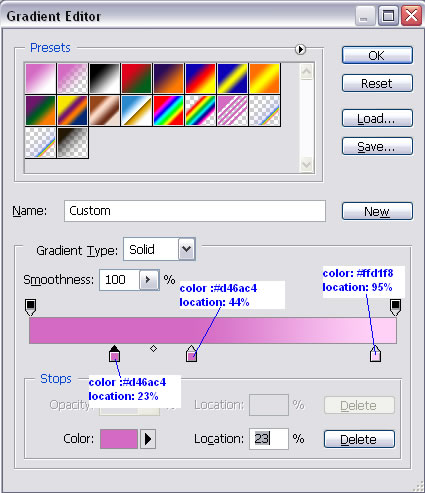
I have a little problem with S top surface and O surface, because they have only one color;
But the light doesn't have the same intensity all over the area;I will use gradient to change that.
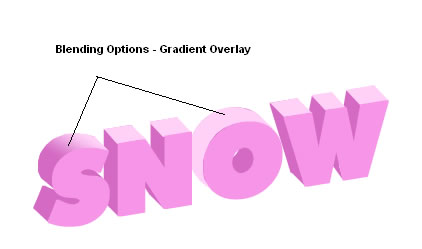
So go to Blending Options of this layers and do the following settings:
How to Add contour to the text
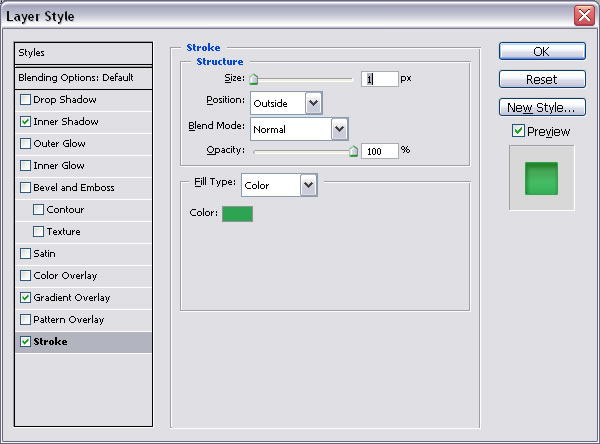
I will have to set Stroke from Blending Options of each layer with this settings:
How to Add pattern to the text
Download the pattern from
this link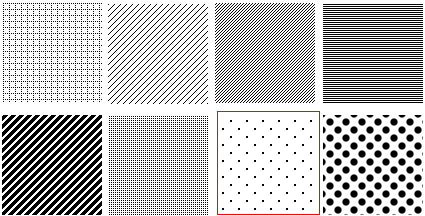
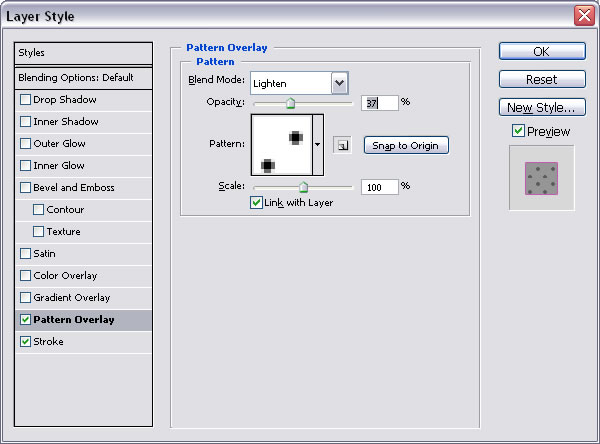
Go to Snow 1 layer , right click and choose Blending Options; do the following settings.
I changed the blend mode and the opacity.
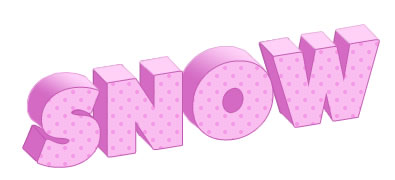
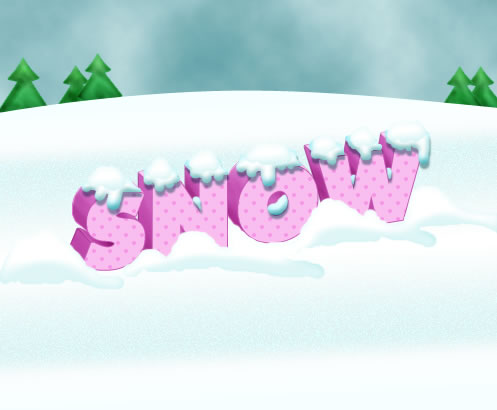
Now your text should look like this
How to Add more shadow
Select the layers from the group S and merge layers. Do the same for the other letter groups.
Now the layers are not vector anymore, are rasterized images; so we can apply effects with Burn and Dodge Tool.
A special case is O group that has only one layer; so duplicate O shape layer and then merge the two layers.
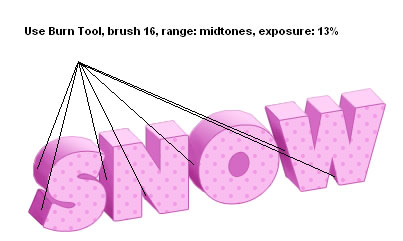
Use Burn Tool as shown below.
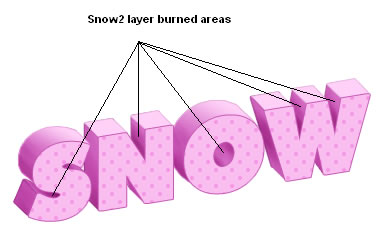
As you can see we have other parts that need burn treatment; go to Snow2 layer, right click, choose Rasterize Type and than with the same Burn Tool and settings shown above darken those areas:
How to Add more light
With the same technique presented in the Step 4, but this time with Dodge Tool, lighten the areas
that receive more light. Brush size is 13, range midtones and exposure 14%.

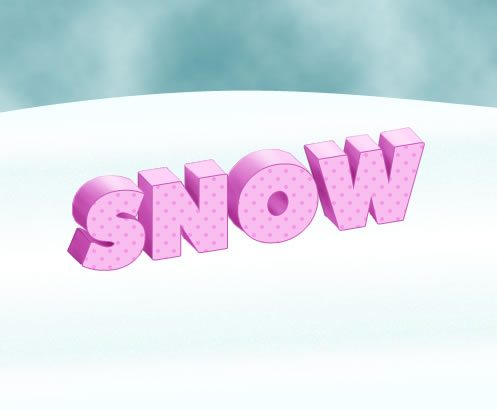
How to Create the winter background
Set the foreground color # d3f5f6. With the Pen Tool draw a shape similar to this one:
Call this layer Background.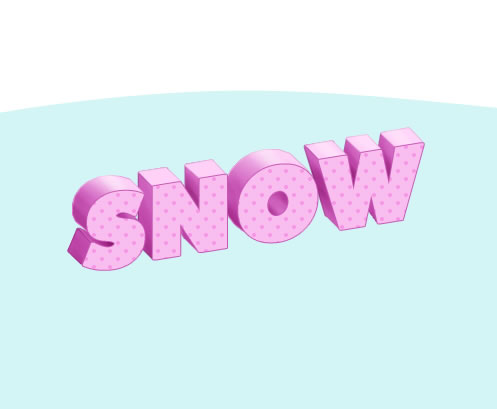
Go to Blending Options of this layer and do the following settings.
How to Create the winter sky
Set the Foreground color #e2f4f5 and Background color to #3a8992.
Draw a rectangle with the Rectangle Tool. Call this layer Sky. Place Sky layer below
Background layer.
Go to Filter - Render - Clouds.
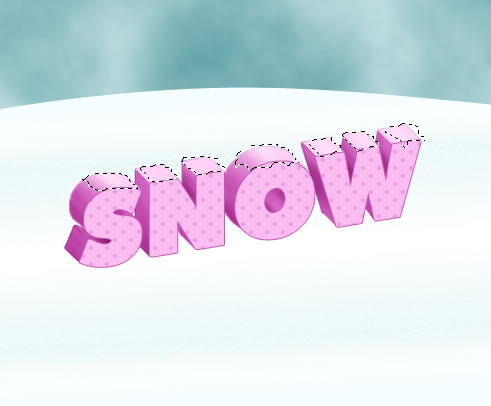
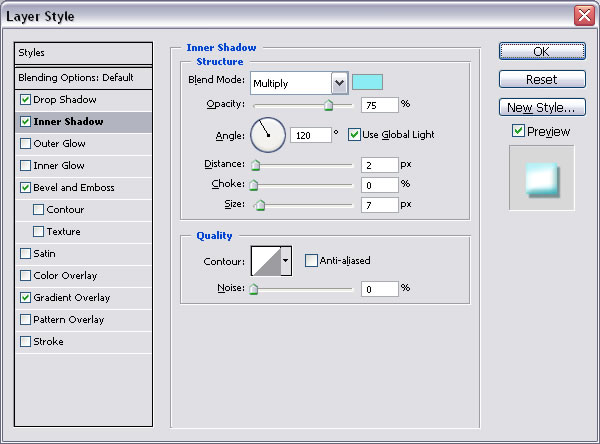
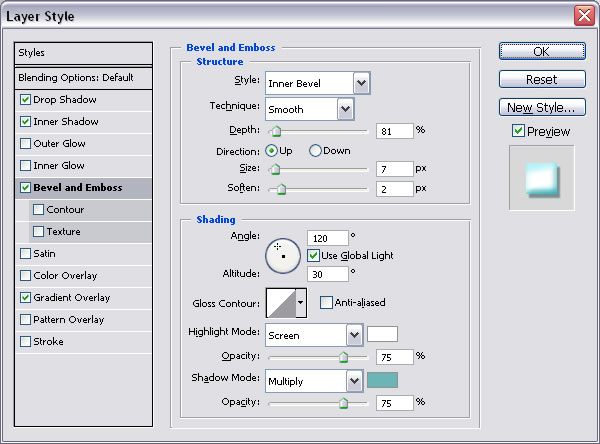
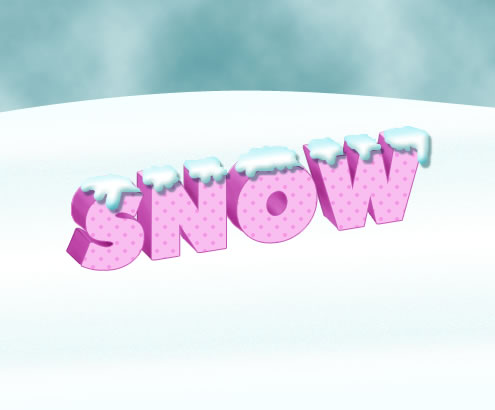
How to Add snow on top of the text
Create a new layer and call it Text Snow.
Use Lasso Tool and select areas from the top of the text. Press SHIFT key to make multiple selections.
Set the foreground color white and with the Paint Bucket Tool fill this areas.

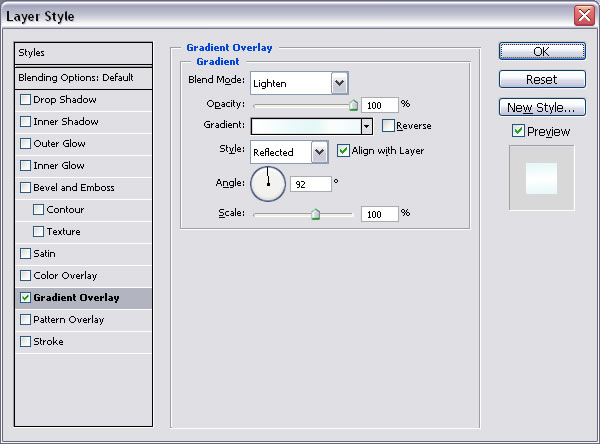
For this layer go to Blending Options and make those settings:
Drop Shadow: color #1d5a60
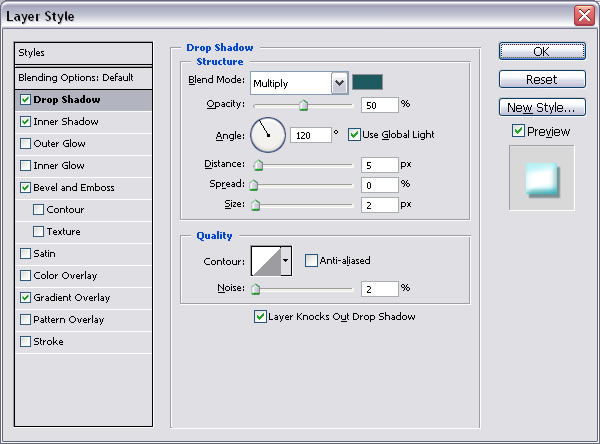
Inner Shadow: color #8bedf3
Bevel and Emboss
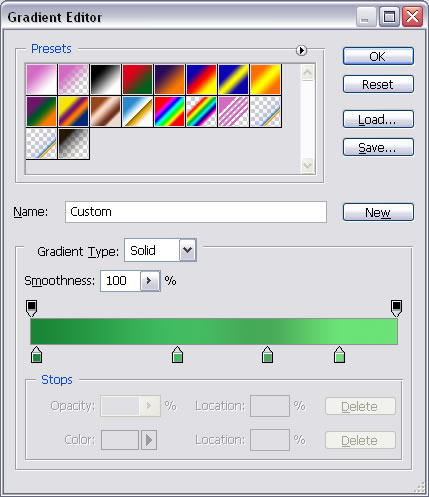
Gradient Overlay
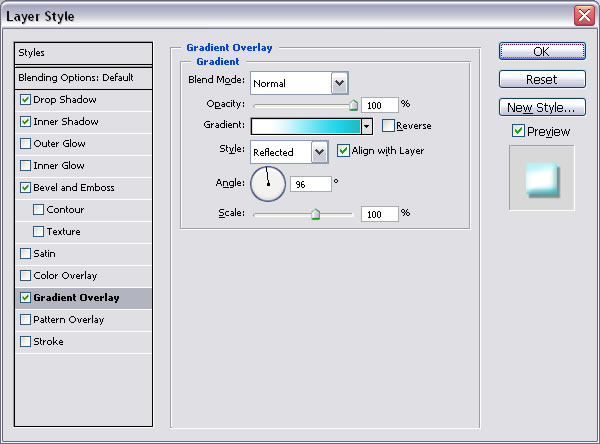
Settings for the gradient
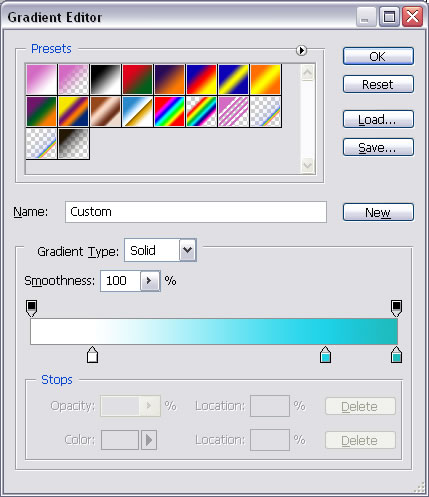
The colors doesn't have to be identical; the best measure for a good result is the layer itself.
With the Smudge Tool, brush 7 - 10, strength 100% adjust the shape of the snow so it looks like it is falling out of the text
How to Add more snow on the text
Duplicate this Text Snow layer. Call it Text Snow 1 . With the Eraser Tool, opacity 100% delete the layer content.
The reason I do that is because I want to keep the same Blending Options settings without setting it manually.
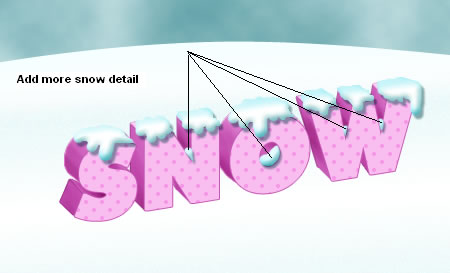
With Brush Tool, color white and opacity 100% draw snow in the places indicated in the image
above. Don't worry if it is not perfect, with Eraser Tool opacity 100% and a small size brush you can adjust the size of the snow.
The only thing modified on Blending Options is the Drop shadow; set a lower distance, 4.
How to Add more snow on the ground
Duplicate Text Snow 1 layer. Call this layer Extra snow. Go to Blending Options of this layer and keep only Inner Shadow and
Bevel and Emboss checked.
With Brush Tool, color white and opacity 100% draw snow on the ground around the text.
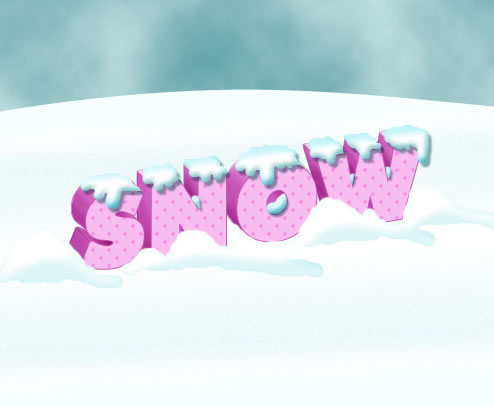
In this layer(Extra Snow) draw with Brush Tool more snow on top of the text.
Use a smaller brush 9, opacity 100% and draw something like ice cream on top of the text.
How to Add trees to the scene
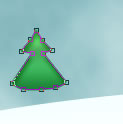
Draw a simple tree with Pen Tool. Call this layer tree.
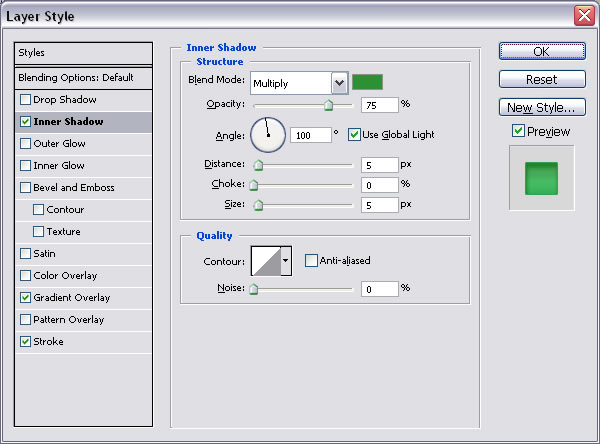
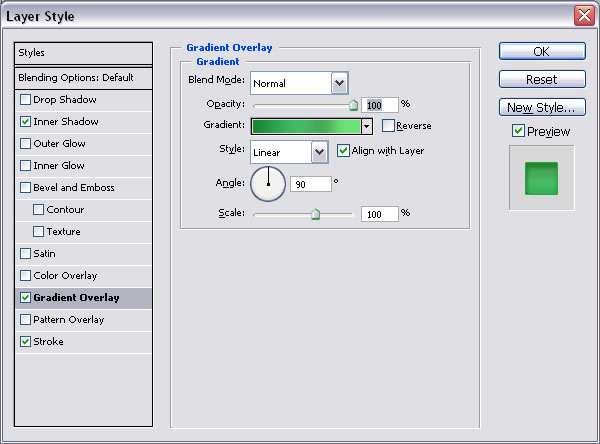
For this layer do the following settings:
Duplicate this layer 4 times and scale the layers to obtain bigger and smaller trees.
Merge all 5 tree layers and adjust their color with Burn Tool. Use Dodge Tool to lighten top part of the trees.
How to Add snow to the trees
Go to Extra Snow layer and with Brush Tool , white color, opacity 100% and brush size 6 , add some snow to the trees also. Delete with Eraser Tool the unnecessary snow; it looks better if the snow follows the shape of the tree.
How to Create Falling Snow Effect in Photoshop
If you want to add falling snow effect you can add the falling snow texture and set the blend mode to Screen. You can use these textures snowfall 1 and snowfall 2 with Screen blend mode. Also you can download this snow brushes and add snow using the Brush Tool and color #ffffff.
Here are some more snowfall textures that you can use with Screen blend mode.
How to Adjust the color
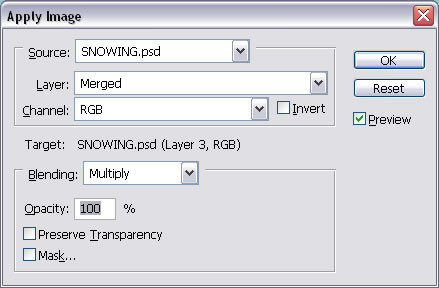
Create a new layer and go to Image - Apply image
Now I will change the color of the image to look more like a cartoon.
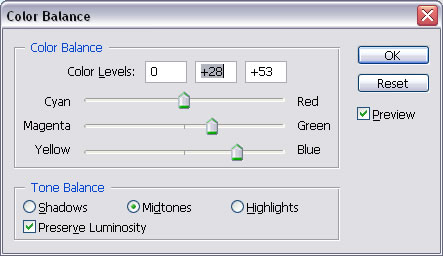
So go to Image - adjustments - Color Balance
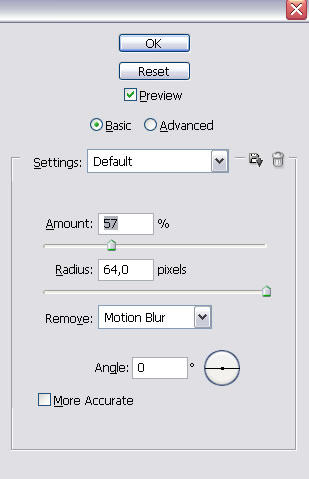
Go to Filter - Sharpen - Smart Sharpen
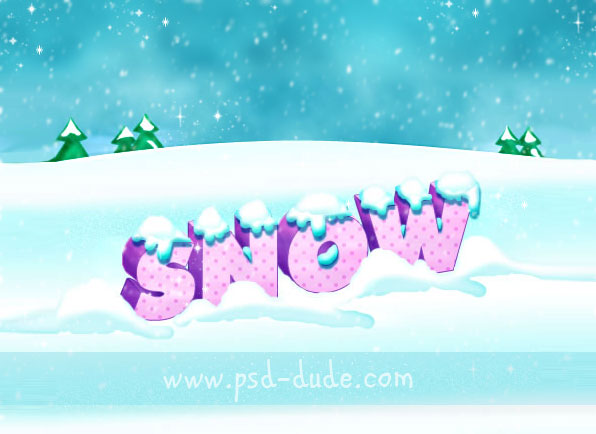
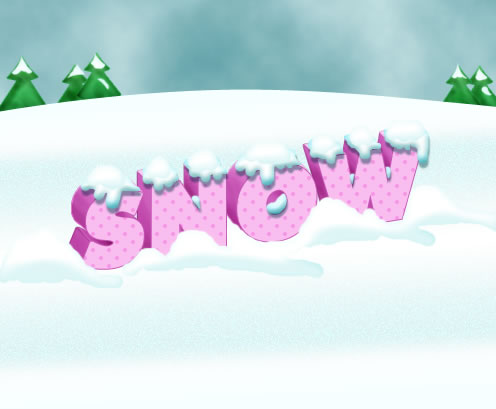
Here is the final result for the snow text effect made from scratch in Photoshop. This is one of my first tutorials so you might want to check out one of my newest tutorials Christmas Snow Text in Photoshop.
Online Christmas Card Maker
Did you know you can use online tools like MockoFun to make Christmas cards? Combine Christmas vector shapes with text and create some amazing Christmas cards. MockoFun provides pre-made templates for making Christmas cards online in just a few minutes.
Check out this awesome list of over 50 Christmas fonts that you can use online or download for free to use in Photoshop. Combine Christmas fonts with text symbols like a star symbol for example.
Check out this tutorial on how to use the online Christmas Card Maker and all the awesome features that MockoFun has to offer.

8 comment(s) for "3D Text with snow"
Unfortunate, i dont see all the pictures. Links broken?
Thank you reply
superb output
excellent creativity example
your all Photoshop tutorials are wonderful
you prove that Photoshop is so user friendly software
keep up good work
god bless you reply
I hope it helps! reply