


The new year is a few days away so here is a tutorial that you can use to create interesting greeting cards, party flyers for your friends and family. For this new Abobe Photoshop tutorial I will use a cool 3D golden text effect on a shiny sparkling background.
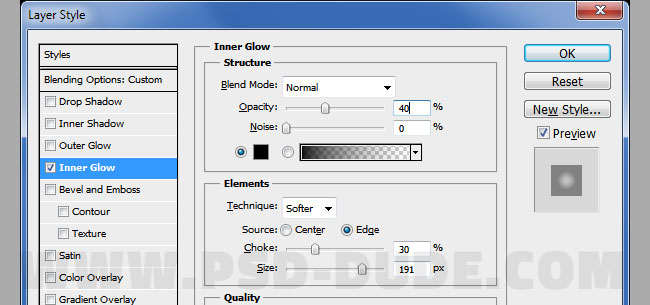
So for start let's create the background for our "Happy New Year" text effect. Create a new layer and call it Background Layer. For this tutorial I will use a canvas of 790x760 px. This is important because if you use other sizes you will have to resize the layer styles, the gradients etc proportional with the new size. Fill the layer with a dark color #1f1f1f. Add an Inner Glow layer style.

In a new layer add this Christmas tree sparklers image. Call this Sparklers Background.

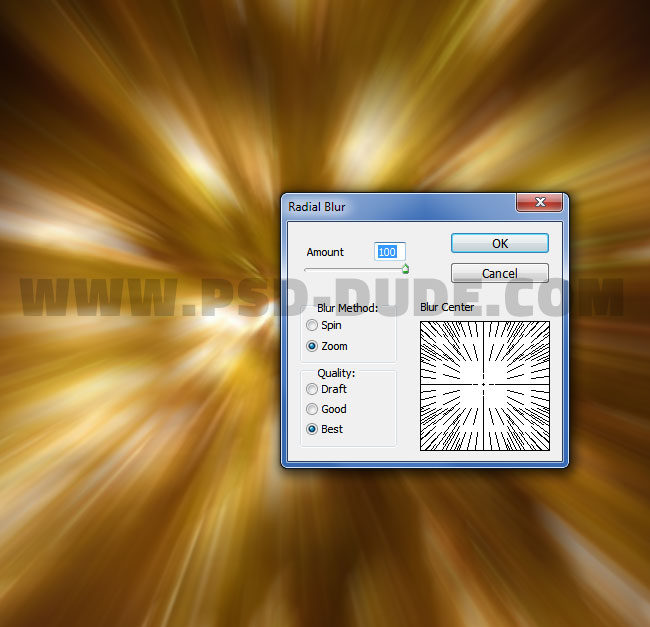
Resize the Sparklers Background layer to 150% and a Radial Blur and a Surface Blur filters, in this order.

Go to Image>Adjustments and add a Brightness/Contrast adjustment layer with these settings.

Now let's add the 3D golden text effect. To simplify the process I will give you the PSD file with the text effect. All you have to do is to open the "ADD YOUR TEXT INSIDE" smart object; double click on its thumbnail. Inside again open the "ADD YOUR TEXT INSIDE" smart object and finally add your text, shape, raster, whatever you want. Save and close the two smart objects to see the result.
Download the Free Gold Text Style
You have to Download the Gold Text Style to continue this tutorial. Inside you will find a fully layered PSD file and also an ASL file that you will need later on. Right click on the ZIP archive to extract the files. Also check out this gold text Photoshop tutorials list.

Inside the smart object I have 4 text layers that you can replace. You can make all the changes you want, you can change the gold layer style for example.

Now let's hang the Christmas ball letters. Use the Pen Tool to create these 4 shapes. Add them in separate layers in this order.

Here are the layer styles for each of the 4 shape layers. We start with Shape 1.


For the Shape 2, add these layer styles.


For the Shape 3, add these layer styles.


For the Shape 4, add these layer styles.


Very Important: i use small size shapes so if you use large size images you have to adjust all the layer styles. Go to Layer > Layer Style > Scale Effects and scale to 150% for example and see how it looks.
You can merge the 4 shape layers and duplicate them, in our case three times for each "2016" text character. Your text should now look like this.

Create a new layer and call it Sparklers 1. Add Christmas tree sparklers image inside the layer. Set the blend mode to Screen. Use the Eraser Tool to gently delete the edges; use a soft round brush.

Duplicate the Sparklers 1 layer and call it Sparklers 2. Resize the image to 60% like shown in the preview.

Create a new layer and call it Vignette. Fill the layer with white, reduce the Fill to 0% and add an Inner Glow layer style .
In the next step I will add some curly golden ribbons on each of the Christmas balls. You can download the set of Christmas ornaments and add the curl ribbon. Duplicate the ribbon 3 times for each Christmas ball.

In a new layer add this sparkle background texture. Set the blend mode to Screen and add a Hue/Saturation adjustment just for the Sparkle Texture(right click on the Hue/Saturation adjustment layer and choose Create Clipping Mask).

Now I will add a text message like "Happy New Year" for example. The font types that I used are Charlemagne Std, Ostrich Sans Inline and Streetwear. For the text layer I will use a simple gold text style that you can find in the ZIP file as ASL file. Simply install the ASL file in Photoshop(Edit>Preset Manager choose the Prest Type>Styles and load the ASL file) and you can use the "gold-style".

To make the image even more bright and festive I will add more sparkle effects. Use one of these amazing bokeh textures in a new layer above all the other layers. I picked the stars bokeh texture. Set the blend mode to Lighten and add a Gradient Map adjustment just for the Sparkle Texture using the Clipping Mask.


If you want you can add more bokeh lights in other areas like I did. For the final touches, add a Gradient Map above all the other layers, with Overlay blend mode, opacity 100%.

So, here is the final result for the golden text effect that is perfect for creating party flyers, greeting cards or even calendar covers for the new year celebration.

3 comment(s) for "New Year Golden Text with Sparklers in Photoshop"
My friends loved the card i made and here is the result.
Wishing you a good 2017.