Ghost Text Effect in Photoshop with Spooky Background
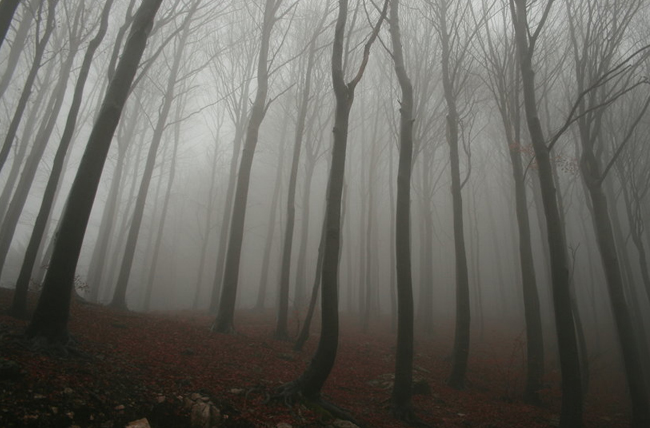
Open this creepy forest background image in a new PSD file. Call this layer Forest Image.
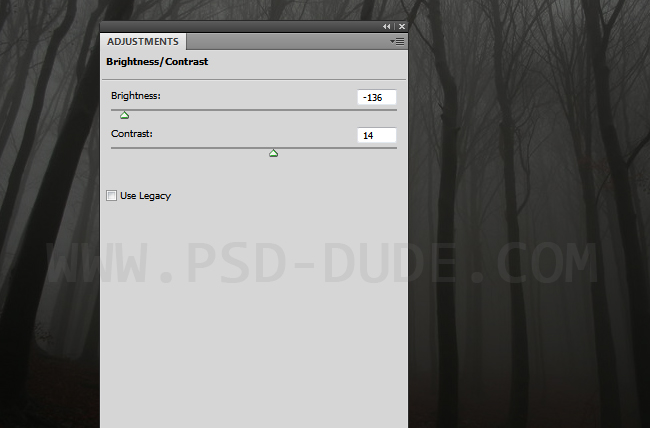
Add a Brightness/Contrast adjustment layer to darken the image. You can use the Exposure adjustment instead of brightness and contrast.
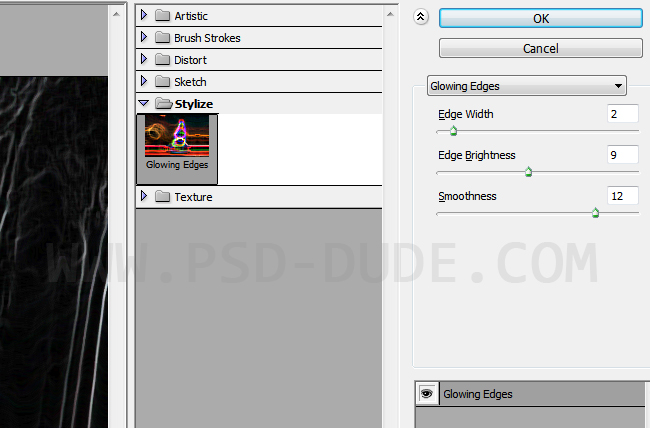
Duplicate the Forest Image layer and call it Highlights 1. Place this layer in fron of all the other layers. Go to Filter>Stylize and choose Glowing Edges
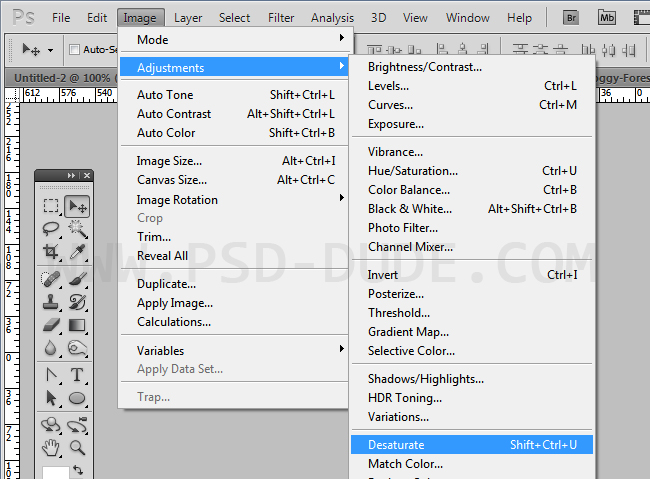
Go to Image>Adjustments and choose Desaturate.
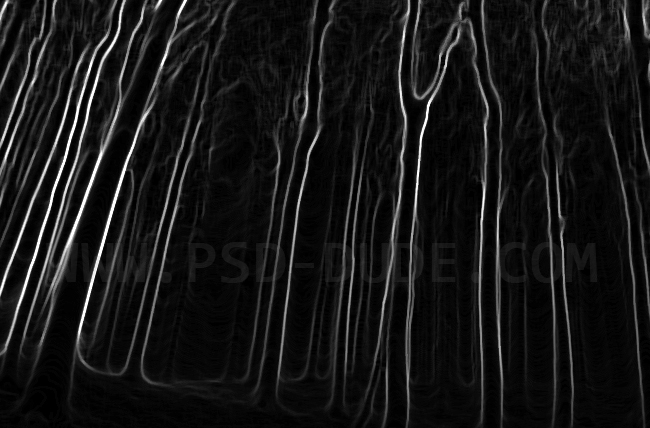
Set the blend mode to Screen, opacity 50%
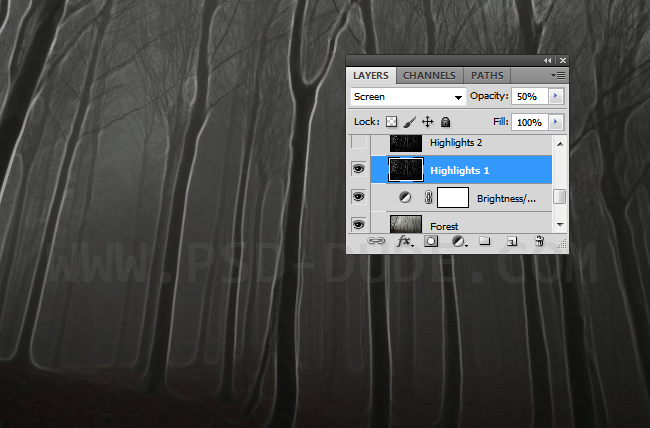
Add a Layer Mask to this layer. Use the Brush Tool, color black and paint inside the layer mask to hide some areas. Try to leave highlight on only one part of the trees (left or right).
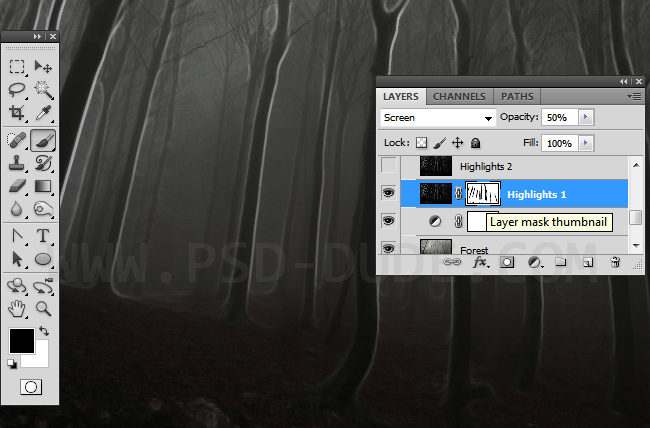
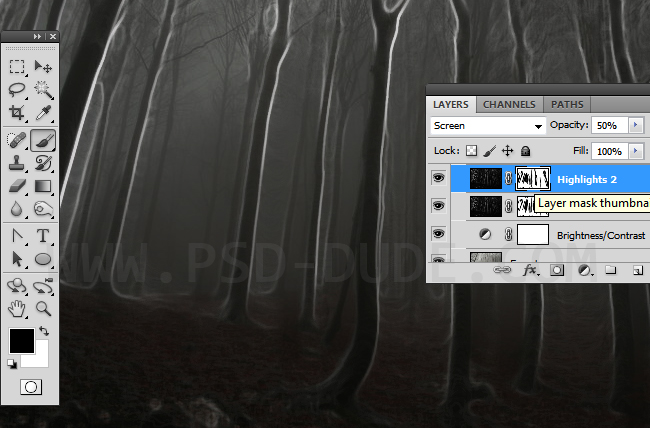
Duplicate this layer and call it Highlights 2. Use the Brush Tool again to hide more parts of the white lines to create more highlights.
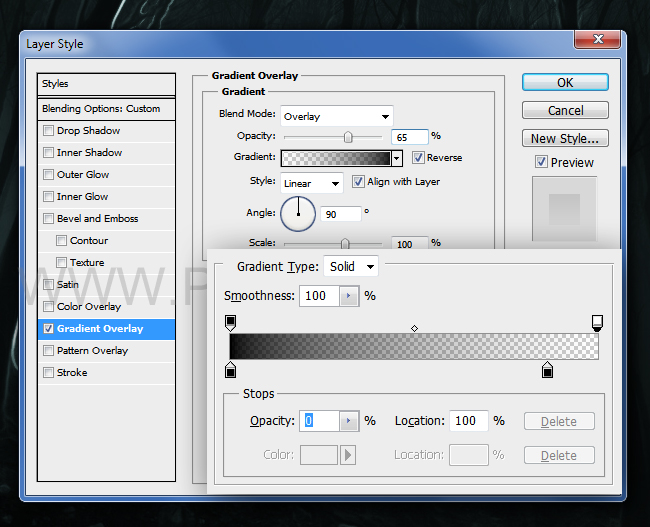
Create a new layer and call it Gradient. Fill the layer with any color you want. Set the Fill to 0% and add a Gradient Overlay layer style with these settings.
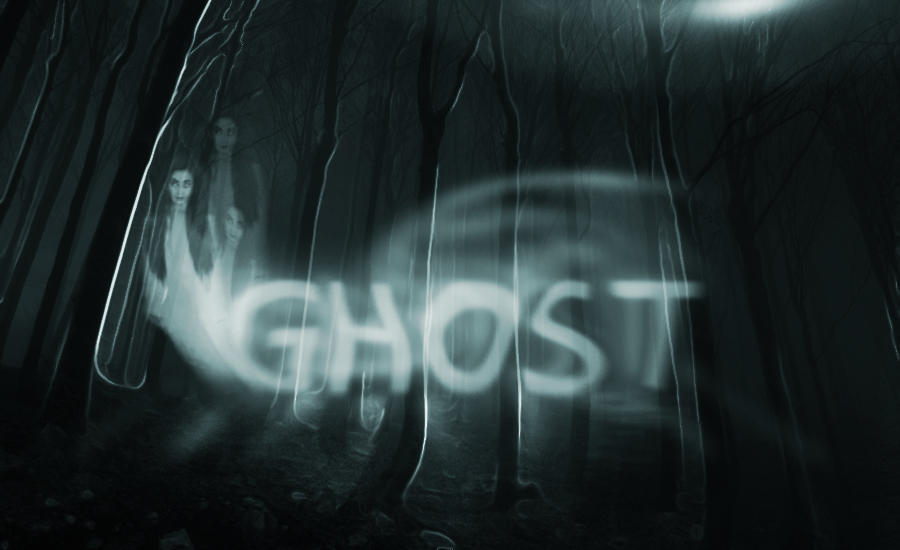
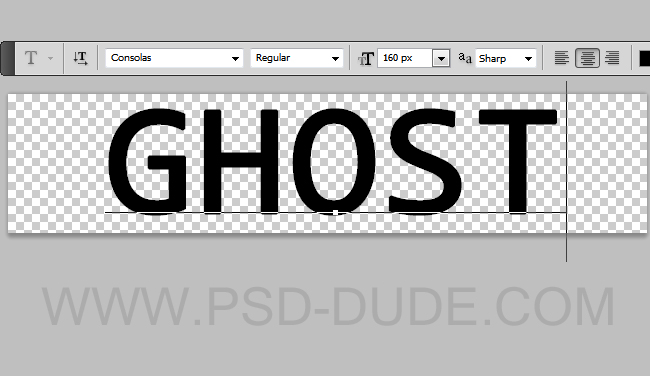
Now it is time to add the text and to create the spooky ghost text effect. Type the text "Ghost" using any font type you like. I use the font type Consolas.
- Install New Font in Photoshop
- You can choose a font family from the Font Family menu in the Character panel or options bar. If a document uses fonts that aren't installed on your system, you see an alert message when you open it. If you later try to edit type layers with missing fonts, Photoshop prompts you to substitute an available matching font. Learn how to install a new font in Photoshop Read more...
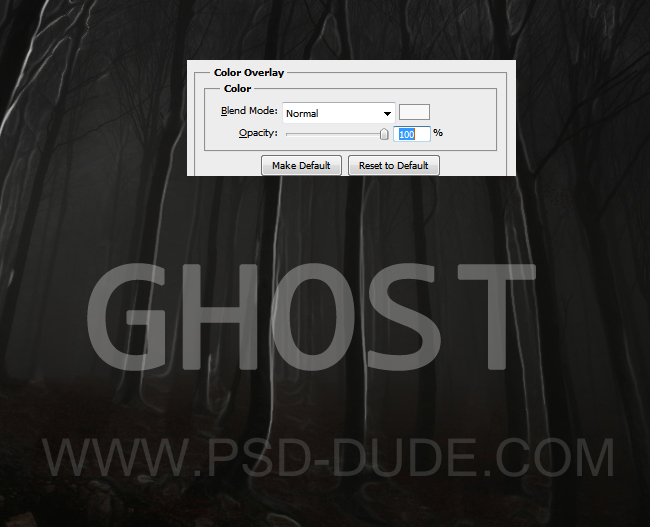
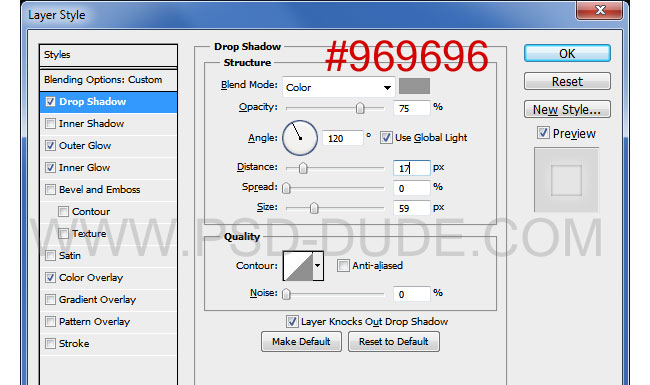
Rasterize the text and make 2 copies. Name the 3 layers: Ghost1, Ghost2 and Ghost3. Let's start with the top layer, Ghost3. Hide the other two layers. Add a Color Overlay using #f8f8f8. Set the Opacity of the layer(not of the Color Overlay) to 30%
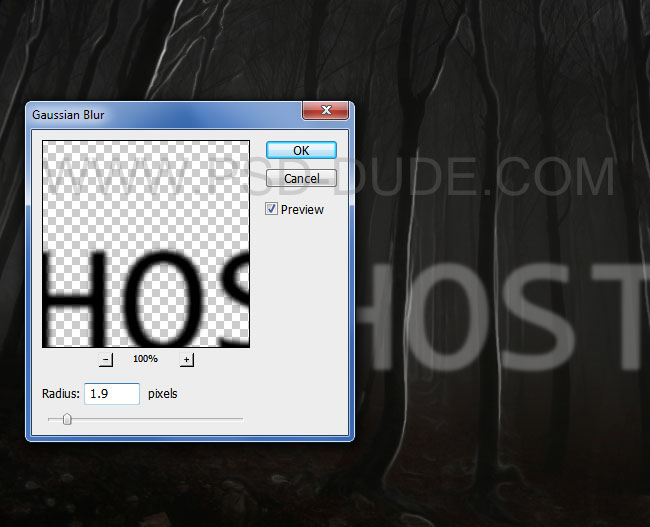
Go to Filter>Blur and choose Gaussian Blur with these settings.
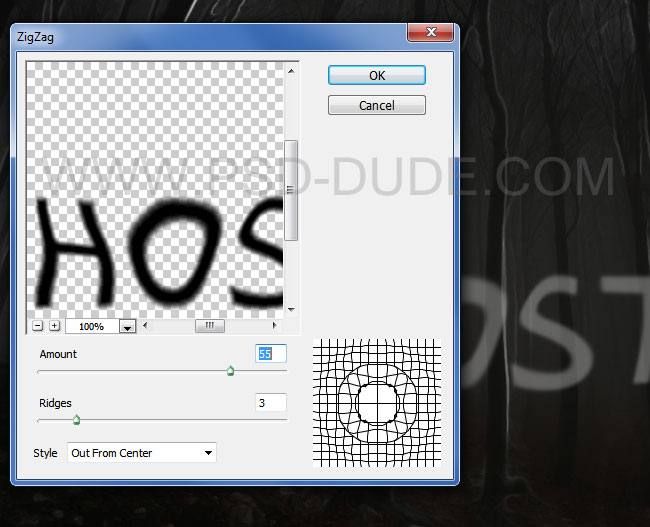
Go to Filter>Distort and choose the ZigZag filter.
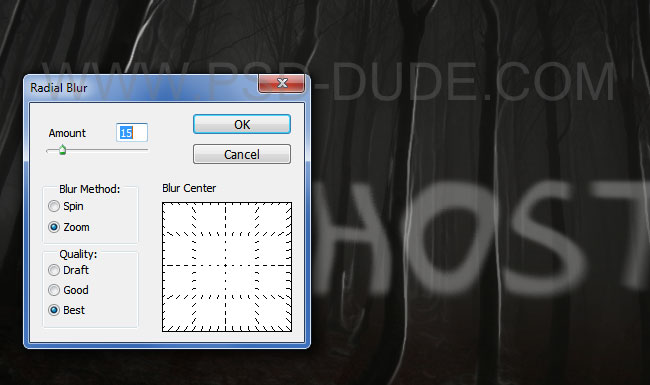
Go to Filter>Blur and choose the Radial Blur filter, Blur Method Zoom.
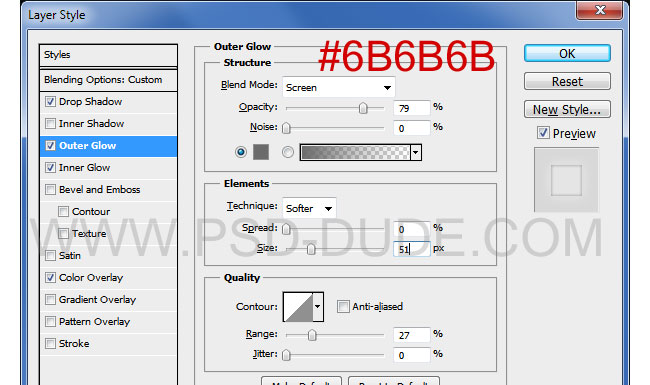
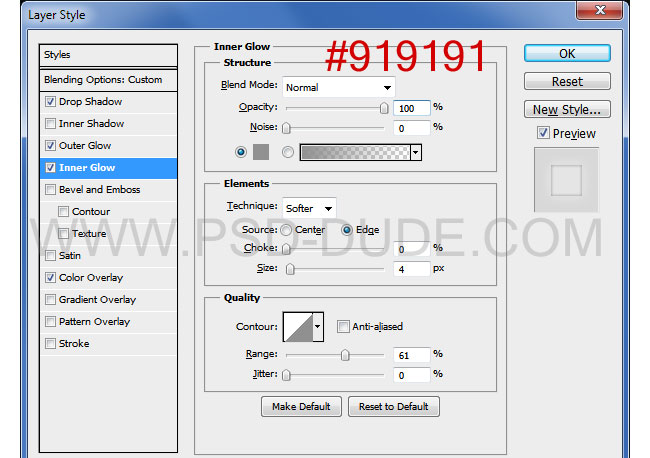
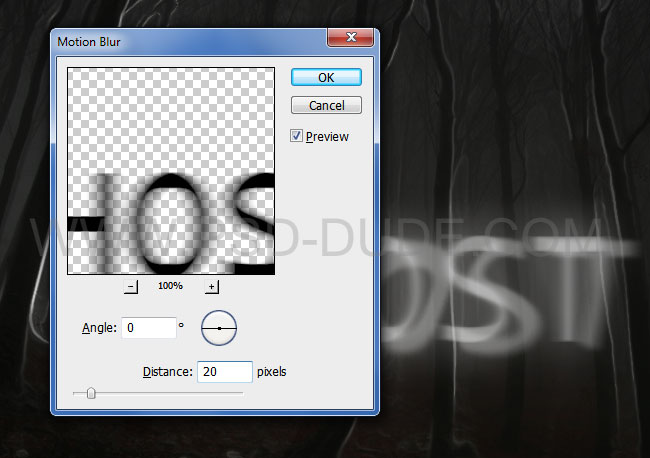
The next layer that we work with is Ghost2. Please unhide the layer first. To create a spooky effect we'll add some layer styles like Outer Glow.

Now we'll add some filter effects similar with the one used for the previous layer. First add a Filter>Blur>Motion Blur filter.
Next, add a Gaussian Blur effect.

Very important aspect: move the Ghost2 layer to the left to create movement effect. Also set the opacity of this layer to 55%
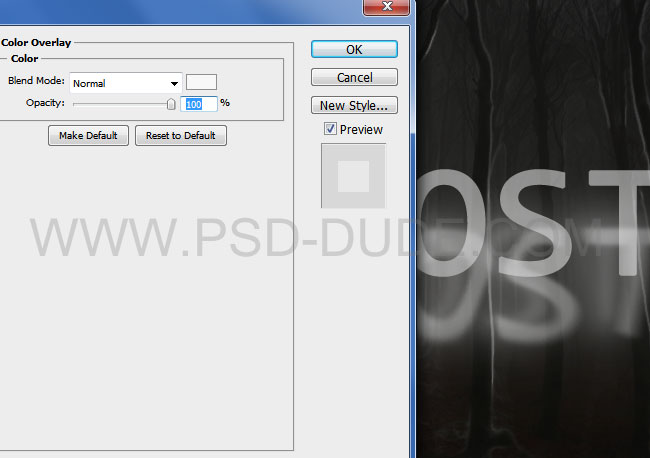
Time to add styles to our last layer called Ghost1. Set the opacity of the layer to 50% and add a Color Overlay style using a dirty white color #f8f8f8.
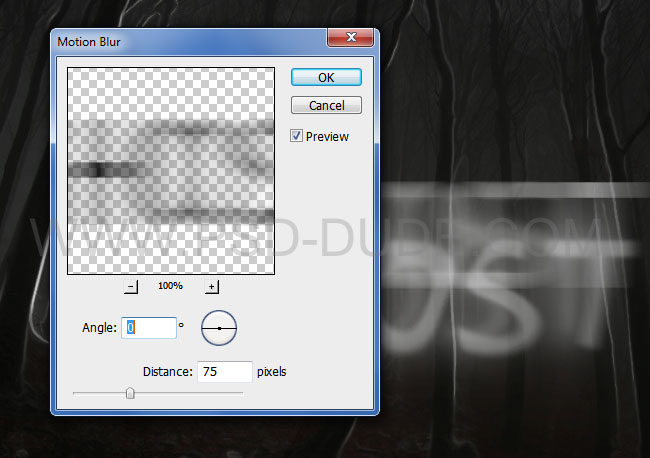
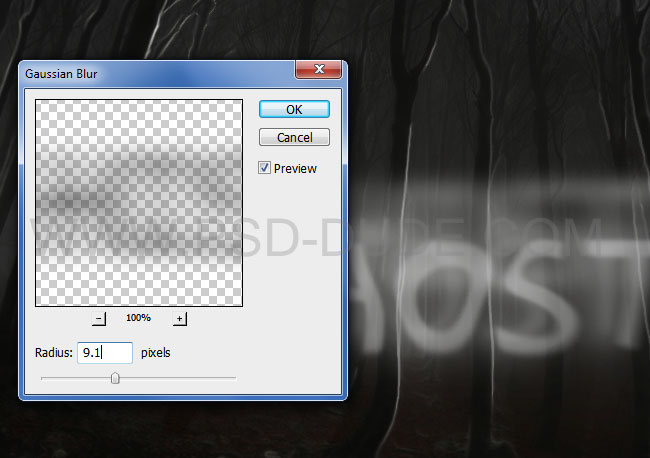
To create that ghostly eerie effect we will use again the two Photoshop filters: Motion Blur and Gaussian Blur.
To distort the text entirely, to the point that is not readable anymore, we'' use the Twirl filter that you can find also in the Distort category of filters.
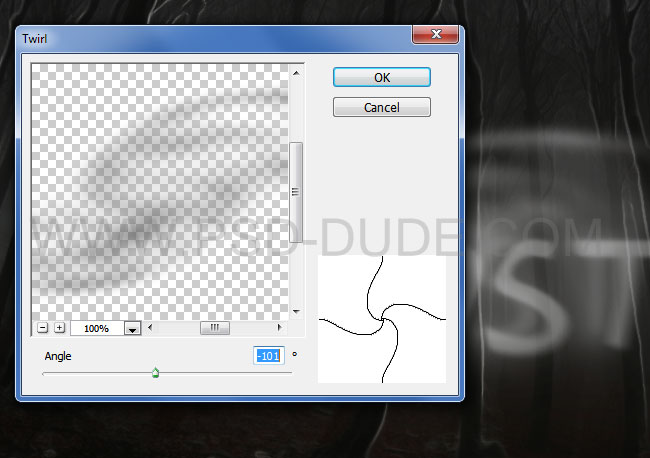
Very important is to move the Ghost1 layer up.
Download these ghost brushes as we will need them for the next step. Unzip the files and load the ABR file in Photoshop.
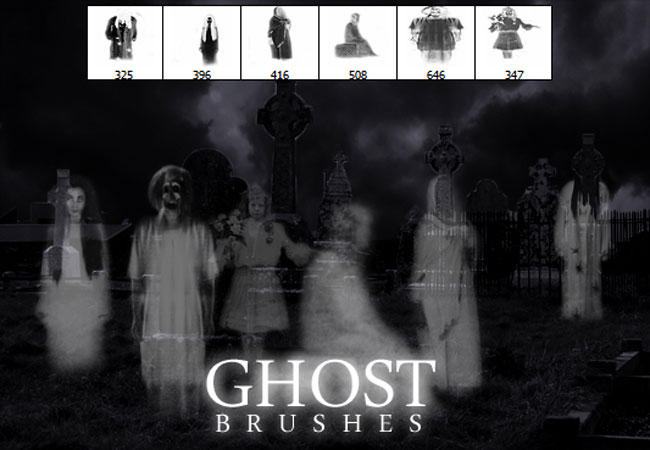
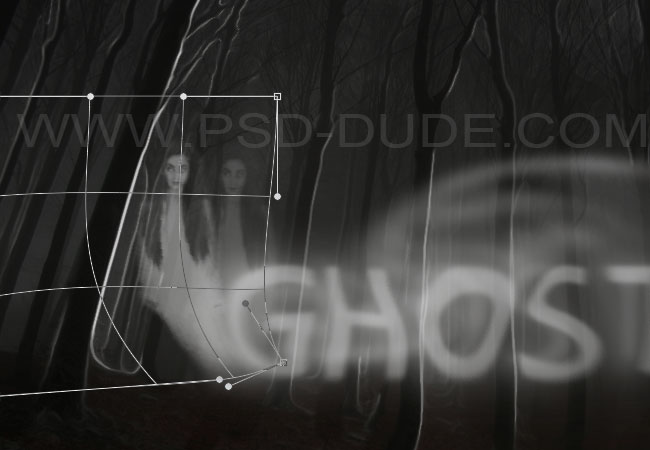
Create a new layer and call it Ghost Silhouette. Use the Brush Tool, color white and add a ghost from the list of brushes. I used the "ghost8 brush" but you can choose any creepy silhouette you want.
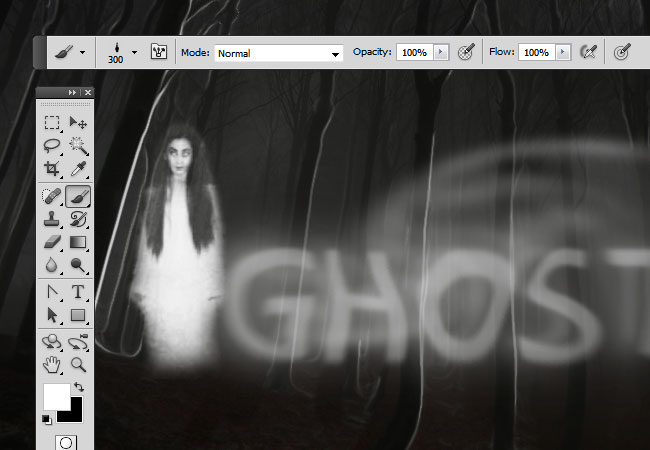
Set the opacity of the Ghost Silhouette layer to around 40%. Duplicate the Ghost Silhouette layer, resize it, lower the opacity even more and move it like shown in the image.
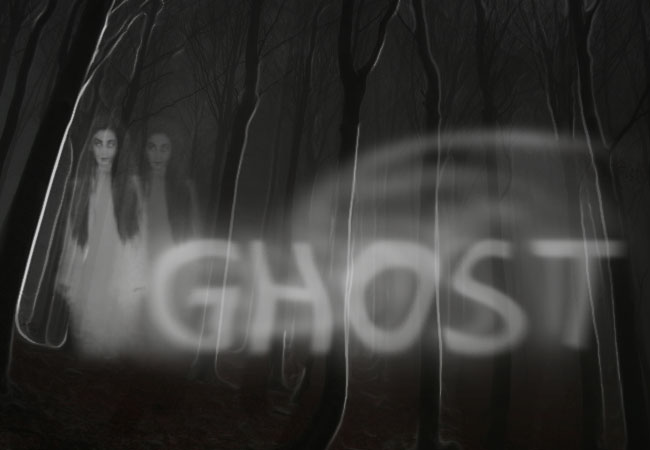
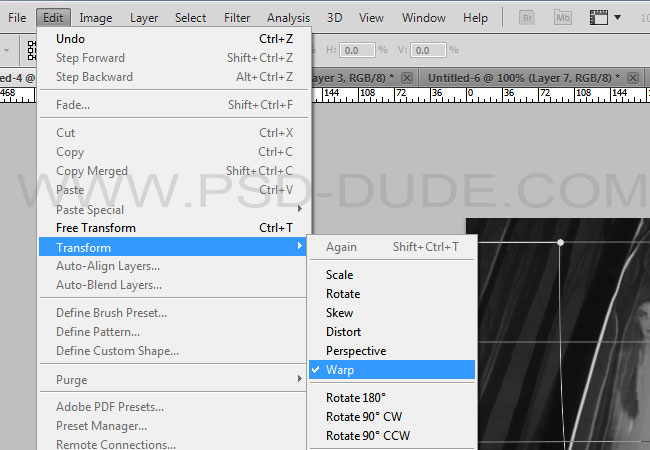
You can use the Warp Tool to distort the two ghost images.
Add a new layer or layers and use the Brush Tool, color white, to create highlights. Set the blend mode to Overlay. Play with different opacity levels. Use the Gaussian Blur to soften the light effect.

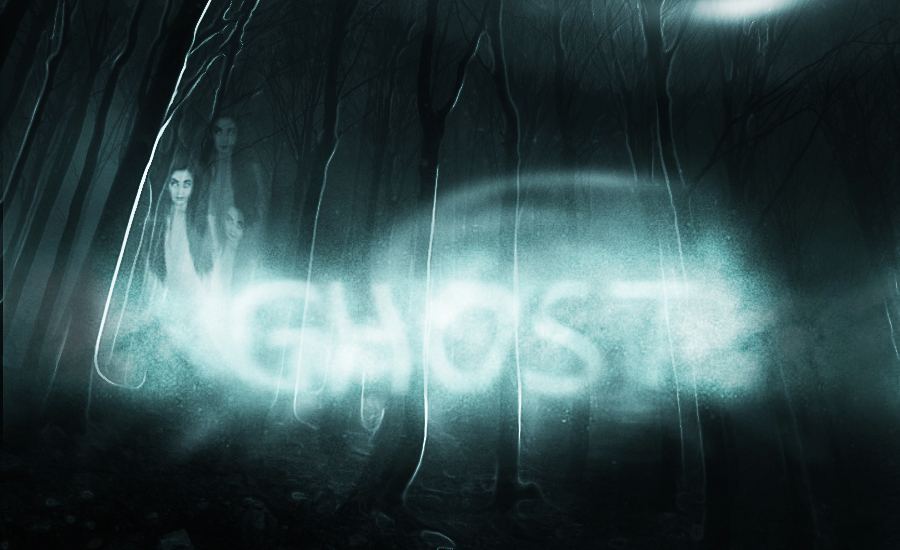
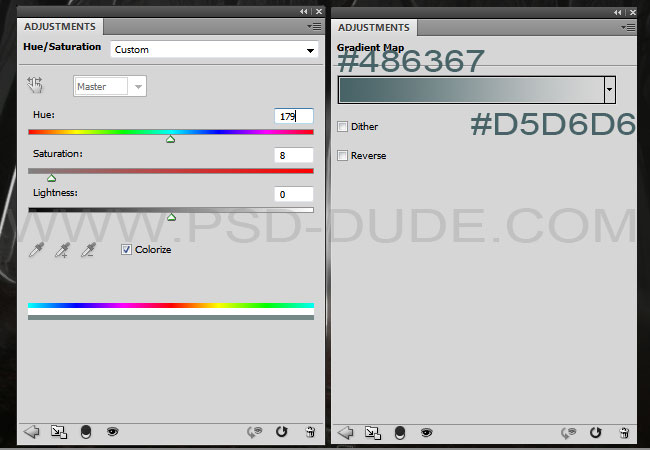
For the final touches we'll add two adjustment layers: Hue/Saturation and Gradient Map. For the Gradient Map set the blend mode to Overlay. So, here is the final result for the ghost text style made in Photoshop using layer styles and filters.
If you enjoyed this tutorial, make sure you check out these amazing premium Photoshop addons for Halloween:
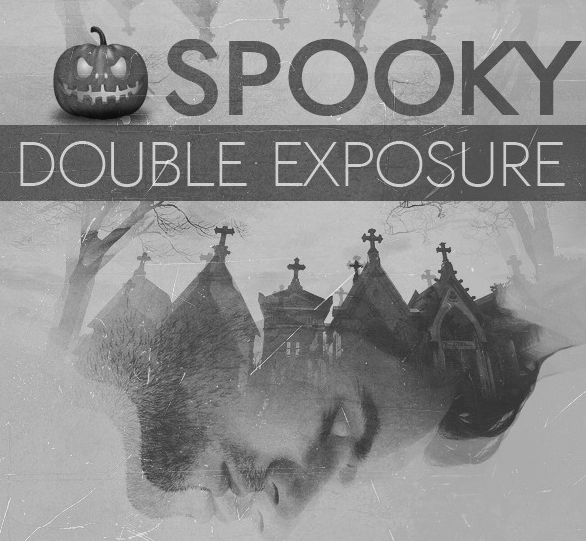
Spooky Double Exposure Photoshop Action
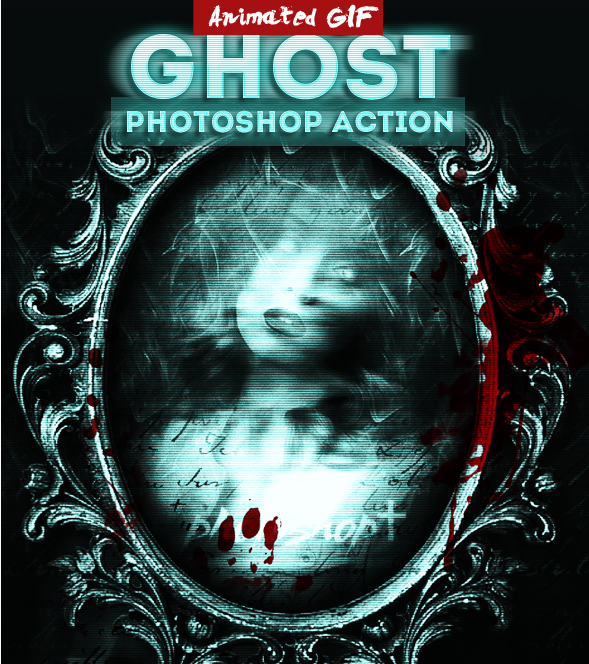
Halloween Ghost Animated Photoshop Action
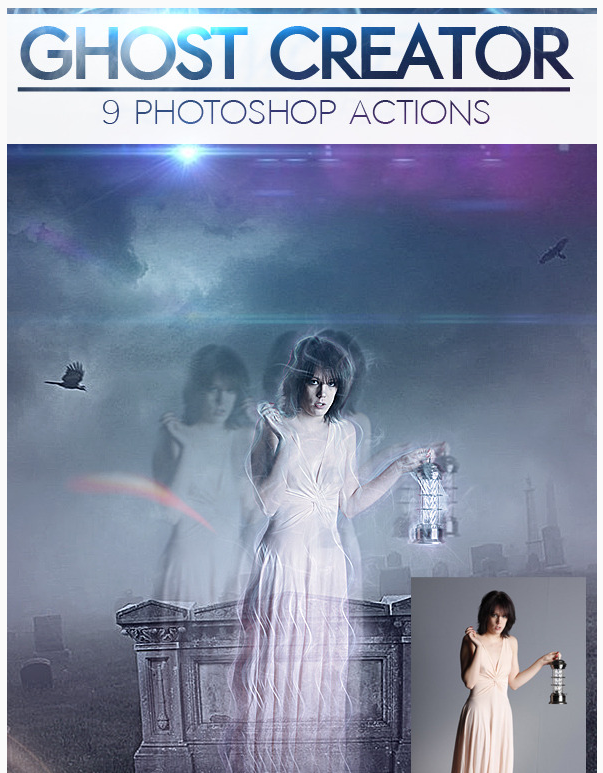
Ghost Creepy Photo Effects Photoshop Actions
6 comment(s) for "Spooky Ghost Text Effect Photoshop Tutorial"
Also, on the ghost, you said to duplicate it and "resize it". Resize to what? anything? or something specific?
Otherwise, one of the best tuts I have done in terms of complete instructions,,thank you! reply
About the resize use something between 60% and 80% ... it will probably not look identical!
Thank you for the message :) reply
Su reply