


Create the Background and Add an Outline Text
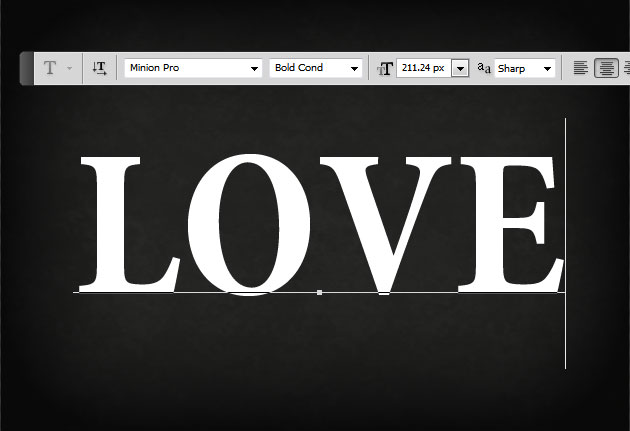
Start with a nice dark background. To create the background you can use a grunge texture or you can try with a brick texture; whatever texture you will use you have to darken the image using the Brightness/Contrast adjustment. Time to add the love message. Write a simple text using a font that you like similar to the one that I have used.
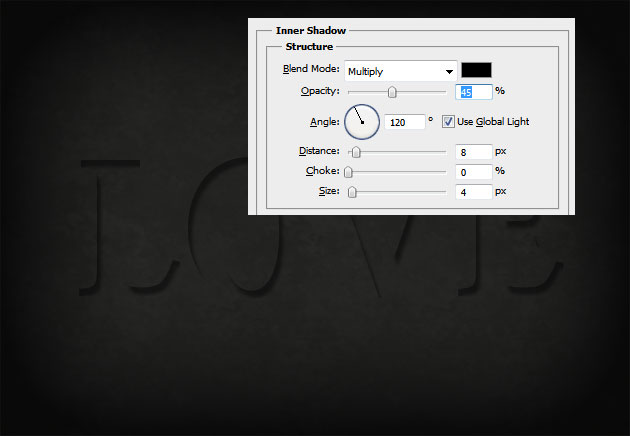
Call this first layer Original Text; we will keep it to make a copy when it is necessary. Duplicate this layer and hide the Original Text. Call this new layer Text Inner Shadow. Set the Fill to 0% and add an Inner Shadow like in the image.
Make the Roses Text Effect
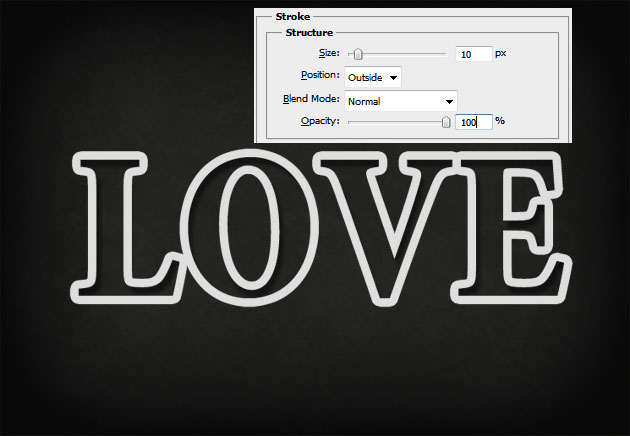
Duplicate the Original Text and place it above the Text Inner Shadow. Set the Fill to 0% and add a Stroke like in the image. Convert this layer into a smart object. Call this layer Text Outline 1.
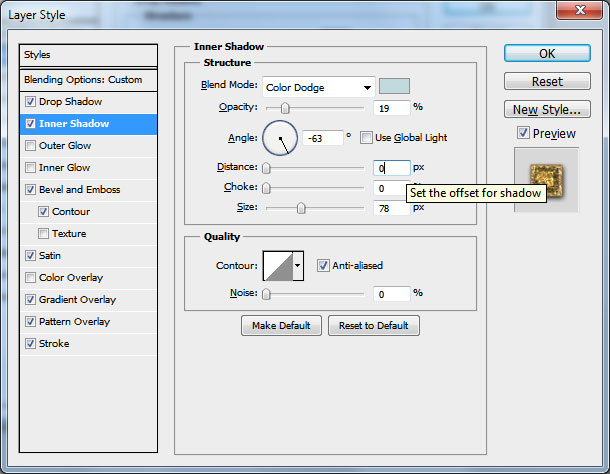
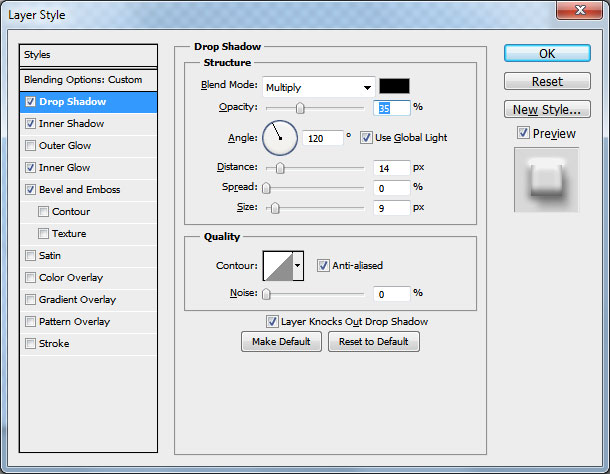
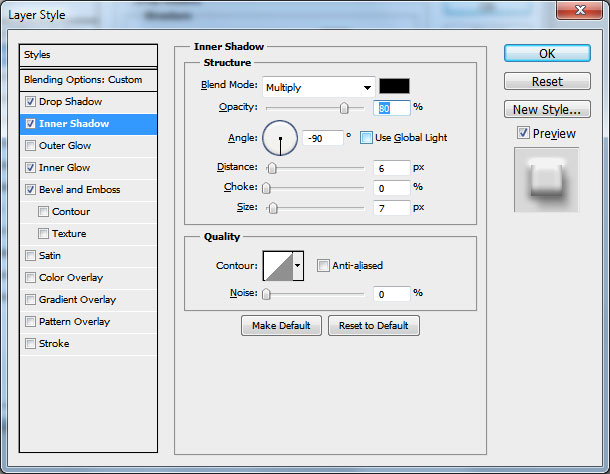
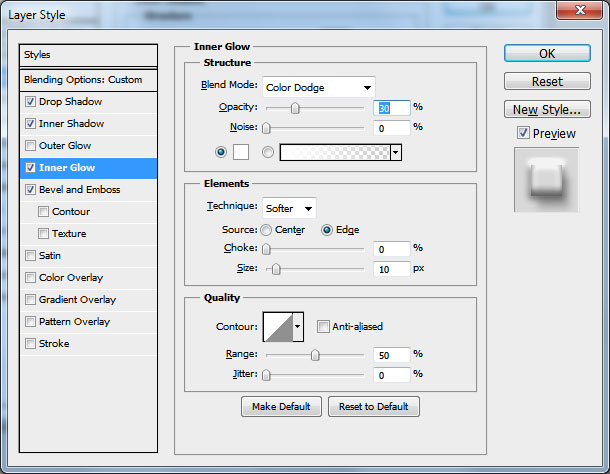
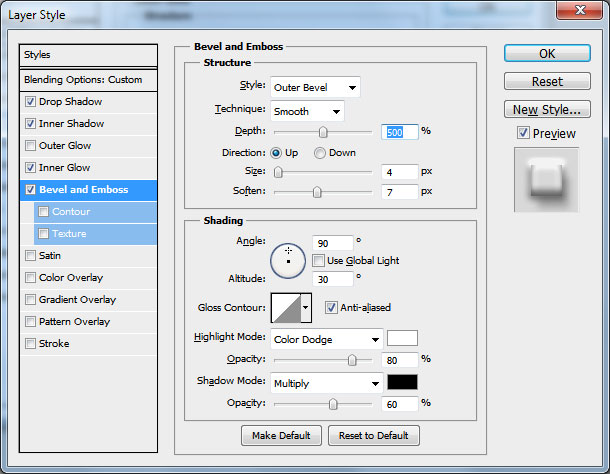
Now I will add a golden glitter style to the Text Outline 1 layer. So open the layer style window and add the following layer styles.

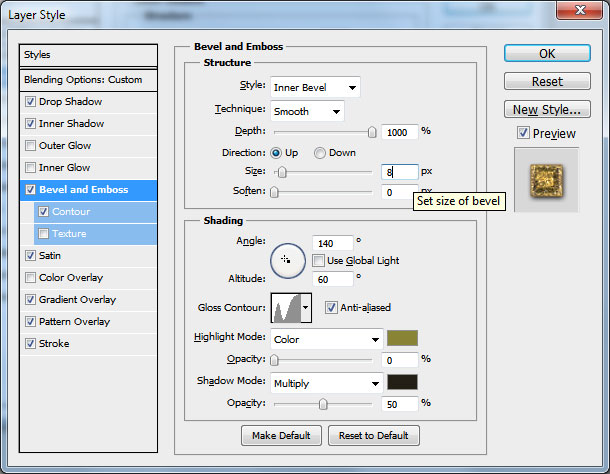

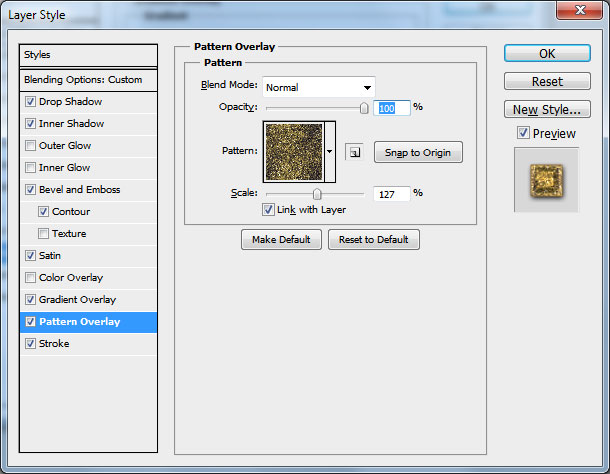
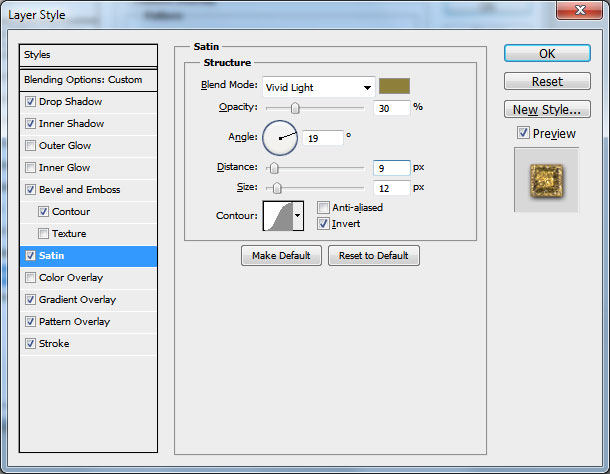
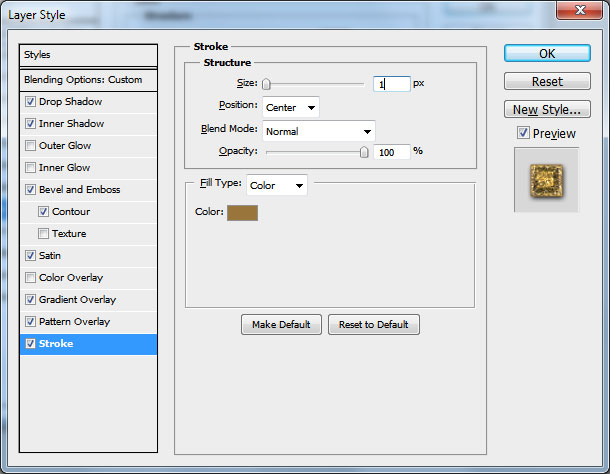
Make the Text Glitter Gold
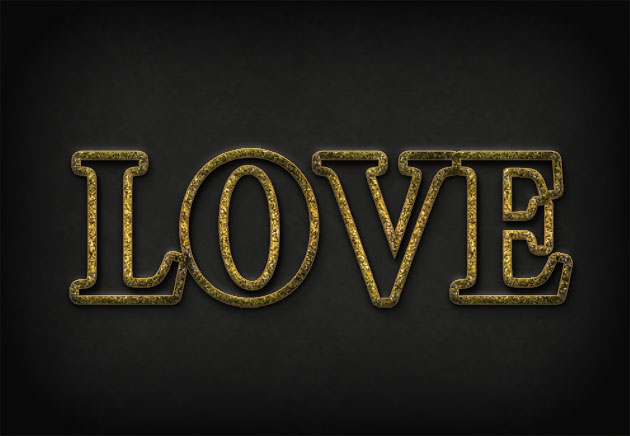
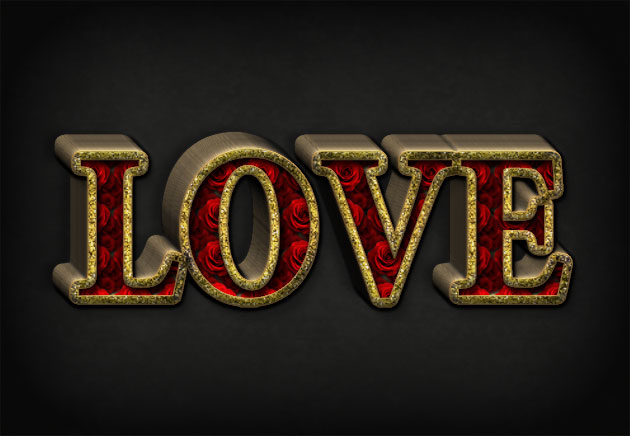
So far your love text effect should look similar to this one. It looks kind of nice as it is now. Download the ZIP file at the end of this tutorial and you will find the text style for this layer named gold-glitter. Simply load the ASL file in Photoshop and apply the gold-glitter style.

Duplicate the Text Outline 1 layer, clear layer styles and rename it Text Outline 2. Simply add these new styles tho the second outline layer. Set the Opacity of this layer to 70& and the Fill to 0%
Your text effect should look like this; if you are not sure about the settings for all the layers I will give you the ASL file with the styles that I have used; it will be much easier for you to make this tutorial. Download the ZIP file at the end of this tutorial and you will find the text style for this layer named bevel-emboss. Simply load the ASL file in Photoshop and apply the bevel-emboss style.
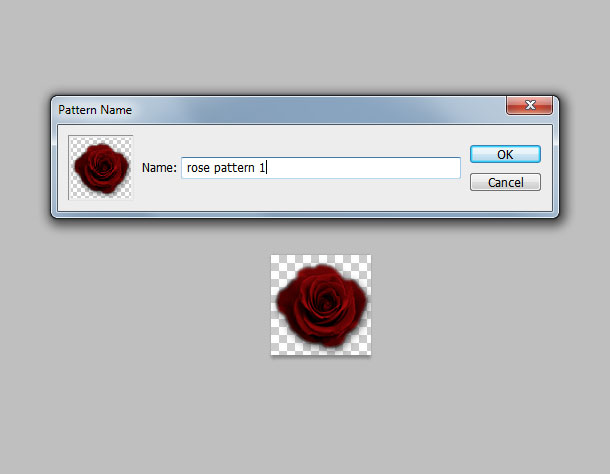
Duplicate the Original Text three times and call these layers Rose Pattern. Group these layers into a new group called Rose Pattern Layers. Open a new canvas of around 100x100px size. Copy this rose PNG into your file and resize it to fit. Add a soft Drop Shadow effect to the rose to add it a little depth. Now go to the Edit menu and choose Define Pattern.
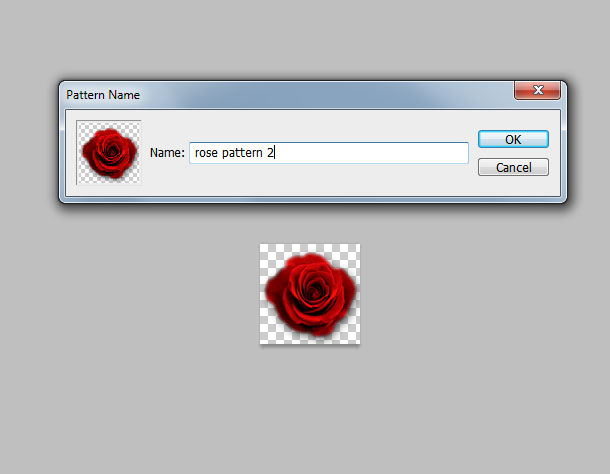
Now lighten the red rose a little using the Brightness/Contrast adjustment and again go to the Edit menu and choose Define Pattern.
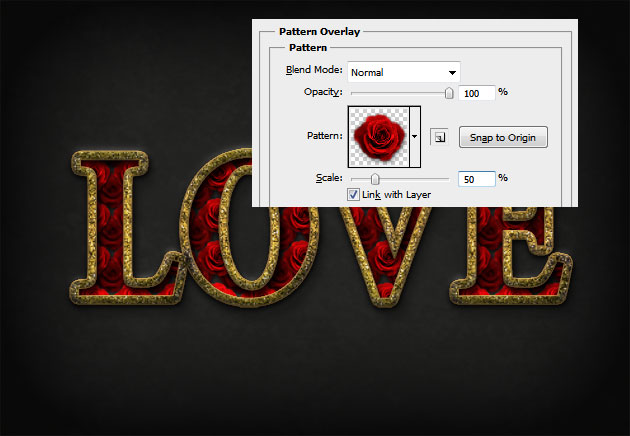
Return to the initial canvas; open the layer style of the first Rose Pattern layer and add a Pattern Overlay using the rose pattern 1 that we have just created. Set the Fill to 0%
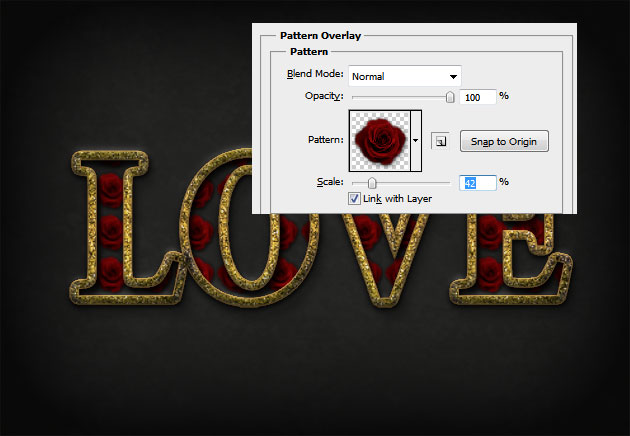
open the layer style of the second Rose Pattern layer and add a Pattern Overlay using the rose pattern 2 that we have just created. Set the Fill to 0% . VERY IMPORTANT: with the Pattern Overlay layer style open simply drag the pattern to cover the entire text area with roses. You can drag the pattern up/down, right/left as you wish.
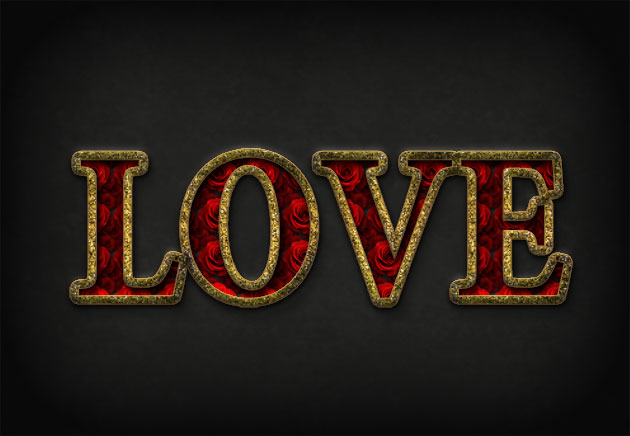
Use the third Rose Pattern layer and add a Pattern Overlay using the rose pattern 1 with asmaller size and drag the pattern to fill the remaining gaps. Download the ZIP file at the end of this tutorial and you will find the rose pattern for these layers. Simply load the PAT file in Photoshop and apply the rose patterns. Your rose text effect should look like this.
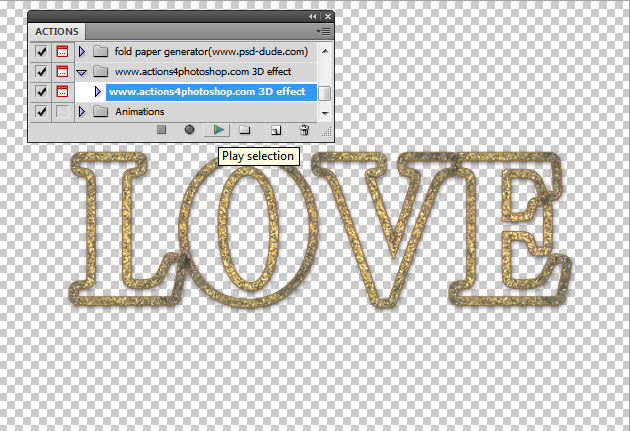
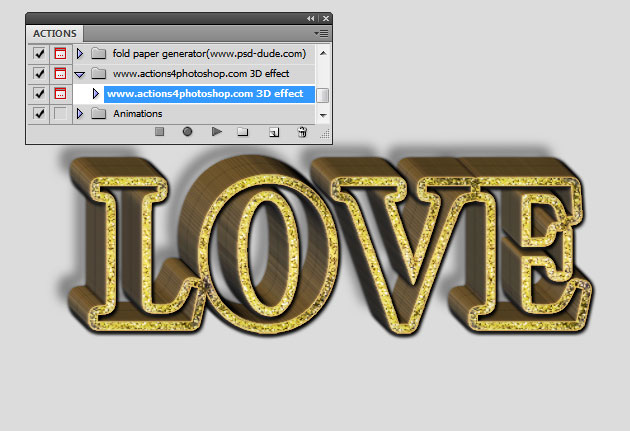
Duplicate the Text Outline 1 layer in a NEW CANVAS and use this 3D action to create a 3D text effect in Photoshop. Simply load the action and click play.
After the action is ended simply select all the groups and layers(except the background layer) and group them in the 3D text group. Copy this gropu into our initial canvas.
Place the 3D text group behind the Rose Pattern group of layers.
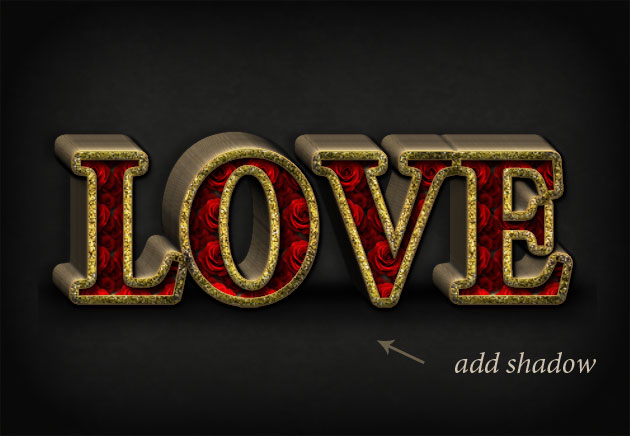
I a new layer use a soft round brush and color black to paint a shadow below the text effect to look like it is standing on a hard surface.
Add Finishing Touches
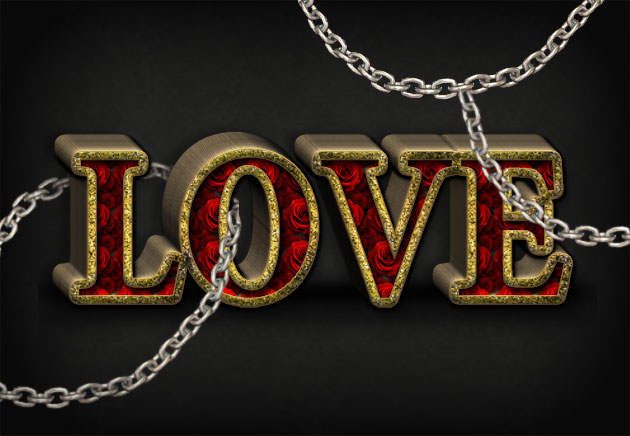
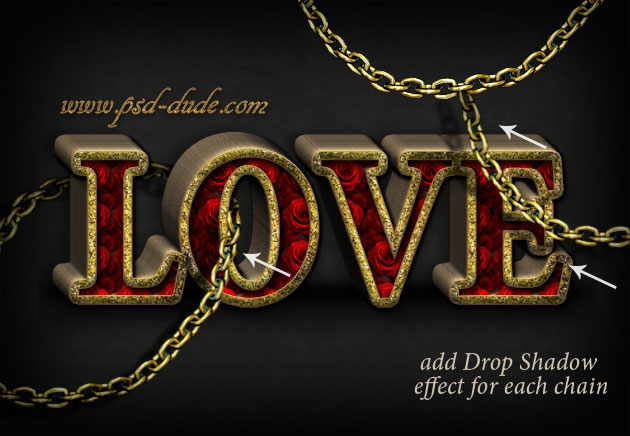
I will now use this chain PNG stock image, duplicate and add it like show in the image. You will have to rotate the image, resize and arrange as you wish. You can place the chain layers in behind or in front of the love text.
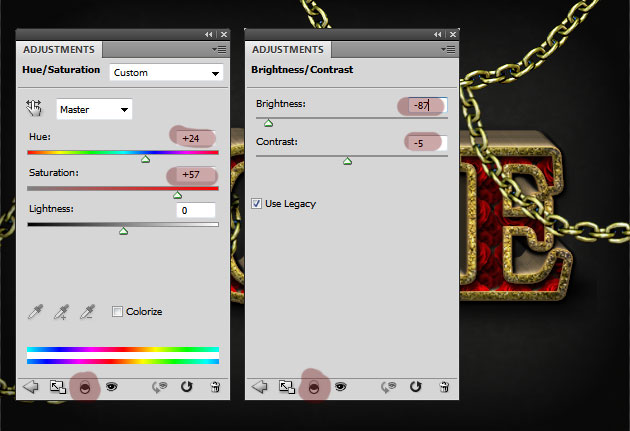
Because these are silver chains I will add adjustment layers to match the color and turn it from silver to gold. So add Hue/Saturation and Brightness/Contrast as shown in the image. Press the Clip to Layer button to add the adjustments as clipping mask for the chain layers.
Add a Drop Shadow effect for each chain; it is not the most good solution but it is the easier one. If you want to learn more about casting realistic shadow in Photoshop check out this tutorials.
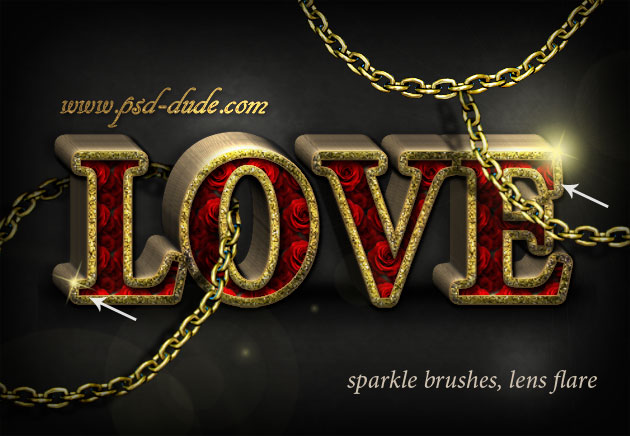
As a final touch I have added some sparkle brushes, lens flare brushes; I have used the #fff9c9 color tone for both brushes. I have also created a new layer (blend mode Overlay) and in this layer I have used a soft round brush and paint with white color over the areas that I want to lighten.
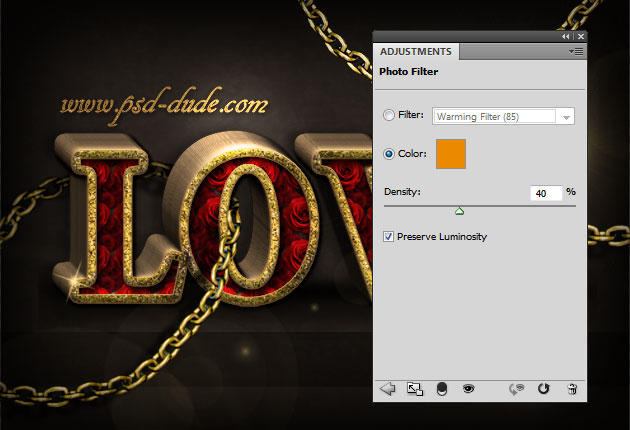
As a final touch you can add Photo Filter adjustment layer, using the color #ec8a00 as shown in the image.
You can even add some roses using the same stock image that we used to create the roses pattern; so here is the result for the love red roses text effect that we created in Photoshop. Don't forget to download the ZIP file with the styles, patterns and brushes used.
21 comment(s) for "Love Roses Text in Photoshop for Valentine Day"
Go to Actions Panel > Load Actions > and choose the actions4photoshop(3D-generator-ver1).atn file reply
Many thanks :) reply
Su reply
My realisation with comments:
http://www.chez-mireilled.com/article-texte-saint-valentin-roses-rouges-115105872.html
The Gradient Overlay colors are (black, #d5a592, black)
You can download the styles and patterns used in this tutorial from here:
https://www.psd-dude.com/tutorials/download/zip.ashx?f=ASL-PAT-files.zip