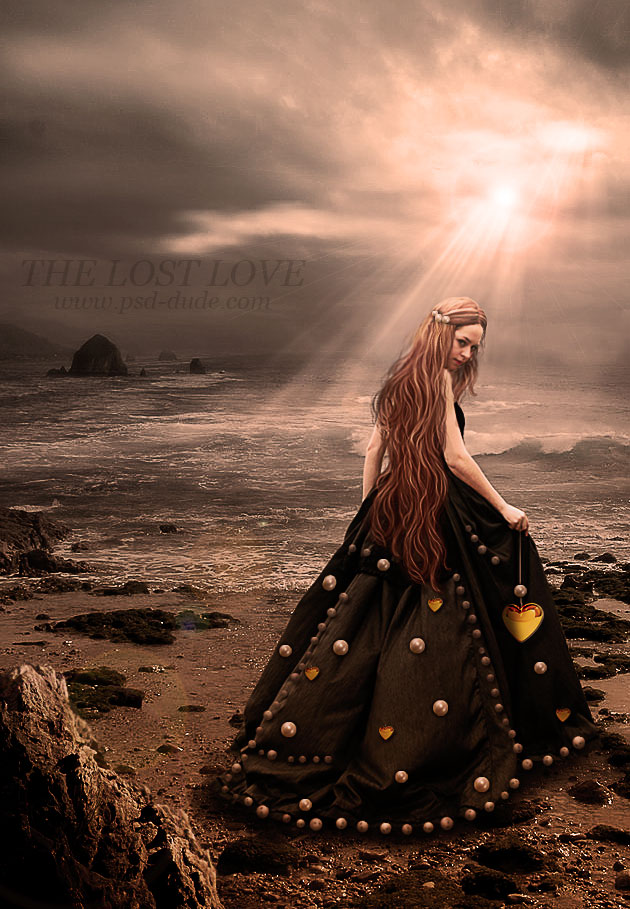
Learn how to create a romantic Lost Love Photoshop manipulation just in time for the upcoming Valentine's day. We'll create a beautiful water landscape that you can use as background for other photo manipulations as well.
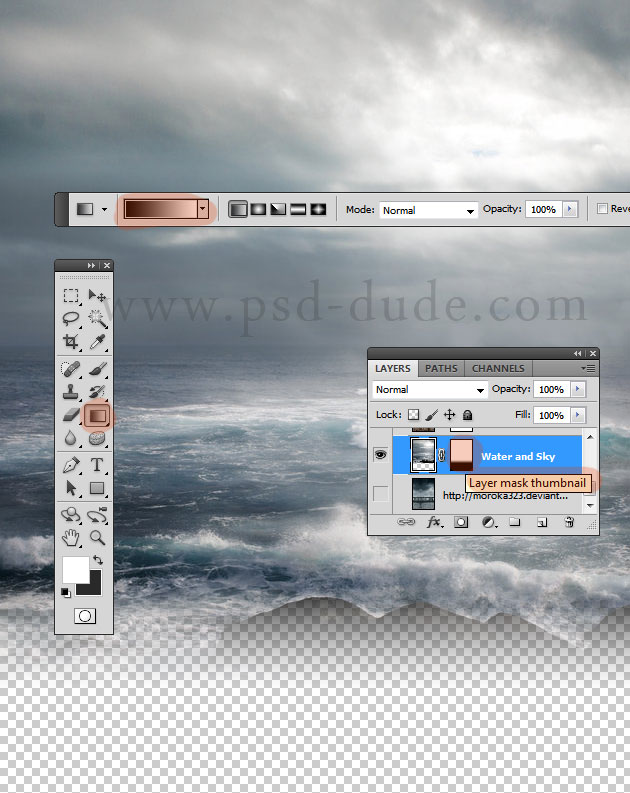
We'll start by adding this amazing storm at sea premade background. Call this layer Water and Sky layer. Add a layer maskto this layer and use the Gradient Tool to mask the lower part of the image.
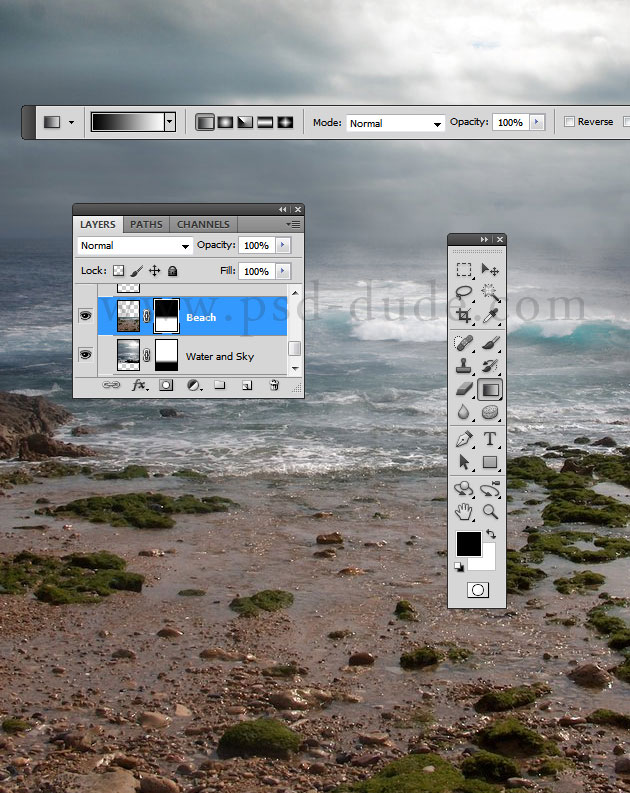
Now in a new layer add this beach stock image and add a layer mask to this layer like in the previous step; try to blend the two images as good as possible. Remember that the layer mask is a noninvasive methos and you can at any time adjust the mask. Simply use the Brush Tool and paint in the layer mask; use white color to reveal and black color to hide some areas. Call this layer Beach layer.
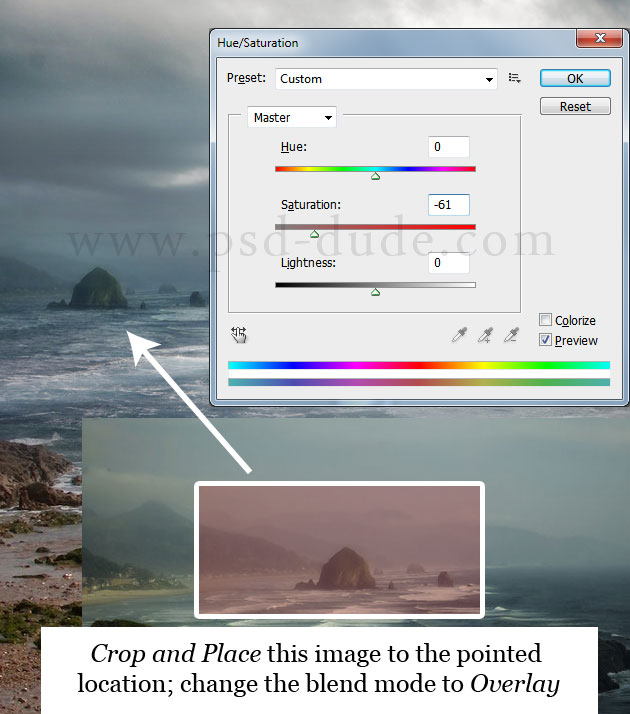
Take this beach image and place the marked area like shown in the image. Simply crop that area and place it on the water surface. Set the blend mode of this layer to Overlay and also lower the saturation of the image a little bit. Use a soft round brush and use the Eraser Tool to blend the edges of this cropped image with the rest.
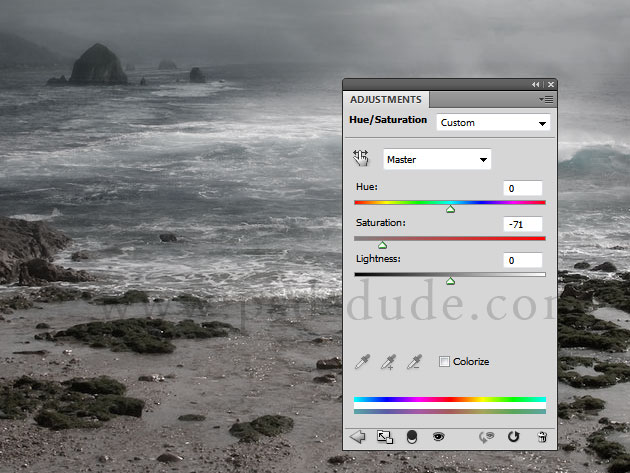
Add a Hue/Saturation adjustment layer above all the other layers and lower the saturation level.
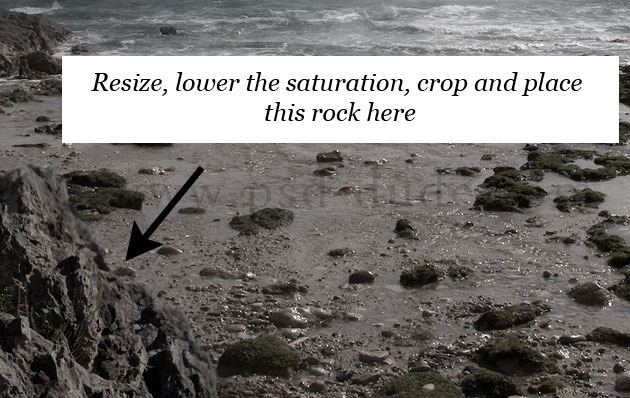
I will now crop and resize an area from this cliff rock image and place it in the left corner like shown in the image. Again you will have to lower the satutration level.
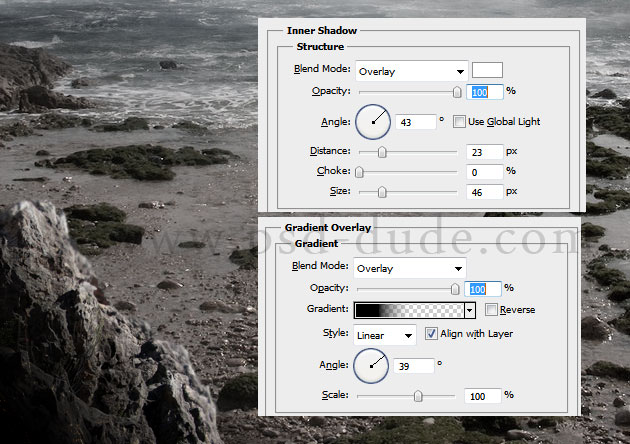
Add an Inner Shadow and a Gradient Overlay to the Rock Layer according to the light direction.
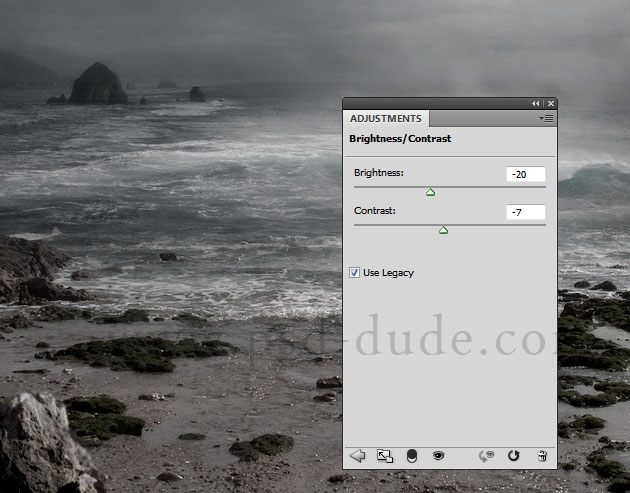
Add a Brightness/Contrast adjustment layer above all the other layers with these settings.
Open this girl stock image, crop the girl from the left, resize it and place it like in the image. See here how to cutout images or remove background in Photoshop using the Selection Tool. Or you can use the Pen Tool to trace the contour of the girl, make a selection and crop it.
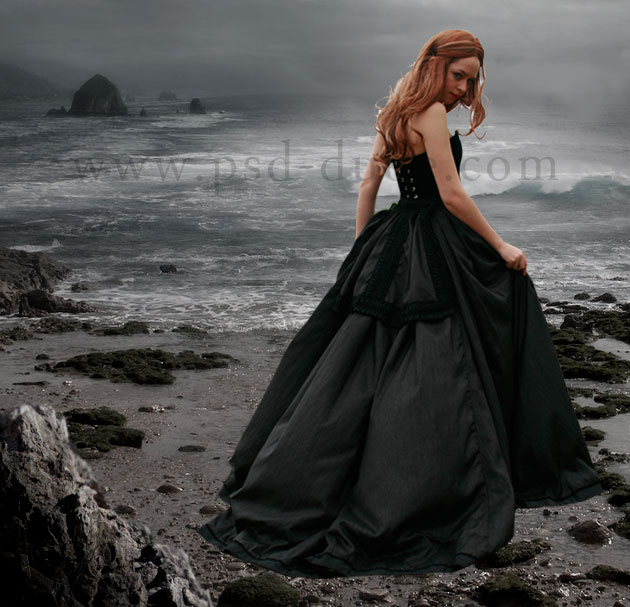
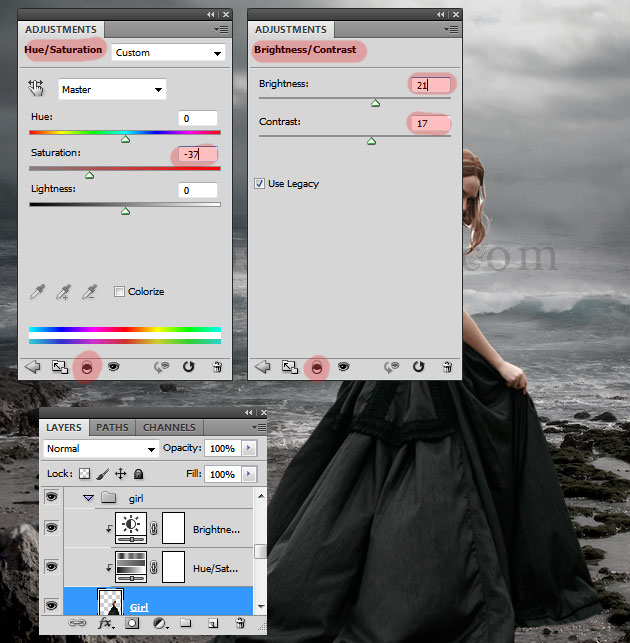
Add two adjustment layers only for the Girl Layer. Add a Hue/Saturation and a Brightness/Contrast as shown.
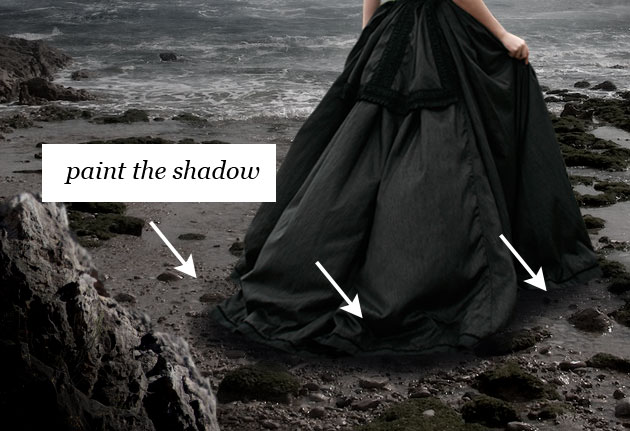
Now add a new layer behind the Girl Layer and use a black soft round brush and simply paint a shadow using the Brush Tool. You can read more about how to cast shadow in Photoshop
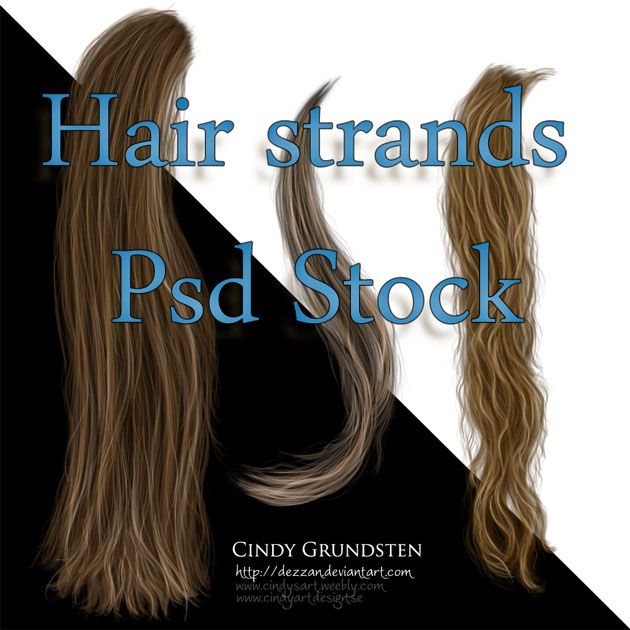
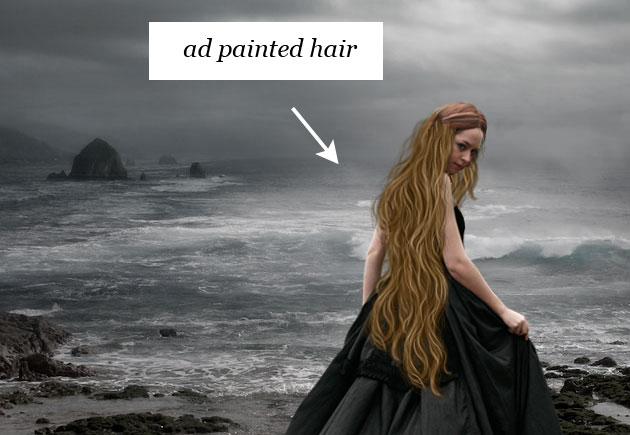
As you can see around the hair there are leftovers from the previous background; don't worry about that we will fix it later on. Usually the hair is very difficult to cutout so in photo manipulation there are two options: to use a hair stock image or two paint the hair. I will use the first method which is the easier one, especially if you are not that good at digital painting. So download this great painted hair PSD
Use the Eraser Tool to remove the hair from the original girl image; we'll reploace it with new one.
Open the PSD file and copy the Hair 1 layer into our photo manipulation; resize it to fit and place the hair strands like shown in the image. Duplicate the hair layer a couple of times, rotate, erase to create a nice hair volume. Use the Eraser Tool and the Warp Tool to give the desired shape.
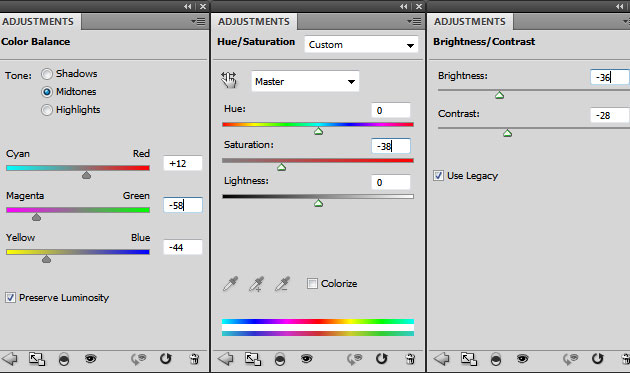
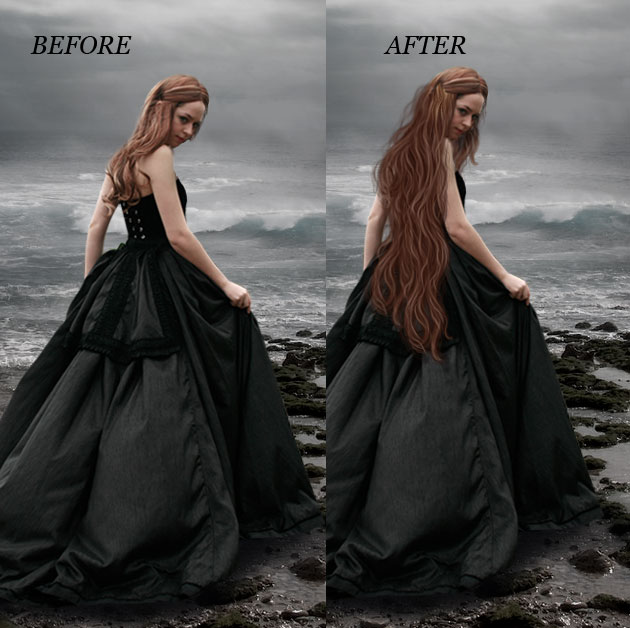
Next we have to adjust the color of the hairs, So merge all the hair layers and add the following adjustments as clipping masks for the merged Hair Layer.
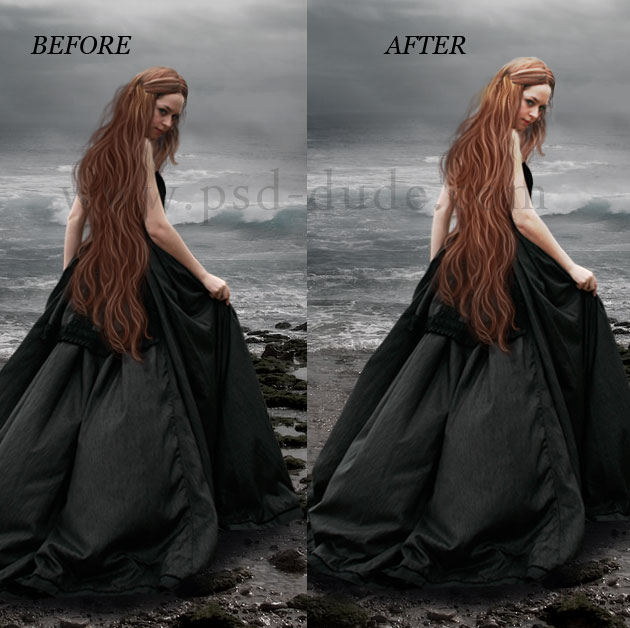
Use the Dodge Tool and the Burn Tool to add shadow and lights in certain areas. Your image should now look like this:
In a new layer use a soft round brush and paint over the Girl Layer using different opacity levels to lighten the girl. Change the blend mode to Overlay
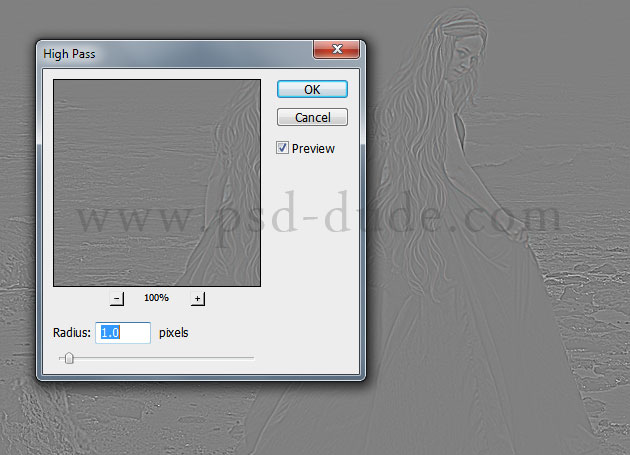
Create a new layer above all the other layers. Go to Edit>Apply Image. Now go to Filter>Other and choose High Pass. This will actually sharpen the image a little bit. Set the blend mode of this layer to Overlay
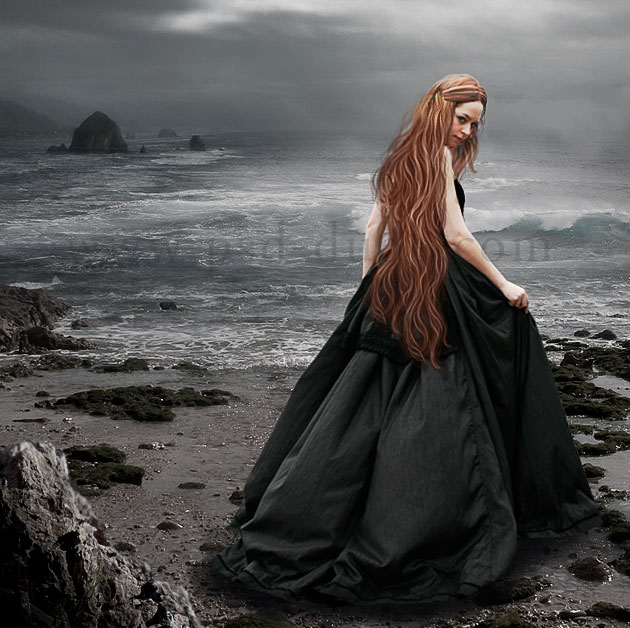
I will now use this beautiful Golden Heart and place it on the girl's dress; add a simple wire and also add a golden heart hanging in the girl's hand like shown in the image.
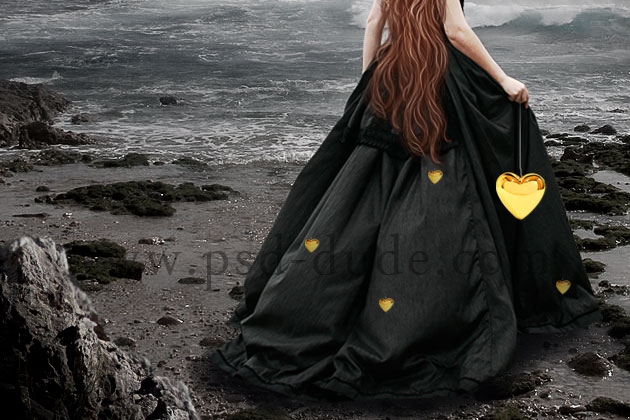
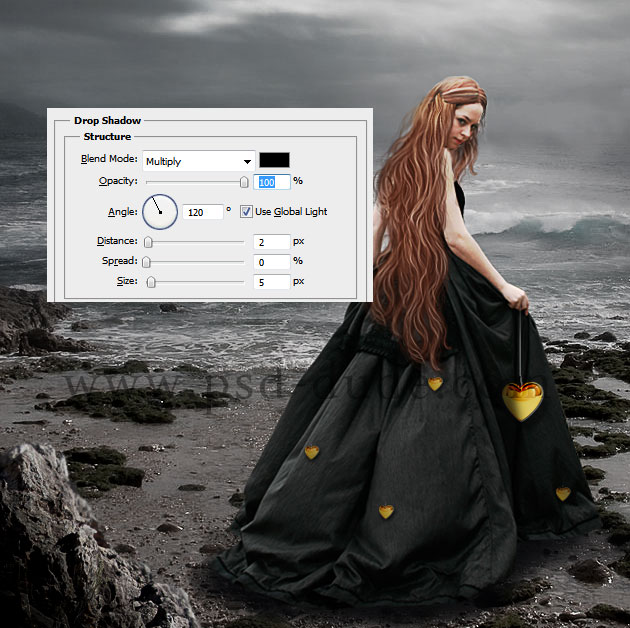
Use the Burn Tool to darken some areas and also add a Drop Shadow effect for each heart shape; put all the little heart shapes in a layer and the big heart in a separate layer. That way you can adjust the shadows and effects more accurate.
Copy this pearls image in a new layer and use the Ellipse Tool to extract one of these pearls. Use the Clone Stamp Tool to multiply the pearls in different parts of the dress.
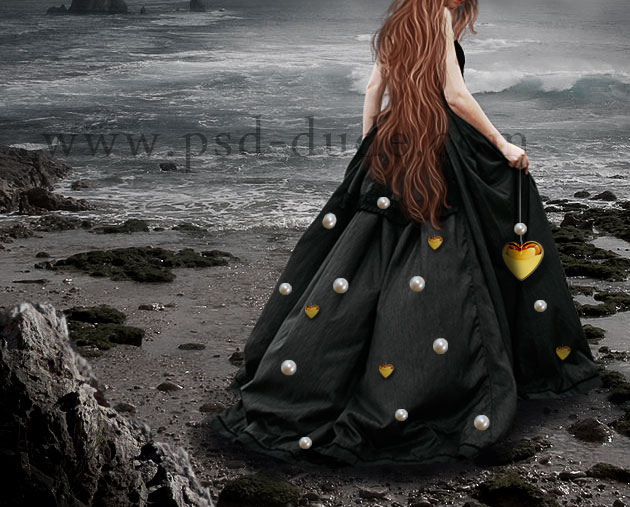
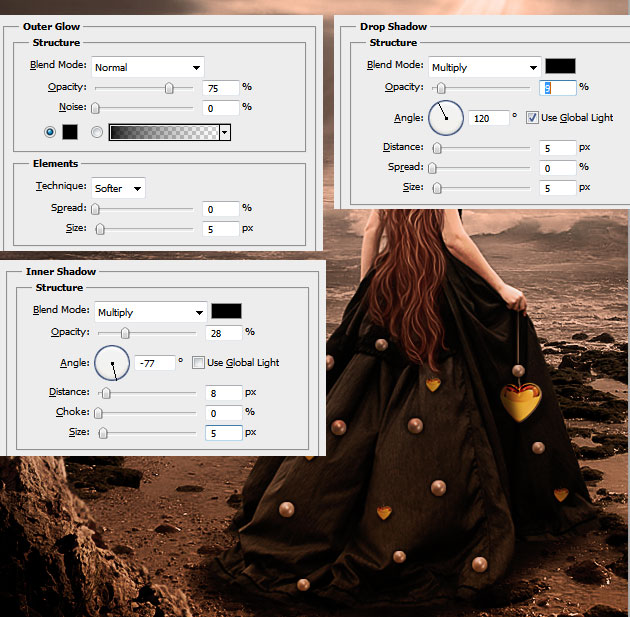
Open the layer style window and add a Drop Shadow, Outer Glow and Inner Shadow effects using black as color. That way the pearls look like they are glued or stitched on the dress.
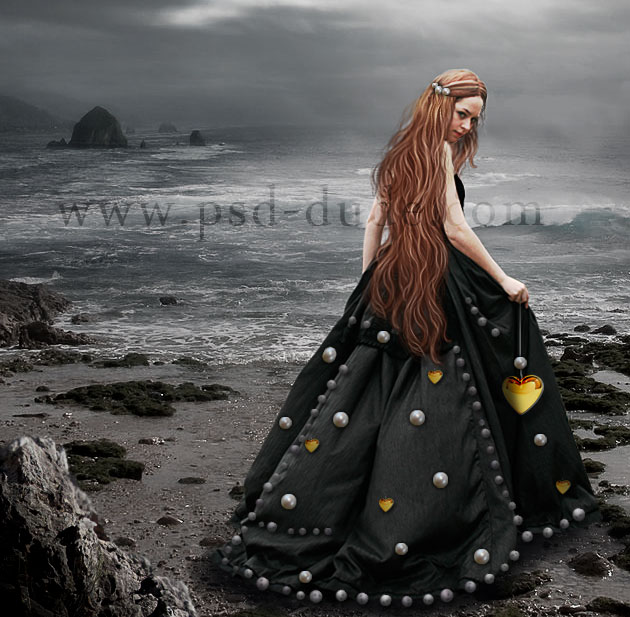
In a similar way I have added some pearls in the girl hair like in the image. Also I have made a custom made pearl brush that I have created using the pearl image. Learn how to create your own brushes with scatter effects by reading this Photoshop Brush Tutorials Guide for Beginners
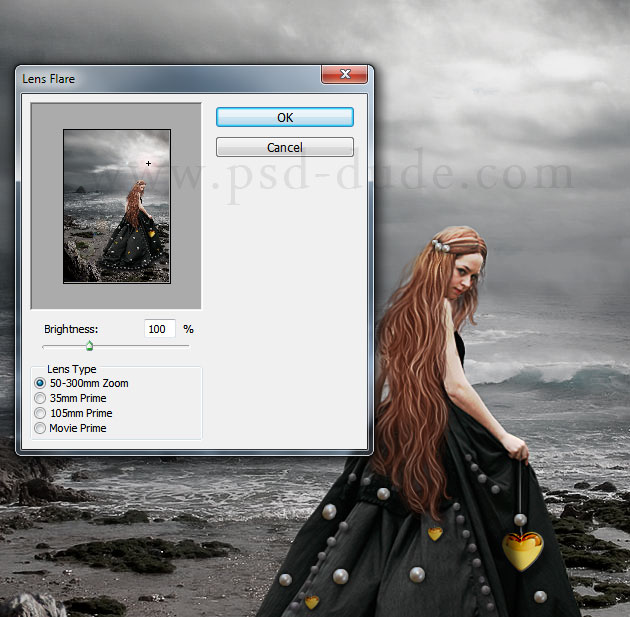
Create a new layer above all the other layers. Go to Edit>Apply Image. Now go to Filter>Render and choose Lens Flare; drag and move the lens flare where you want by using the preview screen.
In a new layer add some sunlight effect by using these rays of light brushes. Use the Brush Tool, color white, different opacity levels and the size depending on your canvas. To rotate the brush you have to open the brush option pannel and simply modify the brush angle.
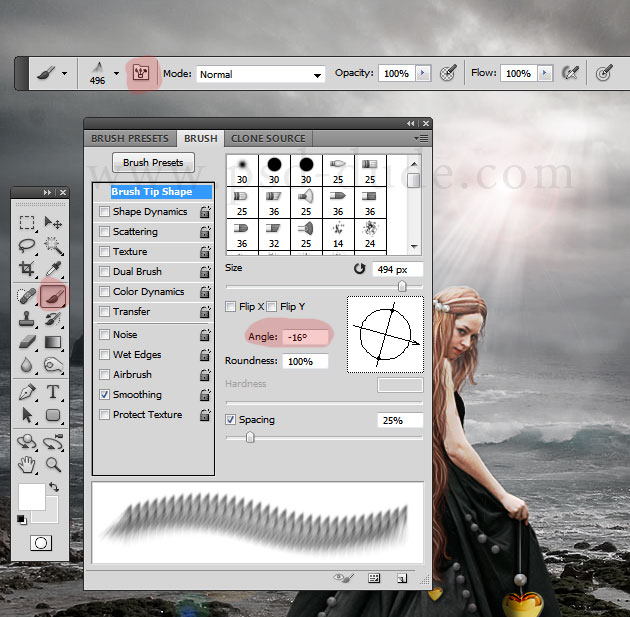
Add sunlight beam in two layers and set the blend mode of each layer to Overlay.
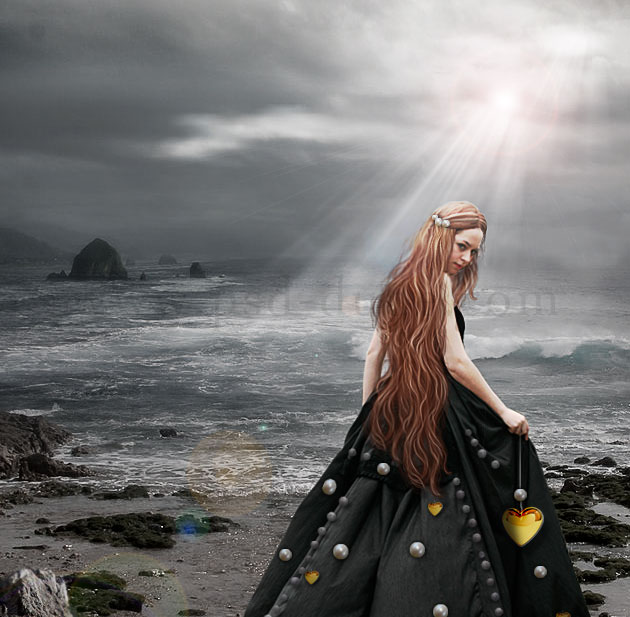
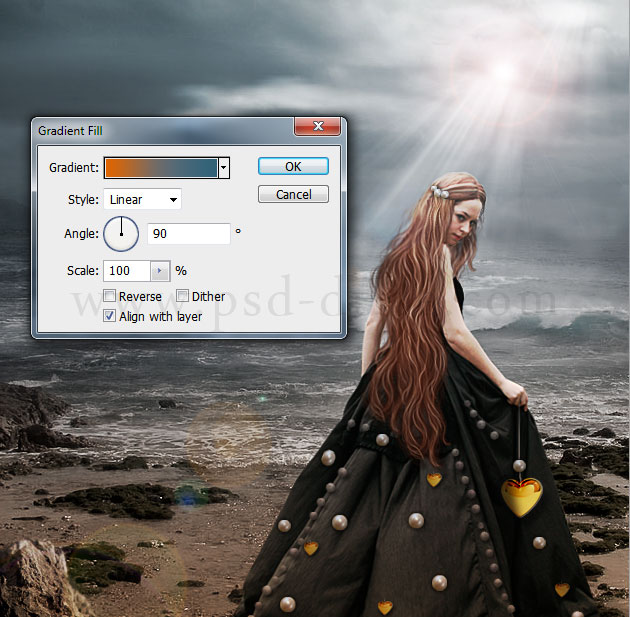
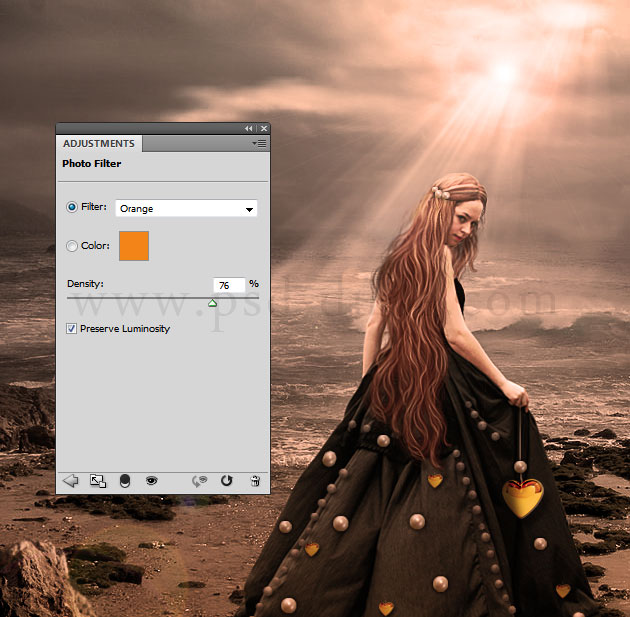
For the final touches I will add three adjustment layers: Gradient Fill, Photo Filter and Brightness/Contrast. The first two adjustments are added for adding color tones to the image; you can use your own combination.
The colors used for the gradient fill map are #e16500, #6b6b6b and #2e6278.
The color used is #f28517.
For this adjustment you can add paint inside the layer mask to have more control over the areas that you want to add more contrast or not.
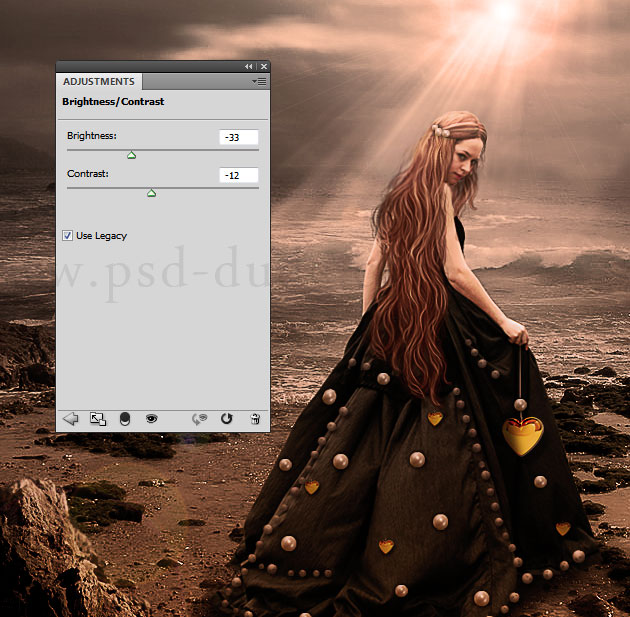
So here is the final result for the lost love photo manipulation just in time for the upcoming Valentine's day. I hope you enjoyed this Photoshop love theme tutorial and that you decide to practice it. Be creative and fave fun!

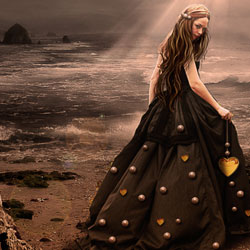
14 comment(s) for "Lost Love Photoshop Manipulation Tutorial"
thank you for practicing this tutorial. I like your result and I hope you had fun and learned while doing it.
I really appreciate when people find my tutorials interesting enough to practice them.
keep up the good work everybody reply
It was fun and i learnd a lot.
it looks quite good, I mean if this is your first try you are really talented :) the only obvious problem that I could find is with the hair. Cropping hair in Photoshop is a big challenge and you will have to use additional hair brushes or painted hair stock images to obtain a good result! reply
My realisation:
http://www.chez-mireilled.com/article-photomontage-pour-la-saint-valentin-115072173.html reply