Realistic Water Texture Photoshop Tutorial

How To Create Water Surface Texture In Photoshop
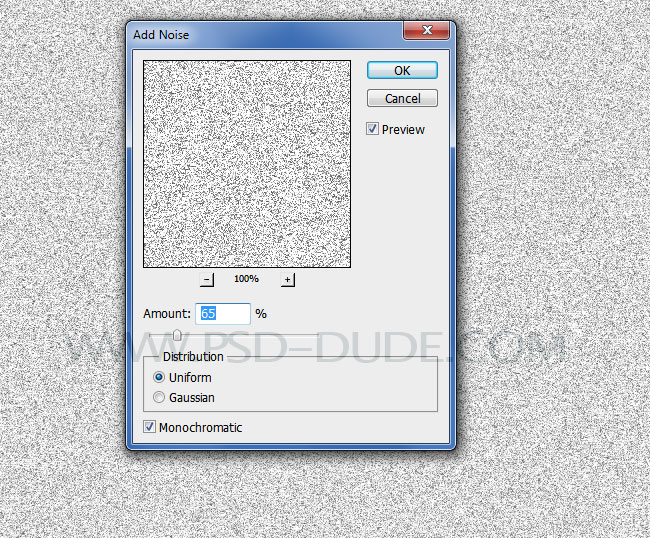
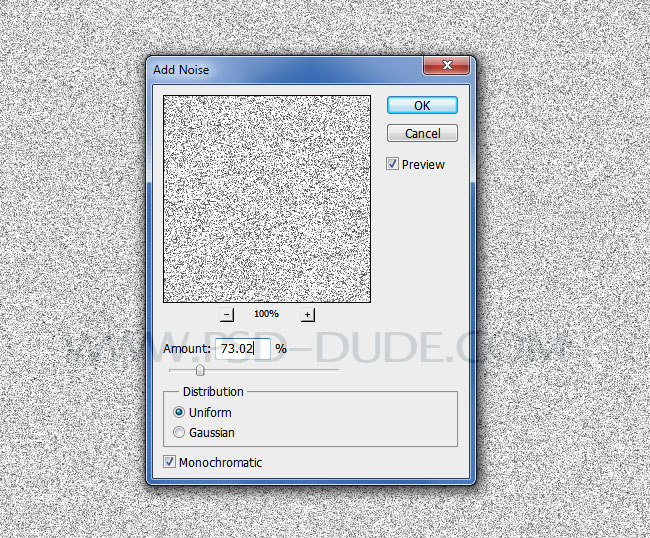
Create a new document 1500px/1000px. Name the first layer Water Surface. Fill it with color white. Make sure the Foreground Color is white and the Background Color is set to black. Convert this layer to a smart object(right click and choose Convert to smart object). Go to Filter>Noise and choose the Add Noise filter.
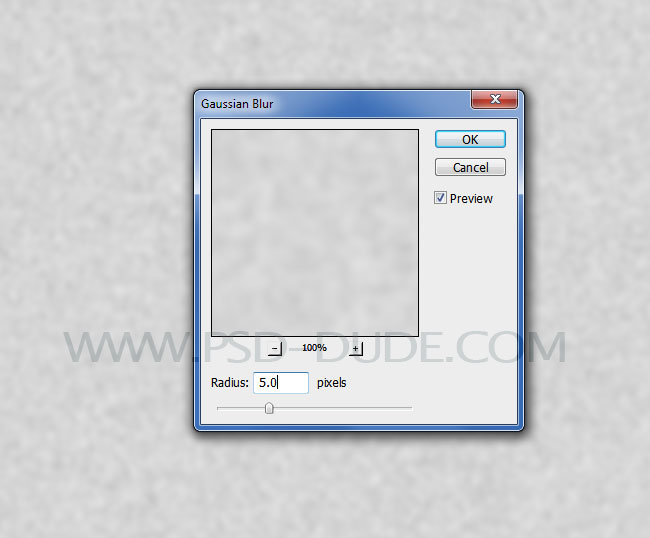
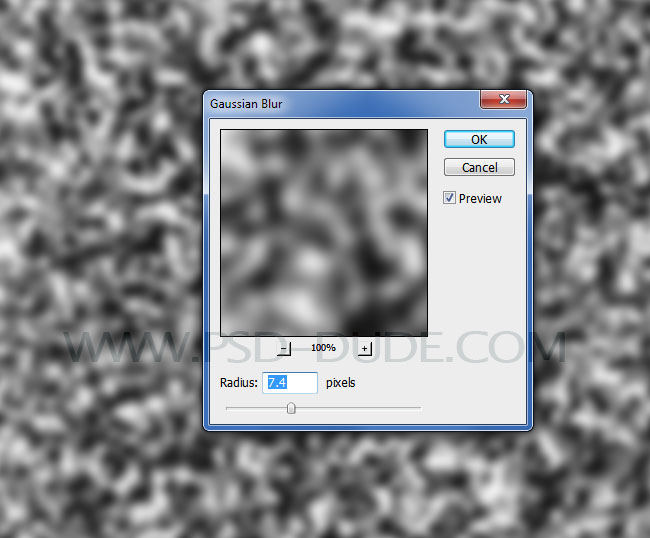
The water texture needs to have some ripples. But, the noise created too harsh details. Let's soften them up using some blur.
Go to Filter>Blur and choose the Gaussian Blur filter.
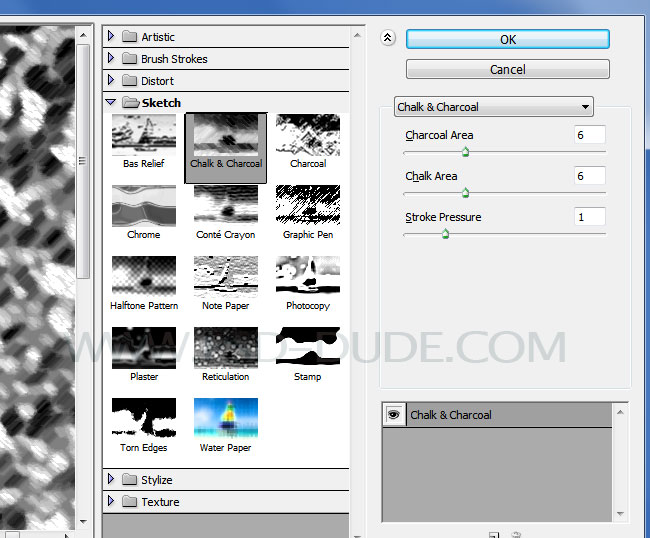
Now we need to create some variance in the water surface texture. You know, like the water waves created by the wind on the surface of the water.
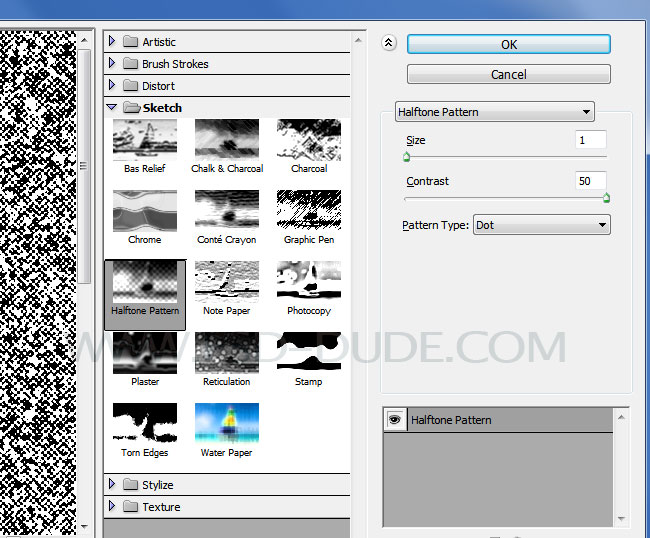
Go to the Filter>Sketch and choose the Chalk and Charcoal filter to create an abstract effect like this.
Add again a Gaussian Blur smart filter with these settings.
The Water Photoshop Texture Needs Ripples
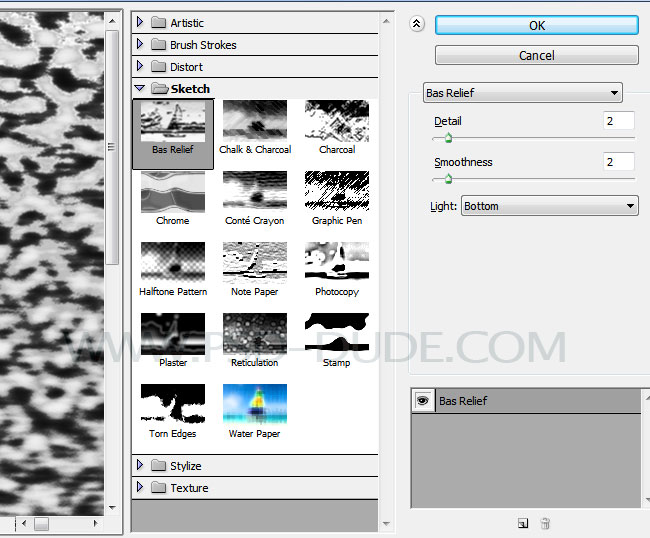
To finalize the water ripples textures in Photoshop you have to go to Filter>Sketch menu and choose Bas Relief.

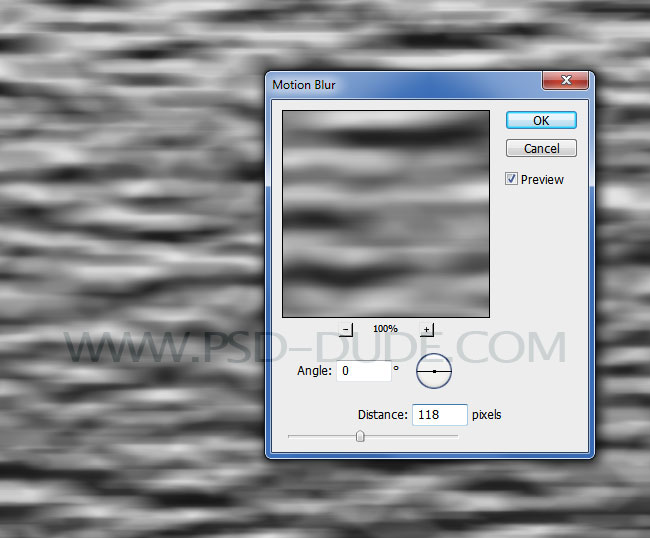
This starts to look more like realistic water texture. But, it looks like it's shown from above. We want the ripples of the water texture to be horizontally longer. So, we smudge the water ripples horizontally using some motion blur.
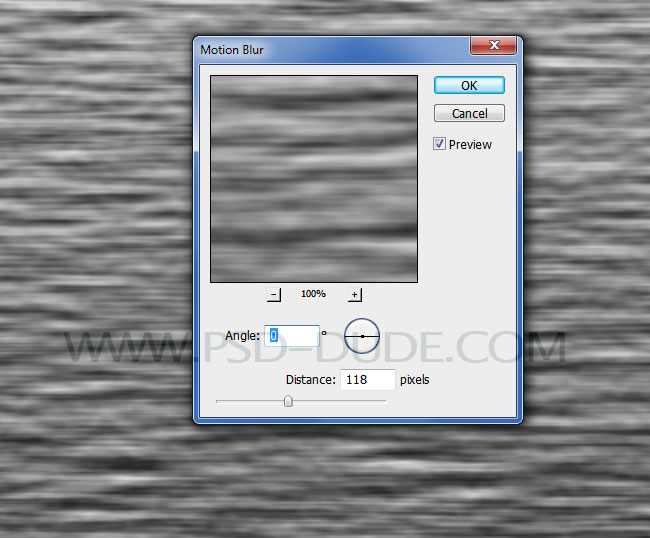
Time to add another filter effect. Go to Filter>Blur and choose the motion Blur filter.
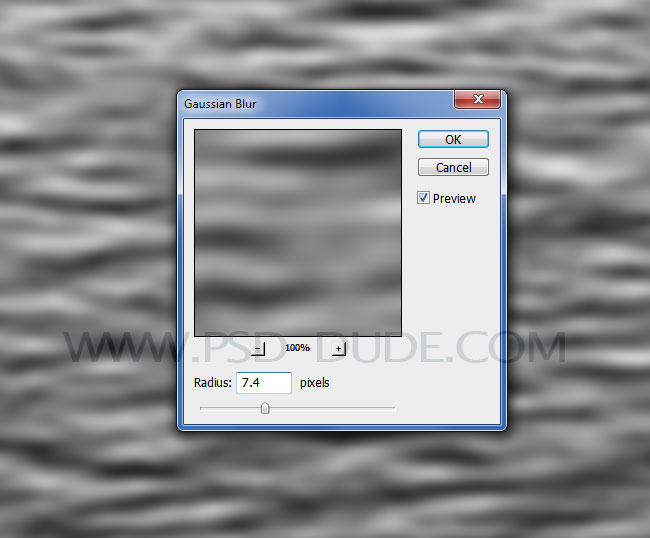
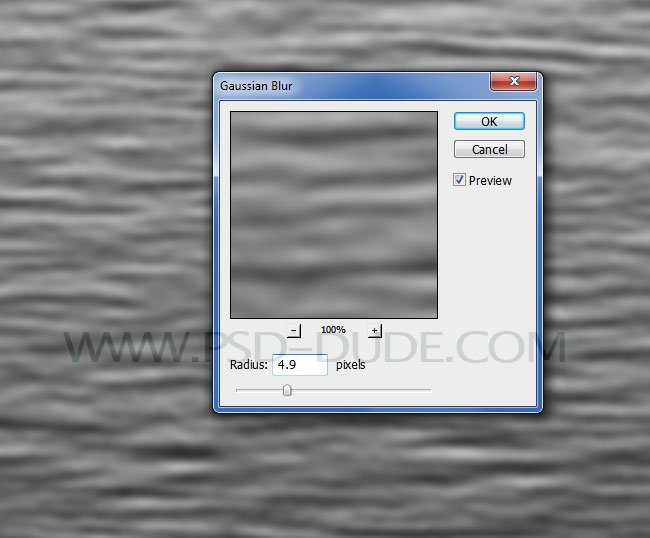
Again, the result is a bit to sharp. Add one more Gaussian Blur effect.
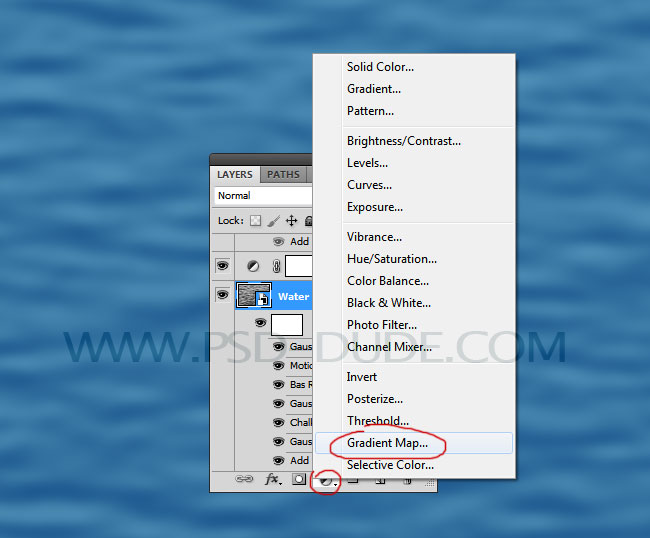
This really starts looking like an awesome water texture. But, it's black and white, so we need to add color. We will make the water texture blue by adding a Photoshop Gradient Map.
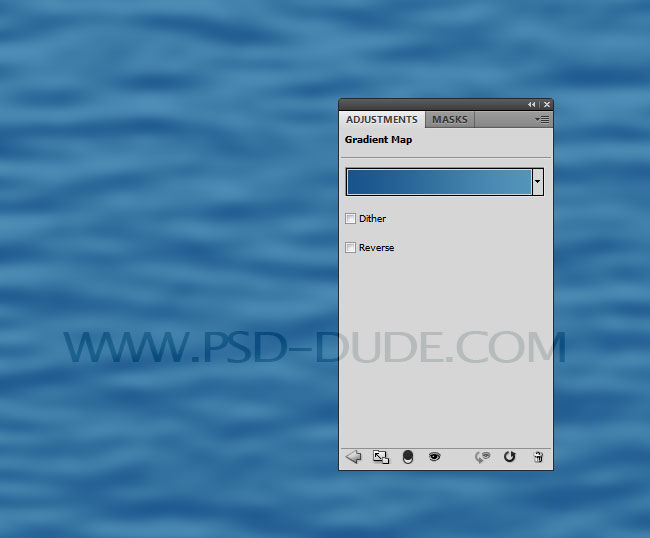
Add The Water Texture Photoshop Gradient Map
Now add a Gradient Map using the Create a new fill or adjustment layer button from the layers tab.
Here are the colors for making a blue water texture with Photoshop Gradient Map: #18548b and #5394b9
How To Make The Water Texture Realistic
Our Photoshop water texture looks good and you could really use it like this. But, if you want, you can improve it.
How do we do that?
Well, if you look in the distance over a body of water, you will see that the riples on the surface of the water have some higlights - light reflected from the sun. Let's see how we can add those hightlights to our water texture in Photoshop.
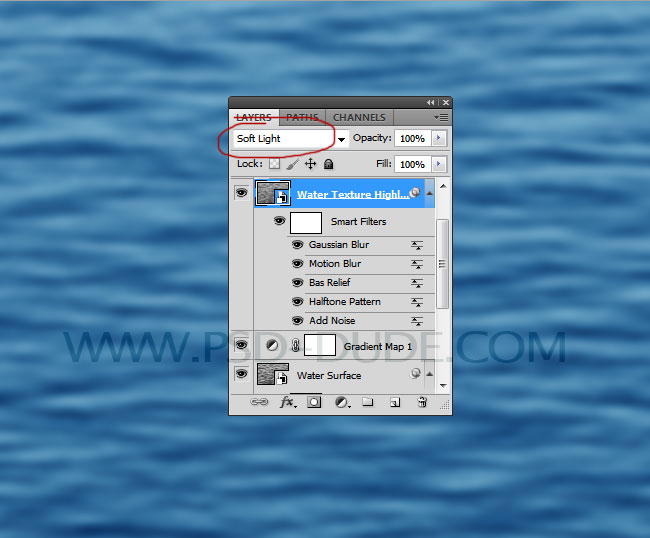
Create a new layer and call it for example Water Texture. Fill the layer with white color and convert it to smart object. We will add similar smart filters so let's do it quickly. Use the Add Noise filter.
Add Filter>Sketch>Halftone Pattern.
To create the water texture ripple highlights add Filter>Sketch>Bas Relief.
Then add Filter>Blur>Motion Blur to soften those water ripple highlights and reflections.
Add Filter>Blur>Gaussian Blur to make the ripples in the water longer on the horizontal.
Set the blend mode of the Water Texture layer to Soft Light as this will accentuate the water wave highlights and reflections.
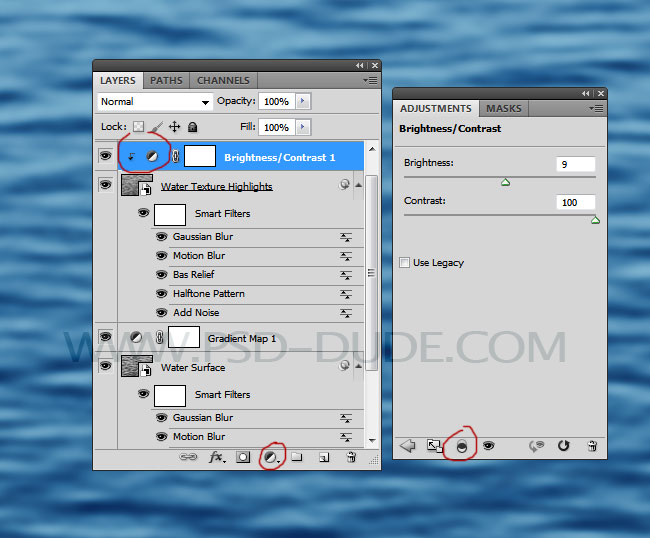
Add a Brightness/Contrast adjustment layer just for the Water Texture layer using a clipping mask. Right click on the adjustment and choose Create Clipping Mask.
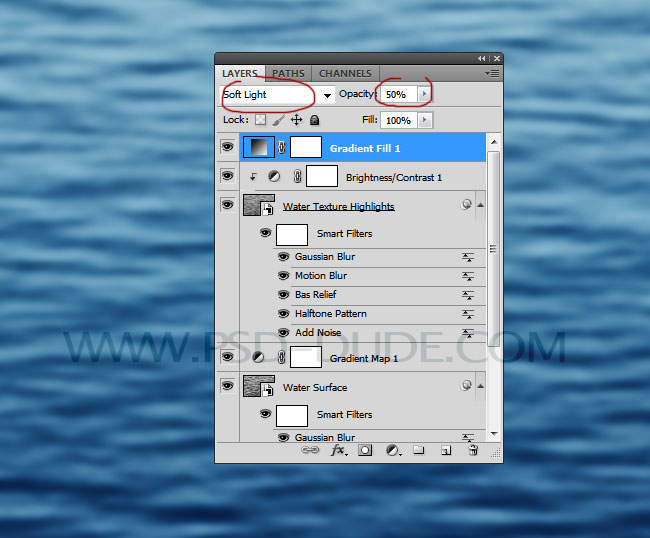
Because we made the water texture using a blue gradient map the result has a cold color. We can warm up a bit the water texture color by adding a dark to yellow(ish) Gradient Fill adjustment with these color tones: #070605 and #fbf4cd.
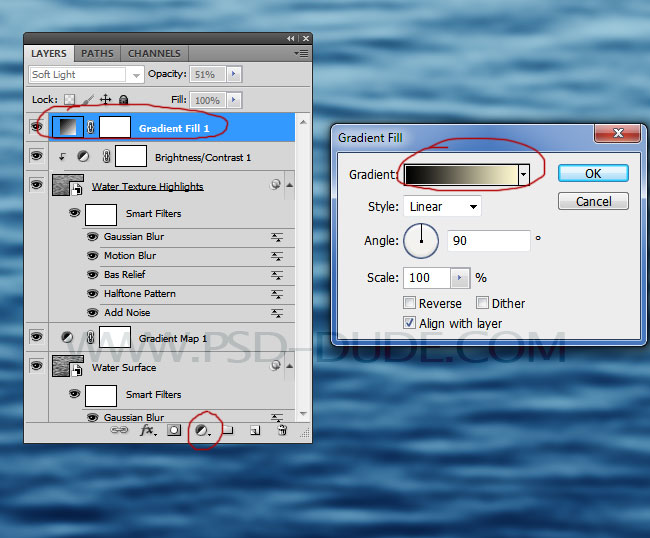
Set the blend mode of this gradient to Soft Light, opacity 50%.
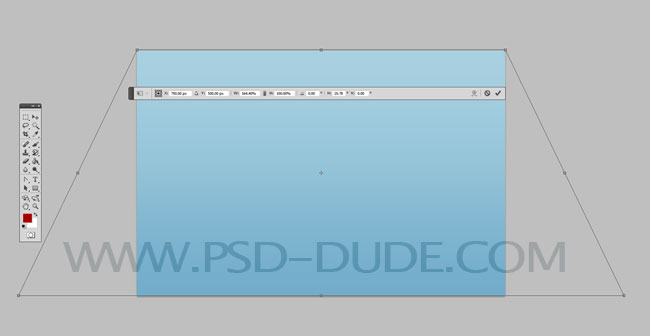
Change The Water Texture With Photoshop Perspective
Let's adjust the perspective for our water texture in Photoshop. For the final perspective touches, select the Water Surface layer and the Water Texture layer and go to Edit>Transform>Perspective.
So, here is the final result for our realistic water Photoshop texture made from scratch. Hope you enjoyed reading our new tutorial. Check out our huge collection of already made water textures for free.
2 comment(s) for "Create Water Texture in Photoshop"
it was so useful :) reply