
Photoshop Surrealism
In this surreal portrait Photoshop tutorial, I will show you how to use the Kaleidoscope Photoshop action to create an abstract portrait. You don't need advanced photo editing skills to make awesome surreal portraits like these!
This kaleidoscope generator is very easy to use, even by Photoshop beginners. Surrealism portrait creation is a very useful technique for making posters, wall art, movie posters or even viral images for your Instagram.
Surreal Portrait Video Tutorial
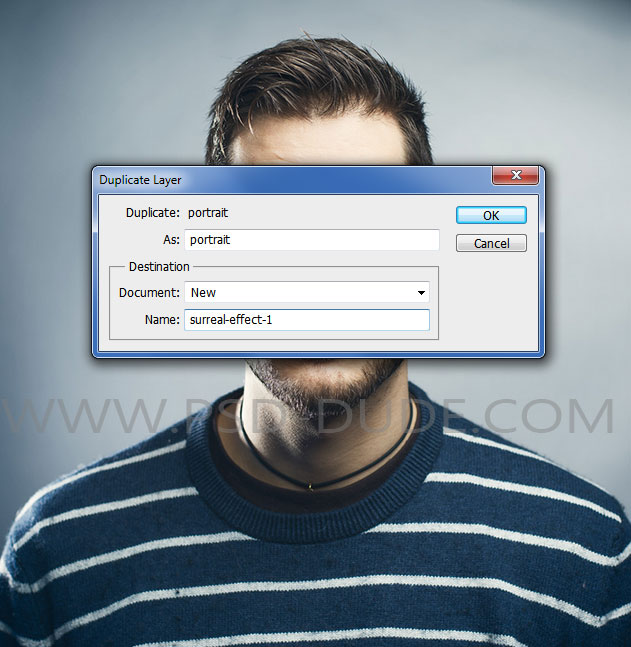
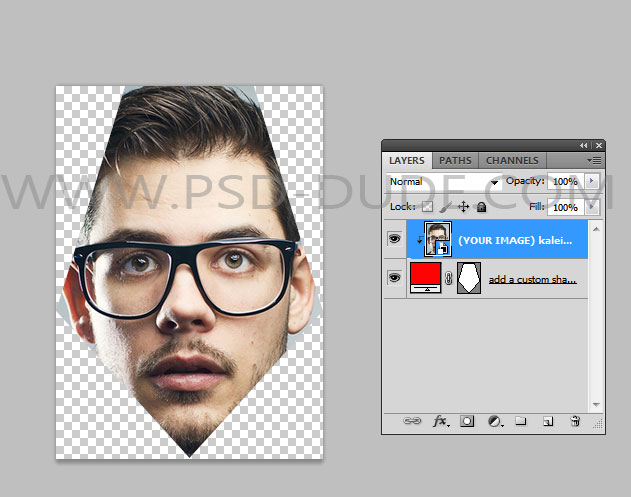
Open a new PSD file called "surreal-portrait.psd". Copy this portrait into your file (this portrait image is no longer available; use your own image or other portrait). Call this layer Portrait.

Right click on the Portrait layer and choose Duplicate Layer in a new PSD file called "surreal-effect-1".
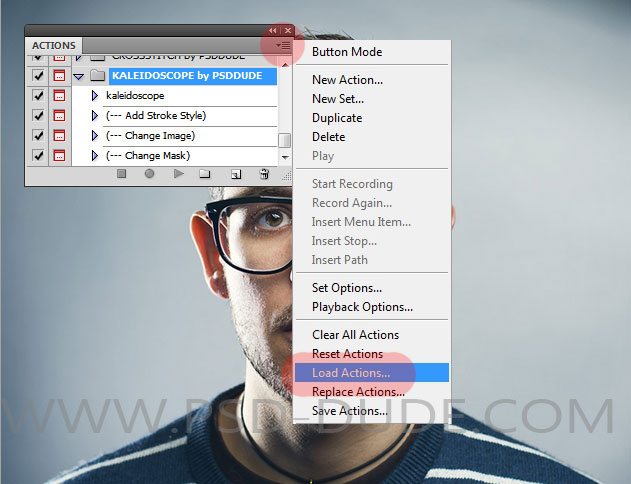
For this tutorial I will use this Kaleidoscope Abstract Effect Photoshop Action from the GR market.
inside the pack that you download you have an ATN file and a CSH file that you have to install. First you have to load the action in to your Photoshop actions tab. So open the actions tab by going to Window>Actions menu. Or you can simply press ALT+F9. And simply load the "KALEIDOSCOPE-by-PSDDUDE.atn" action file.
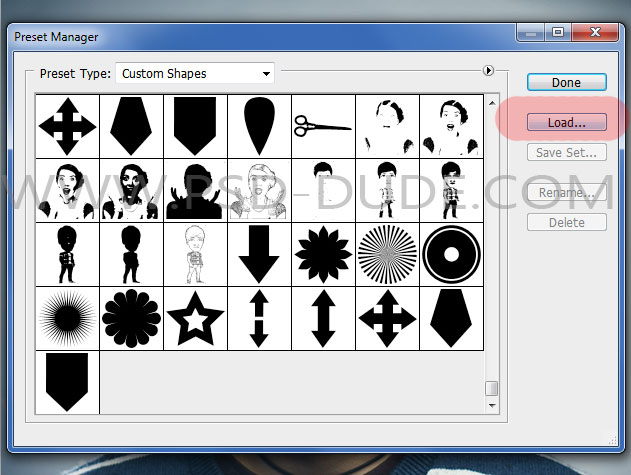
In the same pack you have an CSH file that contains custom shapes. In Photoshop go to Edit>Preset Manager, change the Preset Type by choosing Custom Shapes from the drop-down list. Click the Load button and choose the "abstract-shapes.csh" file.
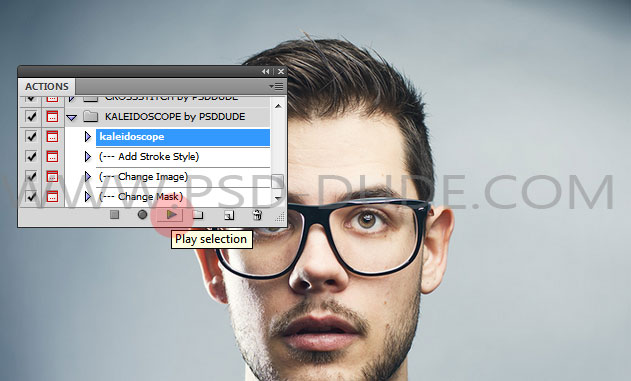
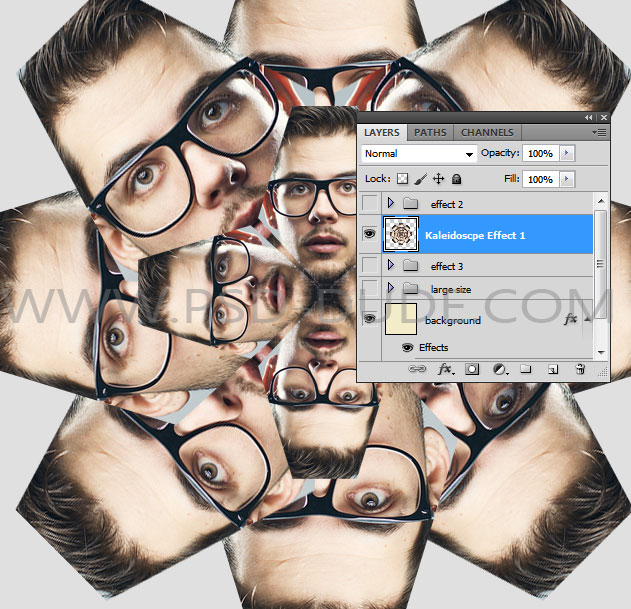
Let's return to our PSD file called "surreal-effect-1". Pick the "Kaleidoscope 1" action and click Play selection button.
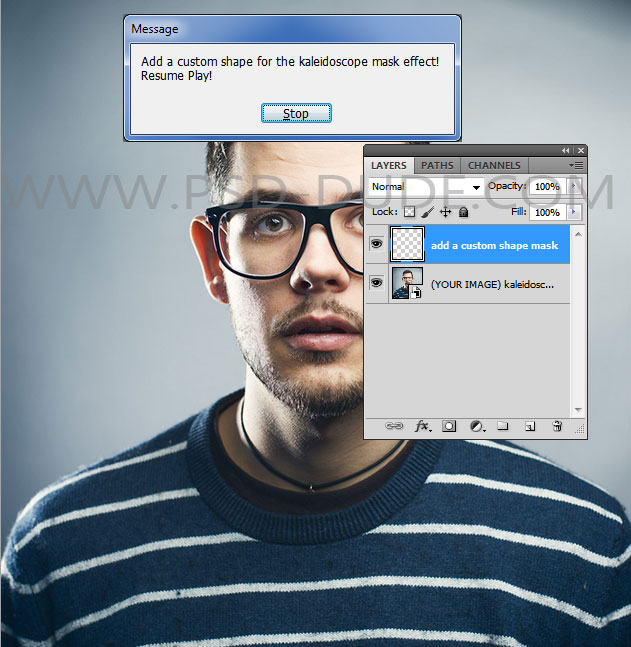
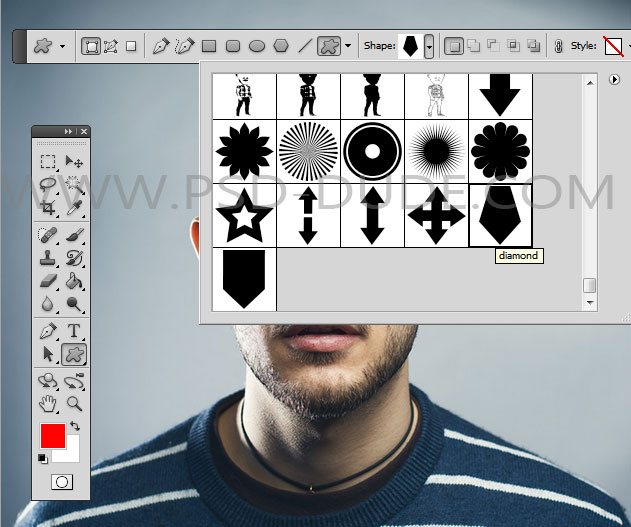
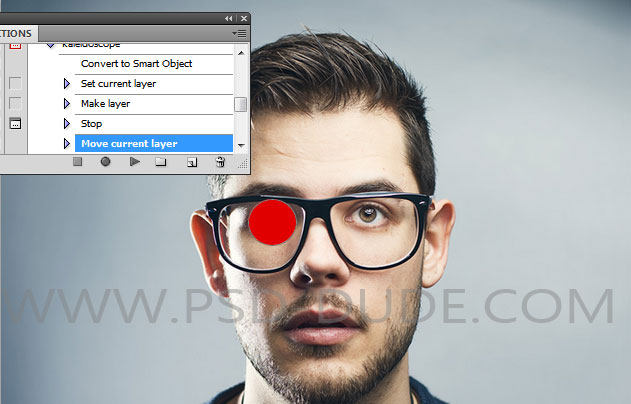
The action stops with this message: "Add a custom shape for the kaleidoscope mask effect! Resume Play!". So pick the Custom Shape Tool and from the shapes list choose the "diamond" shape.
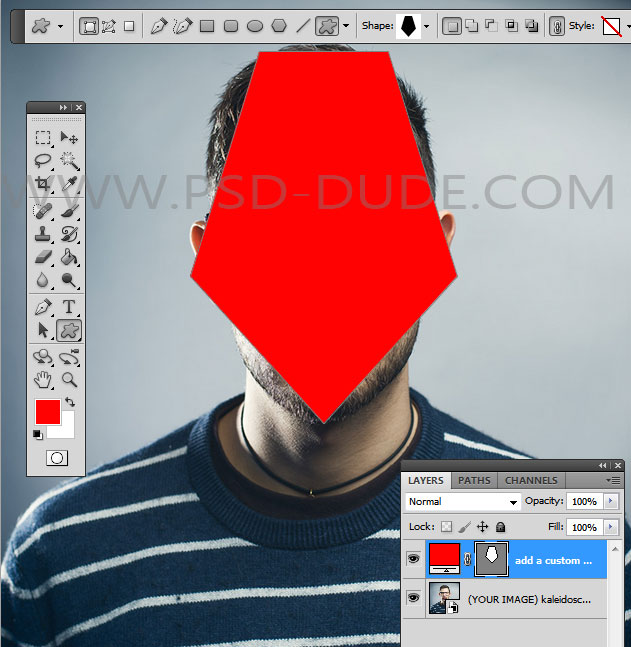
Draw the shape inside the "add a custom shape mask" layer like shown in the image. Resume Play the action from where it stopped.
The action stops again with this message "Drag and Drop the image to reposition it". You can move the "(YOUR IMAGE)" layer to your liking.
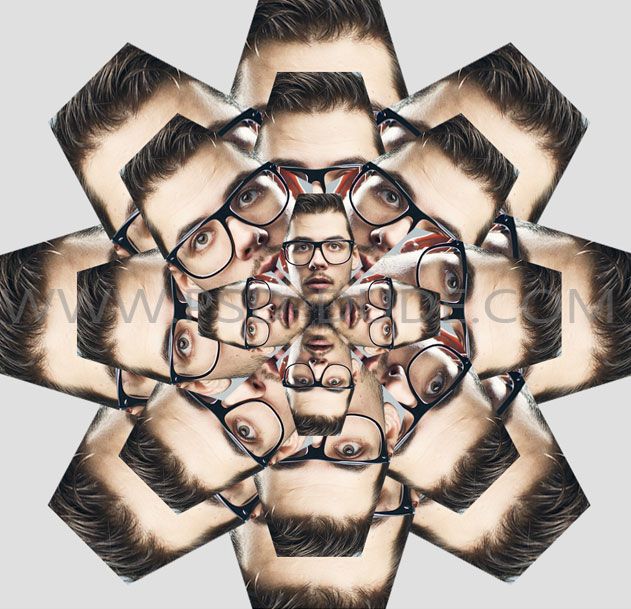
Now, you have to "Resume Play!" the action from where it stopped and wait for the result.
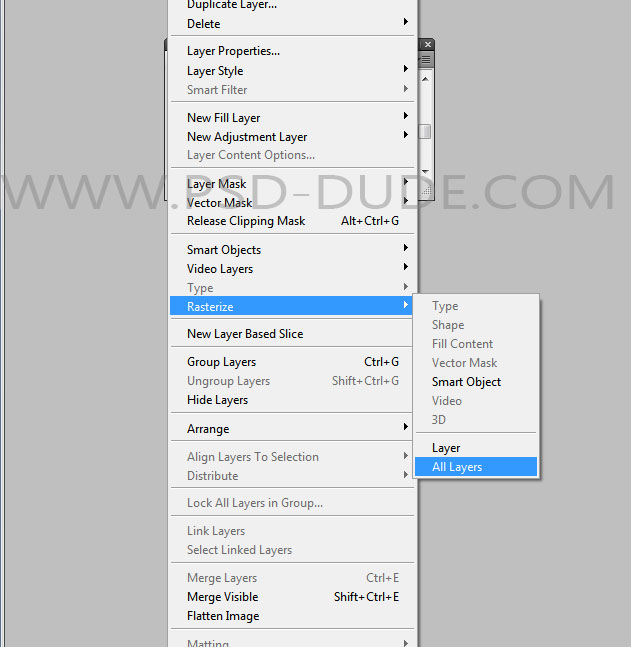
Go to the Layer menu, choose Rasterize submenu and click on the Rasterize All Layers.
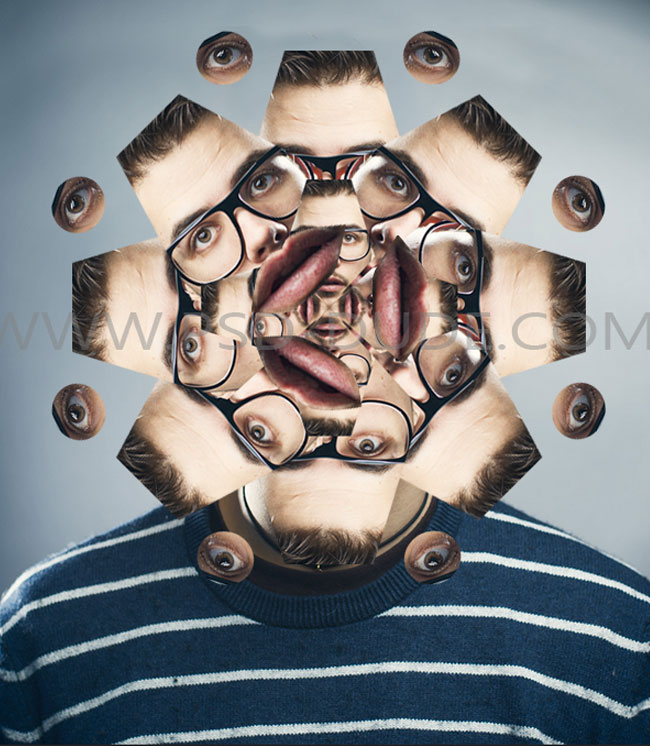
Kaleidoscope Portrait
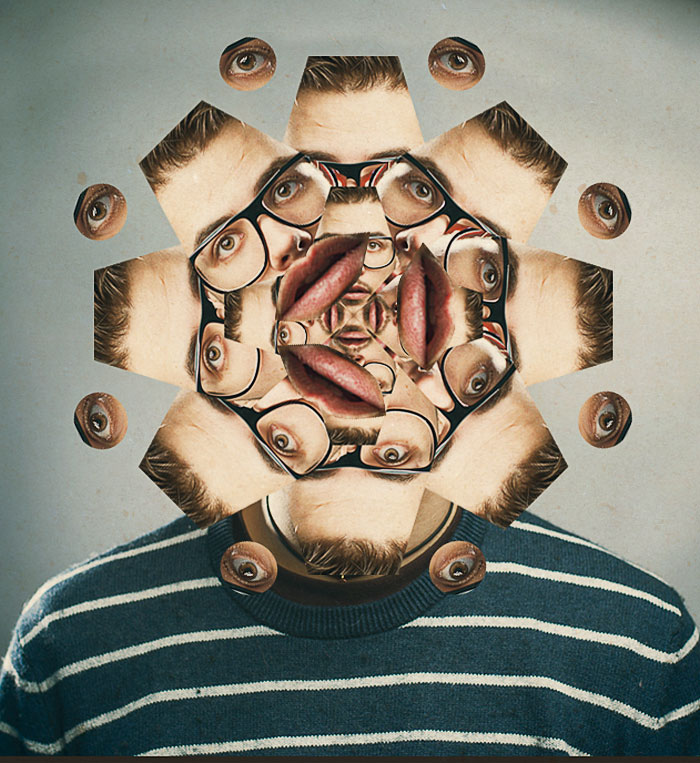
The end result for this surreal portrait effect should look something like this.
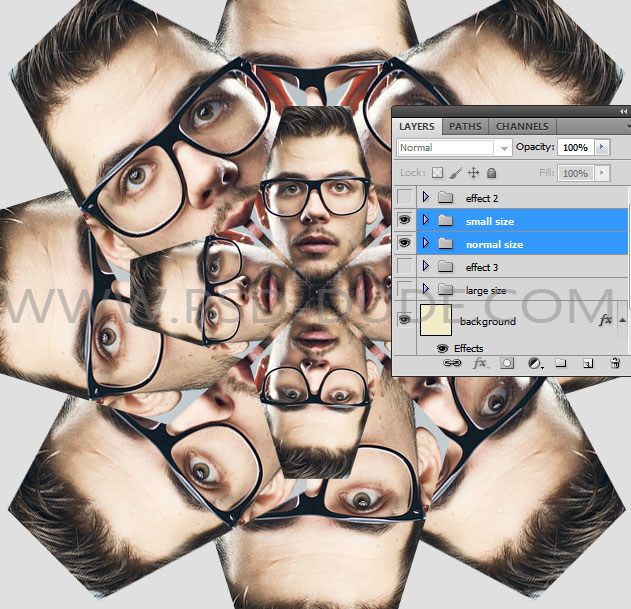
Select the "normal size" and "small size groups" and merge them(press CTRL+E). Call the resulted layer Kaleidoscpe Effect 1.
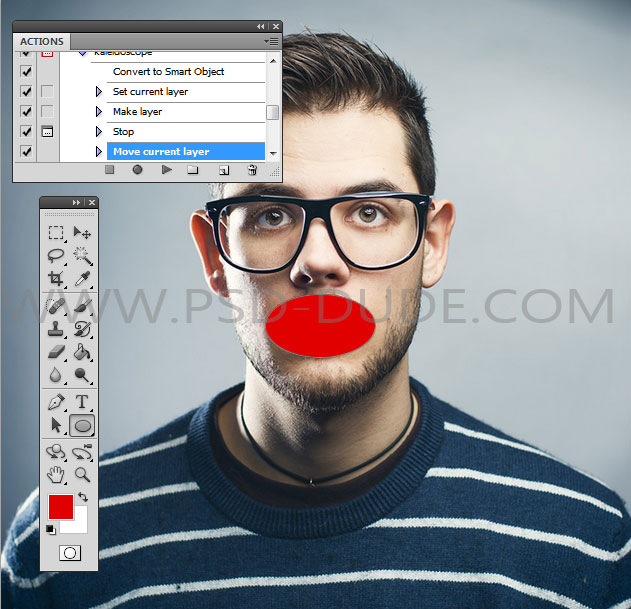
Return to the initial PSD file("surreal-portrait.psd"). Right click on the Portrait layer and choose Duplicate Layer in a new PSD file called "surreal-effect-2". Repeat the same process (Part1-step5 till Part2-step5). The only difference is that you have to use an Ellipse Tool to cover the mouth area.
Hide all the groups/layers from the result except the "large size" group. Inside that group keep only the "41 copy", "31 copy" and "2 copy".
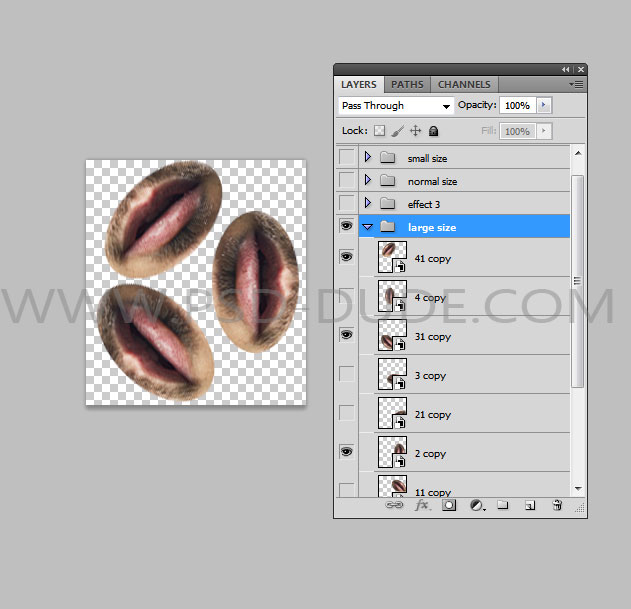
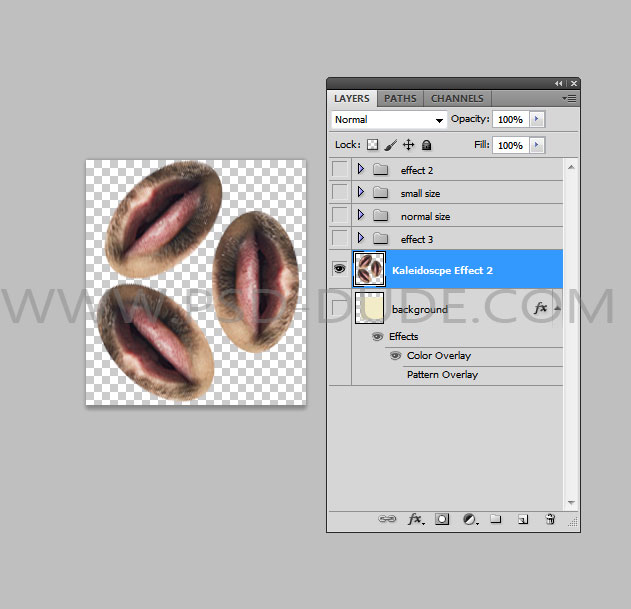
Select the "large size group" and merge the layers inside(press CTRL+E). Call the resulted layer Kaleidoscpe Effect 2.
Return to the initial PSD file("surreal-portrait.psd"). Right click on the Portrait layer and choose Duplicate Layer in a new PSD file called "surreal-effect-3". Play the action "Kaleidoscope 2". The only difference is that you have to use an Ellipse Tool to cover the eye area.
Select the "large size group" or the "normal size group" and merge the layers inside(press CTRL+E). Call the resulted layer Kaleidoscpe Effect 3.
Now copy all the layers Kaleidoscpe Effect 1, Kaleidoscpe Effect 2 and Kaleidoscpe Effect 3 in the initial PSD file ("surreal-portrait.psd"). Place the layers like in the image, replacing the head of the man with this new surreal abstract montage. You can move, rotate, resize the layers to fit with your canvas proportions.
Photoshop Surrealism Portrait Result
For the final touches you can sharpen the image with the High Pass Filter for a cool look. To obtain a grunge effect you can use an old paper texture for example. Set the Blend Mode to Multiply and the opacity to around 50% or less. So here is the final result for the surreal kaleidoscope portrait made in Photoshop using this useful Photoshop action.
2 comment(s) for "Surreal Kaleidoscope Portrait Photoshop Tutorial"
The original image can be found here:
https://www.flickr.com/photos/apfeltee/14195394337/sizes/l