This text effect would look awesome added over a JPG image. Check out this tutorial about how to edit text in image using Photoshop.
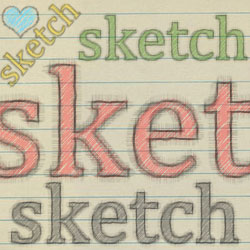
Before we begin creating this pencil sketch effect let's take a quick look at the final image preview. As you can see we'll obtain a pretty realistic pencil sketch that can be combined with different paper textures and even cutout image. Or you can combine it with some doodle brushes. I have use this pencil stock image for the preview.
Let's start with the background layer. For a sketch text effect the best choice is a paper texture, so open this notebook texture into your canvas and name it Background Layer. Alternatively, you can use any other free notebook paper texture from Textures4Photoshop.
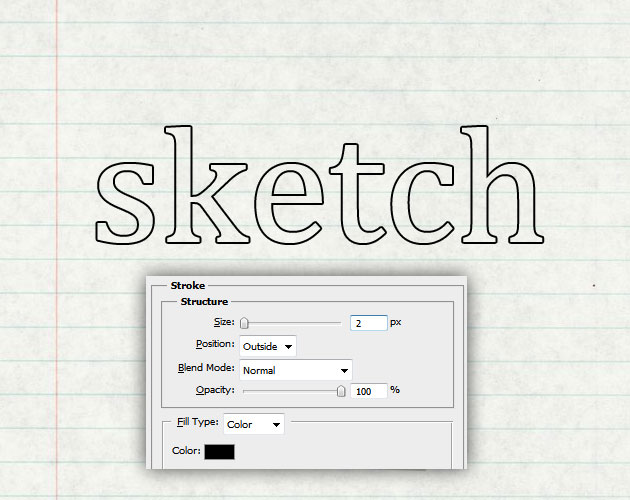
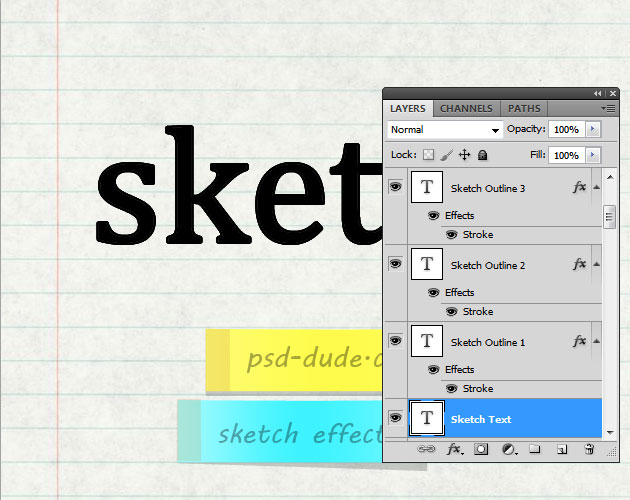
Write a simple text using a not so rounded font; I have used the Cambria Font size around 165px depending on your canvas size. If you don't have that font and you are not sure how to load it into your font list, read this quick tutorial on how to install font in Photoshop. Call this first layer Sketch Text Layer. Duplicate it and rename the duplicated layer Sketch Outline 1 Layer.

Reduce the Fill to 0% and add a 2px black color Stroke to the Sketch Outline 1 Layer. Also duplicate this layer two times and call the new ones Sketch Outline 2 Layer and and Sketch Outline 3 Layer. It might be useful to take a look at one of my other tutorials on how to make outline text in Photoshop.
Let's take a quick look at the layers that we have so far; we have one filed with black layer and three layers with a black 2px outline.
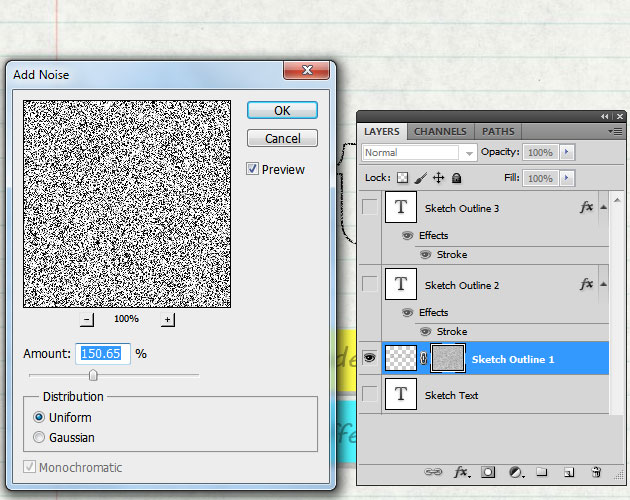
Now will work with one layer at a time so keep the Sketch Outline 1 Layer visible and hide the other three. First you have to rasterize the Stroke effect of this layer by adding a new blank layer and merge the two layers; keep the same name. Add a layer mask to this layer and use Filter>Noise>Add Noise inside the mask. Learn about Photoshop layer mask.
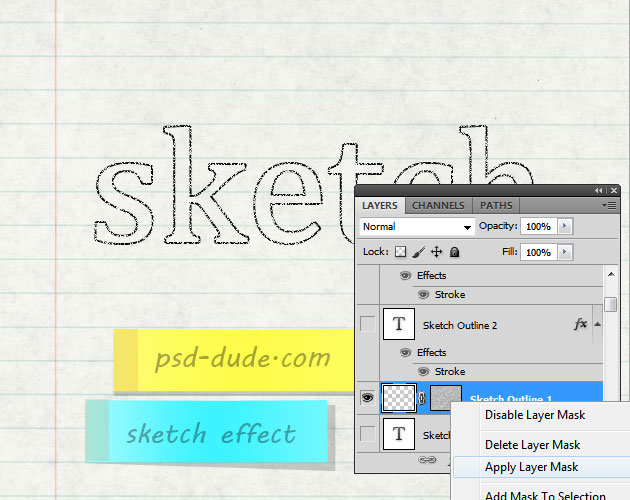
Right click on the layer mask and choose Apply Mask; you will see that the mask and the layer are now merged with the effect applied.
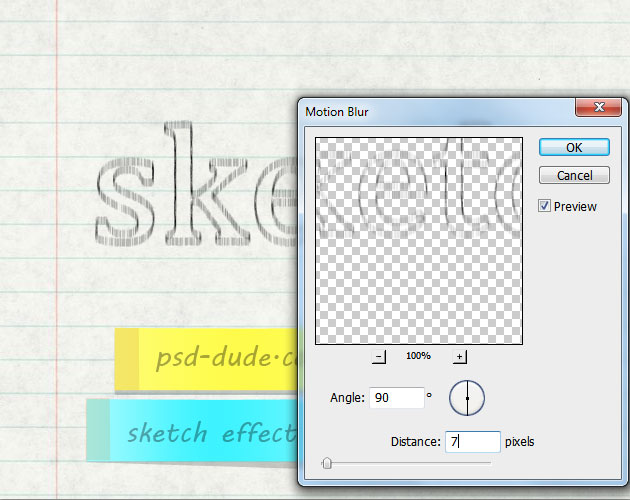
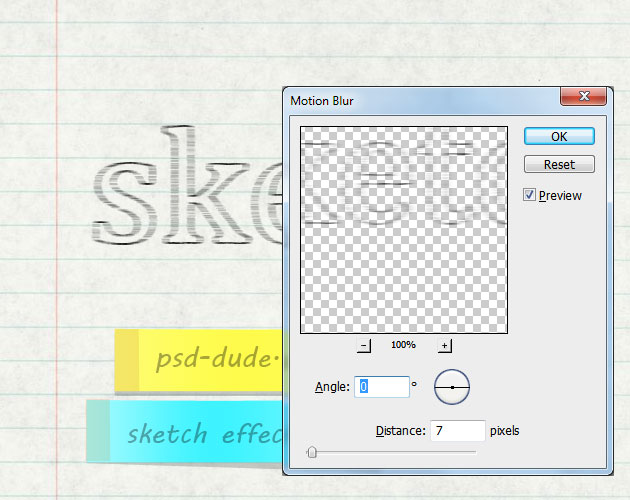
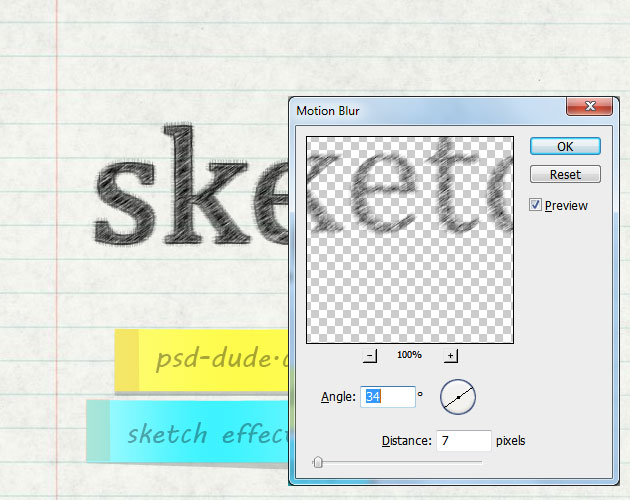
Go to Filter>Blur and choose Motion Blur like in the image.
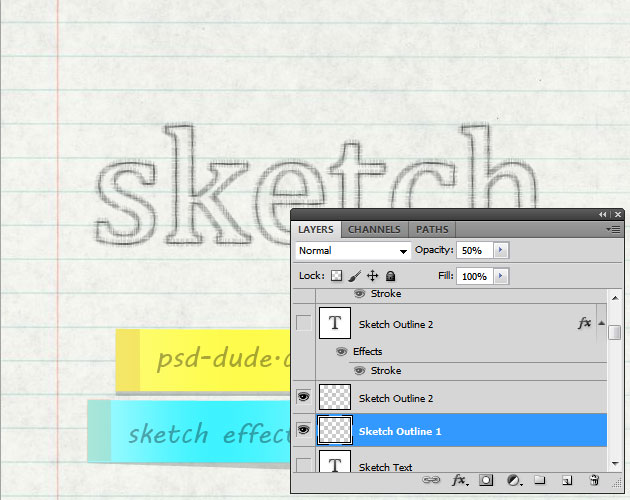
Now make the Sketch Outline 2 Layer visible and make the same steps you did for the Sketch Outline 1 Layer; the only difference is that for the Motion Blur you have to choose Angle 0.
You can apply a Smart Sharpen filter if you want a more sharpen result; and you can also reduce the opacity of both layers between 50% and 80%. Here is the result so far.
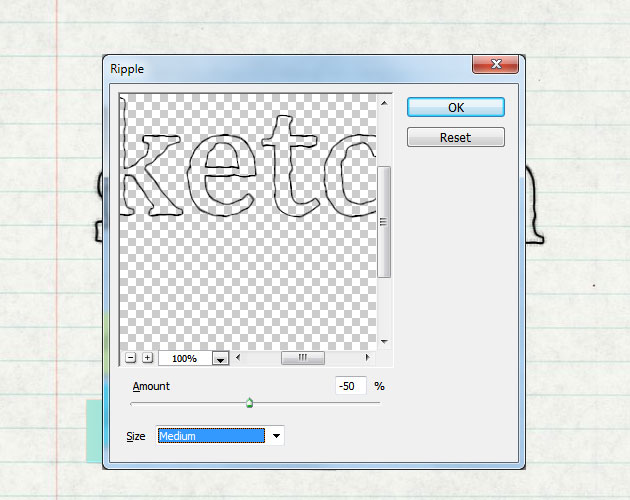
Rasterize the Stroke effect of the Sketch Outline 3 Layer and go to Filter>Distort and choose Ripple. Set the opacity of the layer to 25%.
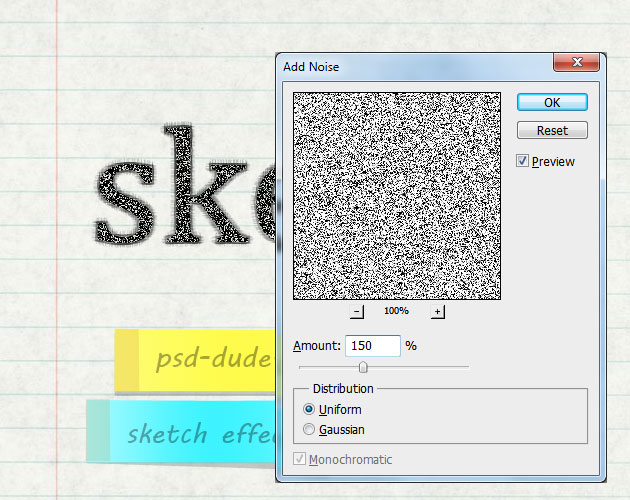
Time to work with the final layer, the Sketch Text Layer. Rasterize the text effect and add a layer mask with the same noise effect.
Apply the layer mask and add a Motion Blur with these settings:
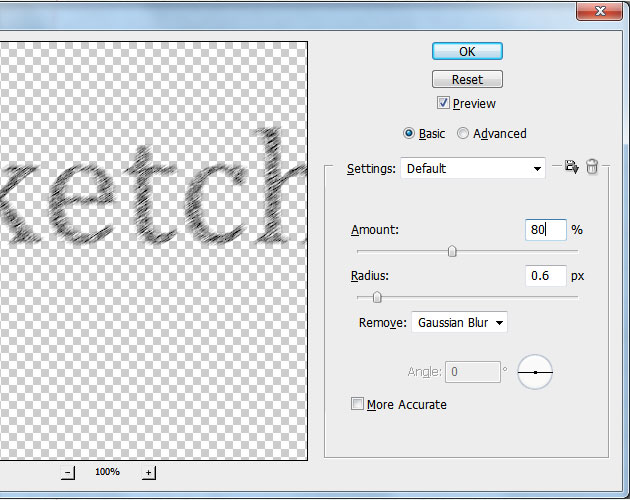
Reduce the opacity of this layer to 40% and add a Smart Sharpen effect:
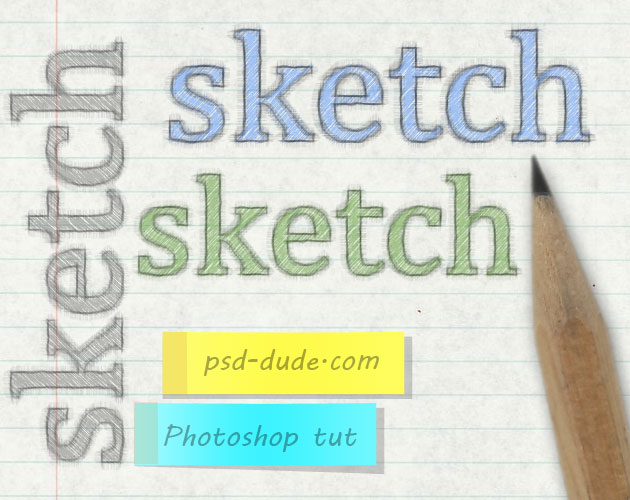
Here is the result for the sketch text in Photoshop. As you can see in the preview image you can obtain a sketch outline effect as well if you hide the Sketch Text Layer. The sketch text looks pretty realistic.
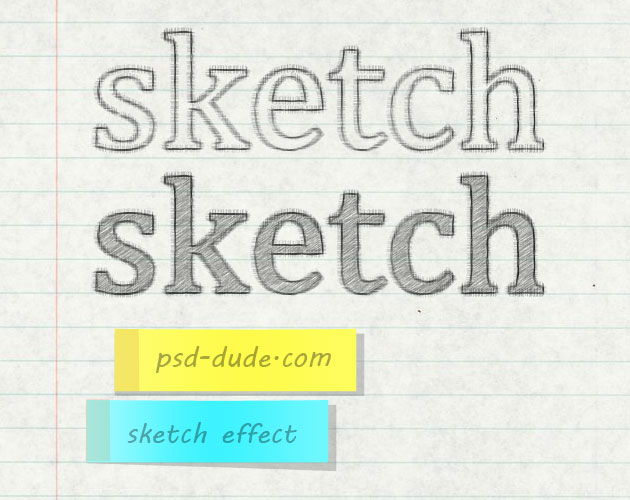
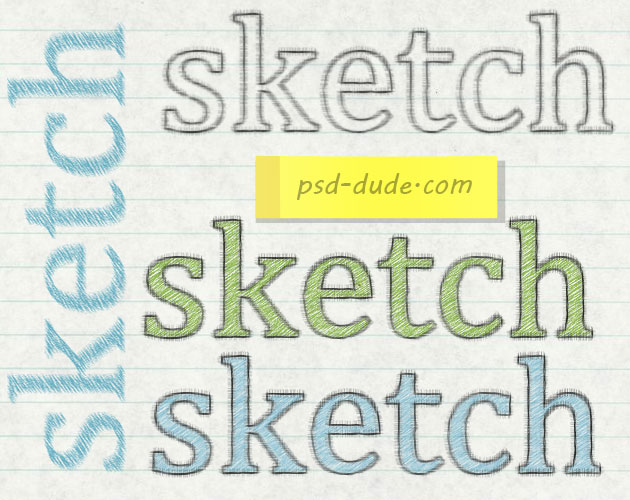
To obtain a pencil sketch text that is colored you simply have to add a Color Overlay to the Sketch Text Layer with the desired color.
You can combine this effect with a texture from the vintage paper texture collection from PhotoshopSupply or any of our huge collection of free high quality old paper texture images.
This sketch effect works perfectly
if you want to create a scrapbook background.
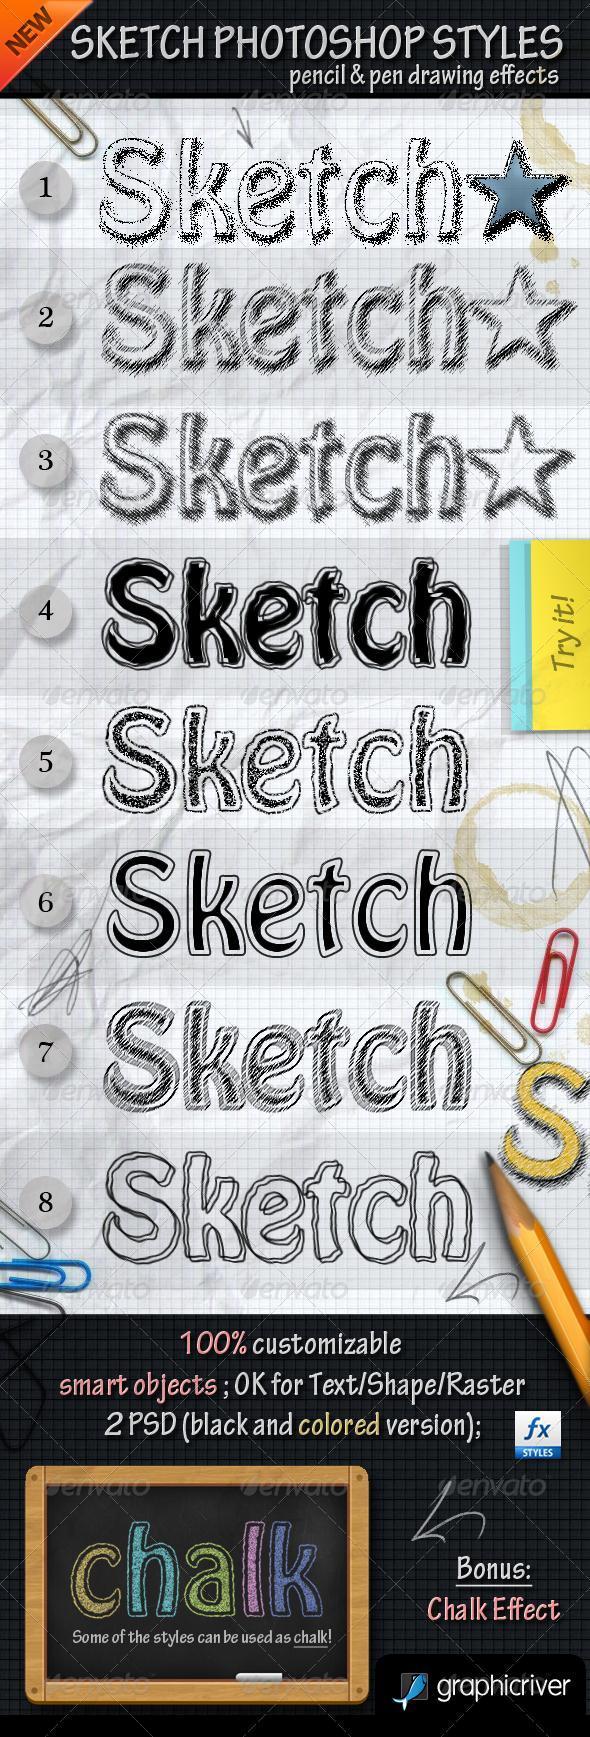
Check Out These Premium Sketch Photoshop Styles
This PREMIUM Photoshop resource contains 2 PSD template files that
will allow you to easily create customized sketch effects from your own text or shape.
All the PSD templates contained grouped layers and smart objects so you can
change almost every aspect regarding size, color ant the other layer styles.
There
are eight hand drawn pencil and pen sketch styles which you can adjust by
placing your own text or shapes. The PSD files are made using smart objects with
intact layer styles, so all aspect of the sketch effect can be changed.
13 comment(s) for "Create a Sketch Text in Photoshop"
wow thanks so much reply
Congrats! reply