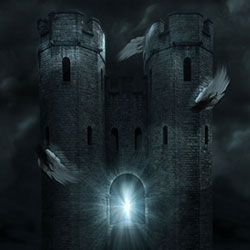
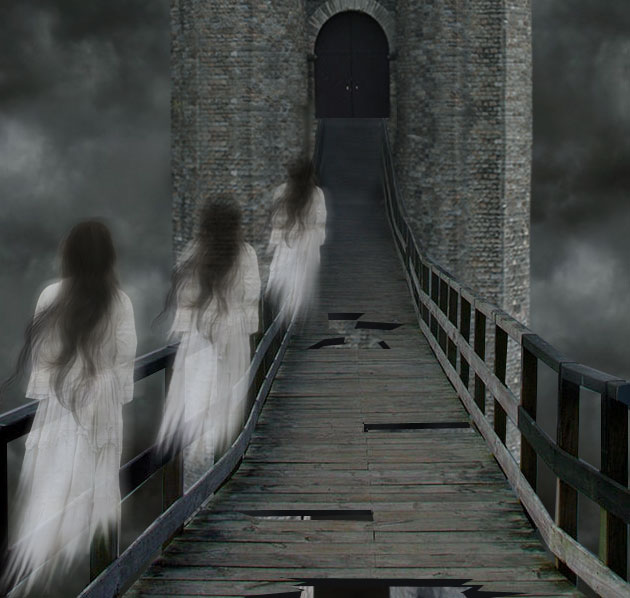
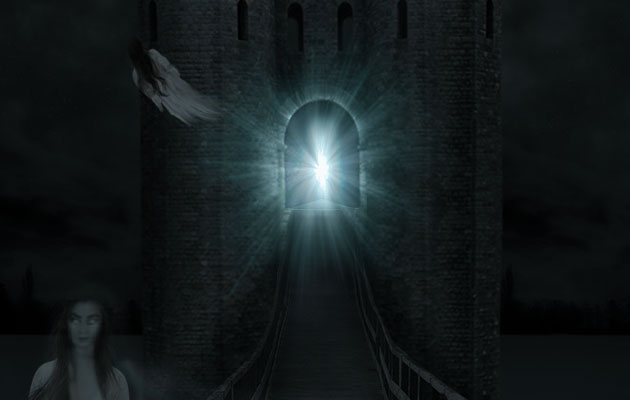
Learn how to create a haunted castle in Photoshop using different stock images and some simple blending techniques. We'll create the haunted effect by turning a girl image into a Photoshop ghost. So before we begin let's take a quick look at the horror photo manipulation that we are about to create.

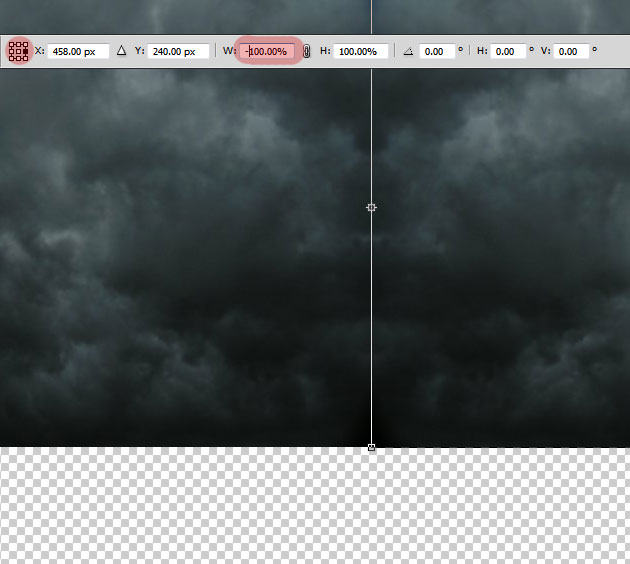
Open a new canvas and copy this Dark Clouds stock image in a new layer. My canvas is around 900x1100 px so duplicate the Dark Clouds Layer and flip horizontal(press CTRL+T set the W to -100% like in the image).
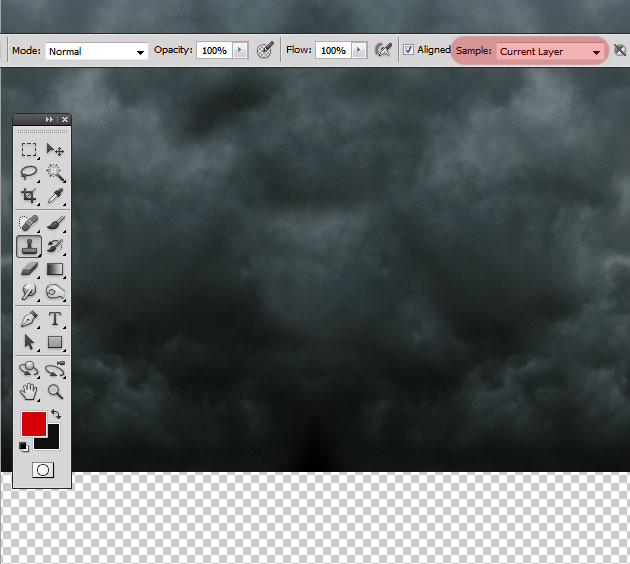
Merge the two layers and use the Clone Stamp Tool to fix the center area that has a strange look after was being duplicated. If you are not really sure how to use this tool, read this article about Photoshop Clone Stamp. All you have to do is press ALT and click on the image to choose the source and paint over the desired area.
Make sure to check Sample Current Layer and choose a Soft Round Brush for the Clone Stamp Tool otherwise you will obtain a rough result.
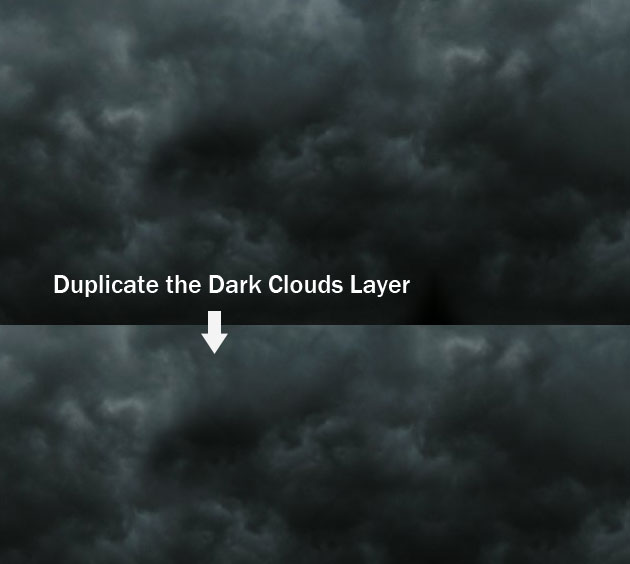
Copy this layer one times and move it down without flipping, so that it civers the left area of your canvas.
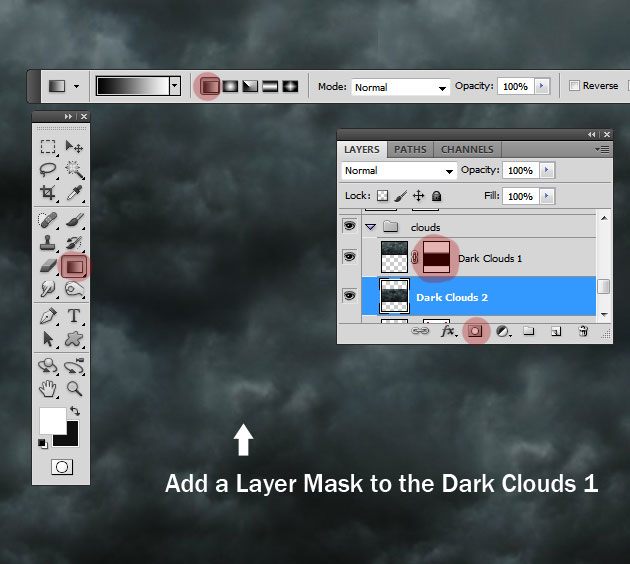
To fix the area where the two clouds layers meet we have to add a layer mask to the Dark Clouds 1 Layer using a black to white simple gradient. Learn how to Use Layer Mask in Photoshop if you are a beginner.
Repeat the process one more time so that you cover the entire canvas. You can of course choose a hi res sky image and skip these steps but this is really a good exercise to practice your Photoshop skills. Merge the three Dark Clouds Layers and use the Clone Stamp Tool to fix areas that look repetitive.
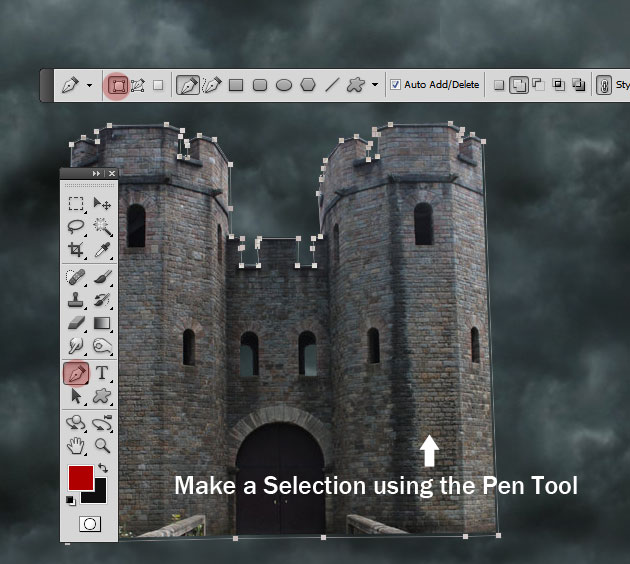
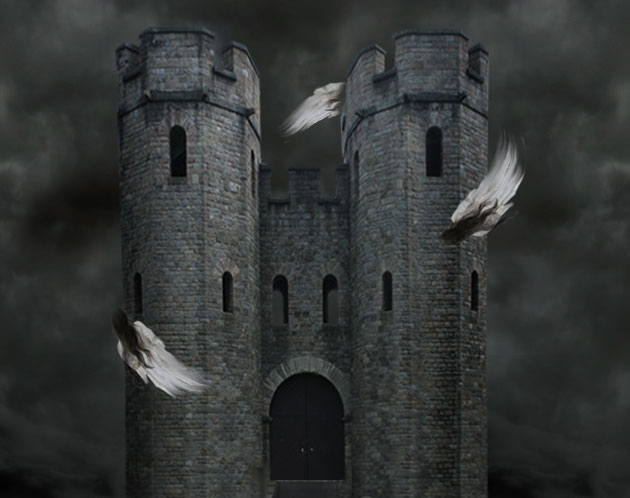
Now let's add this Castle Stock Image in a new layer called Castle Layer. Use the Pen Tool to trace the castle shape and to extract it from the background. Make a selection out of the castle shape, invert the selection and remove the background. It is better to use the Pen Tool for making selections instead of using the commonly used Selection Tools.
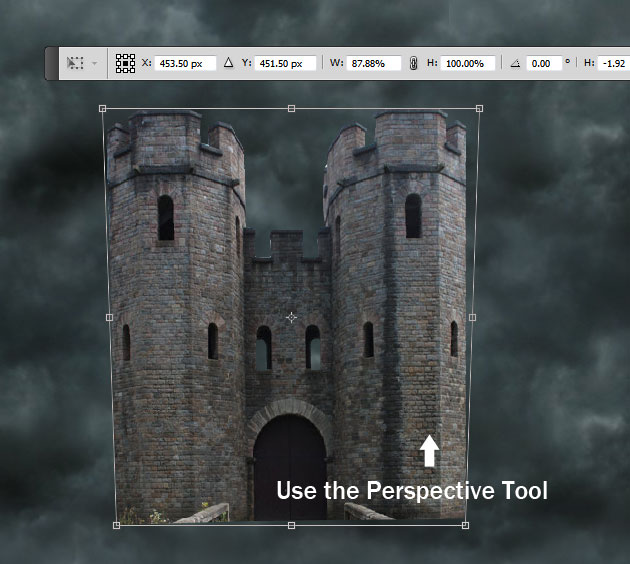
Use the Edit>Transform>Perspective Tool to change the castle perspective like shown in the image.
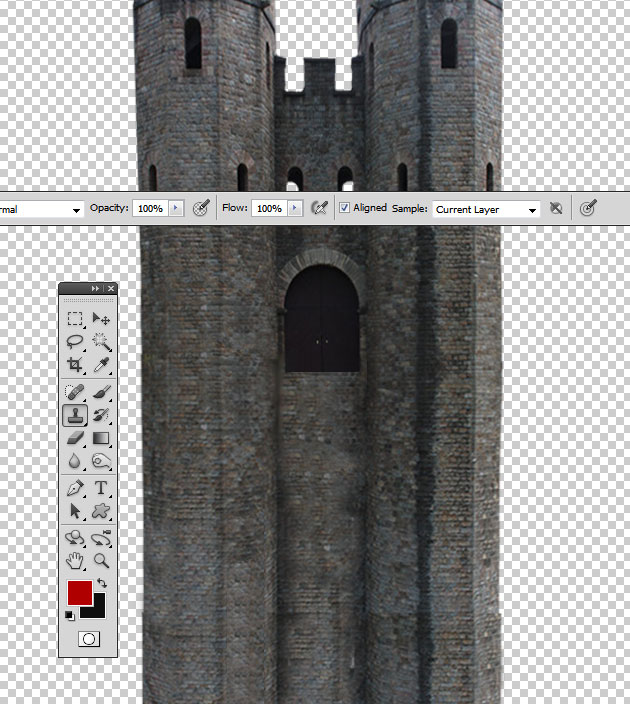
Duplicate the castle layer and Flip Vertical like in the preview. Merge the two Photoshop layers and use the Clone Stamp Tool to fix the indicated areas.
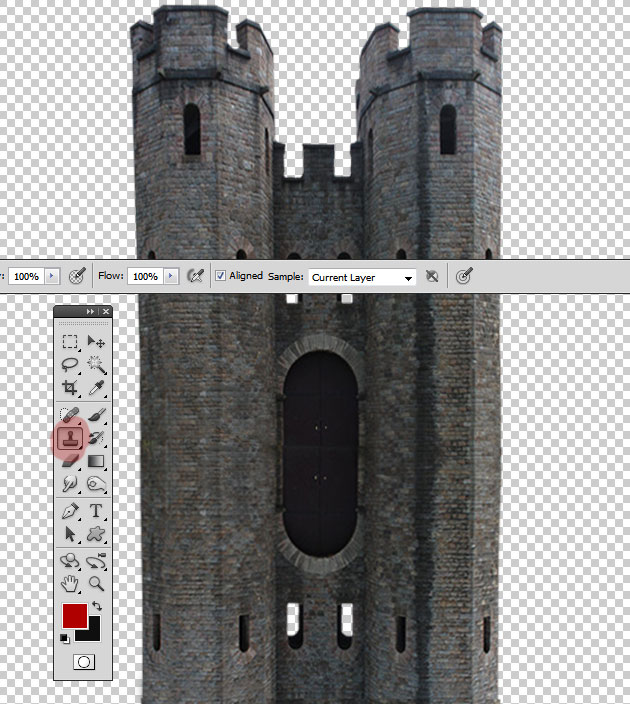
Use the same Clone Stamp Tool to hide the windows of the castle copy and the door, because we don't want a reflection of the castle, we want to make the castle taller.
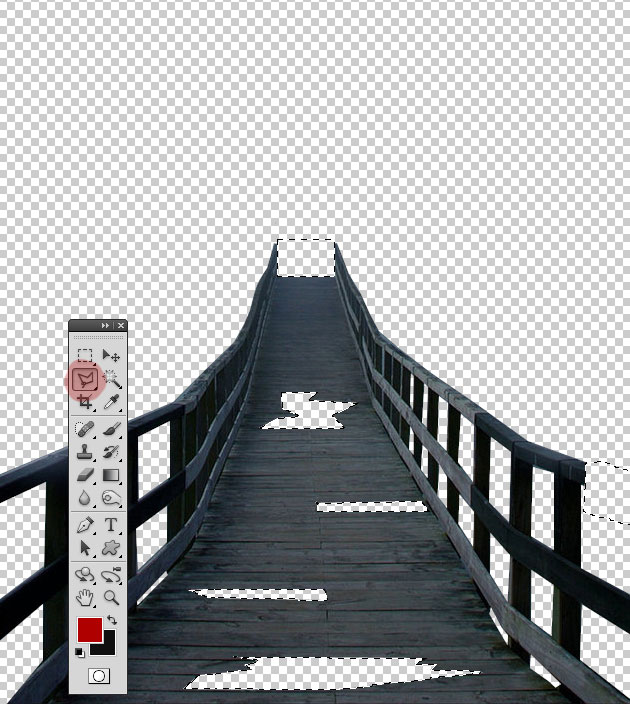
Time to add another element to our haunted castle photo manipulation; so copy this Premade Background and crop the bridge using the Pen Tool like you did with the castle.

To make the bridge look more creepy I will remove some areas to give the impression of an old broken bridge. Use the Polygonal Lasso Tool to make the selections like shown in the image and delete these areas.
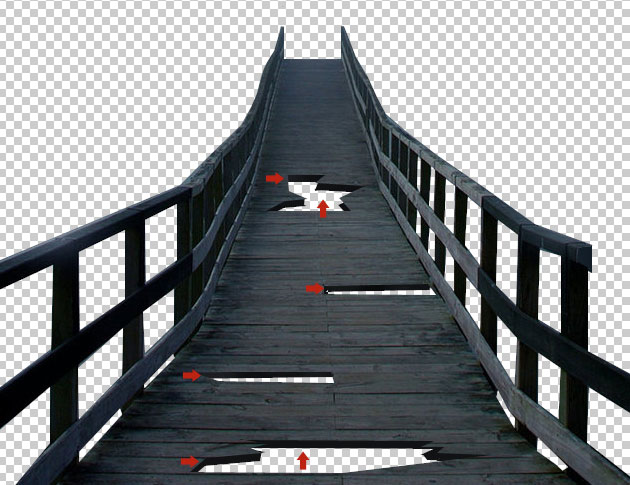
In a new layer below the Bridge Layer make similar selection like you did for the wood crack shapes and fill them with a dark color. See the image below; we are doing that to give a 3D look to the crack shapes.
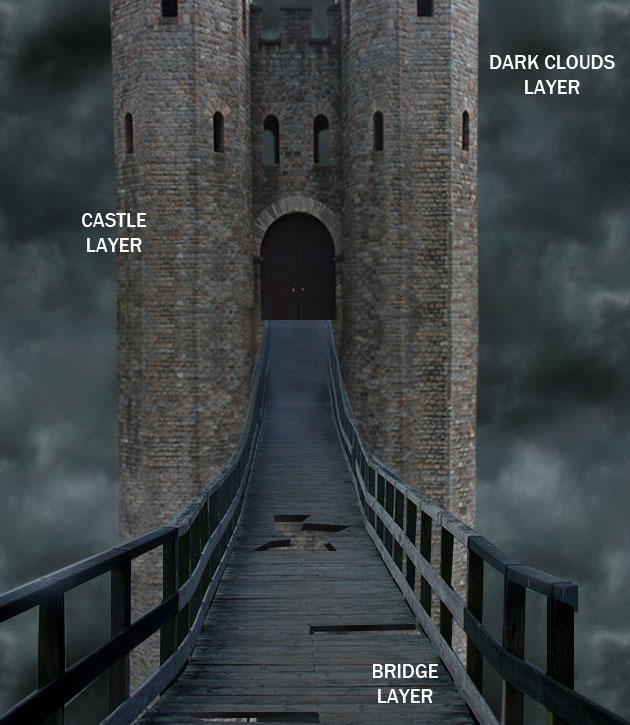
Time to reveal all the elements added so far: castle, dark clouds and bridge. As you can clearly see there is a big difference of color, tone, brightness, etc between the two images. That means that they are not blended in a single image yet. So what we have to do is to adjust the three images by adding adjustment layers.
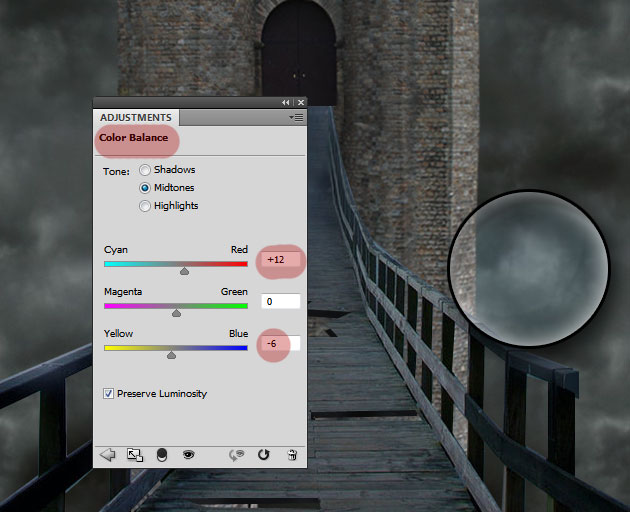
For each layer I will add an adjustment layer to correct the color tone, brightness and/or saturation level. Let's start with the Dark Clouds Layer and add a Color Balance adjustment with the following settings. Make sure you have the Clip to Layer button selected so that the adjustment to affect only the layer below.
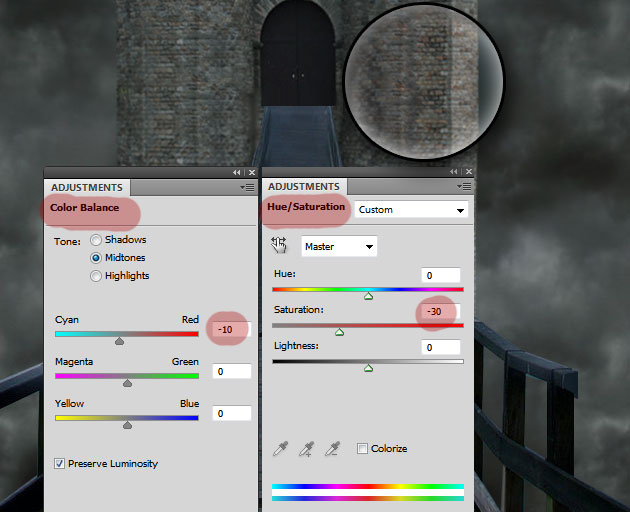
For the castle Layer I have added a Color Balance and a Hue/Saturation adjustment layers.
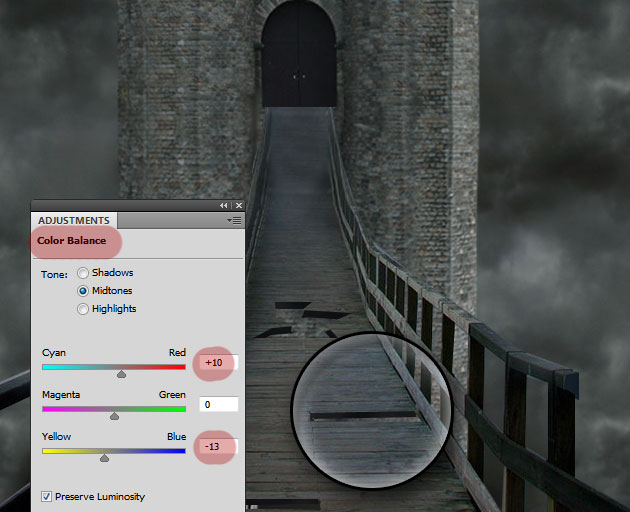
For the Bridge Layer I will add a Color Balance adjustment. Even if these are nor significant changes they do count making the cropped images to blend with one another better.
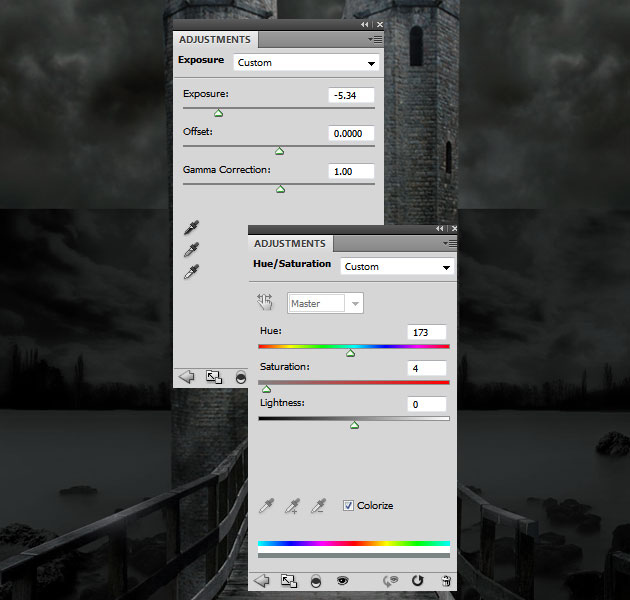
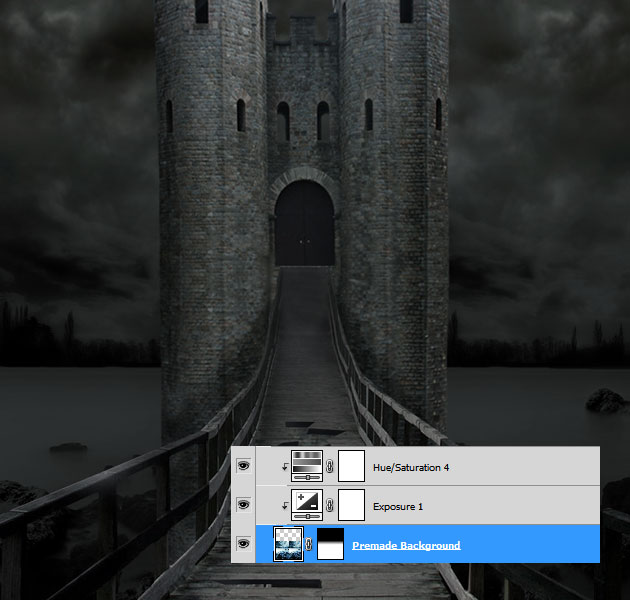
I have decide to add another element to the background; so copy this premade background and place it behinde the castle like shown in the image. Add a Hue/Saturation and Exposure adjustment layers to fix the color tone of the image.
Add a layer mask to the Premade Background Layer and mask the clouds area so that it blends in with the rest of the image.
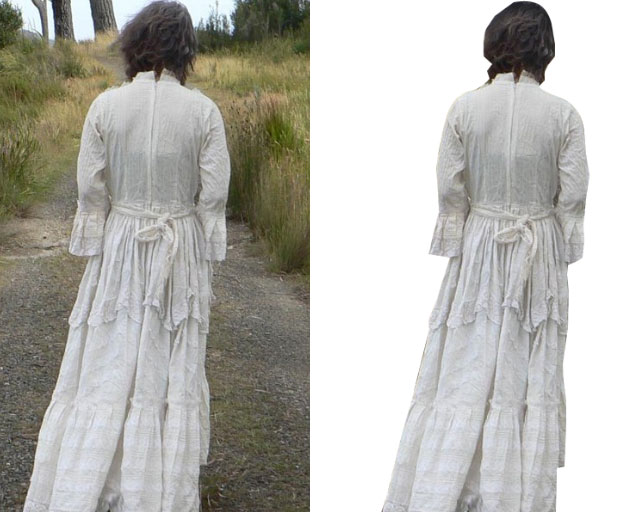
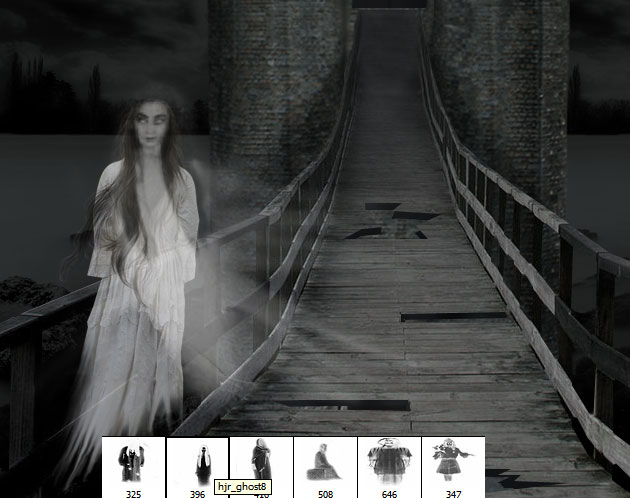
Time to add another element to this photo manipulation. Copy this Ghost Stock Image in a new layer and crop the girl using the Pen Tool selection technique. Don't worry about the hair area, we will fix it later on.
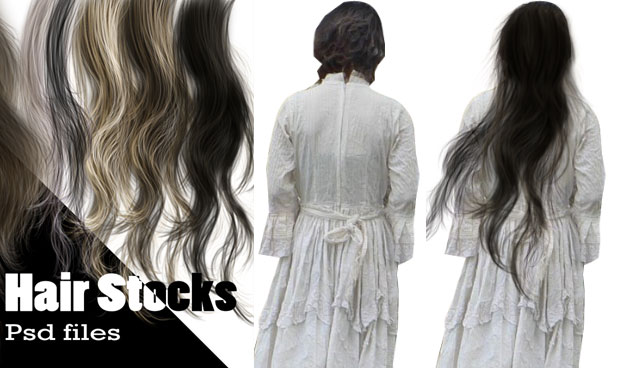
Download this Photoshop realistic hair PSD file that contains different hair colors. Open the PSD file and copy into your file the BLACK layer and place it over the girl stock image. You can duplicate the Hair Layer a couple of times, rotate and arrange to look like real hair.
Now simply duplicate the Girl Layer(that contains all the girl and hair layers merged) three times. Resize and place like shown in the image.
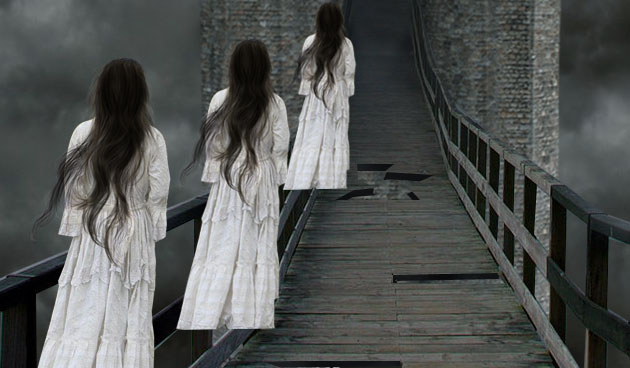
Next I will use the Eraser Tool and the Smudge Tool to make the girls dresses look like are torn and transparent. Lower the opacity of each layer to around 65%. You can also copy the Girl Layers and use the Motion Blur to make them look more realistic. You can check out this tutorial where I make another ghost effect using motion blur.
Use the Warp Tool for the small girl copies and place them around the castle. You can add as many ghost as you want; I have added only three.
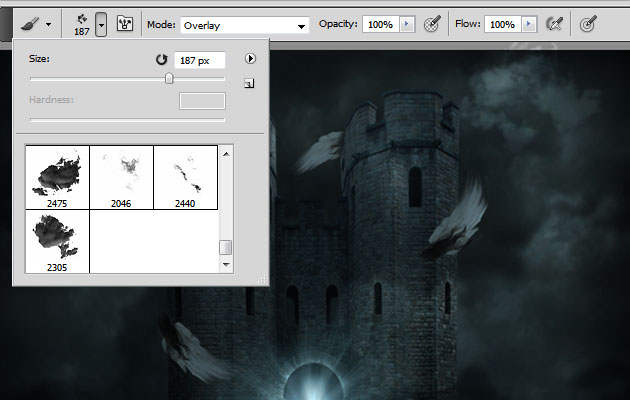
Download these ghost brushes and use the "hjr_ghost8" brush for the gost on the bridge. Use white color for the brush tool and also use the Smudge Tool to create an wind effect.
The next step is to add two adjustment layers that will determine the photo manipulation color tone and brightness level. The other layers that will be added in the following steps will take into account these two adjustments.

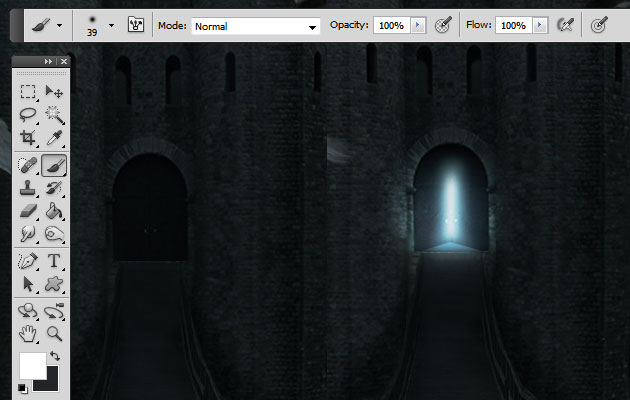
To create a strange light coming behind the castle door you have to use the Brush Tool and paint the light effect. Use a soft round brush, white color and different opacity levels. Create multiple layers and paint over the door area. Set the blend mode of these layers to Overlay.
In a new layer I have used a light beam brush to create a light burst effect.
For the final touches use some clouds brushes to lighten some areas; create a new layer above the sky and castle layers; use white as color and Overlay as blend mode for the Clouds Layer(s). I have used this set of free clouds Photoshop brushes but you can use another one from the clouds brushes collection.
After some small light/shadow retouches here is the final result for the haunted castle horror Photoshop tutorial. If you like this tutorial you might also be interested in my other dark Photoshop tutorial, Photoshop Ghost Tutorial in Gothic Setup. Or you can check out this amazing Horror Photoshop Tutorials collection perfect for all the horror movie fans.
5 comment(s) for "Horror Haunted Castle Photoshop Tutorial"