
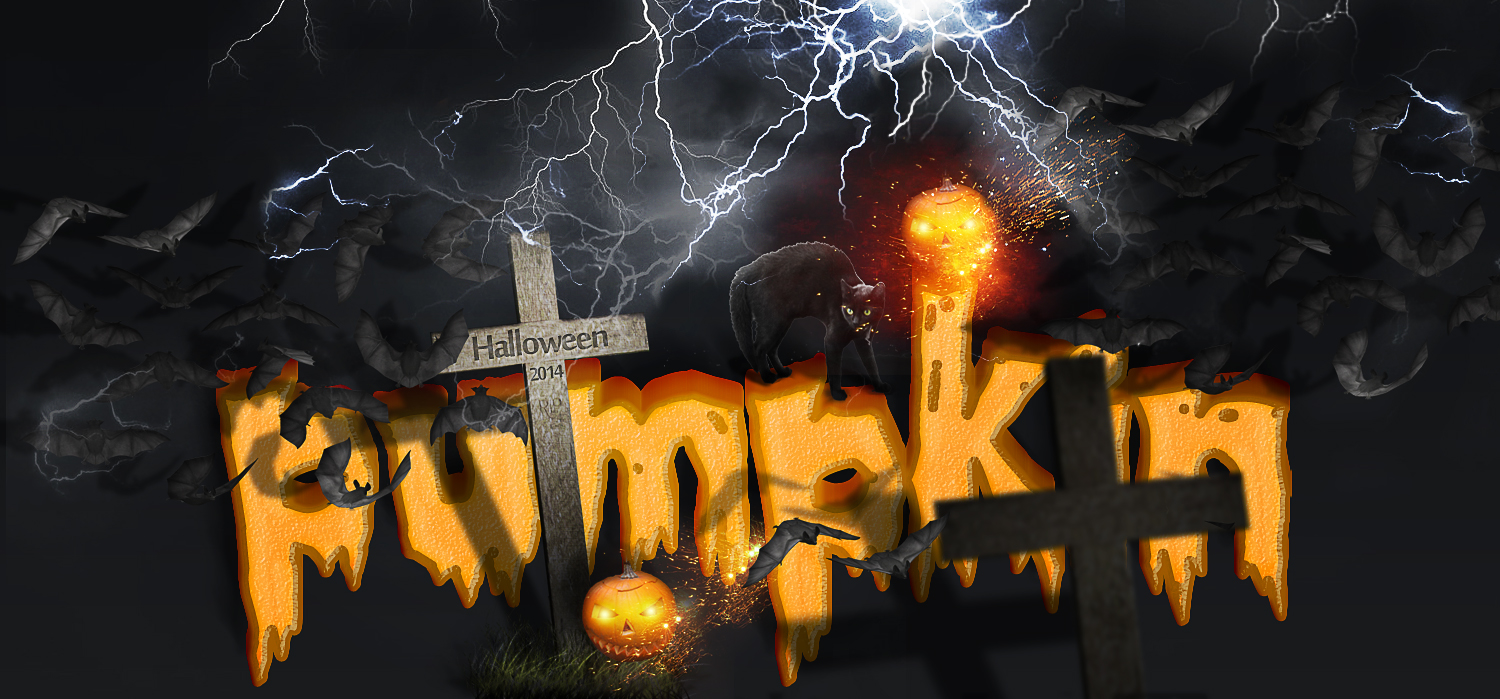
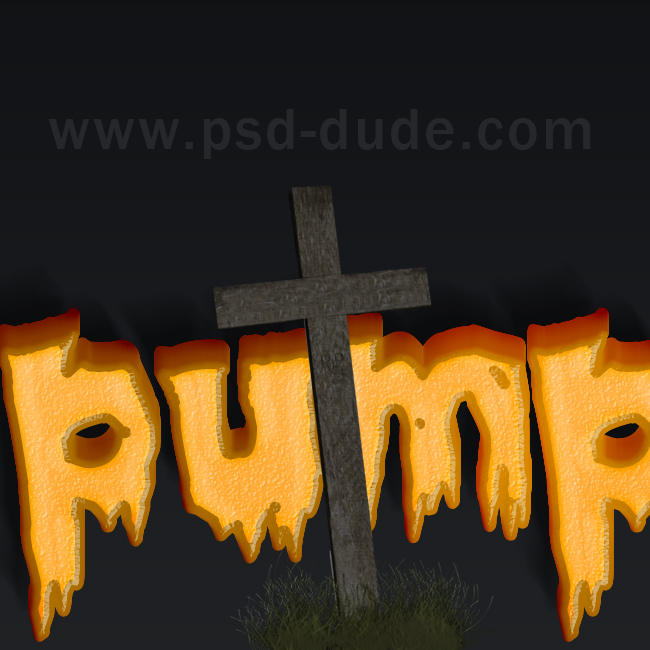
Start with a simple black gradient background layer. Download this Halloween pumpkin text effect mockup with an easy to edit 3D look. The Pumpkin text style can be modified to you liking. For example you can change the colors, light direction, font and of course the text.
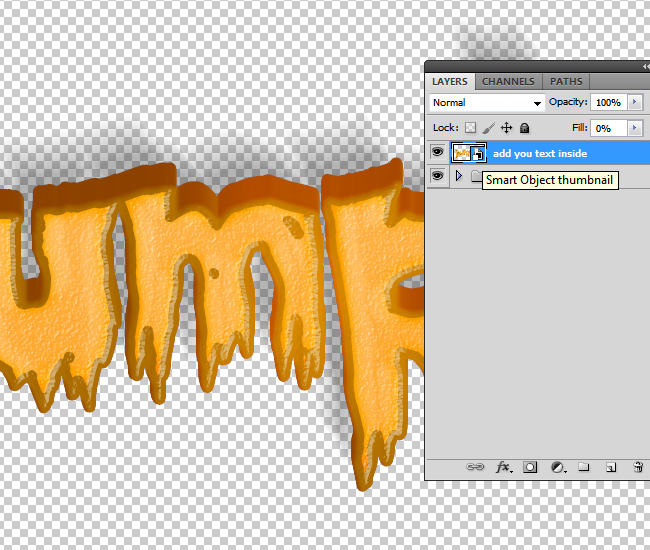
Open the PSD file and simply double click on the Pumpkin Style smart object to open it. Inside you will find another smart object called "add your text inside" that you have to open. And another "add your text inside" that you have to open. Finally you can modify the text or add your own. You can also use a vector shape.
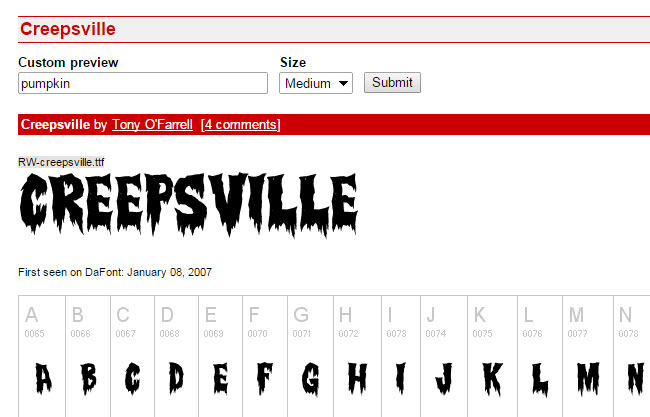
For this text effect I used the free Halloween font Creepsville ; you have to download and install font in Photoshop or you can use any font type you like.
Add this Wooden Cross stock image into your PSD file and place it like in the image. Because this is a PNG file cutout file, you don't have to waste time removing the background.
Call this layer Shadow Effect. Duplicate the Shadow Effect two times. Name the first copy Wooden Cross layer and the second copy, Gradient Effect layer.
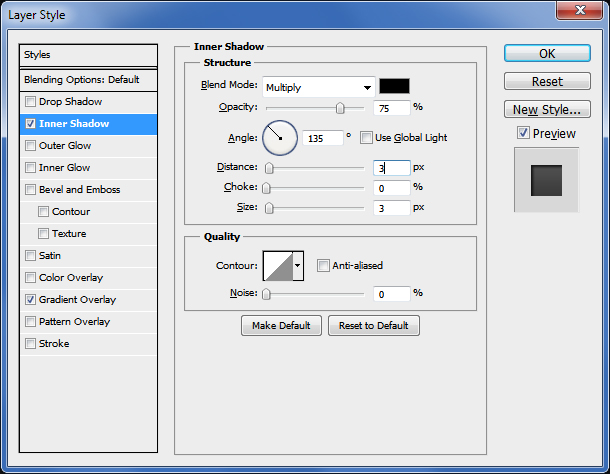
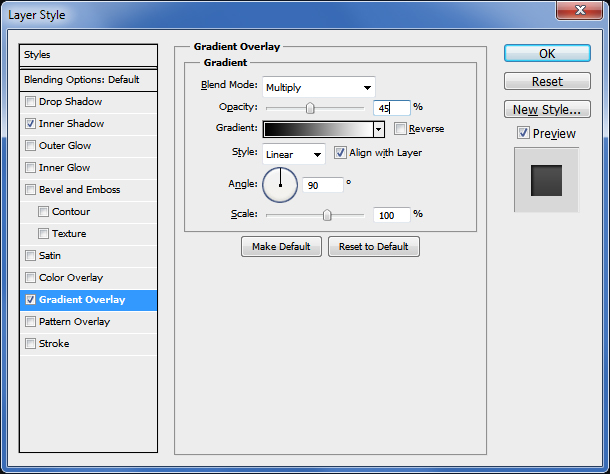
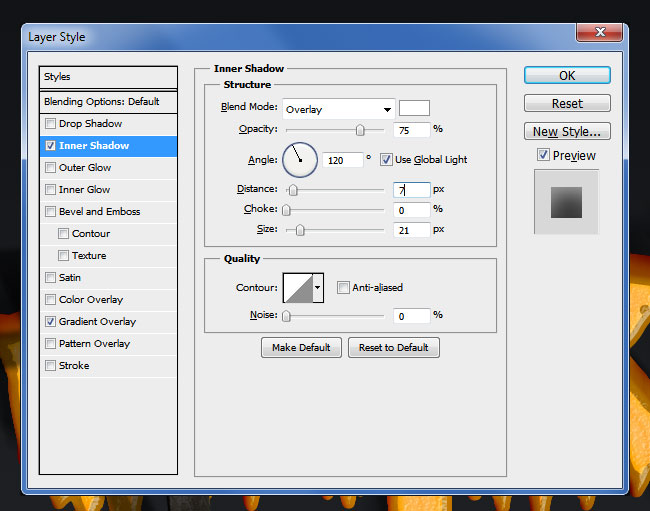
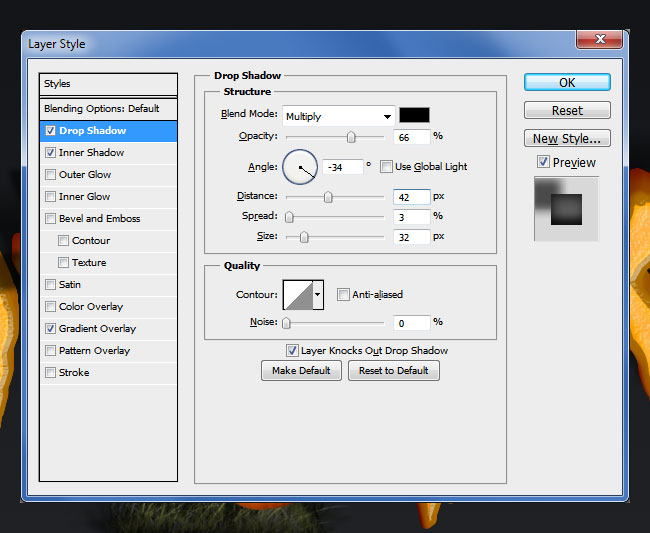
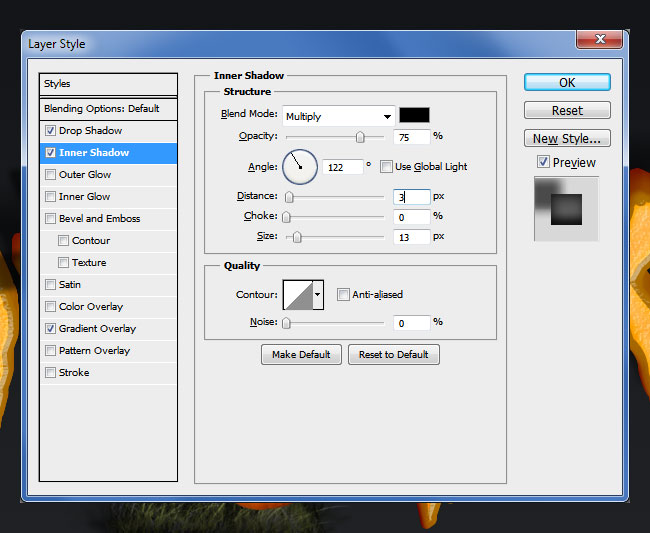
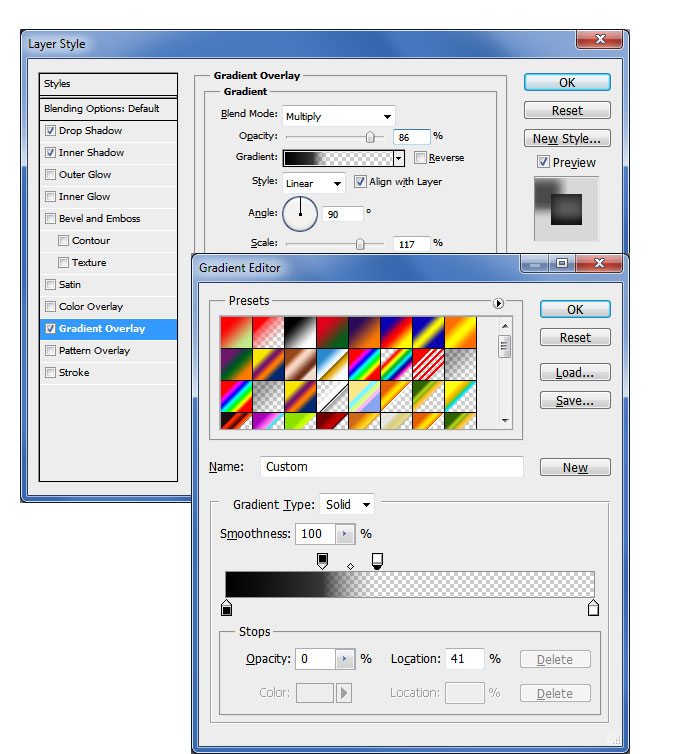
Let's start with the Wooden Cross layer, by adding these layer styles.
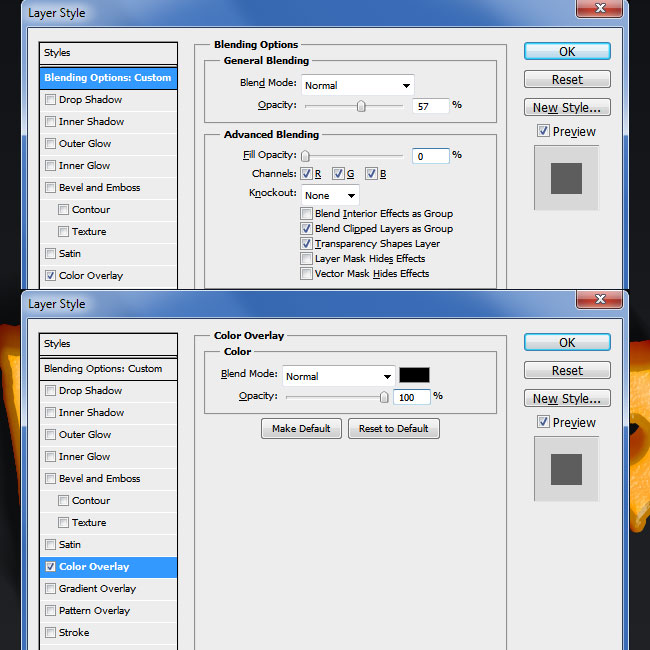
Let's work with the Shadow Effect layer. Set the Fill of the layer to 0% and the Opacity to 57% ; add a Color Overlay layer style.
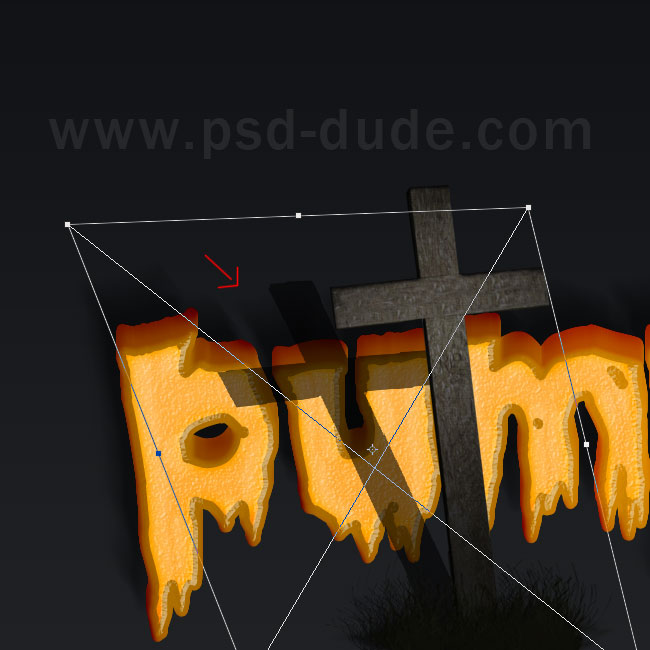
To create the cast shadow effect you have to use the Distort Tool and try to make a realistic shadow. You can find this tool on the Edit>Transform menu. Also add a Gaussian Blur(Filter>Blur menu) effect of around 3 pixels.
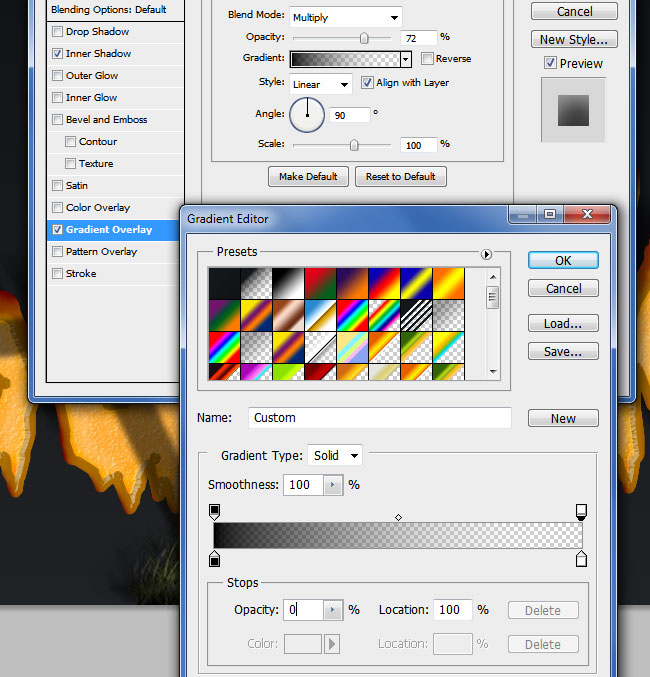
Right click on the Gradient Effect layer and choose Create Clipping Mask. Set the Fill to 0% and add a Gradient Overlay with these settings. Position the gradient in the center of the cross using the drag and drop method.

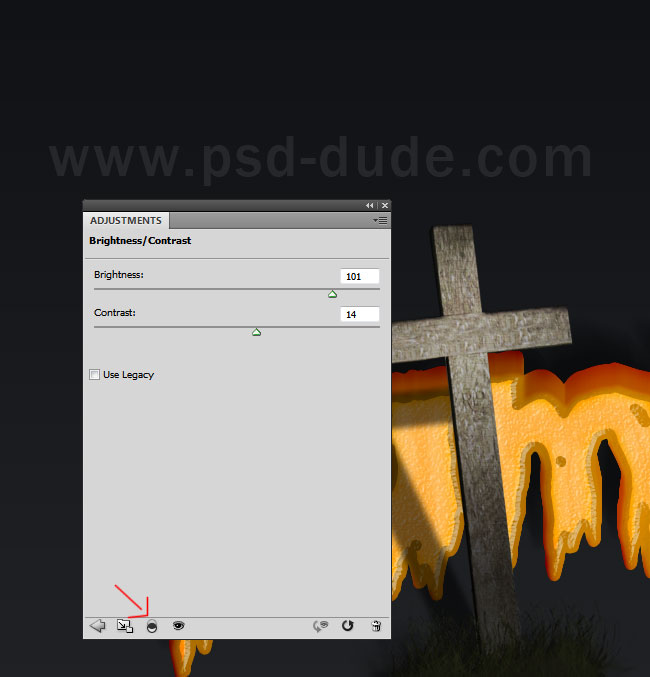
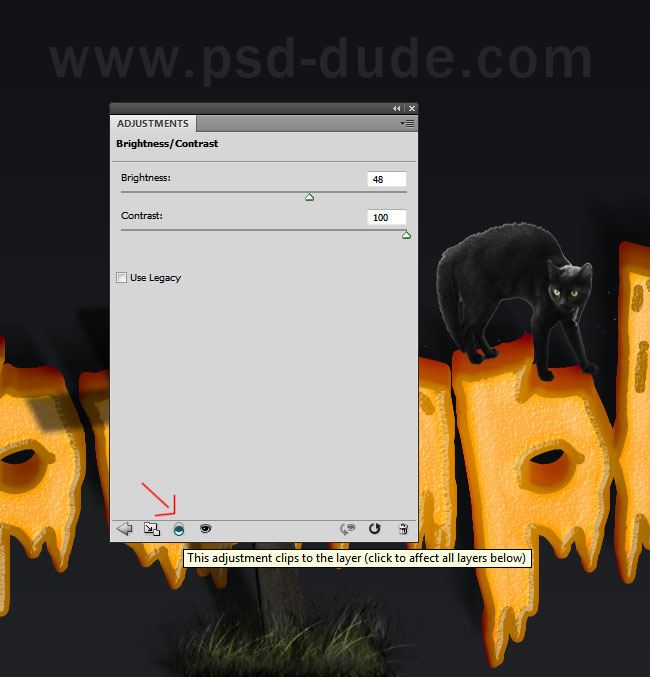
Now add a Brightness/Contrast adjustment layer. Click on the Clip to layer button to make sure this adjustment only applies to the Wooden Cross layer.
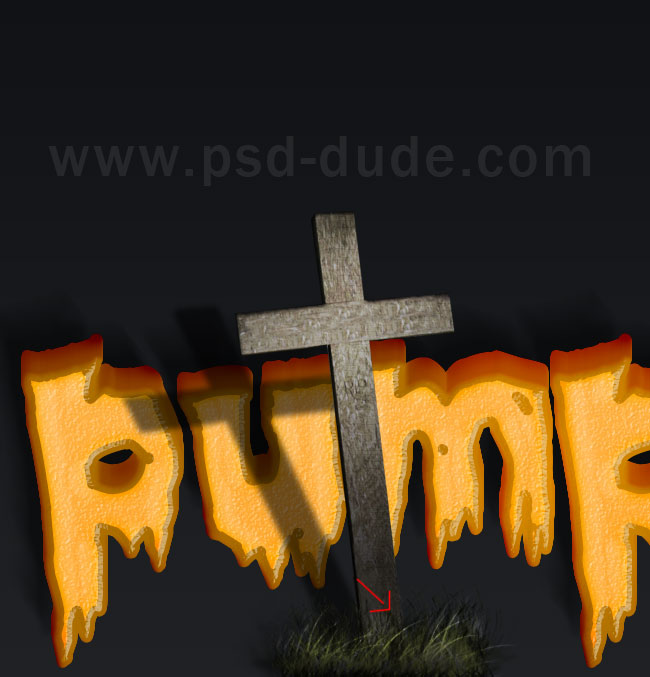
You can use one of these grass brushes to add highlights to the grass area like shown in the image. Create a new layer and use the color white to draw the grass; set the blend mode to Overlay.
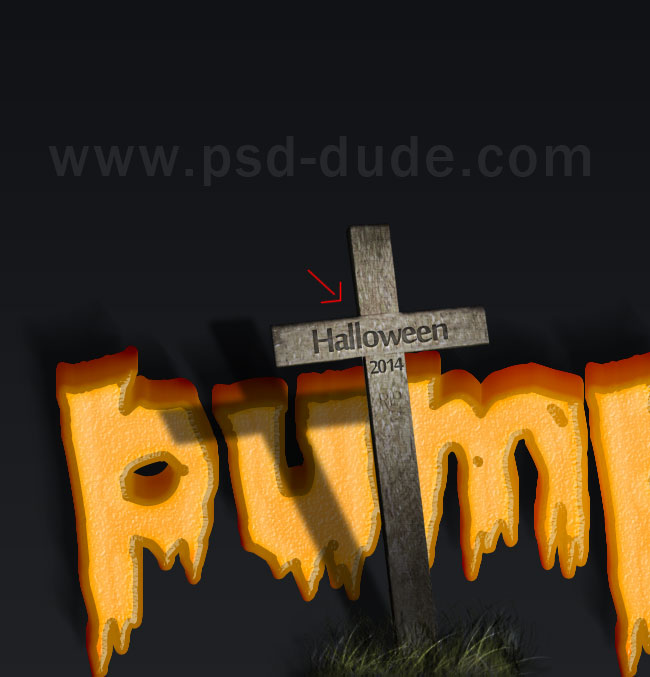
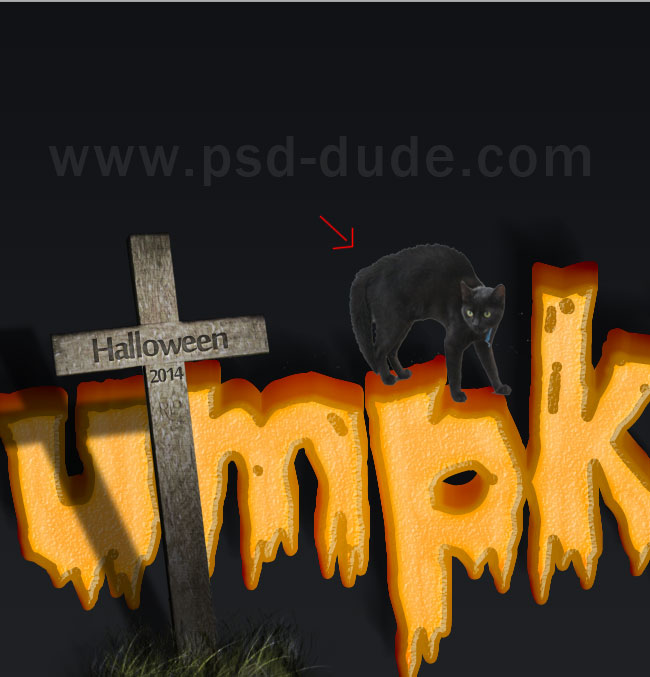
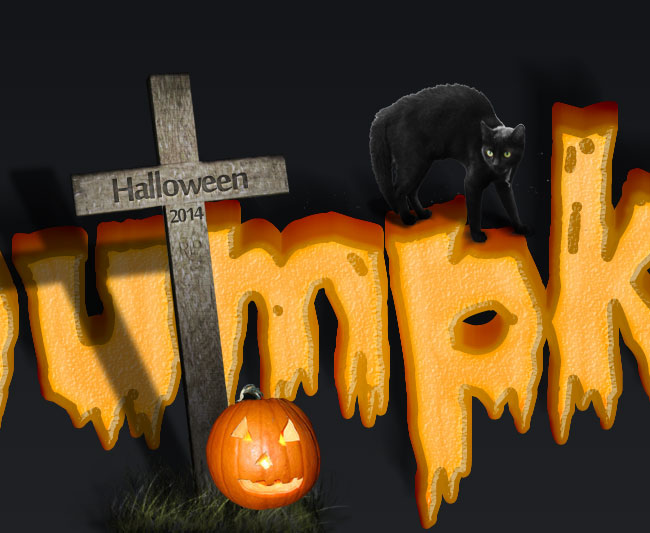
I have also added a text on the Wooden Cross. Use any font you like and pick one of these amazing letterpress styles to create the engrave wood effect.
Let's add another Halloween symbol a scary black cat. In Ancient Celtic religions cats taught to be reincarnated souls of humans, and that they were able to see the future. It was also taught that witches could turn into cats.
Use this black cat stock image and use a Selection Tool to remove the background.
Call this layer Black Cat and add an Inner Shadow and a Gradient Overlay layer styles.
Add a Brightness/Contrast adjustment layer just for this layer.
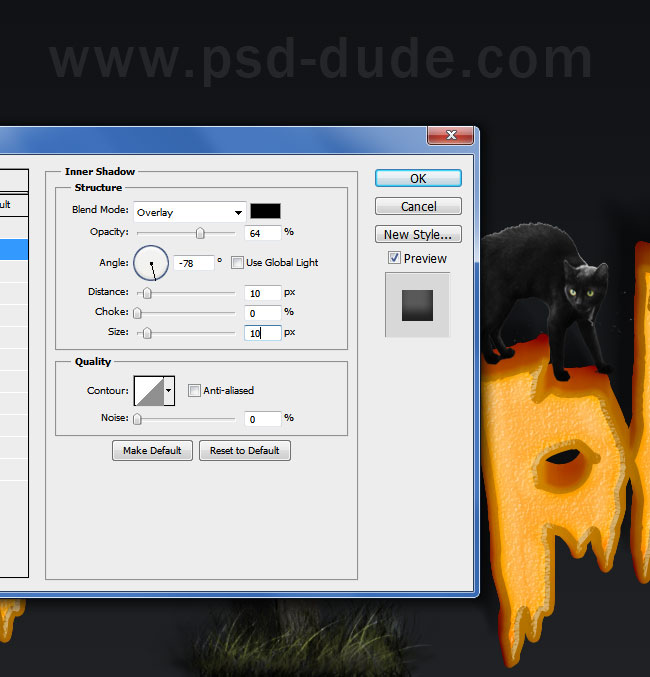
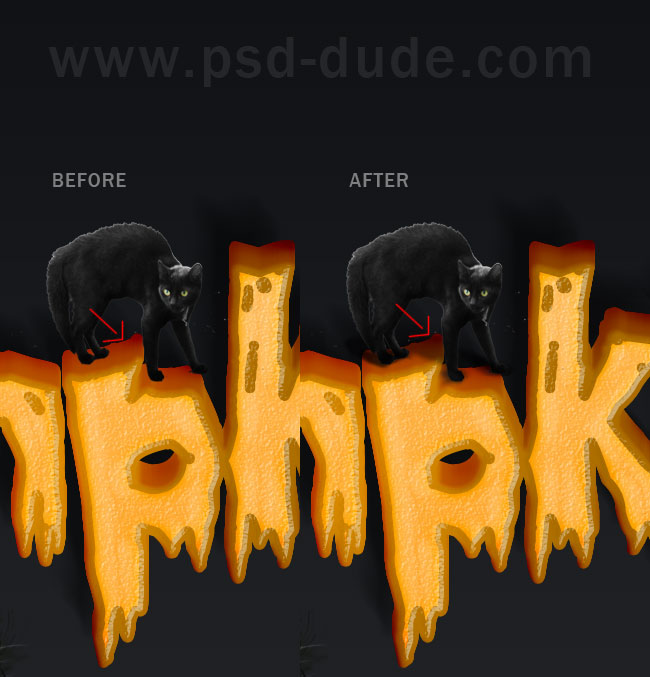
Select the Black Cat layer and its adjustments and convert them into a smart object(right click to Create Smart Object). Add an Inner Shadow layer style to the new created smart object.
Create a new layer and call it Cat Shadow. Pick the Brush Tool and with a soft round brush paint the shadow effect. Use the color black with different opacity levels.
Let's add one or two Jack O'Lantern using this carved pumpkin stock image. Remove the background and place the pumpkin like in the image.
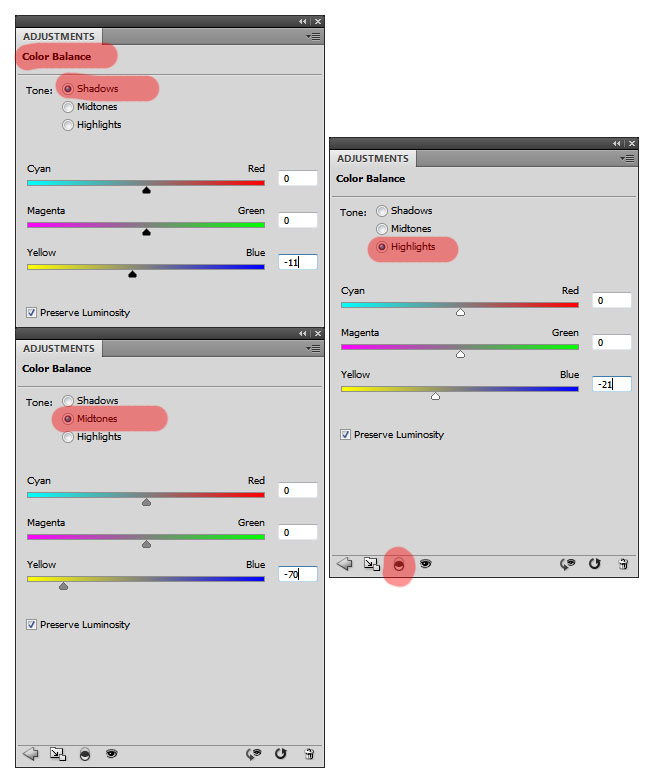
To blend the pumpkin with the rest of the stock images, I will add a Color Balance adjustment just for this layer.
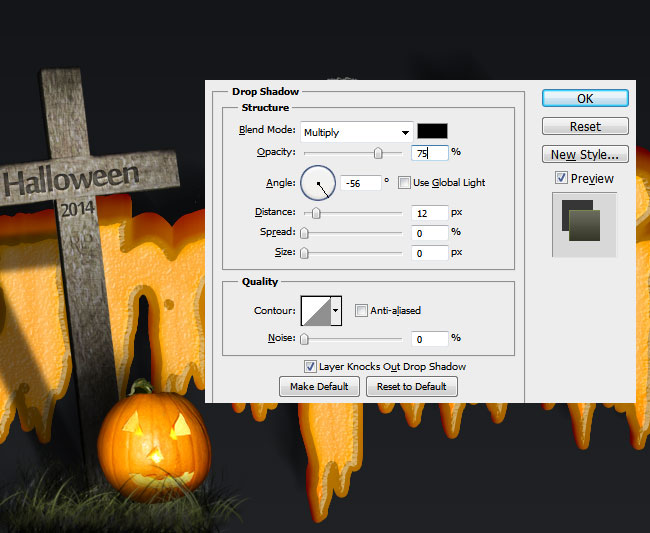
Add some lighting and shading effects using these layer styles for the Pumpkin Layer.
Add some grass in a new layer above the Pumpkin Layer. And don't forget to add a Drop Shhadow style for the grass layer to make the image as realistic as you can.
You can add a second pumpkin; don't forget the cast shadow effects.
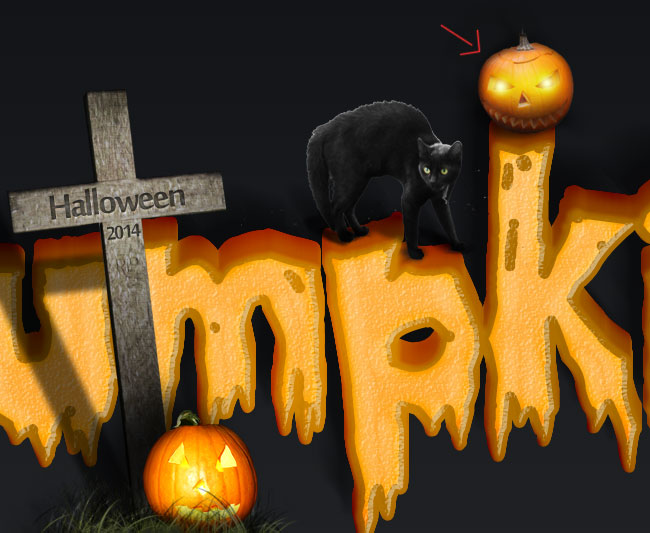
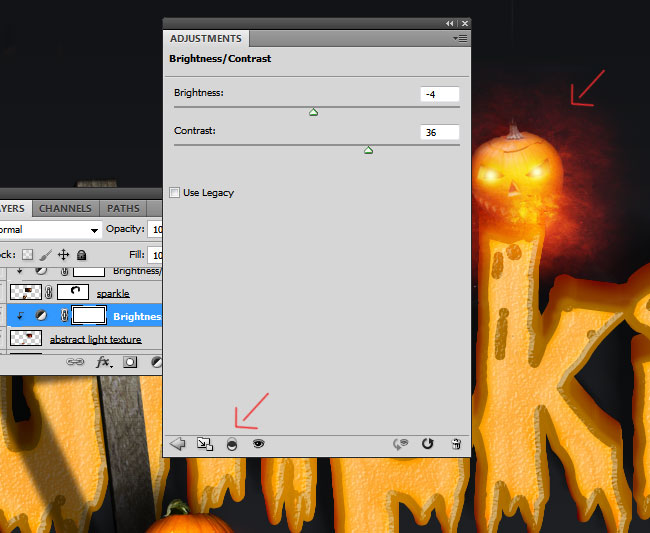
Let's add a little magic to the image and give the feeling that the pumpkins are under a spell. Use this abstract light texture. Set the blend mode to Screen and use a soft round brush to erase the edges of the image, to give it a nice round shape. Add a Brightness/Contrast adjustment just for the Abstract Light Texture layer.
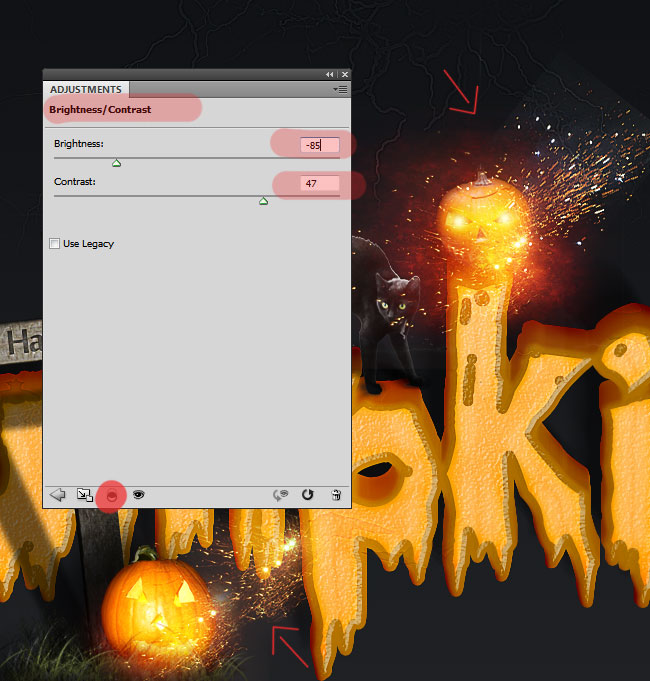
We'll now add another light sparkle effect using this firework stock image. Copy the texture in a new layer and set the blend mode to Screen. Use a layer mask for this texture layer and paint with black color inside the mask. That way you can erase certain areas in a nondestructive way, meaning that the original image remains intact.
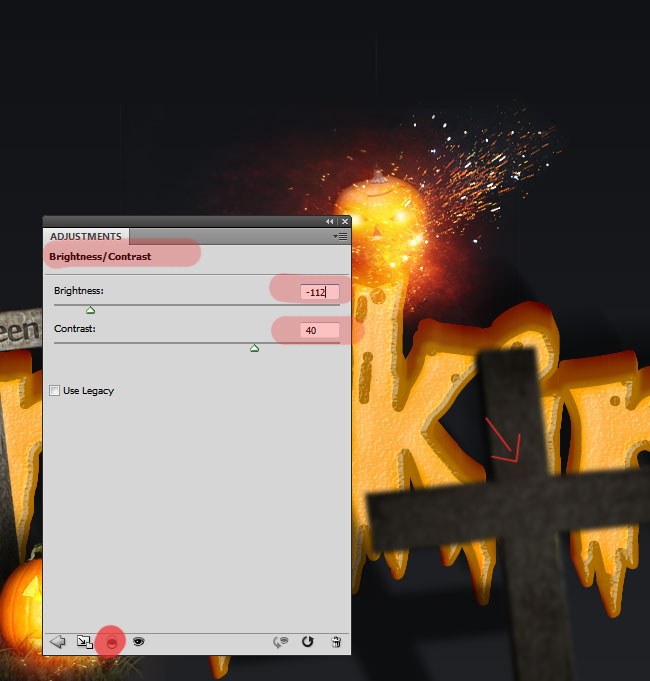
Also add a Brightness/Contrast adjustment just for the Fireworks Texture layer. If you want to add even more sparkle you can add this fire sparks stock image, with Screen as blend mode. You have to resize the image, rotate and place it in the right spot.
Duplicate the Wooden Cross layer and place it in fron of the image like shown in the preview. Resize the image to 130% and add a Gaussian Blur effect; set the Radius to 2.5 pixels. Also add a Brightness/Contrast adjustment just for this layer.
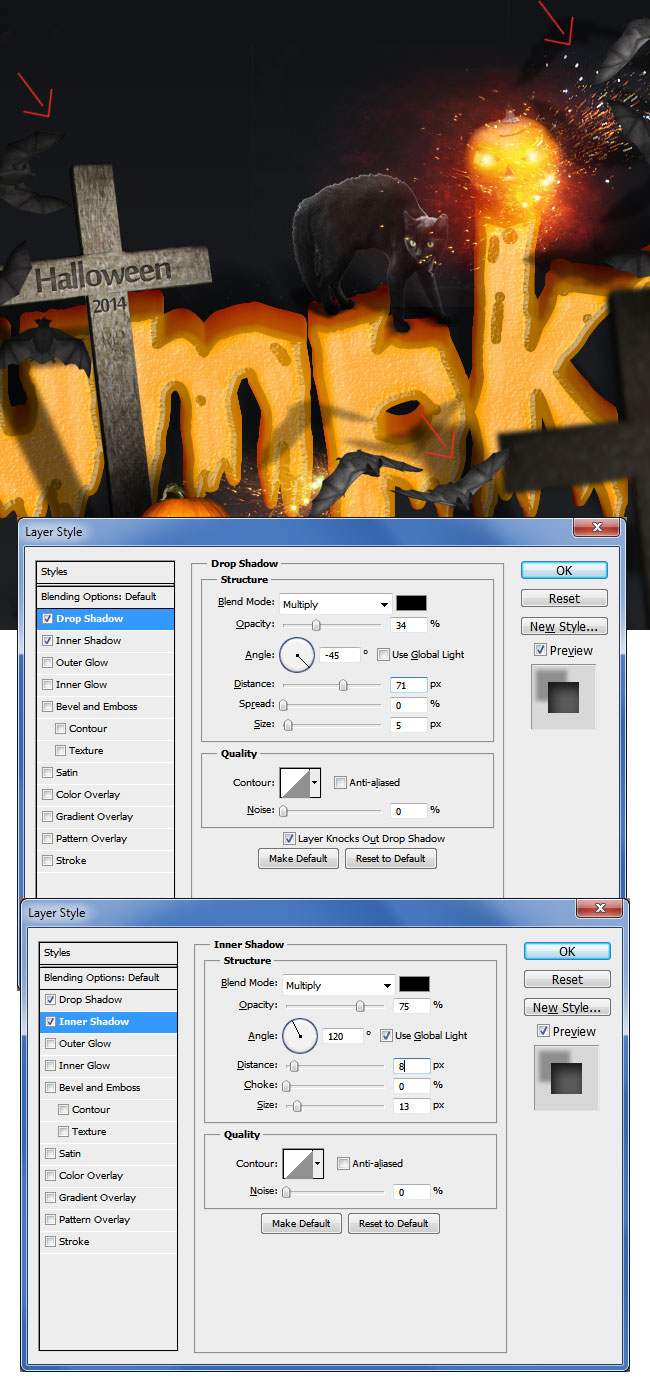
If you want you can add some bats using this PNG stock image. Add the following layer styles to the Bats Layer(s):
For the final touches you can add some lightning effects using one of these lightning textures and brushes. Set the blend mode to Screen and use a Brightness/Contrast adjustment to make the light brighter.
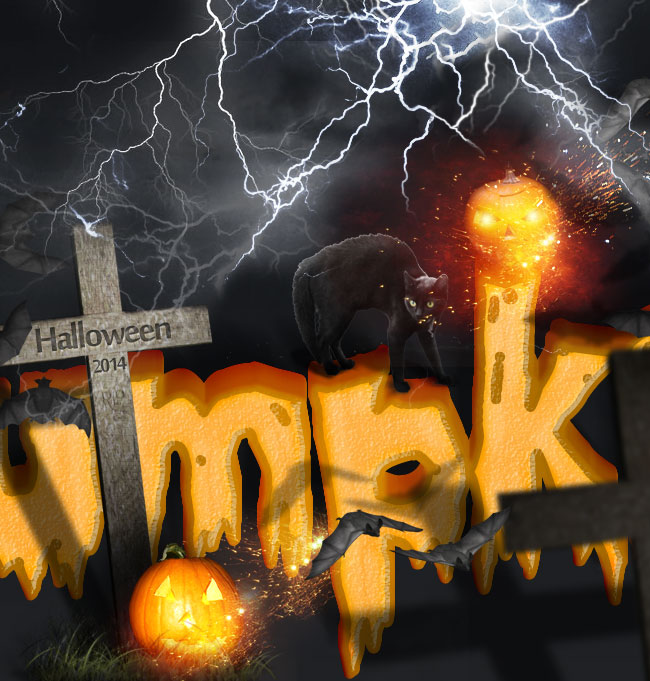
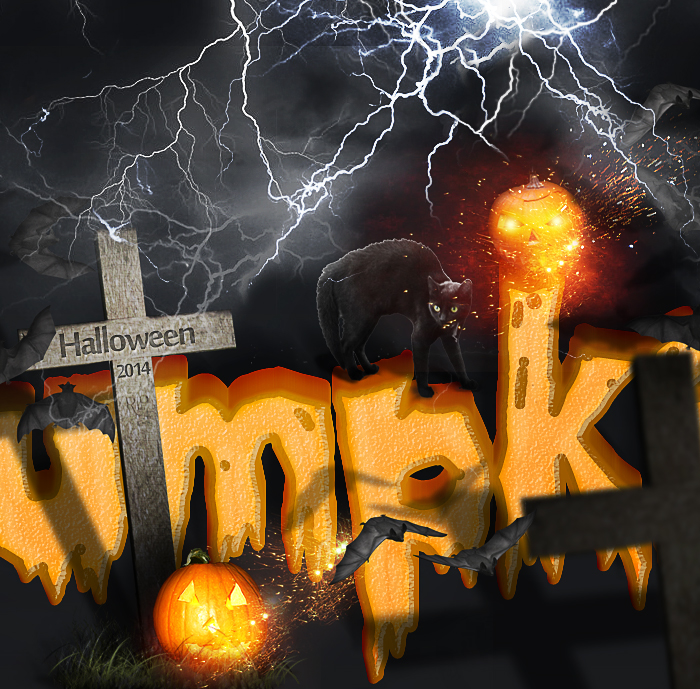
If you want to shaprpen the image for a more spooky effect you can use the High Pass filter. So here is the final result for the Spooky Halloween Text Effect made in Photoshop. Hope you like it :)
2 comment(s) for "Make a Spooky Halloween Pumpkin Text Effect in Photoshop"
hey there, i am facing a lot of problems in this digital art. I have done my bachelors in fine arts therefore my focus was mainly on brushes canvases and colors. So, I am fairly new to this digital thing .
Though I became aware of many things with these tutorials, but I am not sure if I am actually learning something. I can't repeat them on my own, i am not sure when to use these techniques. Further , there were many tuts i couldn't even complete because i couldn't get through a particular step. i get stuck there only.
can u suggest something ?
reply
The key is to persevere!
reply