Sparklers Text Effect Made in Photoshop

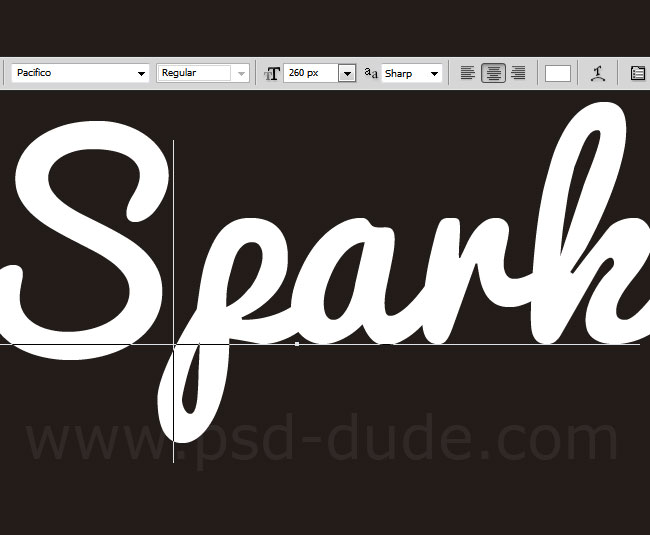
Start with a simple background layer filled with #221c19 color. Write the text that you want. It is great effect for creating a new year party flyer or greeting card. You can use any font type you like. I will use Pacifico which is a free font type. Learn how to install new font in Photoshop from this quick tutorial for beginners.
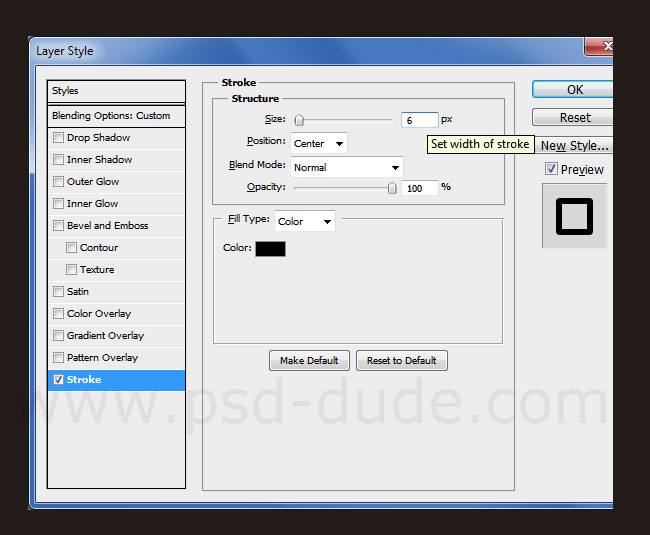
Make a copy of the text layer and call the first layer Sparkler 1 and copy layer Sparkler 2. Let's start with the Sparkler 1 layer by adding these layer styles. The color for the Stroke border is #2b2222.
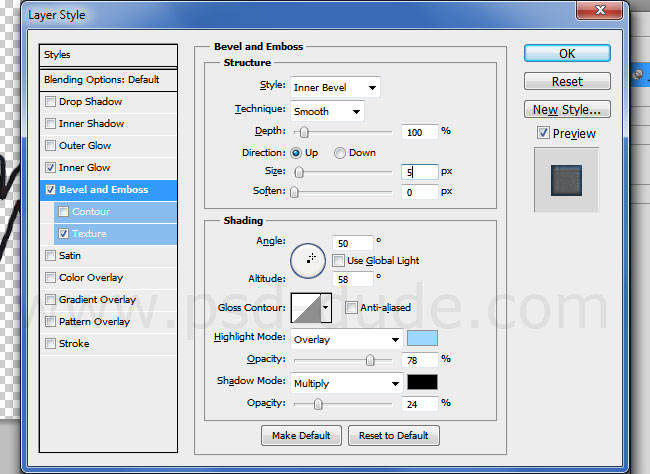
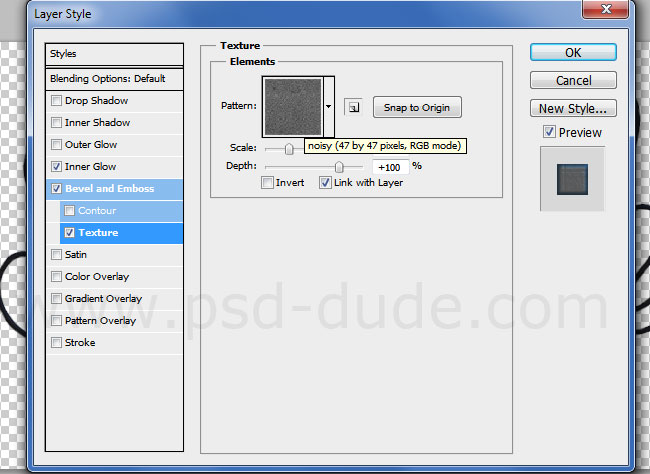
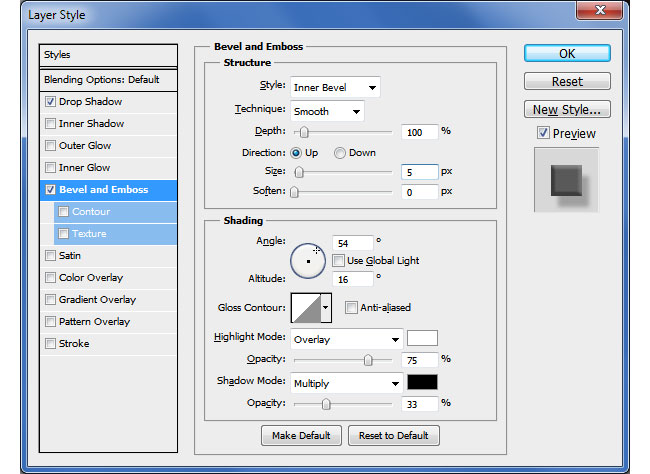
Convert this text layer into a smart object that way you will be able to edit the text. Add these layer styles to the Sparkler 1 smart object. The color for the Inner Glow is #1a3956 and the color for the Bevel and Emboss are #9dd7ff and #000000
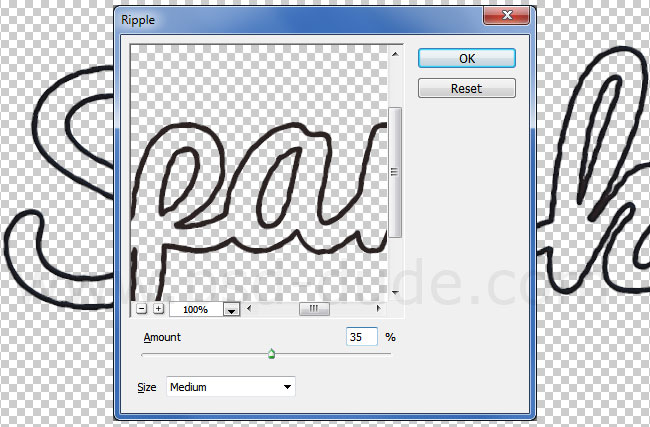
Go to Filter>Distort menu and choose Ripple with these settings. This will be added as a smart filter so you can edit it at any time by double clicking on it. Convert the layer again into a smart object.
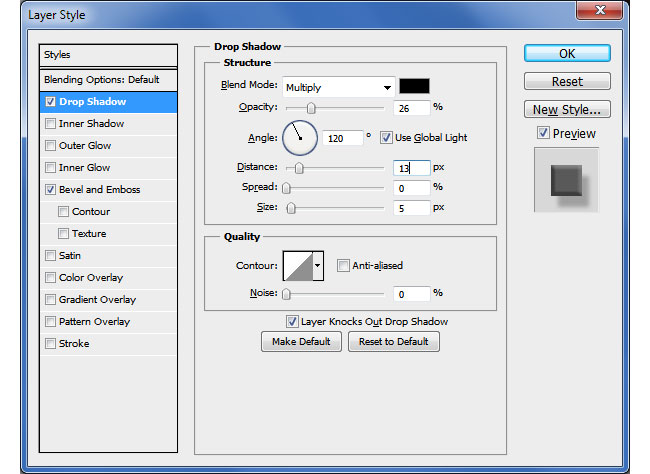
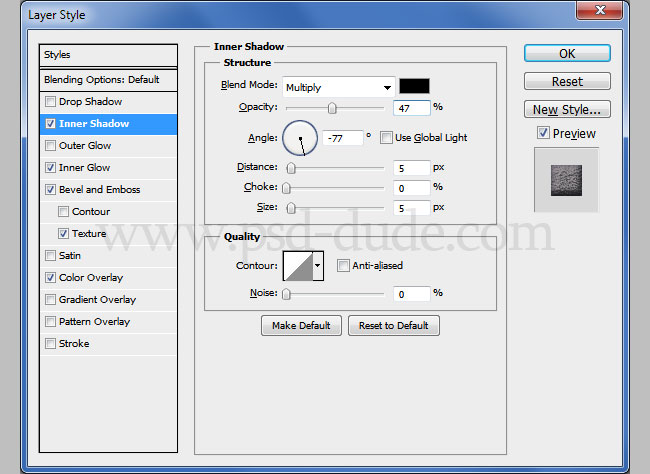
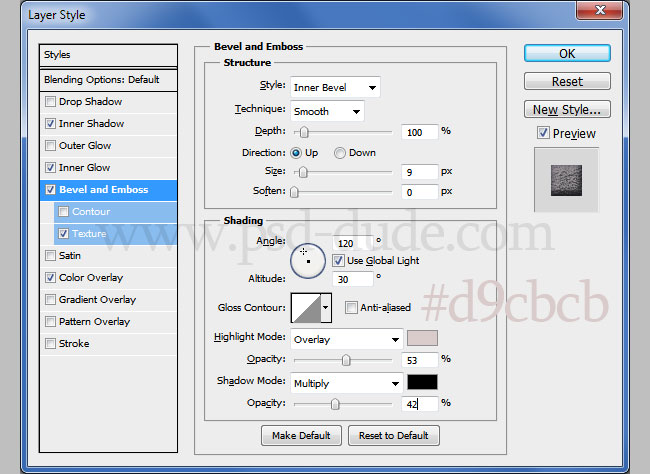
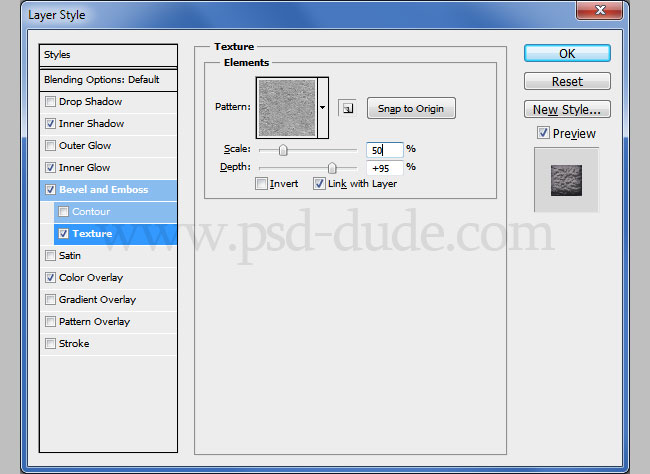
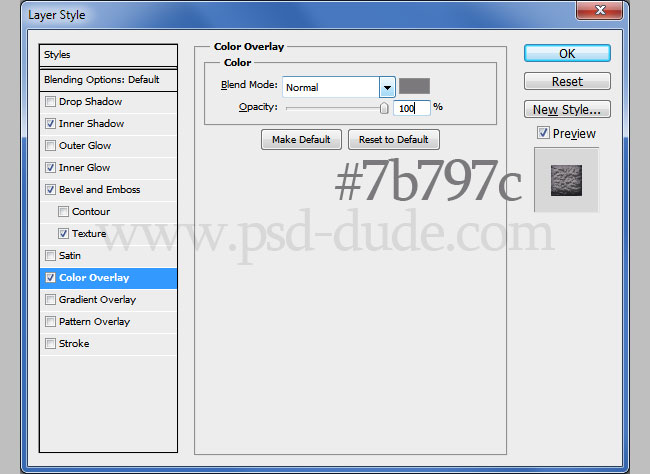
Add these layer styles to the Sparkler 1 smart object.
In a new layer just above the Sparkler 1 smart object, add this lava texture and call it Lava Texture of course. Right click on the layer and turn it into a clipping mask ; that way the Sparkler 1 smart object will act like a mask for the texture layer. Set the blend mode of the Lava Textureto Screen.
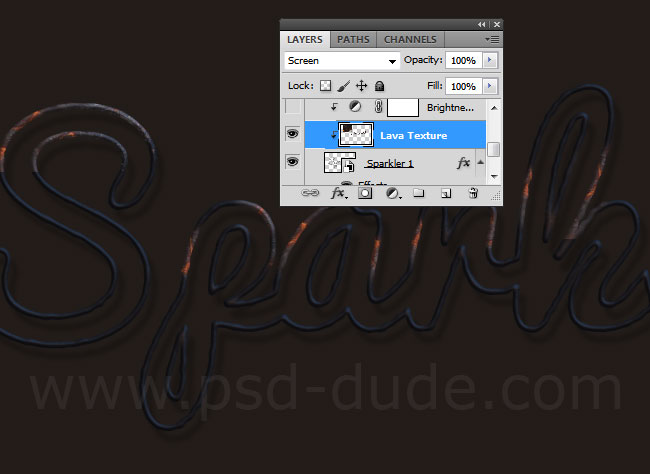
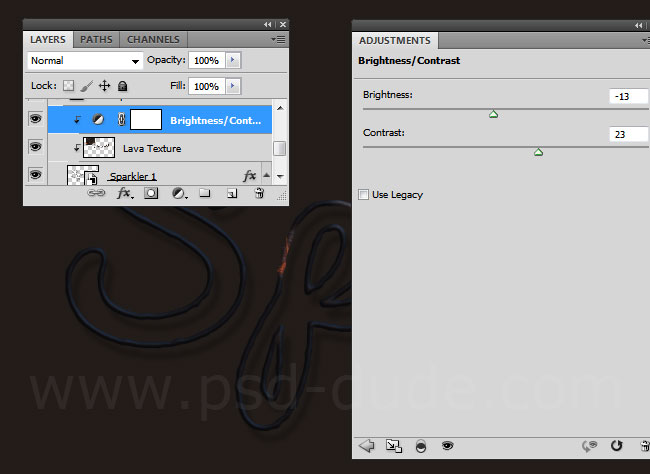
Add a Brightness/Contrast adjustment layer for the Sparkler 1 smart object. Add the adjustment as Clipping mask.
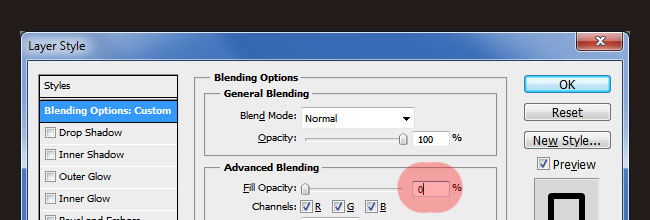
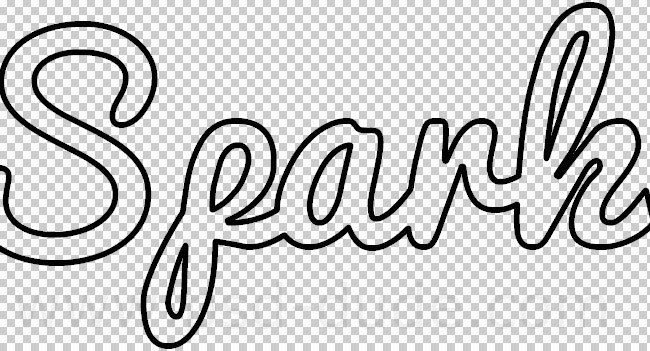
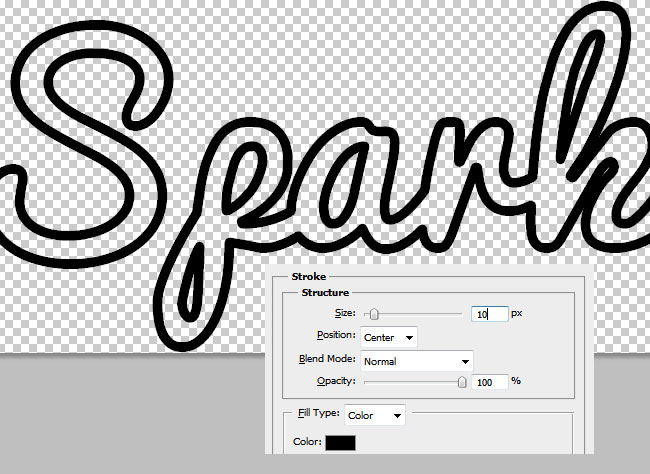
Return to the Sparkler 2 layer and reduce the Fill to 0%. Add a Stroke layer style of 10px.
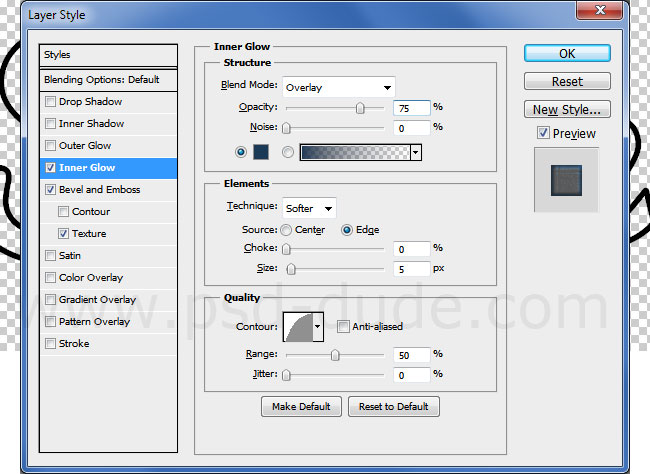
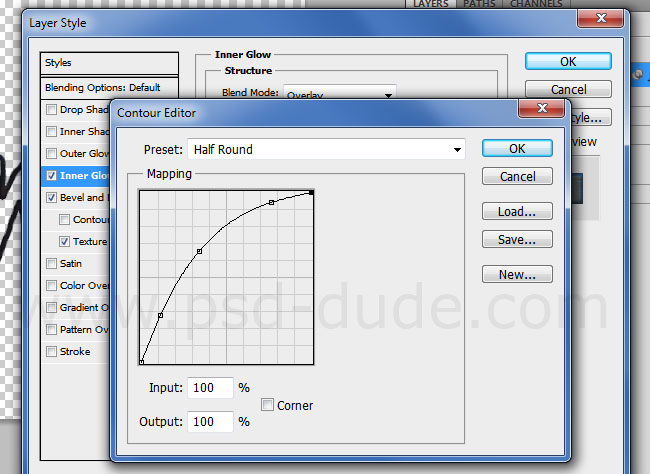
Convert the Sparkler 2 layer into a smart object and add these layer styles to make it look like a sparklers stick.

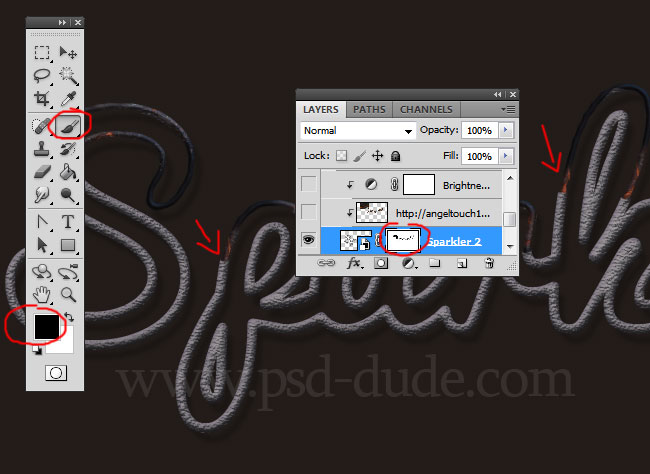
Convert again the layer into a smart object and add it a layer mask like shown in the image.
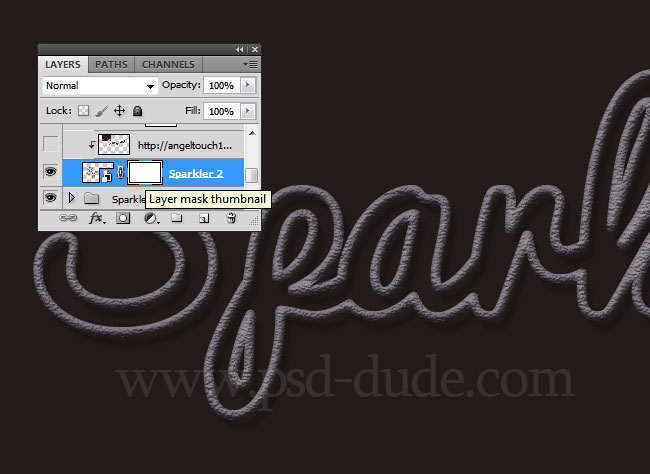
Pick the Brush Tool, color black and paint over these areas to hide part of the text. Make sure you have the layer mask selected otherwise you will not be able to use the Brush Tool. You will get an error message "This smart object must be rasterized .." .
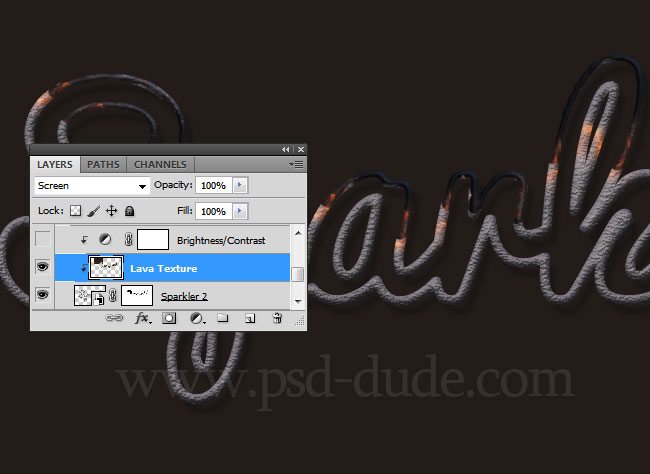
Again add this lava texture in a new layer and call it Lava Texture. Right click on the layer and turn it into a clipping mask ; that way the Sparkler 2 smart object will act like a mask for the texture layer. Set the blend mode of the Lava Texture to Screen.
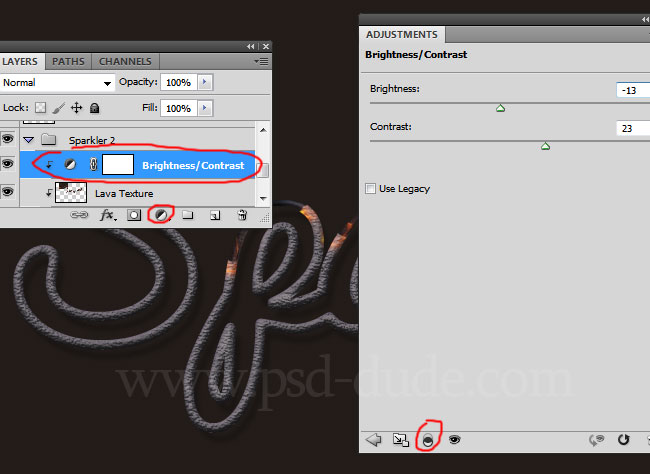
Add a Brightness and Contrast adjustment layer as Clipping mask like shown in the image.
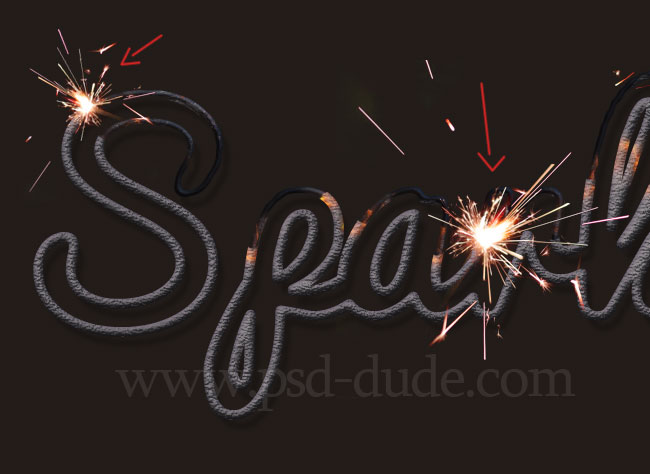
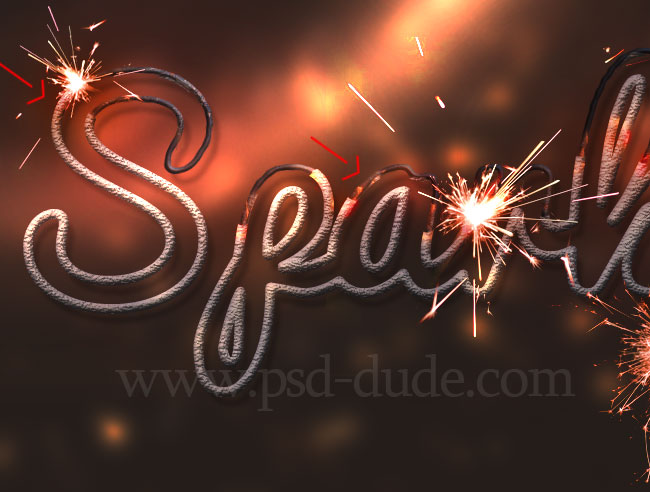
It is time to add the fireworks sparklers effects using real photos. You can of course create the sparklers from scratch but it is a lot easier to use stock images. So in a new layer add this Sparkler stock image and set the blend mode to Lighten. Use the Eraser Tool to delete the unnecessary parts.

Add also a Hue/Saturation adjustment layer to change the color tones like shown in the preview. Make sure you add the adjustment as clipping mask for the Sparkler Image otherwise the color effect change will affect all the layers below.
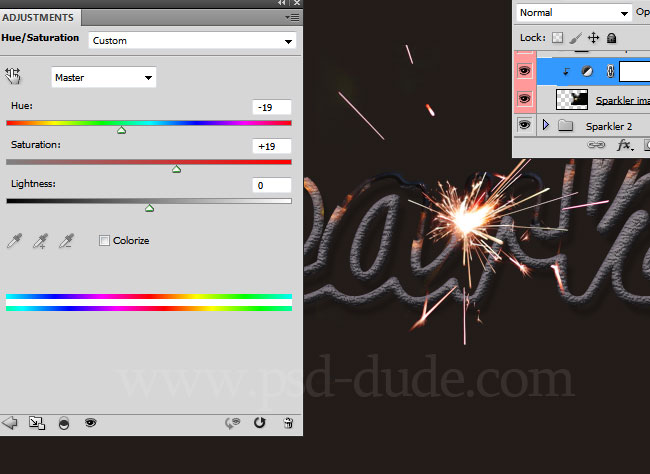
Duplicate the Sparkler Image and its adjustment layer and place it like shown in the image. Resize the image to a smaller size and rotate it.
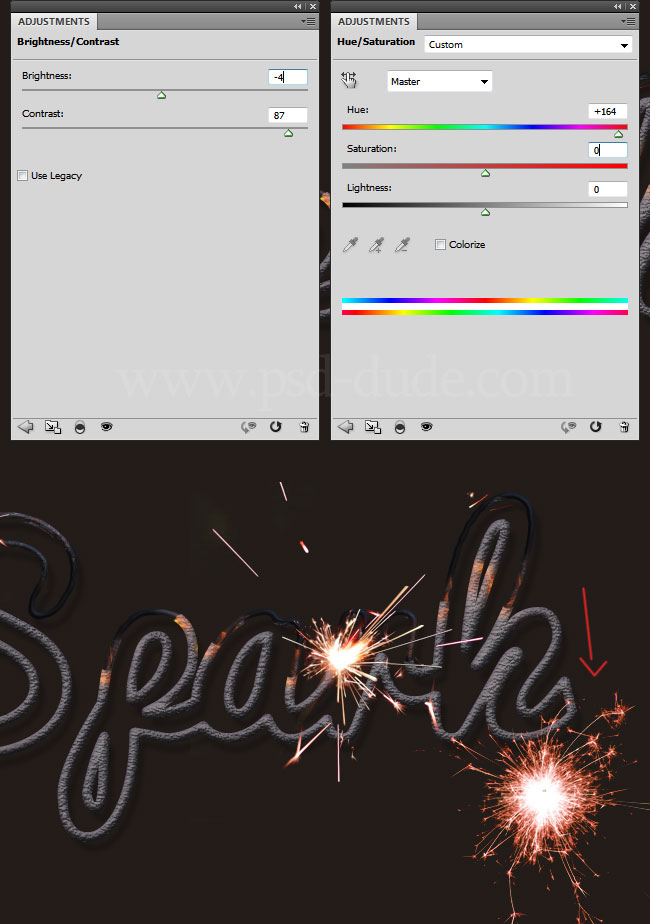
To make the image even more colorful and bright you can add another Spark image. For this image we have to add two adjustment layers, a Brightness/Contrast and a Hue/Saturation.
Add this bokeh overlay or this light bokeh texture in a new layer. Use the Gaussian Blur to obtain a soft look. Set the blend mode to Color Dodge.
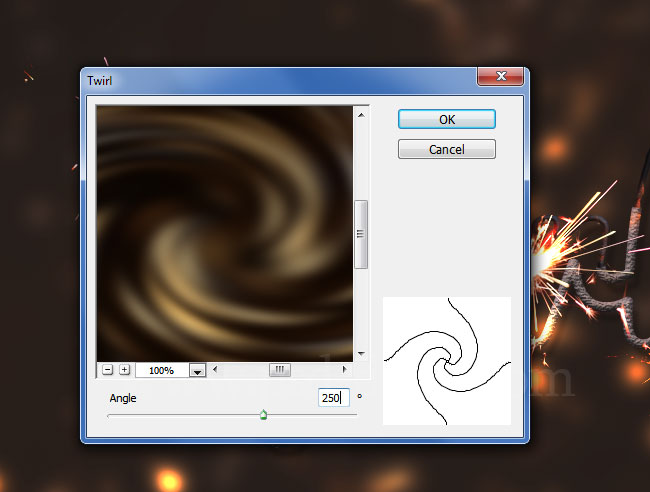
Duplicate the Bokeh Layer and go to Filter>Distort menu and choose Twirl.
Press CTRL+T to resize the image to about 500 % and rotate the image to create a light leak effect. Keep the Color Dodge blend mode.
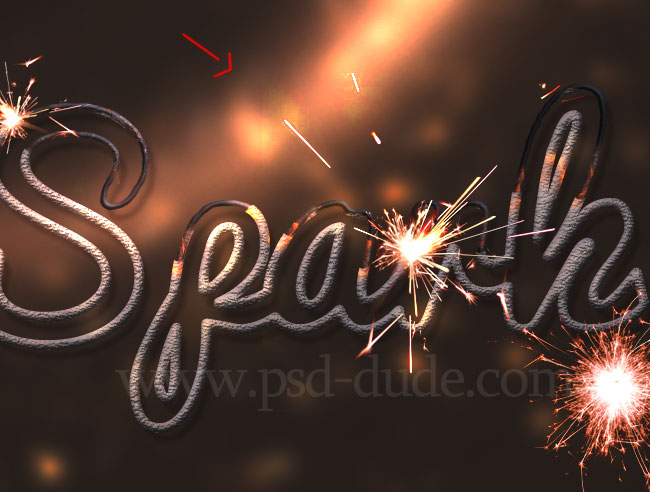
You can also add some layers for color effects. Use the Brush Tool, large size soft round brush and simply paint with a yellow-orange-red color tone in the spots that you want. You can set the blend mode of these layers to either Color, Color Dodge or Overlay. Place these layers some above the spar text effect and some below it.
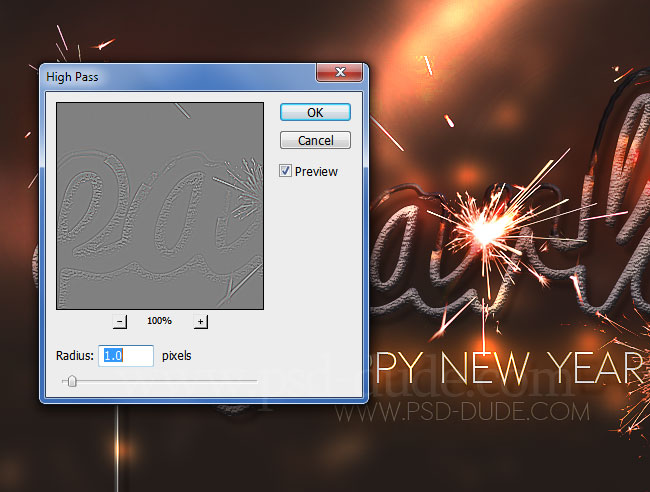
To sharpen the image you can use the Photoshop High Pass filter.
I want to add more blurry light effects so I will use this bokeh Photoshop overlay in a new layer and set the blend mode to Screen.
Use the Burn Tool to daken the edges of the texture overlay; that way you obtian a smooth transition.
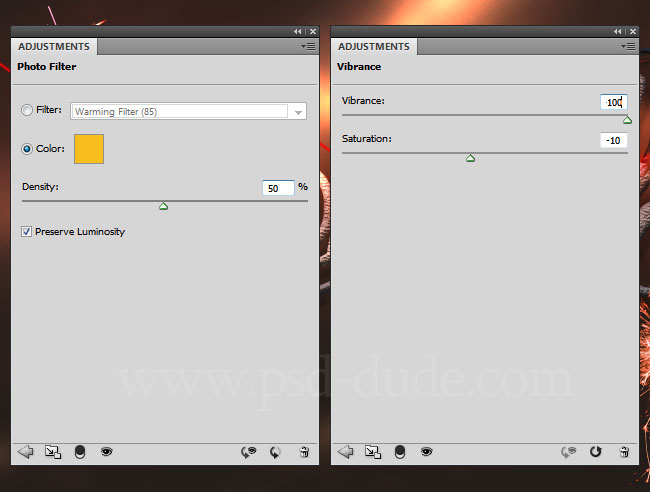
For the final touches use a Photo Filter with a warm yellow tone #f9be1d and a Vibrance adjustment. These adjustments are for all the layers so add them without the clipping mask option.
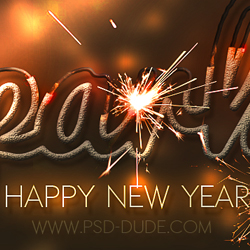
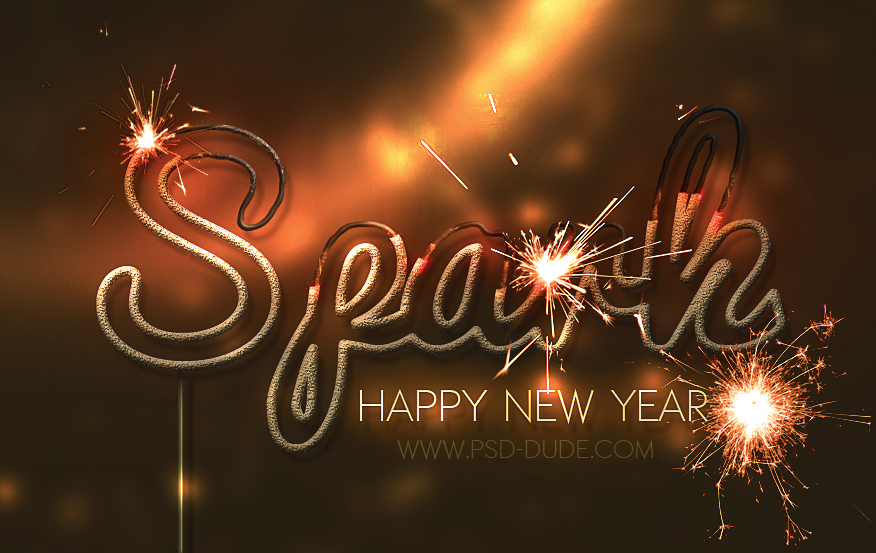
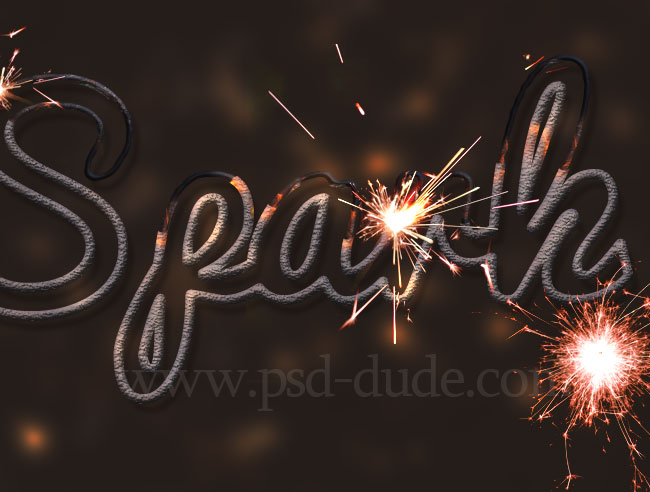
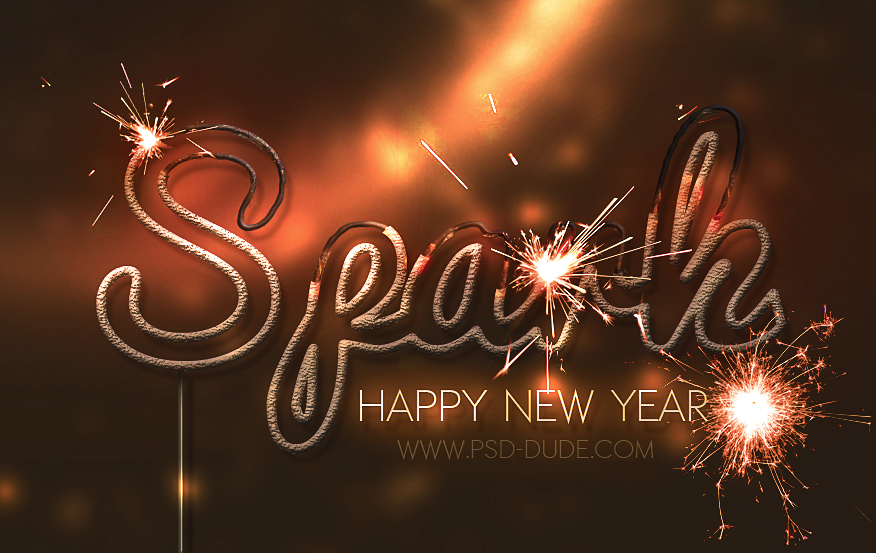
And finally here is the final result for the fireworks sparkler light text effect digitally crafted in Photoshop. Hope you like it!
You may also like...
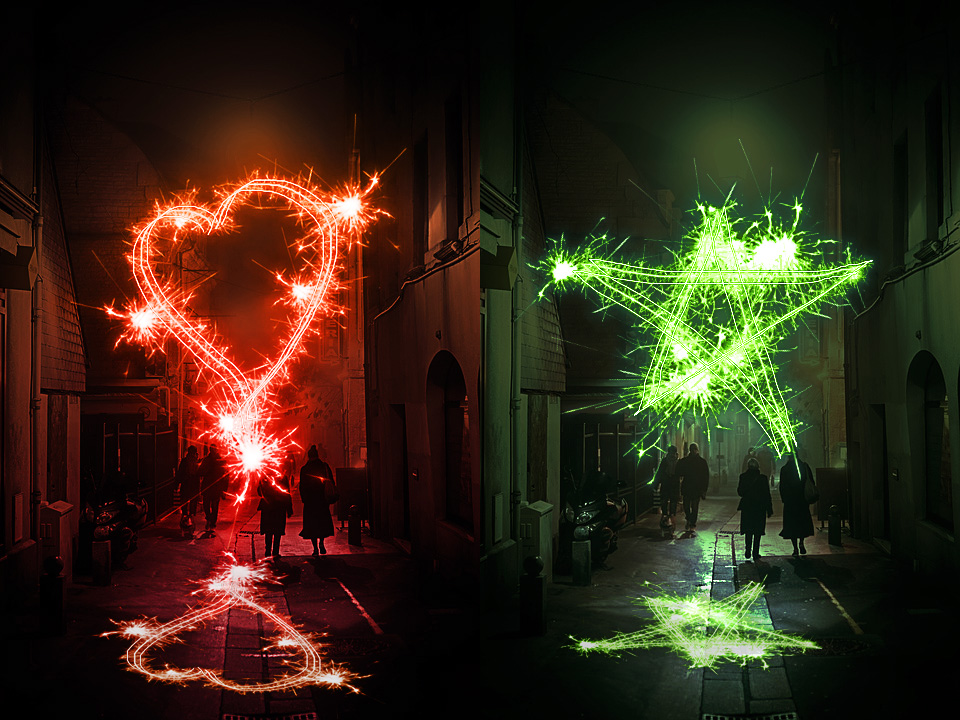
Here are two of my favorite Photoshop actions to create sparklers and fireworks effects out of any text or shape.

Online Christmas Card Maker
Did you know you can use online tools like MockoFun to make Christmas cards? Combine Christmas vector shapes with text and create some amazing Christmas cards. MockoFun provides pre-made templates for making Christmas cards online in just a few minutes.
Check out this awesome list of over 50 Christmas fonts that you can use online or download for free to use in Photoshop. Combine Christmas fonts with text symbols like a star symbol for example.
Check out this tutorial on how to use the online Christmas Card Maker and all the awesome features that MockoFun has to offer.

8 comment(s) for "Sparkler Light Text Effect Photoshop Tutorial"
DOWNLOAD!(331kb)
reply
http://www.testking.com/techking/tutorials/easily-create-a-great-looking-sparkler-effect-in-photoshop/