Step 1 The Text
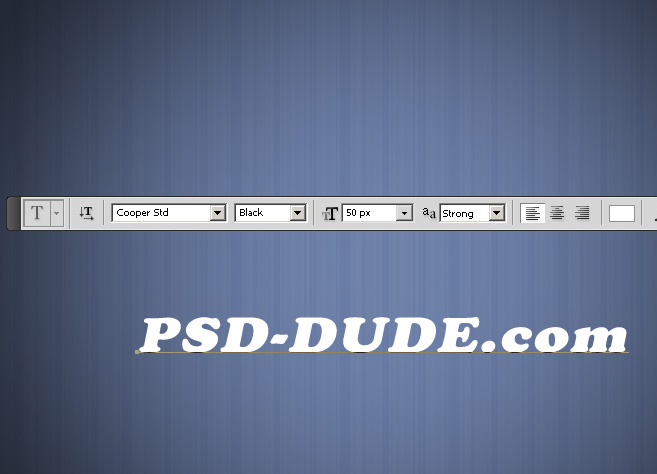
Choose a nice font, I use Cooper Std, black, 50px, strong. You will see that this
text effect does not match with every font type, you will have to experiment.
The color is not important, so simply use white.
Step 2 Drop Shadow
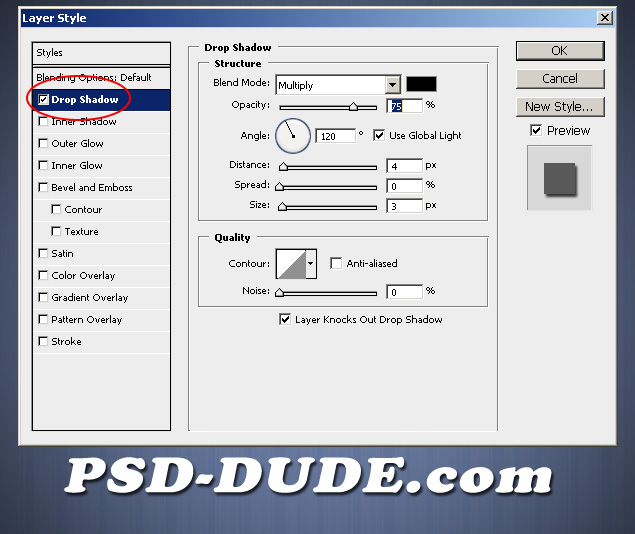
Double click on the Text Layer name and open the Layer Styles window. In the Drop
Shadow section I will make the following settings. Use the Blend Mode Multiply with
color black and opacity 75%.
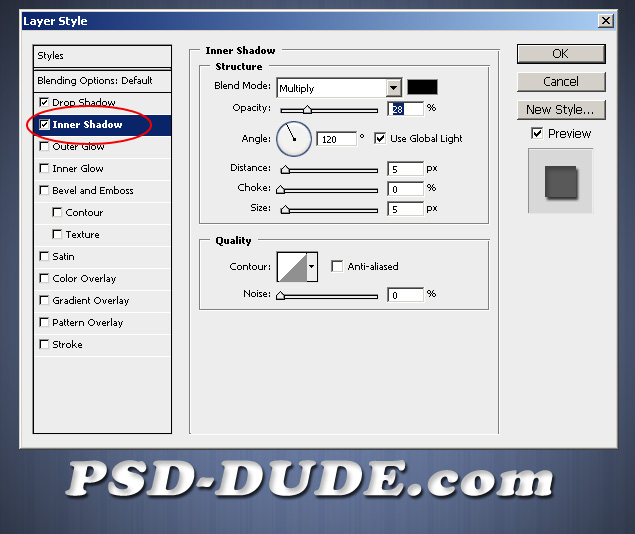
Step 3 Inner Shadow
Add Inner Shadow, use again Blend mode Multiply, color of the shadow is black and
the opacity is set to 28%.
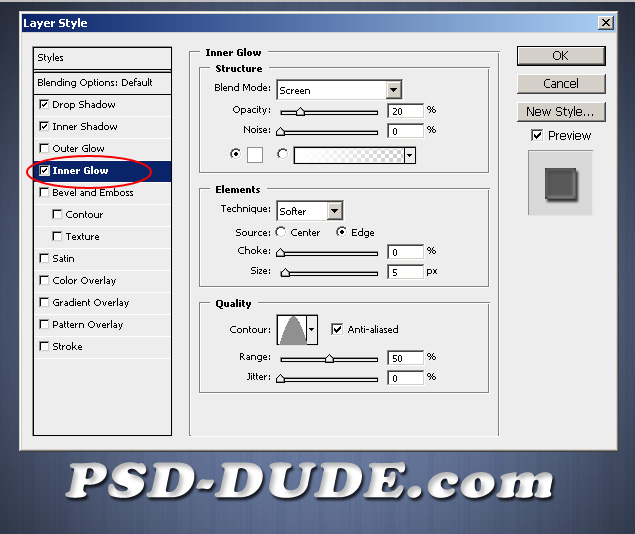
Step 4 Inner Glow
For the Inner Glow use Screen as Blend Mode, color white opacity 20% and other setting
presented in the image below:
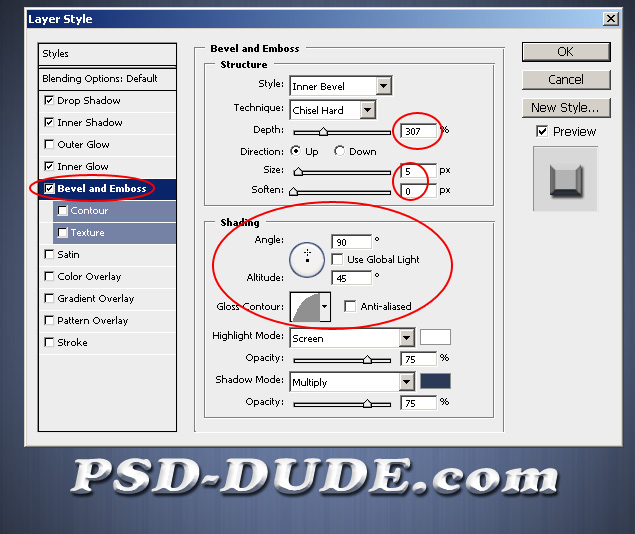
Step 5 Bevel and Emboss
A very important setting is the Bevel and Emboss. This will give the text a 3 dimensional
look. You will see that almost every element is changed so be careful when you set
it. So set Inner Bevel , Chisel Hard. Adjust the depth, size and angle, altitude,
gloss contour. Set the Highlight Mode to screen, color white and the Shadow Mode
to multiply, clor #2c3957.
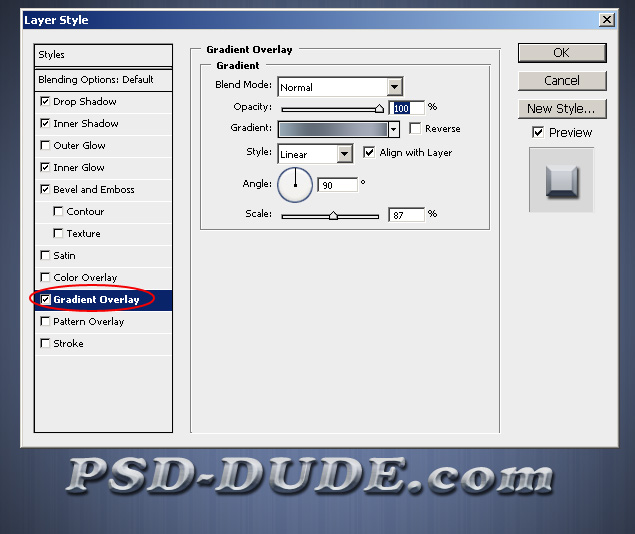
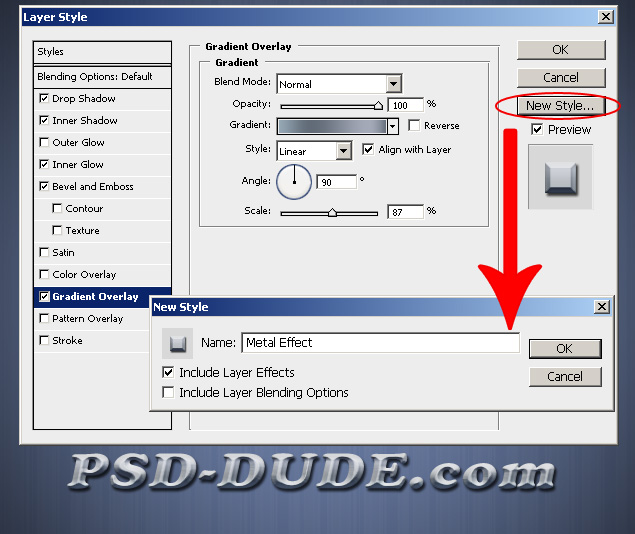
Step 6 Gradient Overlay
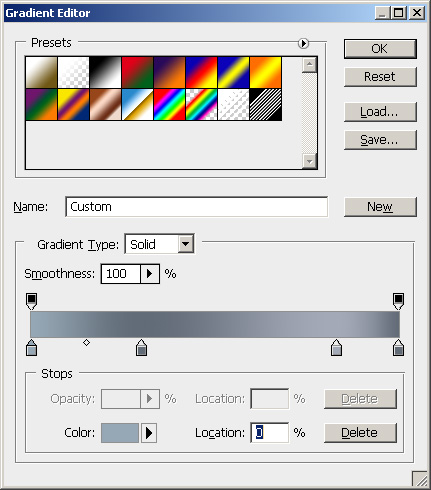
I will now Add Gradient Overlay as a final touch using the following settings for
the gradient: color #96a7b5, location 0%; color #626b77, location 30%; color #a3aab8,
location 83% and color #626b77, location 100%. You can of course use another tones
of blue and different locations.
Step 7 Saving the Settings as a New Style
After you set all the elements, Photoshop offers you a really nice feature. You
can save all these settings in a style and use it later for other text, shapes,
etc.
So you can see in the Layer Style window, a button called New Style. So give your
style a recognizable name, let's say Metal Effect.
 Pick the Custom Shape Tool and draw a shape. You will see that the Custom Shape
Toolbar has an item called Styles that contains a lot of preset styles and of course
our new saved style Metal Effect. Choose this style and you will see that the custom
shape has now all the settings done in a single click.
Pick the Custom Shape Tool and draw a shape. You will see that the Custom Shape
Toolbar has an item called Styles that contains a lot of preset styles and of course
our new saved style Metal Effect. Choose this style and you will see that the custom
shape has now all the settings done in a single click.
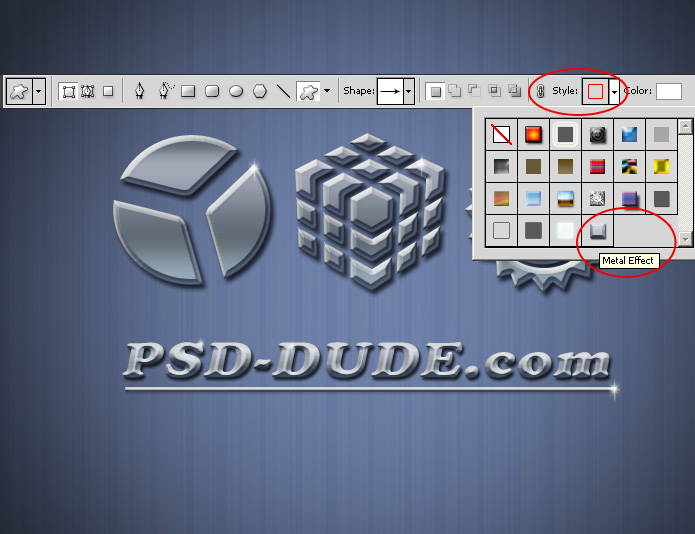 If the style option is not in the toolbar and you want to use it for another text
or another layer, simply go to Windows menu and check Styles.
If the style option is not in the toolbar and you want to use it for another text
or another layer, simply go to Windows menu and check Styles.
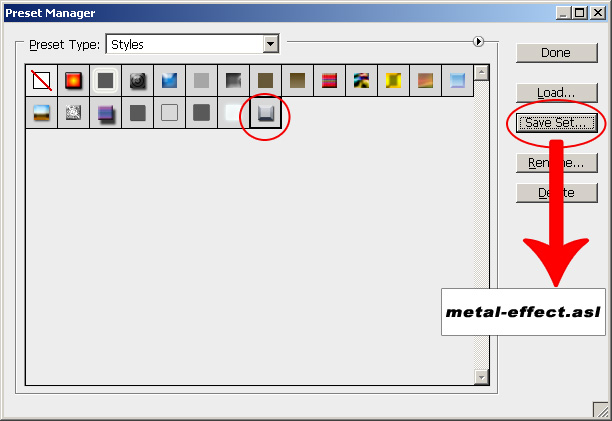
Step 8 Save the Style into an .ASL File
Let's say we want to save this style on our computer, to load it later, to publish
it on a website for others to download it and use it. This thing is possible. Just
go to Edit menu, choose Preset Manager, Preset Type : Styles.
Select the style and click Save Set and give it a name, let's call it metal-effect.asl
. A set can contain at least one but as the name says it can contain a set of styles.
 So this is the final result for Metal Text Effect:
 You can download metal-effect.asl here.
3 comment(s) for "Metal Text Effect Using Styles Photoshop Tutorial"
Just one thing though, working a lot with Photoshop we know how to apply the spark/glow effect. But maybe you should include that in the tutorial (or link to an article that explains it) for the reply
Congratulations!
I`we just started a tutorial indexing website and I would like to ask you to submit some tutorials :D
You can submit tutorials without registering, but if you register you will get gift points f reply