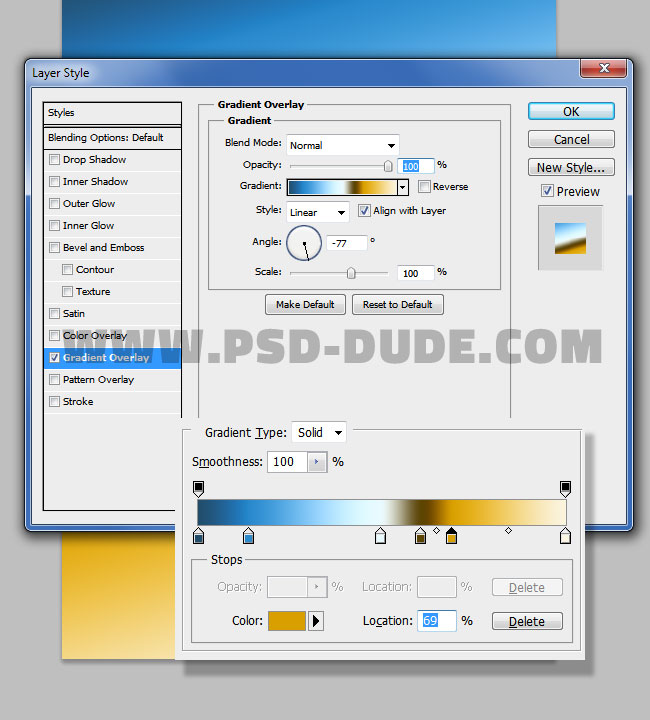
Create a new PSD file of around 740x1080 px size. If you want another size image simply go to Image > Image Size and simply input a new size. That way the proportions are kept intact. Create a Background layer and fill it with white color. Add a Gradient Overlay layer style using these settings and colors: #224d6b, #2989cc, #e9faff, #5d4401, #d99f00 and #fcf5e1.
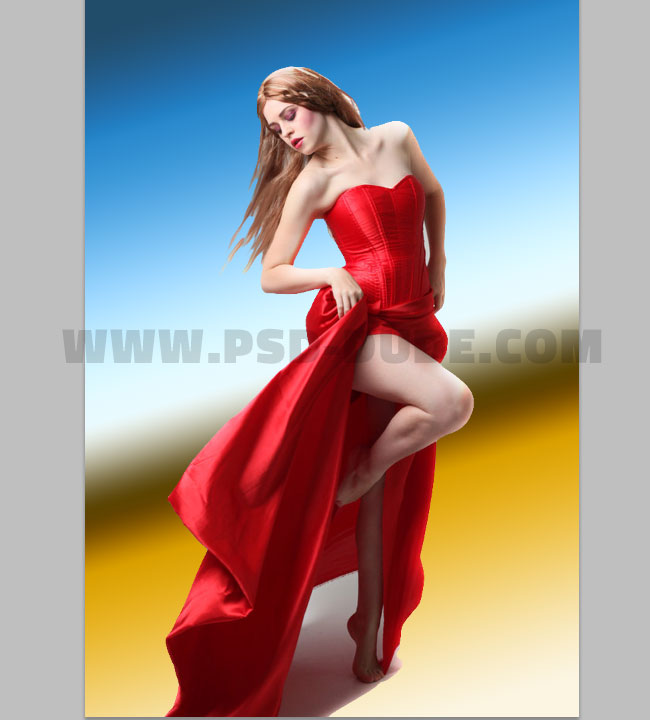
Add the lady in red stock image in a new layer. Use a Photoshop Selection Tool to remove the background. Make a rough cut for the hair area as we will fix it in the next step.
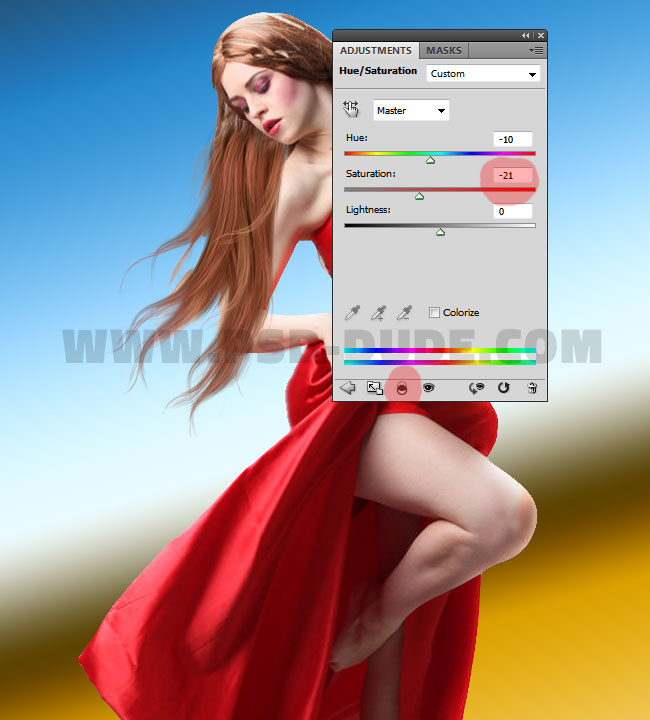
Use this painted hair stock image. Resize it and place it like shown in the image. Add a Hue/Saturation adjustment just for this layer using a Clipping Mask. Merge the Hue/Saturation adjustment and the Hair Layer.
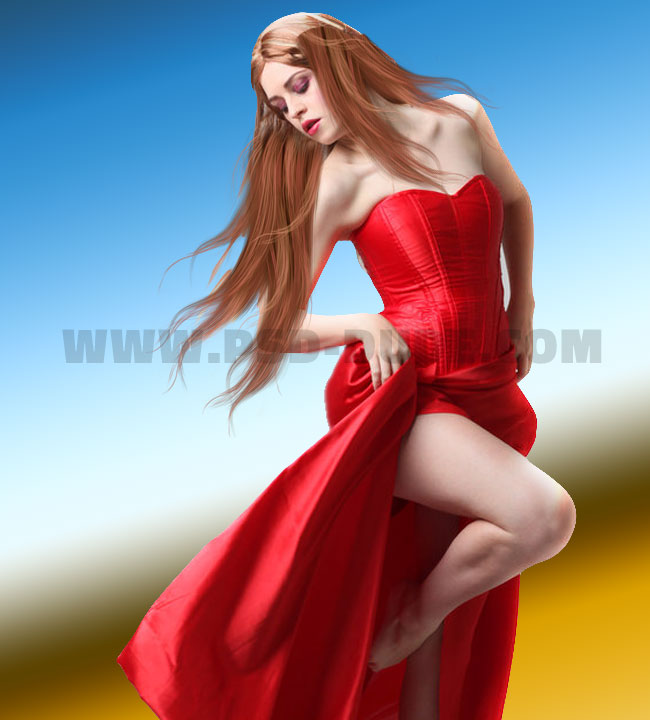
Duplicate the Hair Layer and place it like shown in the preview. Use the Eraser Tool to cut the unwanted areas.
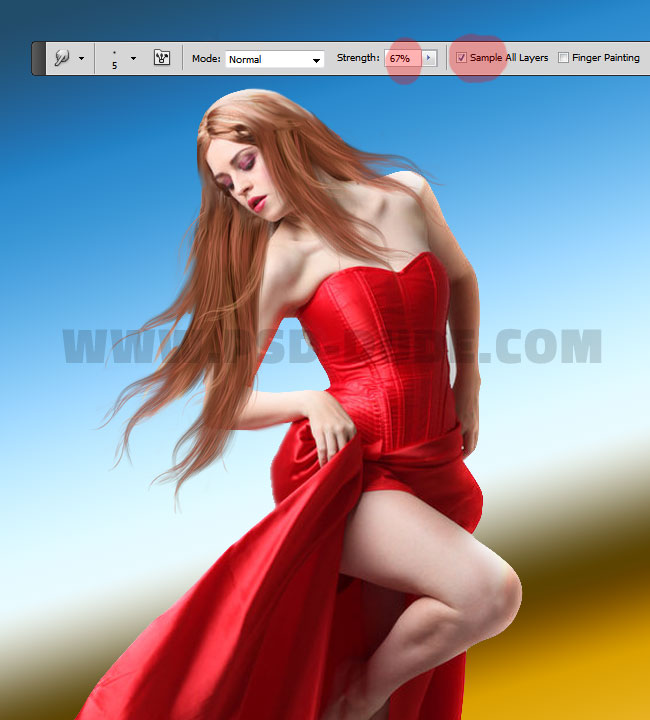
Hide the Background Layer and use the Smudge Tool for the 2 hair layers to blend the added hair strands with the original image. Make sure you have the Sample All Layers checked.
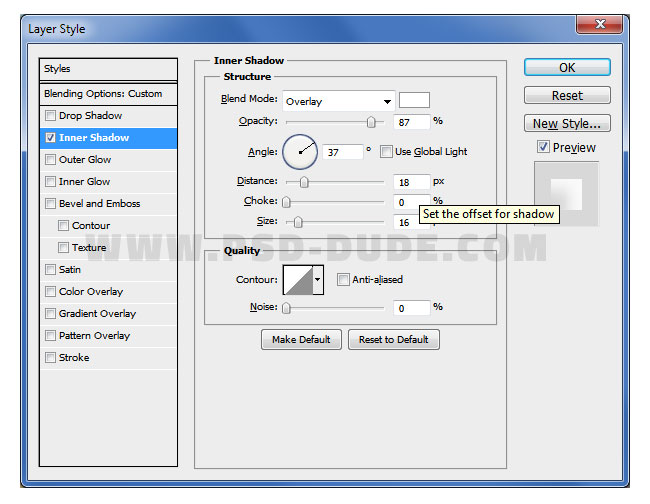
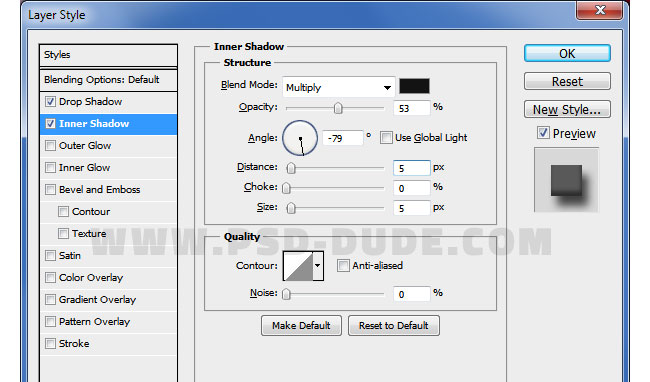
Select all the girl layers including the hair layers and right click to Convert to Smart Object. Call the smart object "Lady in Red". Duplicate the "Lady in Red" layer, reduce the Fill to 0% and add an Inner Shadow layer style.
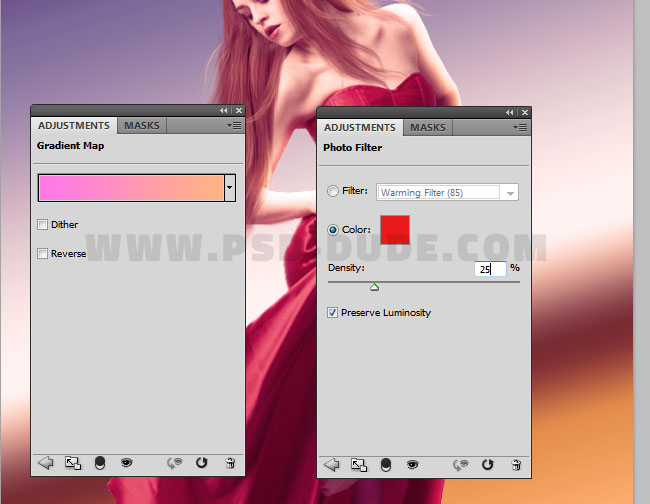
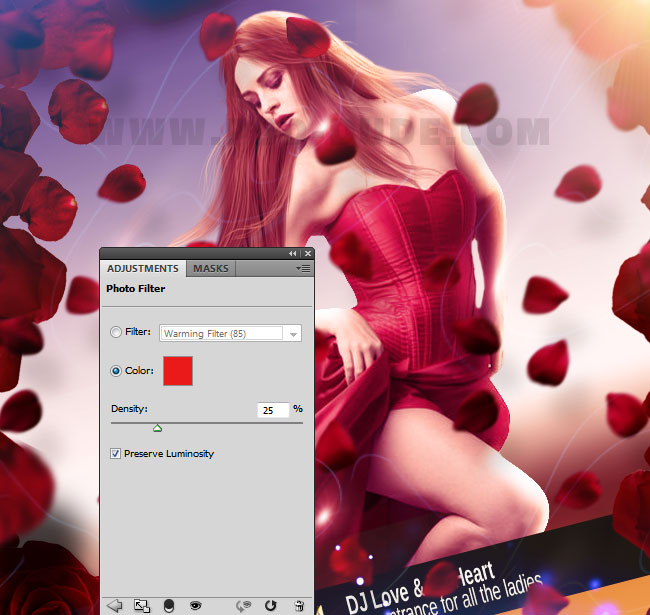
Next, add a Gradient Map(colors: #ff79e6 and ffb285) with Color Blend Mode and opacity 50%. Also add a Photo Filter(color: #ea1a1a) with Normal Blend Mode and opacity 100%.
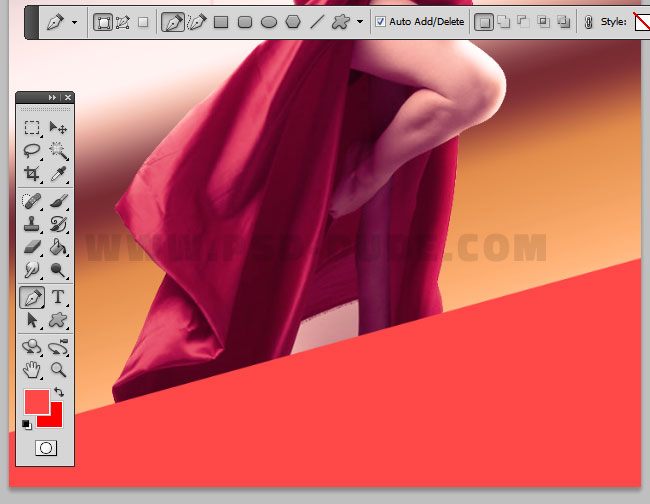
Use the Pen Tool to create a shape like shown in the preview. Call this layer "Shape".
Pick a wood texture that you like and place it in a new layer above the "Shape Layer". Right click and choose Create Clipping Mask. Use the Move Tool to arrange and move the texture.
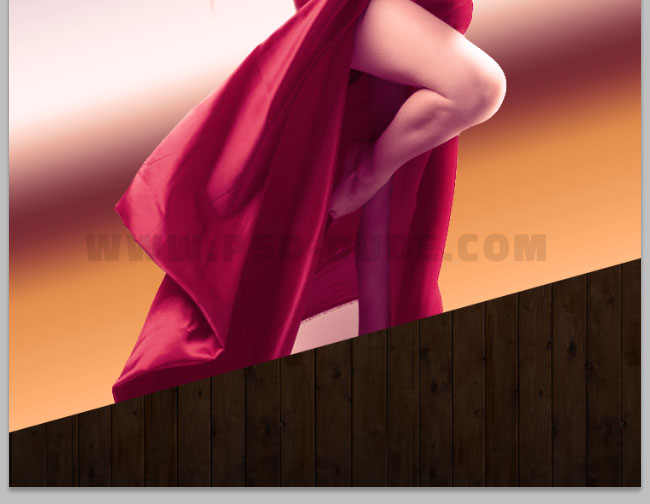
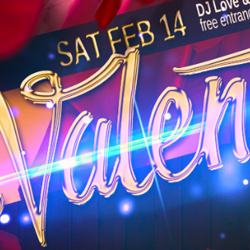
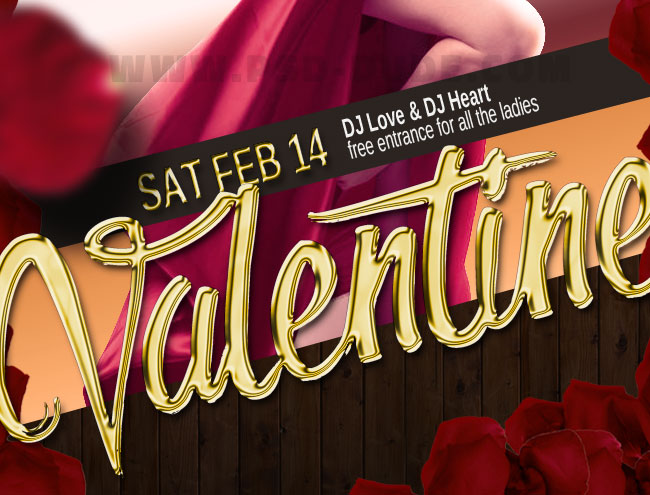
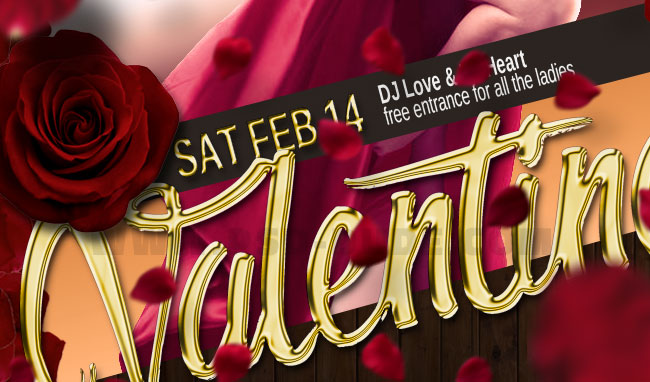
Use the Pen Tool to create a new shape like shown in the preview. The color for this shape is #2b2420 . Add a text that you like. I used a gold style for one of the text.
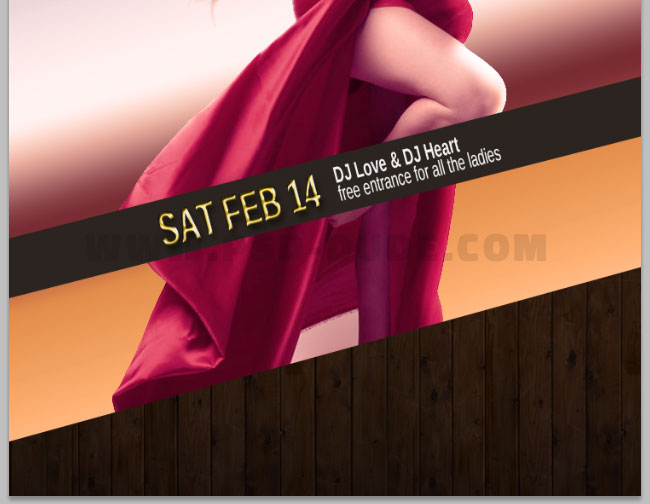
Time to add an eye-catching glamour text style using again one of the gold text effects that you can download from here . The font that I used is the Olympic Branding Font Type which is a free font.
- Add New Font in Photoshop
- To add a new font on your computer you have to follow a few simple steps. Once the font is installed it will automatically appear in your Photoshop Fonts list. Read more...
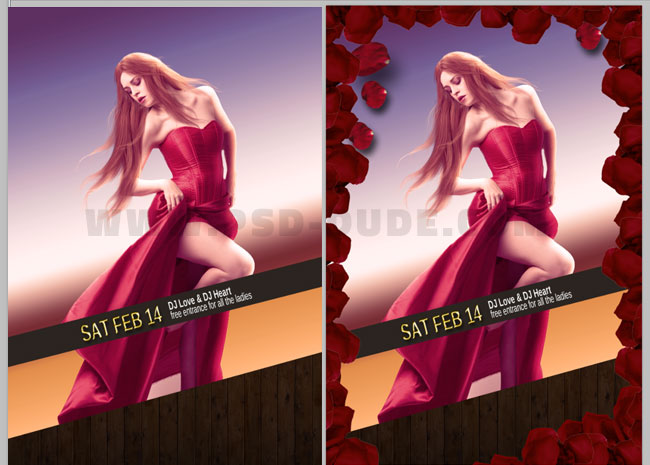
Use these rose petals stock images to create a nice frame for your image: rose petals 1 , rose petals 1 and rose petals 1 .
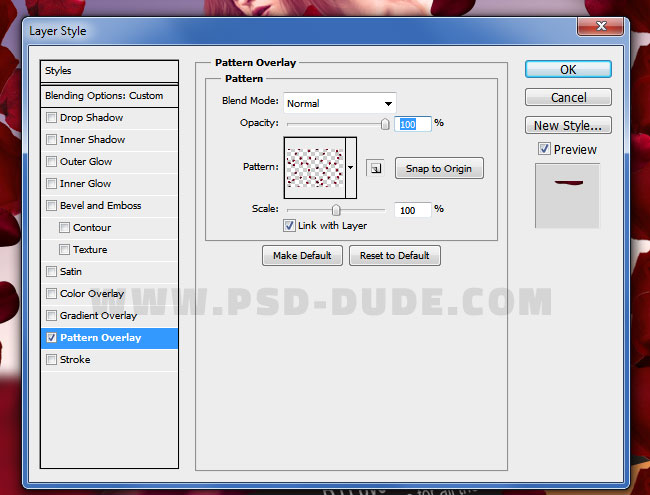
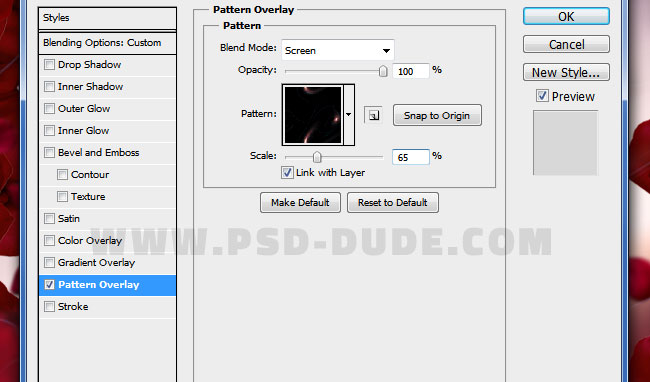
Create a new layer "Rose Petals Pattern" and fill it with white color. Set the Fill of the layer to 0% and add a Pattern Overlay using this rose petals pattern from the PAT file. Extract the files from the ZIP file and load the PAT file in Photoshop.
- Load Patterns in Photoshop
- To load a new pattern in Photoshop you have to load a PAT file. Go to Edit > Preset Manager, choose the Preset Type, in this case Patterns and simply click on the Load Button.
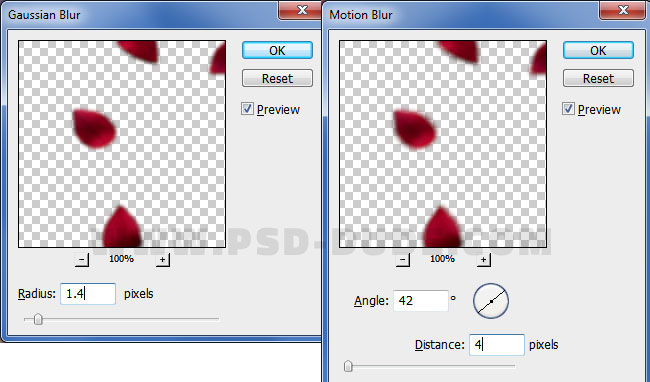
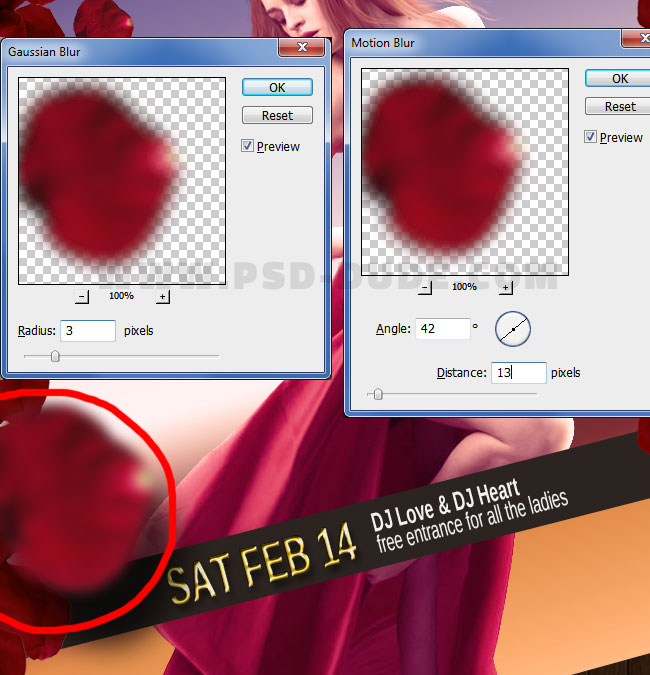
Convert the "Rose Petals Pattern" into a smart object and add Gaussian Blur and Motion Blur like shown in the preview. Also add a soft Drop Shadow effect.
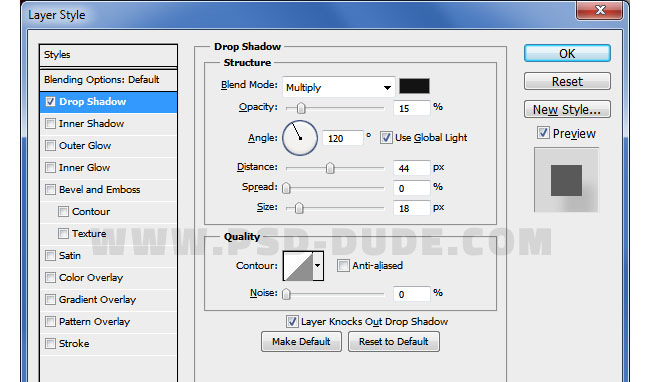
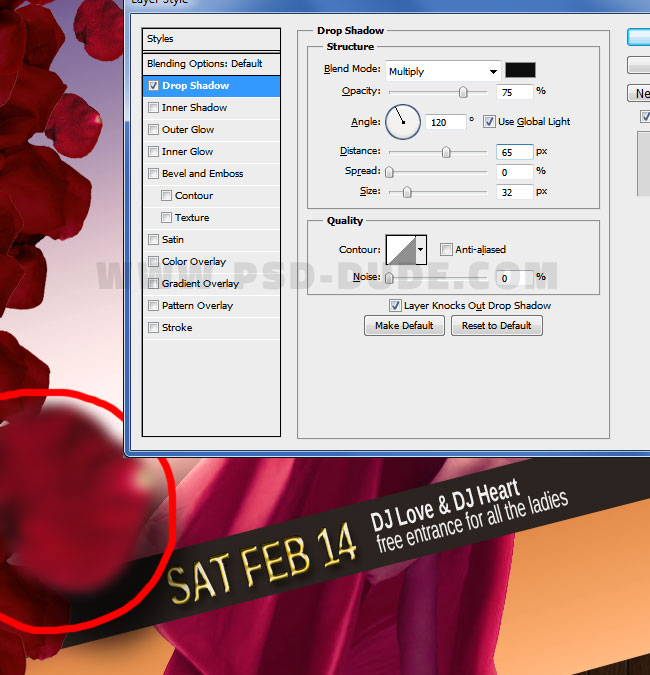
If you want you can add this beautiful Valentine rose png image. Add a Drop Shadow and an Inner Shadow layer style.

You can add one petal at a time in a separate layer, resize it to around 120-150% and add Gaussian Blur and Motion Blur to create speed motion effect. Also add a Drop Shadow layer style. You can add as many flying petals as you want in different parts of the image.
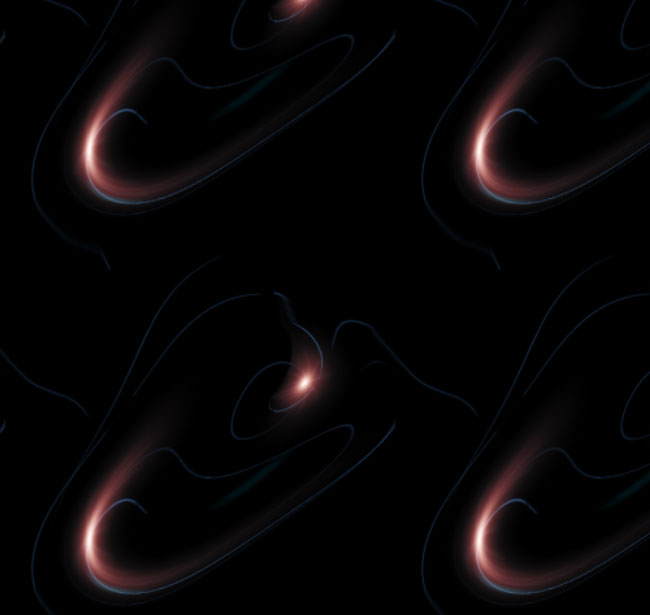
Create a new layer "Flare Effect" and fill it with white. Set the Fill to 0% and add a Pattern Overlay using the flare pattern. Inside the PAT file that you downloaded in one of the previous steps you will find the flare seamless texture.
For the final touches you can use one of these Flare Textures in a new layer. Set the blend mode of the layer to Screen or Lighten(which one works best).
Add a Photo Filter using color #ea1a1a and set the blend mode to Soft Light opacity 50% or less.
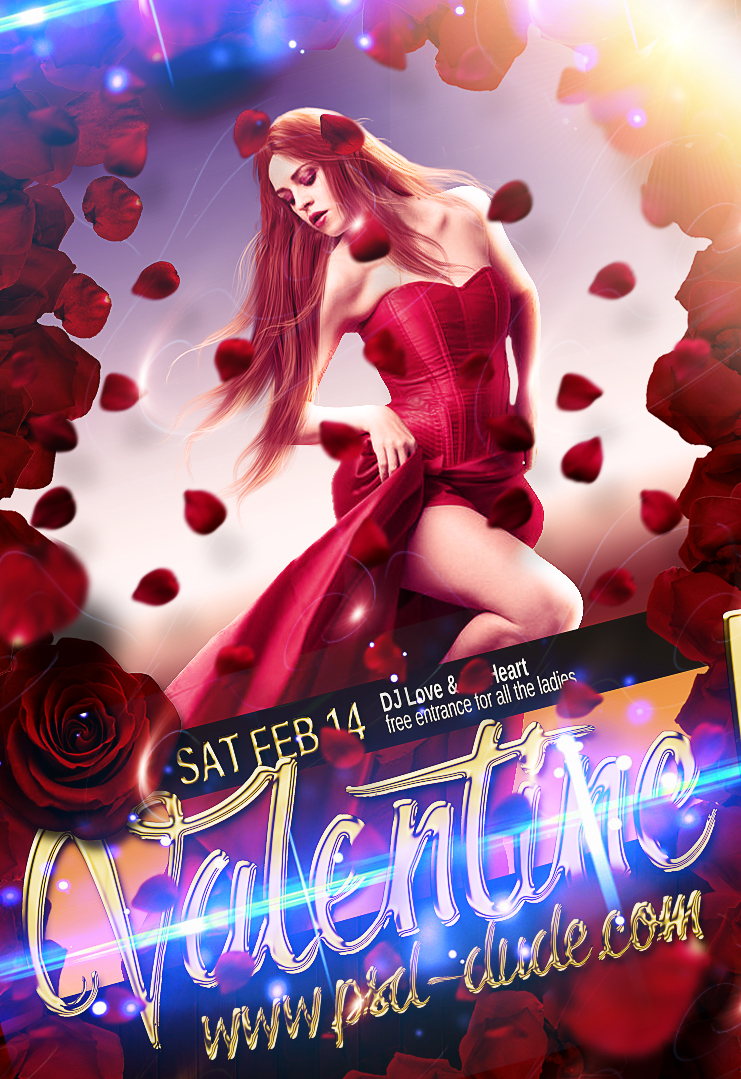
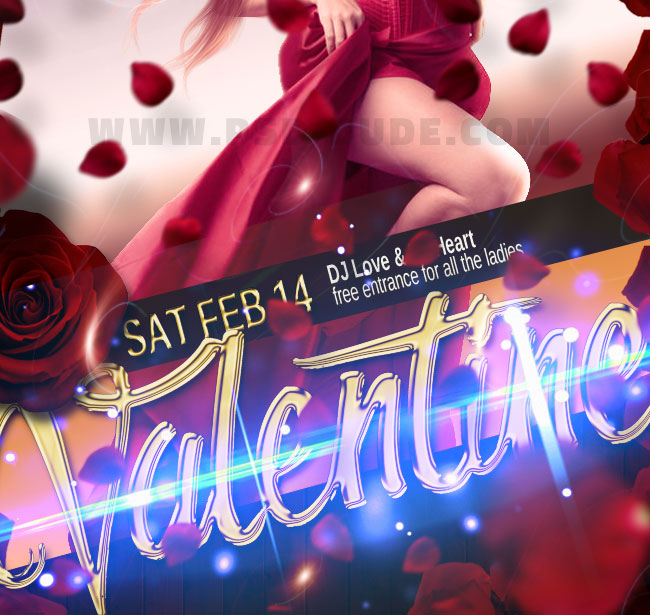
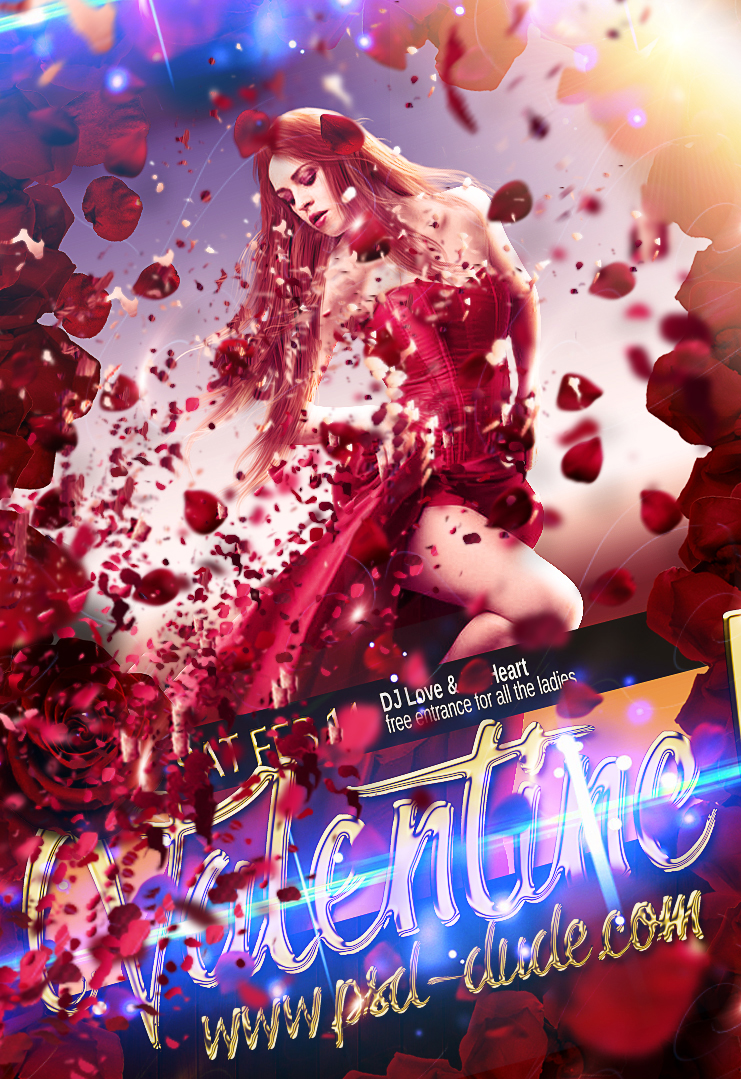
In the end, use this technique on how to Sharpen Photos With High Pass Filter in Photoshop to add more contrast to your image. So here is the final result for the Lady in Red Valentine Party Flyer Photoshop tutorial.
So here is the final result for the Lady in Red Valentine Party Flyer Photoshop tutorial. Hope you all like it and decide to give it a try. I am waiting to see your results so you can upload your finished photo manipulation on our comments section.
If you want you can use this free dispersion disintegration Photoshop action to create an even more interesting effect. Merge all the layers and play the action. Customize the result by moving the layers. Duplicate the layers, resize them to 150%, add Gaussian Blur and/or Motion Blur to obtain a similar or better result.
No comment(s) for "Lady in Red Valentine Day Party Flyer Photoshop Tutorial"