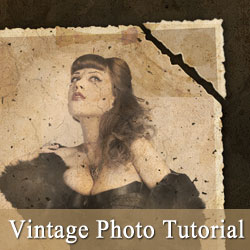
Make your photo look old in Photoshop using some simple Filters, Photoshop adjustments and brushes. The vintage effect can be applied to any photo with great results. There are other tutorials on the internet that teaches you how to create an old vintage photo effect so you might want to check them out as well; here are the best tutorials roundup on how to age a photo in Photoshop.
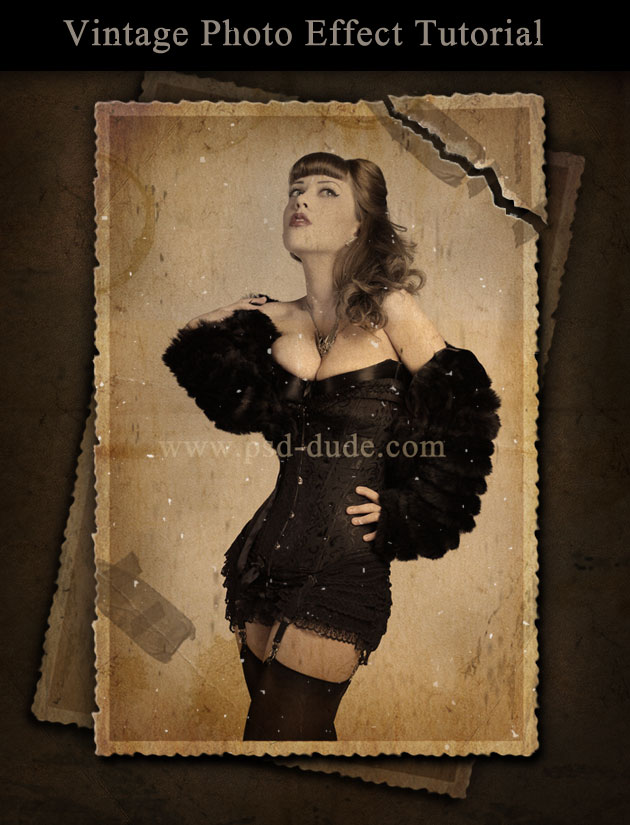
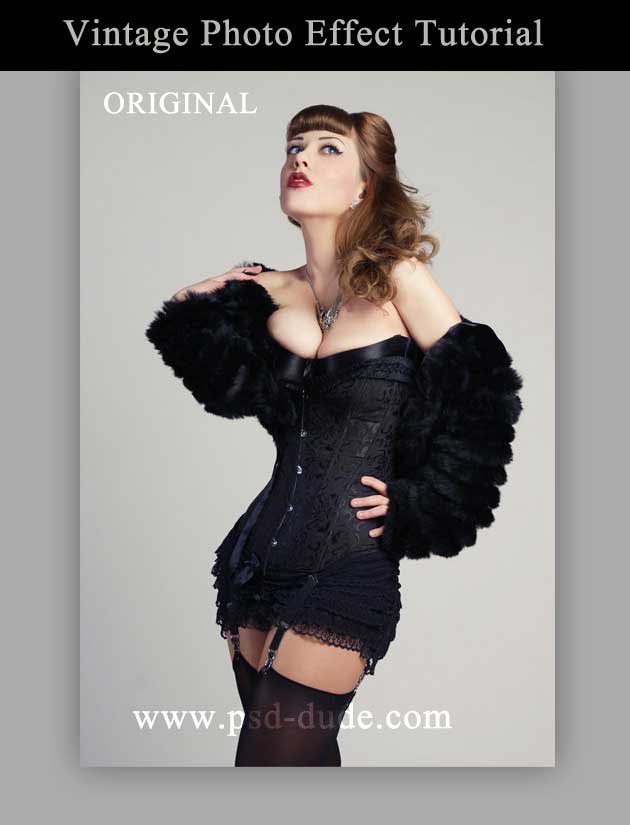
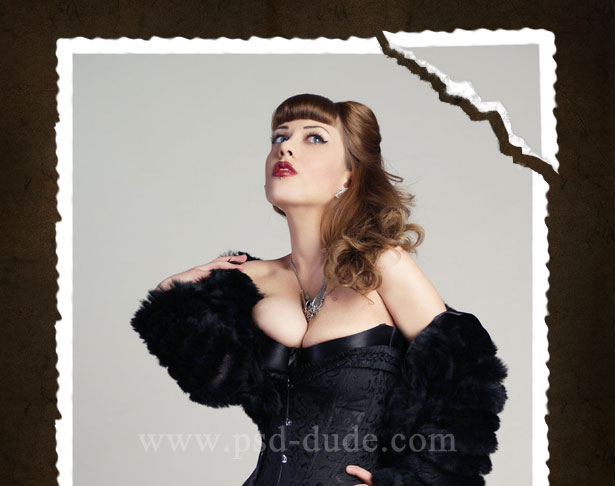
This vintage effect works well for any photo so you can choose your own photo just as well; but to make the tutorial more interesting visualy speaking, I piked up a beautiful pin up girl stock image, from deviantart. So open this Gothic Burlesque Stock and call this first layer Original Image and duplicate it so that you have a copy of the original photo.
The first thing that we have to do in this photo aging process is to add a vintage frame; if you look at an old photo you will see that all of them have a white border, sometimes simple and sometimes with a distressed torn paper look. I will choose the second frame just to make the tutorial more complex and to learn new and interesting things.
How To Create Old Photo Edges Effect In Photoshop
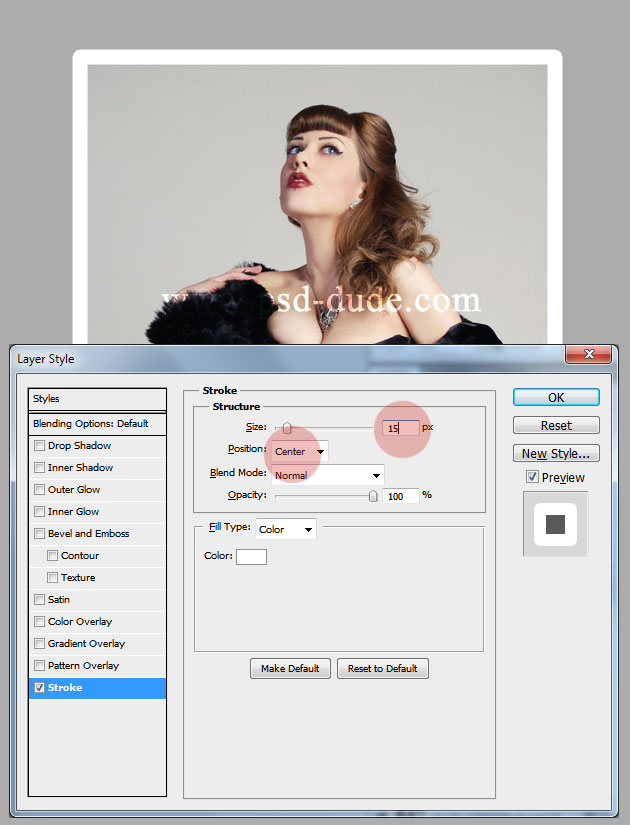
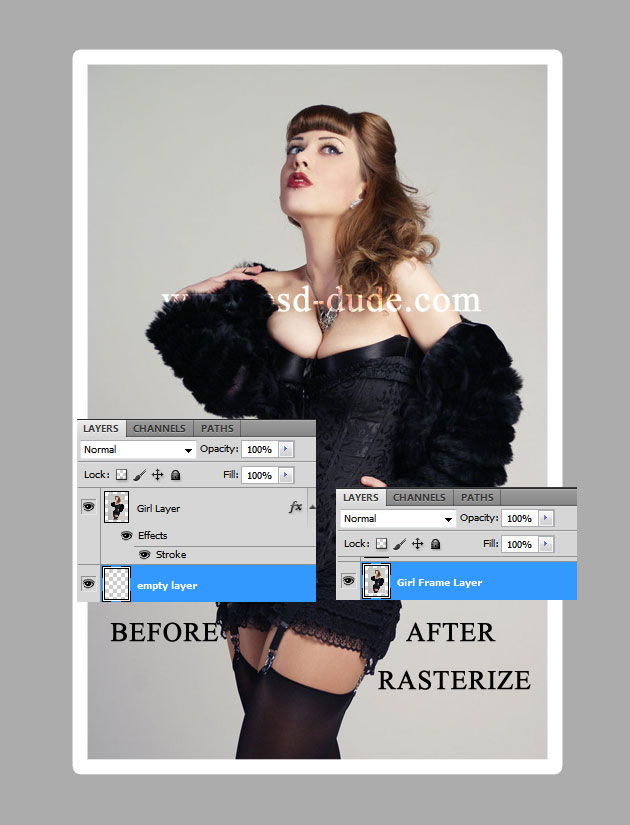
Open the layer style window of the Girl Layer and add a Stroke of around 15px, depending on the size of your photo(my image has 550px width). Make the following settings for this border and choose the color white.
For the next step I need to rasterize the layer style and to make the Stroke to be a part of the girl image. There are several methods to do flatten a layer with all its layer styles. If you apply layer style effects to text or shapes and then rasterize the layer, you will notice that only the text or shape is rasterized. The layer effects stay separate and are still editable. That means you can not apply filters and other effects on the entire layer.
To rasterize and flatten the entire layer contents you can create a new empty layer below the current one and merge the two layers (Ctrl+E on Windows/Command+E on Mac). Or you can choose a better method and to turn this layer into a smart object. That way you can apply smart filters but you can still edit the old layers styles.
For this tutorial to rasterize effects in Photoshop we will choose to make an new empty layer and merge it with the Girl Layer. Name the new layer Girl Frame Layer.
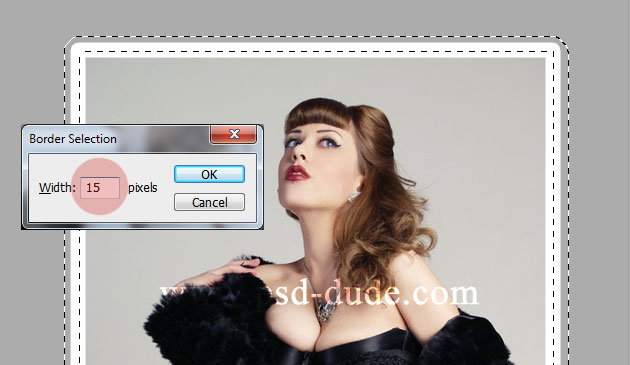
Press CTRL and click on the layer thumbnail to make a selection out of the Girl Frame Layer. Go to the Select, Modify menu and choose Border with the following settings.
With that area selected go to Filter, Distort menu and choose Ripple with these settings for the distortion effect. You can see that the frame edge has now a ripple effect.
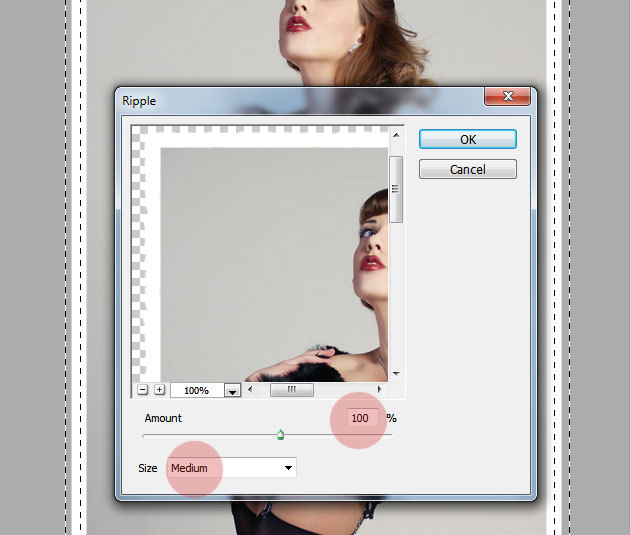
Apply again the Ripple Filter with the same settings and you should obtain a similar result, a photo with the ripple edge frame.
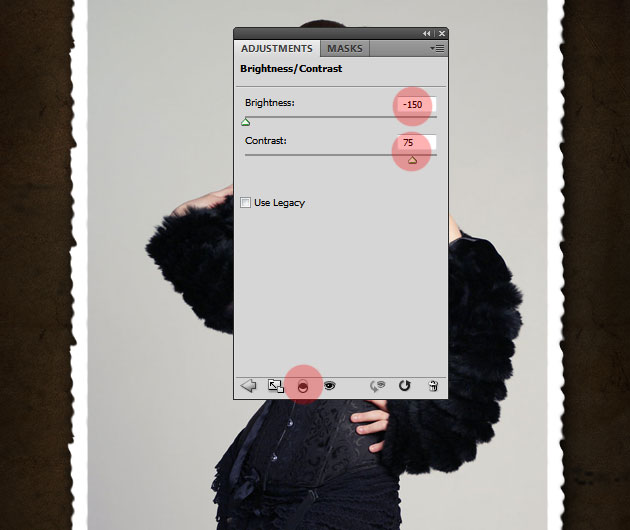
Choose a darker color for the background and add a old paper texture and place it above the background layer with Multiply blend mode. You can choose one of the many paper textures available for free. I will use this old paper. Add a Brightness and Contrast adjustment layer and make sure you press the Click to Clip to Layer button as shown in the image.
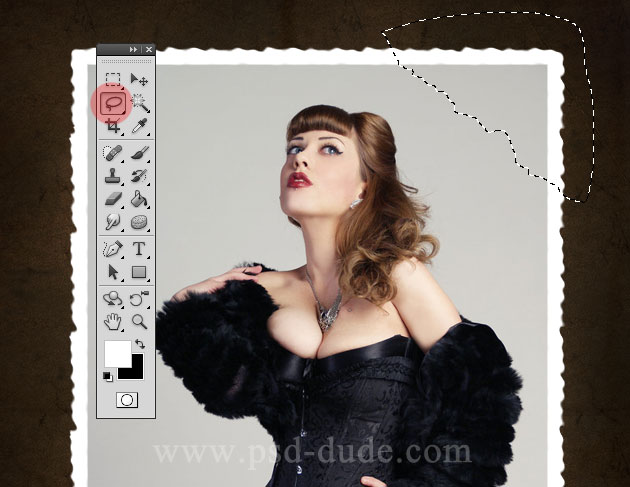
Now we have to start the vintage effect process for this photo, but before we begin I want to torn the photo in the right top corner just to make the effect more authentic. Pick the Lasso Tool and make a selection in the right top corner of the Girl Frame Layer. Try to make it as realistic as possible.
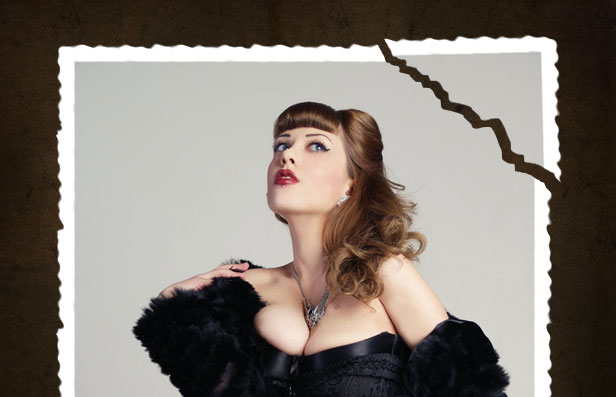
Press CTRL+X and CTRL+V to obtain a new layer with the torn corner area. After the layer via cut simply move and rotate the corner to see the torn photo effect. Call this layer Torn Corner Layer.
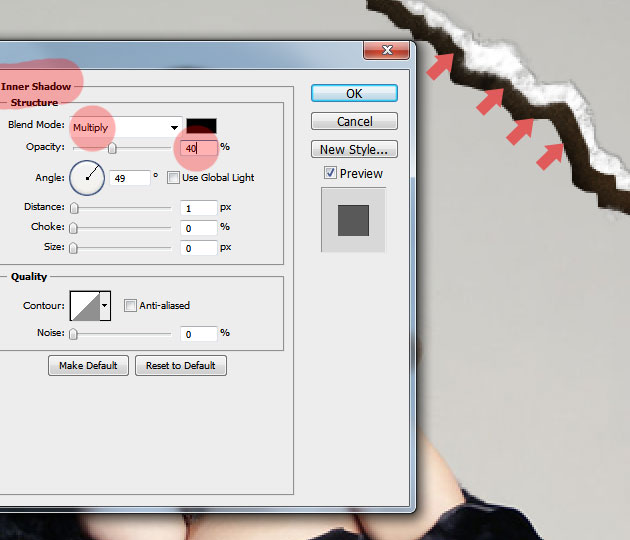
It looks quite nice but we have to add some depth to the torn edge because the photo paper is not quite thin. If you want to find out more about realistic torn paper effect in Photoshop you might want to take a look at these paper tutorials. So, create a new layer above the Torn Corner Layer and with the Brush Tool, color white, draw around the torn edge. Use the Photoshop default Spatter Brush or search another grungy edge brush around the internet. Call this layer Torn Edge Layer.
Add an Inner Shadow effect for the Torn Edge Layer like shown in the image, just to give it some depth.
On the torn edge of the Girl Frame Layer you may use the same Spatter Brush but this time attached on the Eraser Tool to make the edgers more realistic looking. Our photo it should now look like this:
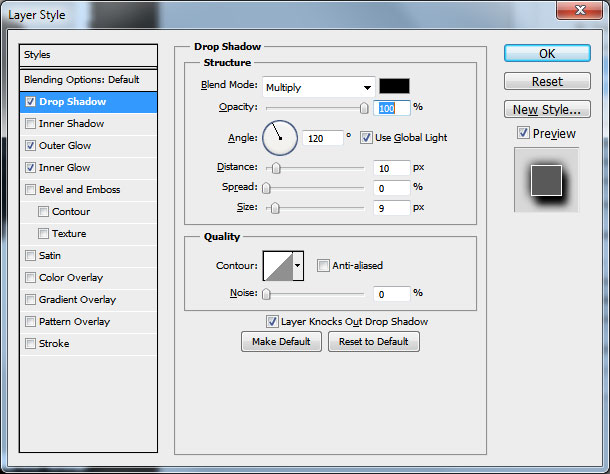
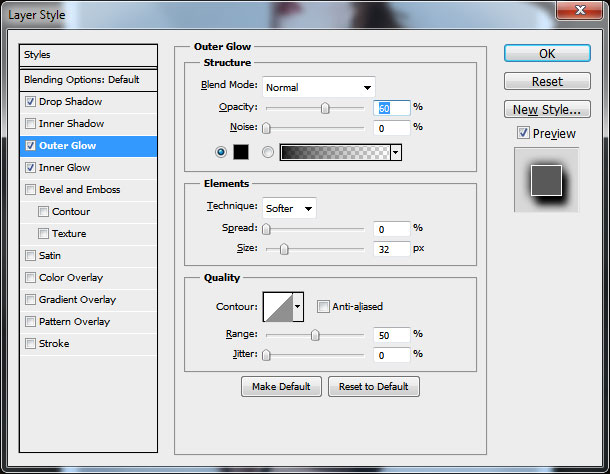
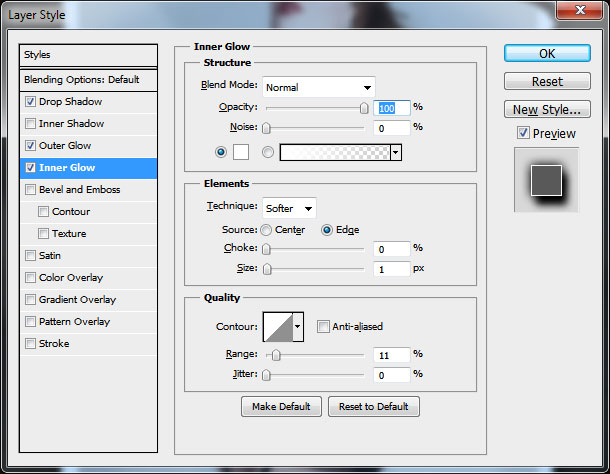
Select the three layers Torn Edge Layer, Girl Frame Layer and Torn Corner Layer and merge them (CTRL+E). Call the result layer Old Photo Layer and add the following layer styles: Drop Shadow, Outer Glow and Inner Glow.
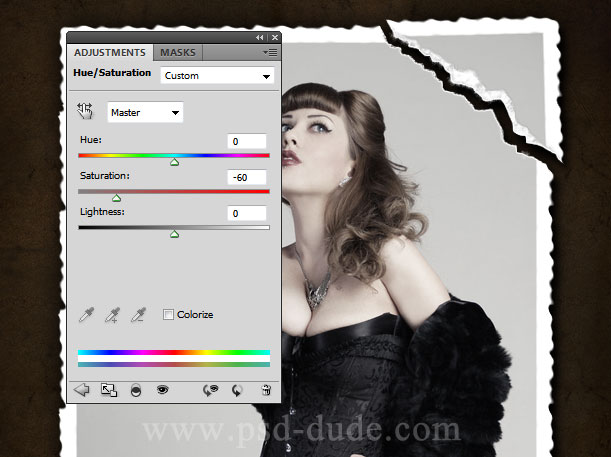
Now we can begin the actual photo ageing process. As you probably know, old photos have a unicolor tone, in many cases it is a sepia color tone.
How To Create Sepia Effect
In this tutorial we will create the sepia effect from scratch. If you are looking to quickly add the sepia effect to your photos you can use this free Sepia Photoshop Action from PhotoshopSupply.com
We are going to add two adjustment layer styles. First add a Hue Saturation adjustment with the saturation level decreased. Make sure you press the Click to Clip to Layer button to affect only the Old Photo Layer.
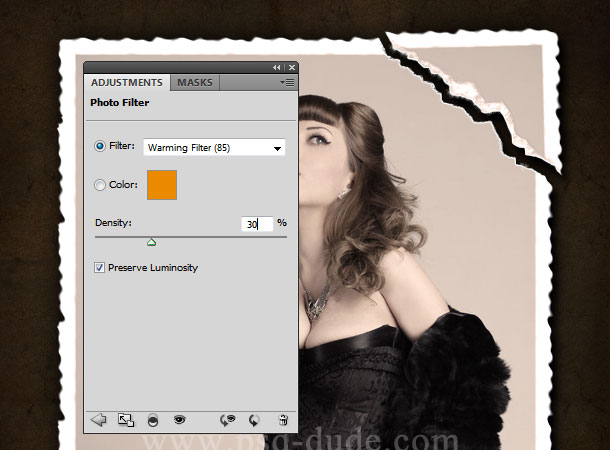
Second let's add a Photo Filter adjustment with the saturation level decreased. Make sure you press the Click to Clip to Layer button to affect again only the Old Photo Layer.
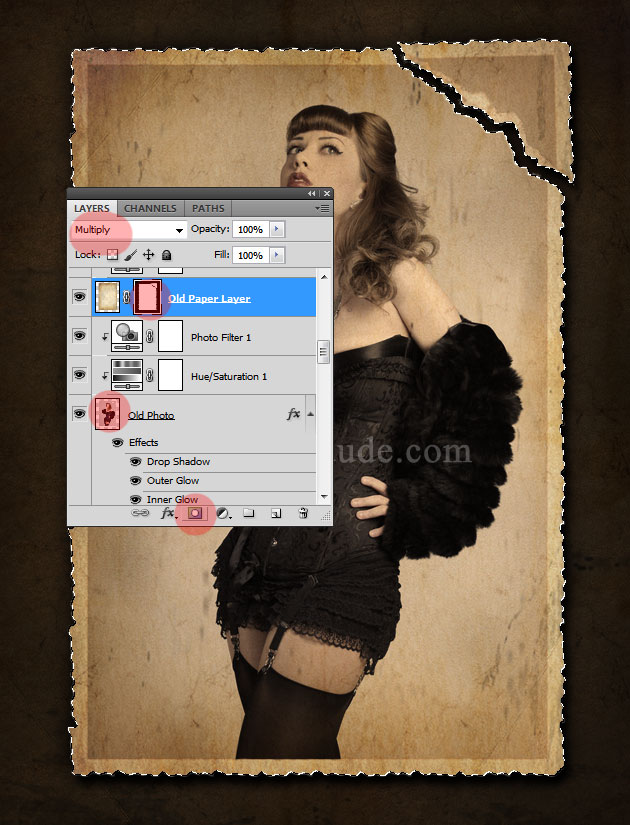
I will use this old paper texture again, this time only for the Old Photo Layer. So copy the texture in a new layer called Old Paper Layer and place it above the other layers. Set the blend mode to Multiply. Make a selection out of the Old Photo Layer (press CTRL and click the layer thumbnail). Add this selection as layer mask for the Old Paper Layer.
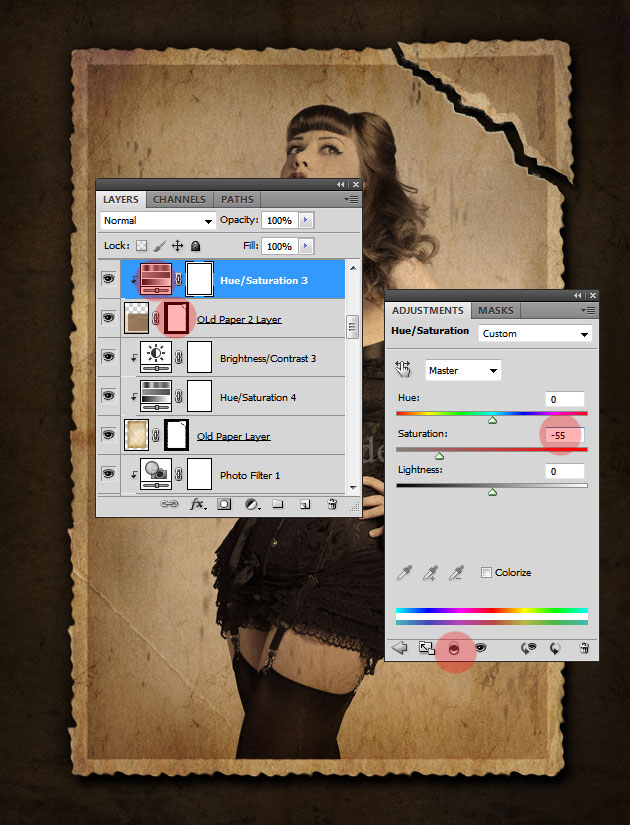
In a new layer copy this new old torn photo texture. SEt the blend mode to Soft Light and add a Hue Saturation adjustment layer that affects only this second old paper layer.
Add to this Old Paper 2 Layer a layer mask using the selection of the Old Photo Layer.
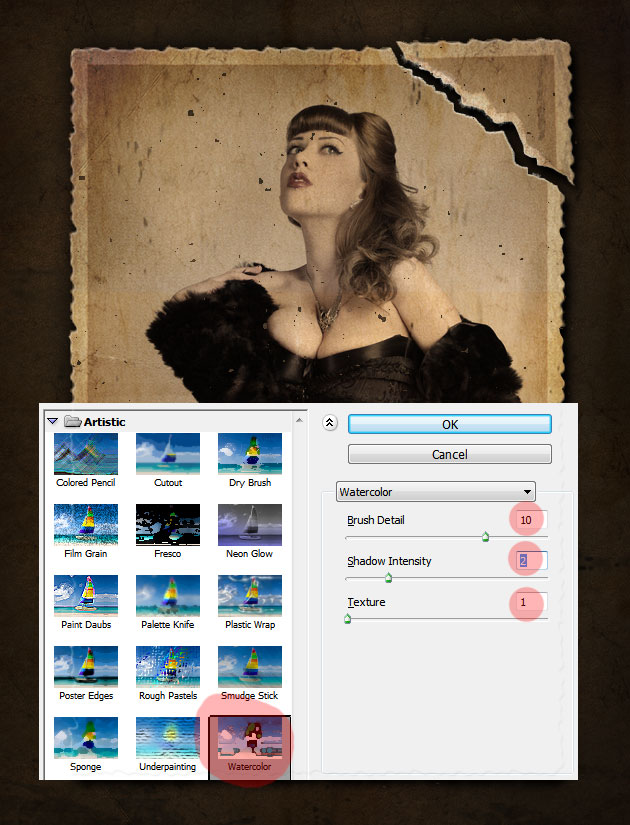
If you want you can add some dust and scratches; to do that, select all the layers and put them in a group. Rasterize the group to flatten the layer styles. Add an empty layer mask for the new layer and in that mask add an Add Noise filter, 100% amount. Apply Watercolor artistic filter with these settings:
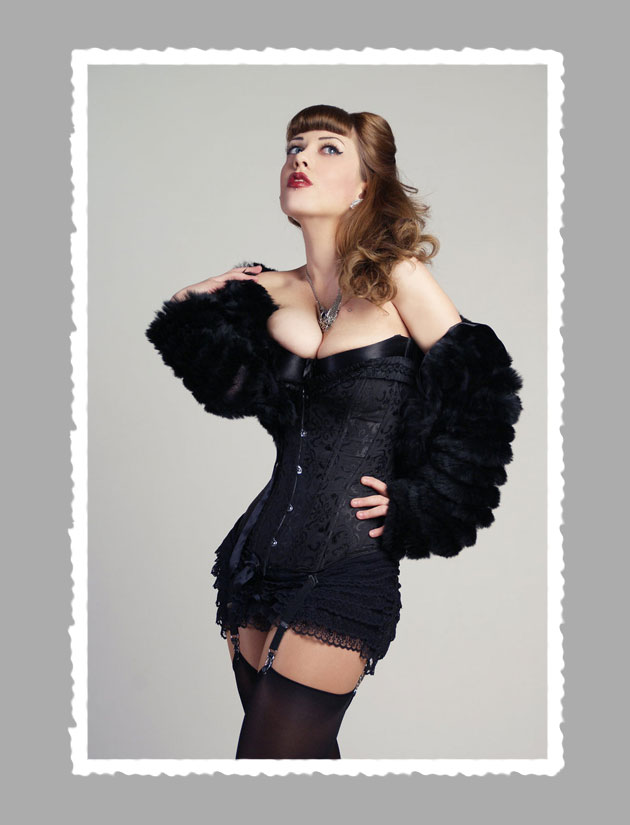
To make a photo look old you can add stain brushes and scotch brushes, scratches and other effects that increase the vintage look. I've used these great scotch shapes but you can try other brushes just as well. Here is my final result for the Photoshop vintage photo effect, hope you like it and I am curious to see your results.
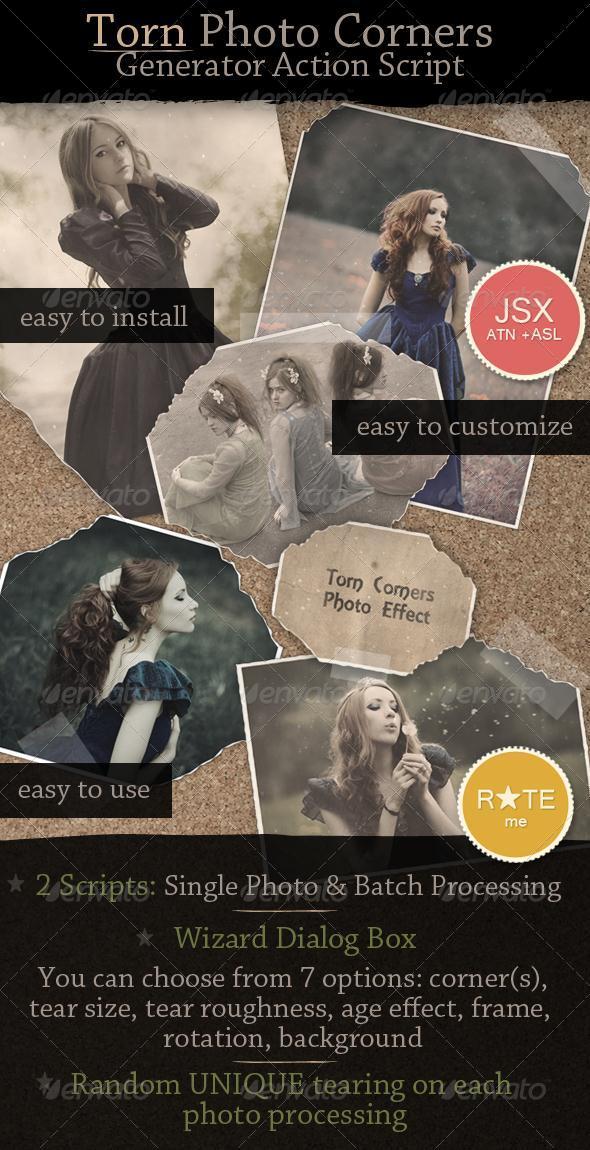
You might also like to try our premium Photoshop plugin that allows you to create torn paper corner for photo effects.
You might also like to try our premium Photoshop plugin that allows you to create torn paper corner for photo effects.
Torn Photo Corner Photoshop Action
Old Photo with Torn Ripped Effect Photoshop Action

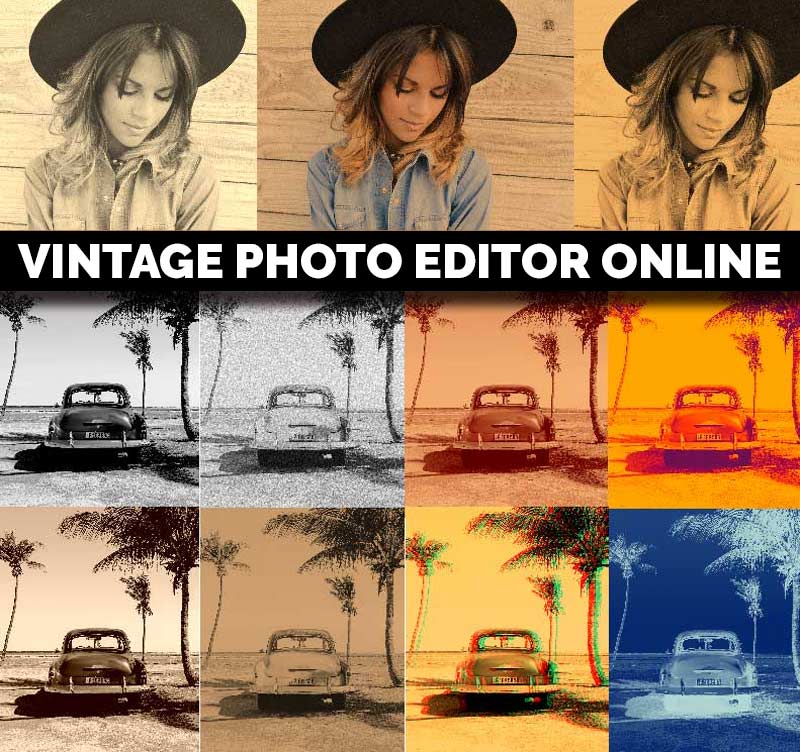
Vintage Photo Editor Online
So, if you don't have Photoshop, you can make old photo effects with MockoFun online photo editor quite easily. Check out the article about the vintage photo editor if you want to make old retro images.
If you are looking for other cool photo effects, check out this list of online photo effects that you can use for your pictures.
MockoFun is probably the best free photo editor with more than 50 non-destructive photo filters, photo overlays and photo effects.
17 comment(s) for "Create a Vintage Photo Effect in Photoshop"
vielen Dank f??rs teilen.
LG
Finja
------
again such a great tutorial,
thanks for sharing.
LG Finja reply
I am glad you find my Vintage photo effect tutorial useful :) reply
reply
used three grunge paper to increase effect, added some coffee and ink stain, and a fingerprint...
here's my result, perhaps is too heavy
http://www.pxleyes.com/tutorial/photoshop/1331/How-To-Tear-Up-a-Picture.html