Painted Wood Photoshop Action Comics Book Photoshop Action Infographic JS Library Textures for Photoshop Online Label Maker

How to Make a Beautiful Fallen Angel in Photoshop

www.psd-dude.com
Tutorials Photo Manipulation 93626 May 16th, 2019

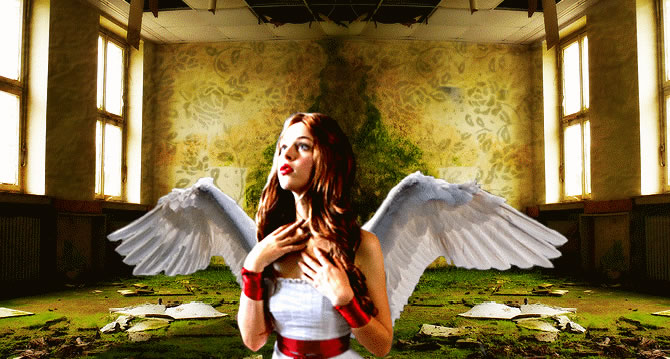
Learn how to make a beautiful fallen angel Photoshop manipulation.

I saw this beautiful stock image with the girl and decided immediately that she is perfect for an angel so this is how my image came to life. It is an easy to create photo manipulation and you can play with settings, colors, shadow and light! I hope you enjoy reading this tut! Let's start!

Beautiful Fallen Angel - Photoshop photo manipulation

Open a new photoshop file size 600/600 pixels. Now open this beautiful photo of an old room

Place the image on the right side of the screen. Duplicate this image and Flip Horizontally, than place it on the left side as shown in the image.
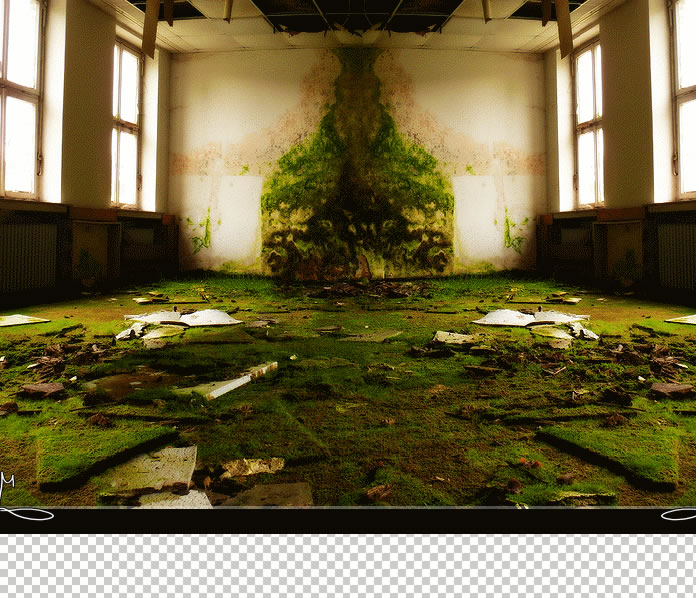
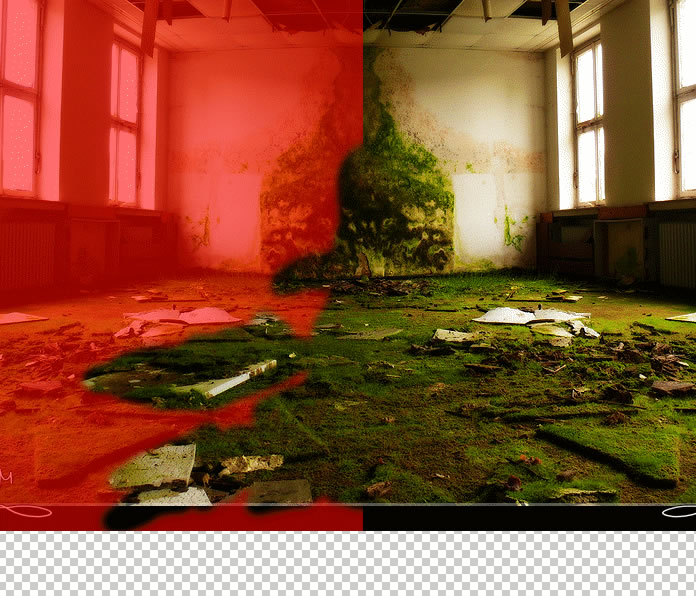
I have also deleted some parts from the left side image (the red area).
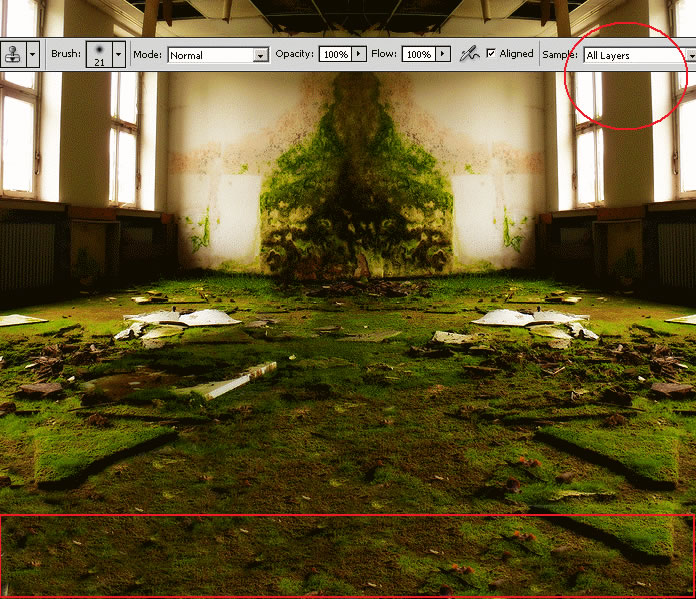
Another thing that I have to do is to fill the empty area from the bottom of the image. Use the Clone Stamp Tool. Keep the ALT key pressed and click to select the starting point. Make the floor look realistic.
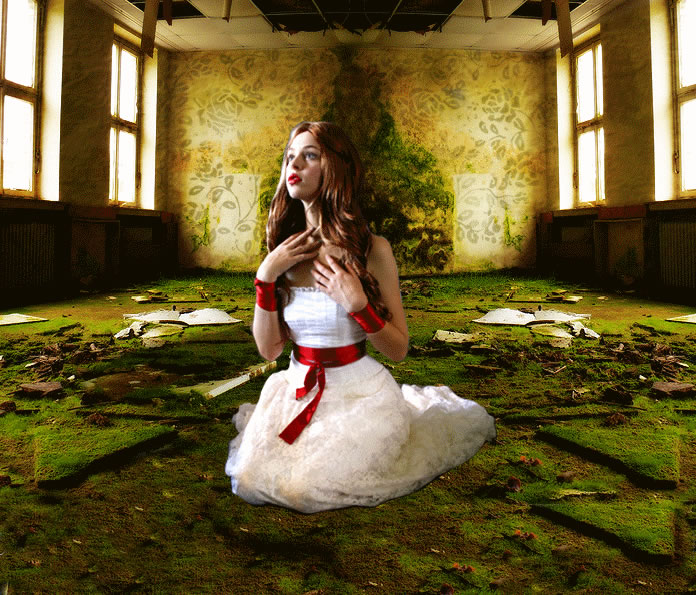
Add the Girl. Copy this beautiful stock image Snow4 into your file. Remove the background and resize the image to 72%.
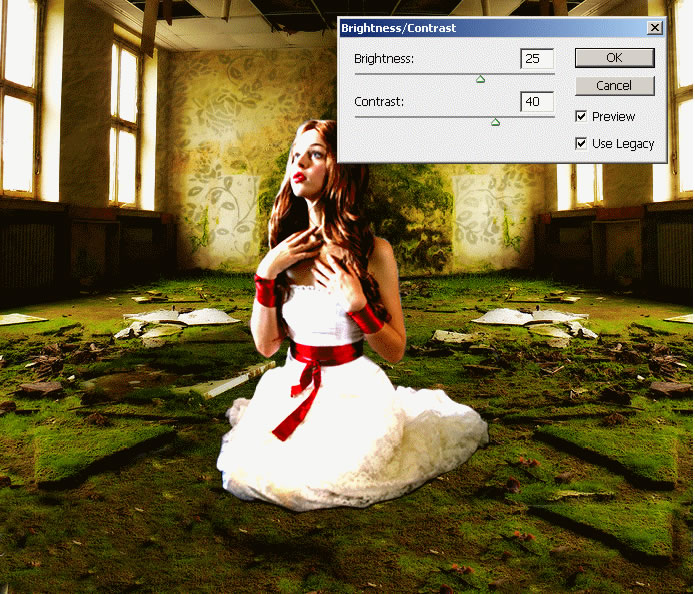
Go to Image > Adjustments > Brightness/Contrast and change the balance to obtain a similar look:
In this step I want to add a dramatic look to the angel. For that I will add sea foam on the bottom of the dress.

Scale this image to 80% than flip it horizontally and place it like in the image :
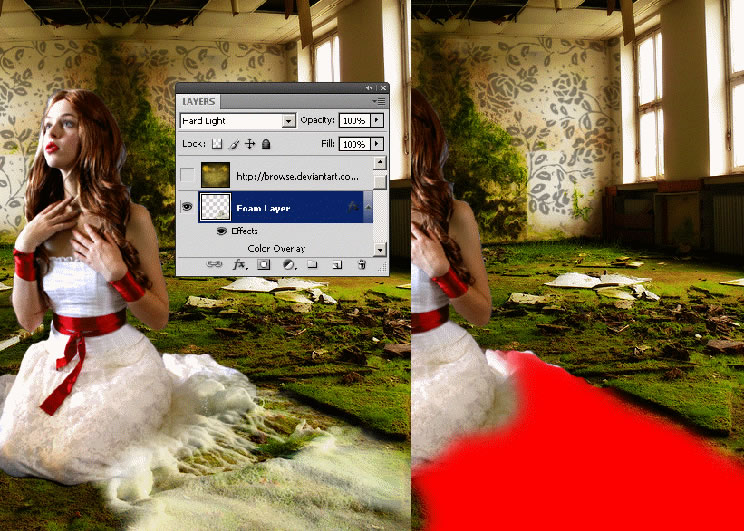
Change the blending mode of this foam layer to Hard Light 100% . Use the Dodge Tool to blend better the foam with the dress.

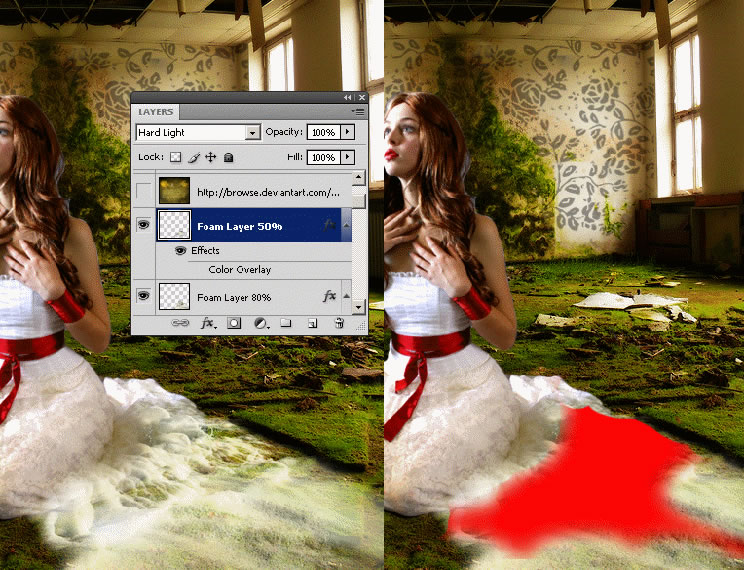
Create a new layer similar to the Foam Layer above but this time scale it to 50% . The blending mode is also Hard Light 100%.
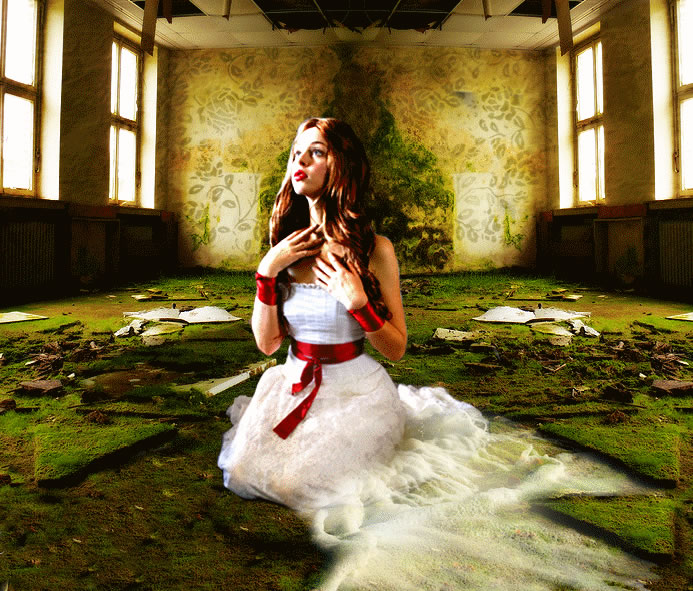
Add Angel Wings to Our Image in Photoshop

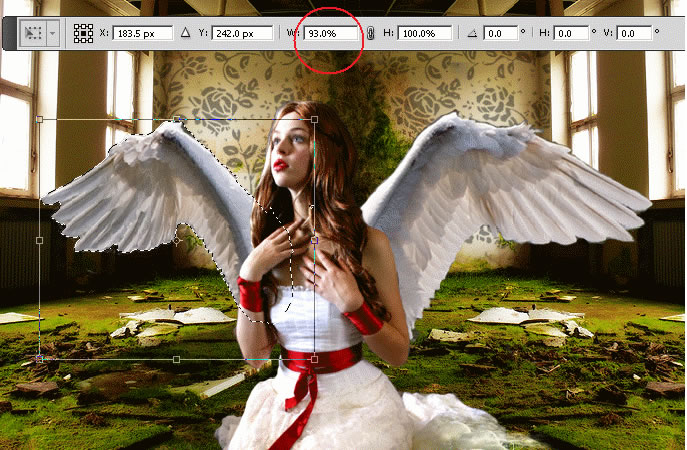
In this step I will add wings to the fallen angel using Photoshop. Copy this Swan wings in a new layer. Here you can find more wings PNG images with transparent background.

Remove the background. Select the left side wing and resize it as shown in the image:
Place this Marble Cross on the floor.

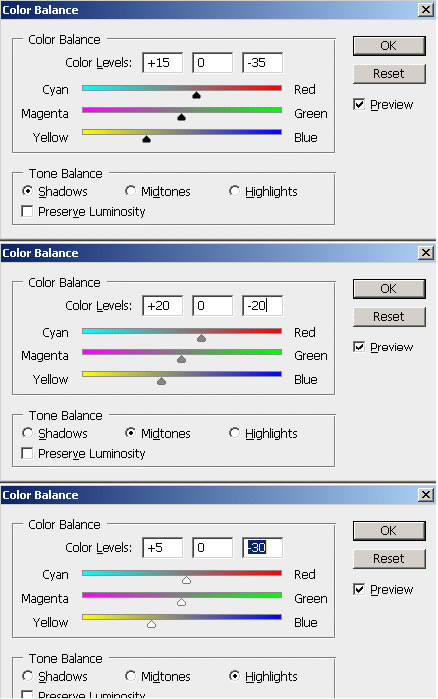
Change the Color Balance.
Adjust also the Brightness/Contrast balance by increasing the contrast and lowering the brightness.

With the Eraser Tool erase part of the cross to blend with the rest of the image.

Use also the Burn Tool to add shadow on the cross and give the illusion that it is under the rock. Use also the Dodge Tool to add light accents.

Add this birds silhouette PNG image.
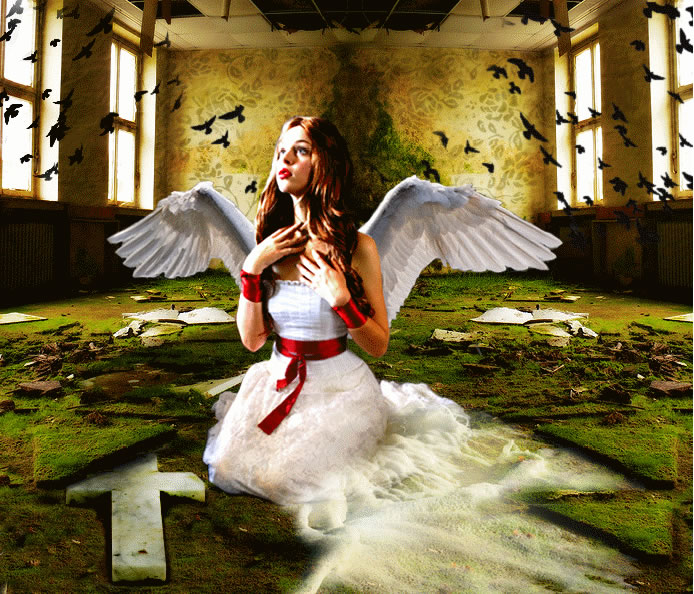
Add this old paper texture in a new layer and set the blend mode to Overlay 100%.
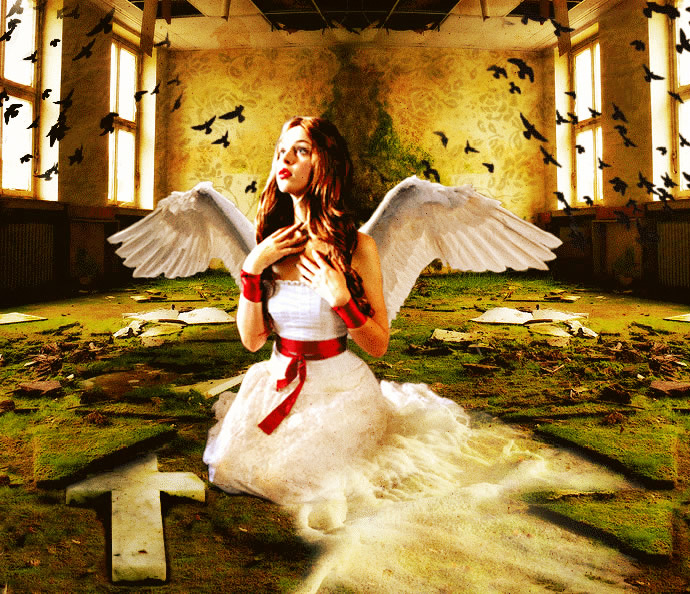
To make the image look more interesting you can try to darken the right side of the image. Create a new layer and use the Burn Tool to darken the image. You can also use the Blur Tool to add a blurry effect to the background.
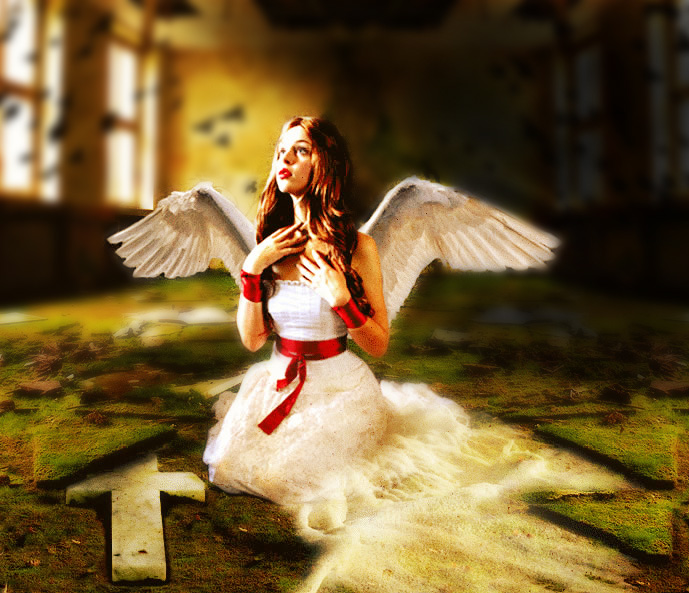
Add Rays of Light in Photoshop

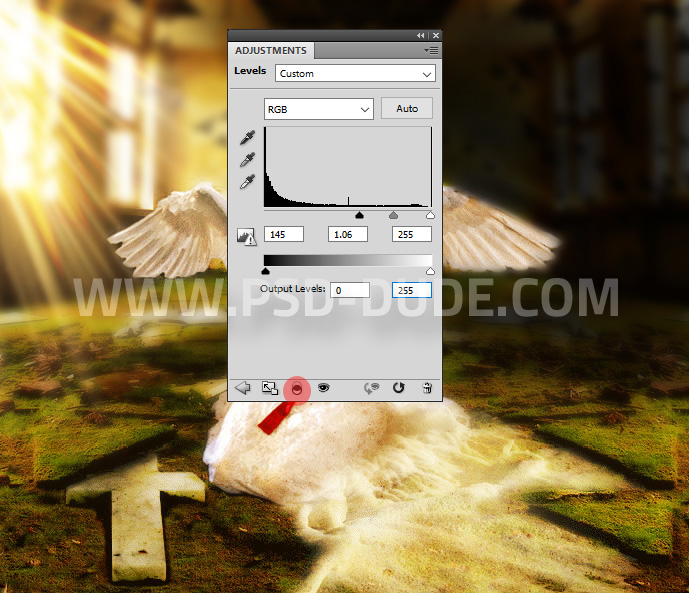
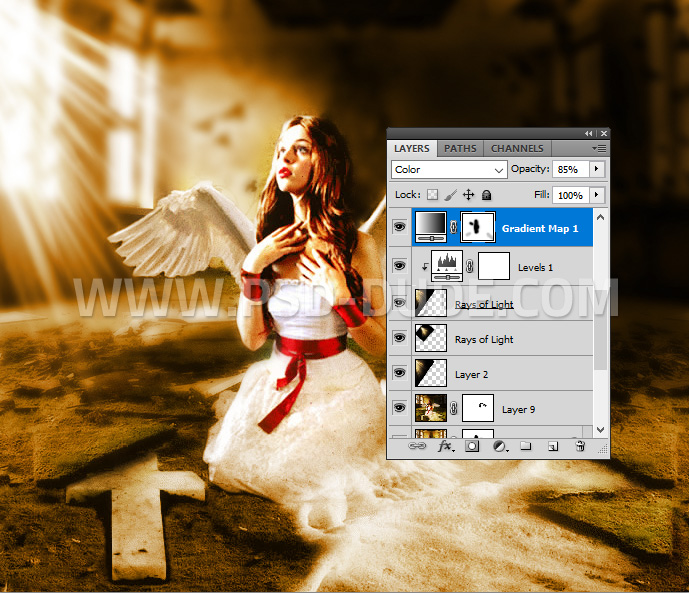
To create rays of light add this Rays of Light Texture Overlay and set the blend mode to Screen. You can add more layers and use the Gaussian Blur filter to obtain a softer light. To sharpen the rays of light you can use a Levels adjustment just for the Rays Of Light layer.
Color and light matching is very important in photo manipulations. So lets add a Gradient Map adjustment layer with Color blend mode and 85% opacity level. The colors for the gradient are: #000000 (location 0%), #ef9b2e (location 35%) and #ffffff (location 100%).
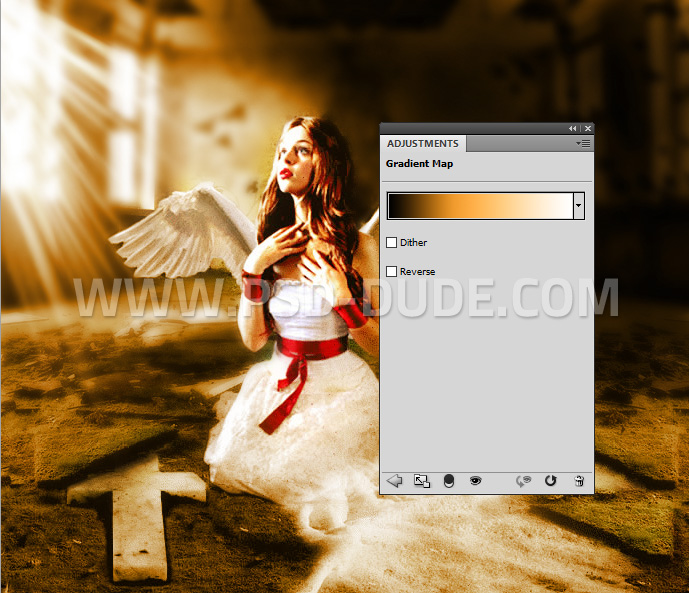
Take the Brush Tool and paint inside the Gradient Map layer mask using different opacity levels and color black. Paint over the girl to reveal the original colors.
For the final touches you can use the High Pass Filter fpr the merged image using Overlay blend mode. The High Pass Filter technique is used to sharpen images in Photoshop.
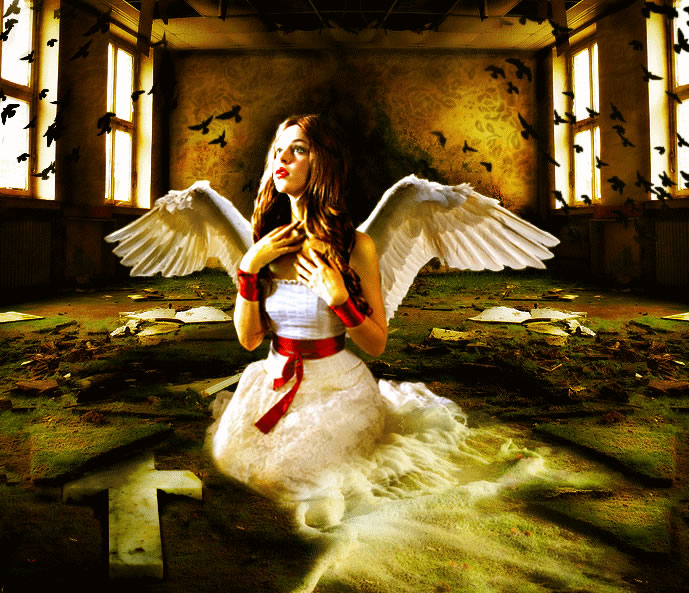
Beautiful Fallen Angel - Photoshop photo manipulation

How to Make a Photoshop Angel Halo

For the finishing touches we will add a beautiful light to our final result. It will look like the angel has a halo around her.

Use this rays of light texture from Textures4Photoshop. Add the rays texture as new layer on top of the fallen angel image. Switch the blending mode to Screen, then simply rotate it and place it somewhere in the top right corner of the image.

Beautiful Fallen Angel Photoshop Manipulation Final Result

Beautiful Fallen Angel - Photoshop photo manipulation
5 ( 102 votes)

If you're looking for amazing textures and backgrounds for Photoshop, explore Textures4Photoshop where you can find 1000+ unique images. You can download all these textures and backgrounds for free to use in personal or commercial projects!

Be a Cool Dude!

With your donation you can help us maintain this website and keep producing free resources many months to come! Any amount counts

30 comment(s) for "Beautiful Fallen Angel"

Luis
Luis
7:00 AM Monday, June 28, 2010
I would like if I don't say that I'm impressed. If I had one tenth of your talent, I'd be happy. How about tutorials with open source or free programs? Thanks! reply
PsdDude
7:00 AM Monday, June 28, 2010
Thank you for your comment Luis! i am glad you think i have talent :) comments like yours keeps me working ...
About free software ... i guess you can adapt my tutorial for Gimp for example , they have the same tools eraser,burn,dodge,color balance reply
Sam
Sam
7:00 AM Monday, July 12, 2010
The colors and the mood of the scene are wonderful! thanks for the tutorial reply
PsdDude
7:00 AM Sunday, July 18, 2010
Hi i am glad u like it! You can post the title and the link of the tut, my twitter account on your blog, not the entire tutorial :)
reply
PsdDude
7:00 AM Sunday, August 1, 2010
If you have an website design and photoshop related, with google page rank 1 or 2 and a similar Alexa ranking sure no problem. reply
PsdDude
7:00 AM Thursday, August 26, 2010
Hi Linda i am glad that you like this new tutorial .... unfortunately i can't say much about your try because the image is too little. I can say from what i see that the colors are not blended so well , the back wall is too green and the texture cove reply
PsdDude
7:00 AM Thursday, August 26, 2010
My opinion is that you have to be careful with every detail, the image must be as realistic as possible ... the blending of all the photos must be close to perfection :) i am myself far away from perfection ;)
and about the inspiration part it is ha reply
PsdDude
7:00 AM Tuesday, December 7, 2010
Thank you Amro! I am glad you like it!!! reply
Dilancuan
Dilancuan
7:00 AM Saturday, December 25, 2010
Hello PsdDude, I hope you don't mind using your tutorial to create my own variation of an angel. Its a different girl, but I used all your techniques. I'll definitely give you some credit when I post it on DeviantART. reply
PsdDude
7:00 AM Monday, December 27, 2010
:) That is great, I want to see the result ... send me the link!!! reply
ra
ra
7:00 AM Saturday, January 29, 2011
That is great, reply
angela McMillan
angela McMillan
7:00 AM Saturday, February 26, 2011
Did you do all of this in Photoshop Elements?? reply
PsdDude
7:00 AM Saturday, February 26, 2011
Yes Angela, it is only Photoshop and of course I have used all the wonderful stock images! Do u like it??? reply
PsdDude
7:00 AM Monday, March 7, 2011
Ups, I don't know what happened but Faestock Account on deviant art is empty ... look: http://faestock.deviantart.com/gallery/ so I really can't help you! You can search similar girl and foam stock images on deviantArt !

reply
Angela
Angela
7:00 AM Thursday, May 19, 2011
Yes I love it beautiful !! reply
kristen
kristen
7:00 AM Thursday, July 14, 2011
im so into the angles i love how it very realistic you are a very good artist i love your picture it is absolutely wonderful psddude you have true talent and i wish i had talent like you this picture is amazing hope to see more like it !!!!!
reply
PSDDude
7:00 AM Friday, July 15, 2011
Thank you Kristen,
but I am not that talented I still have a lot to learn myself.
If you try this tut I would love to see the result :) reply
Clipping Path
Clipping Path
8:40 AM Thursday, December 29, 2011
Good tutorial and nice artwork. I like it. reply
COCABOY
COCABOY
1:30 AM Tuesday, December 23, 2014
NICE TUTORIAL reply
Deep Shah
Deep Shah
1:30 AM Tuesday, December 23, 2014
Heyy dude
i can't find d photo of d girl and sea foam
d site says dat 'd file is not found'
please help reply
Marcel
Marcel
1:06 PM Monday, April 29, 2019
I loved this tutorial. I've learned a lot of new features. Thanks! reply
katya_alagich
katya_alagich
1:06 PM Monday, April 29, 2019
it was very interesting to read.
I want to quote your post in my blog. It can?
And you et an account on Twitter? reply
Gr1nS
Gr1nS
1:06 PM Monday, April 29, 2019
I would like to exchange links with your site www.psd-dude.com
Is this possible? reply
Photoshop Clipping Path
1:06 PM Monday, April 29, 2019
Thanks for sharing this wonderful post reply
Image Masking
Image Masking
1:06 PM Monday, April 29, 2019
wow! nice photoshop blog! I love to read your post :) reply
IT tutorials
IT tutorials
1:06 PM Monday, April 29, 2019
wow! I absolutely love your new design reply
Amro
Amro
1:06 PM Monday, April 29, 2019
I like ur tutorial. Really well done my friend reply
Web Design Sheffield
1:06 PM Monday, April 29, 2019
With the proper picture browsing talent, you could have your model in just no time. This is the beauty of photoshop right here. Great share. I love the angel. reply
Vince
Vince
1:06 PM Monday, April 29, 2019
Wow! This is awesome! reply
Meer Anis
Meer Anis
1:06 PM Monday, April 29, 2019
I think, I should appear here again and again. Absolutely touched the mind. reply

Have something to say? Leave us a comment

Click to Upload Fan Art!

Share your Psd Dude inspired works


Get new posts by email:
LIKE US ON FACEBOOK

      Online Photo Editor
top