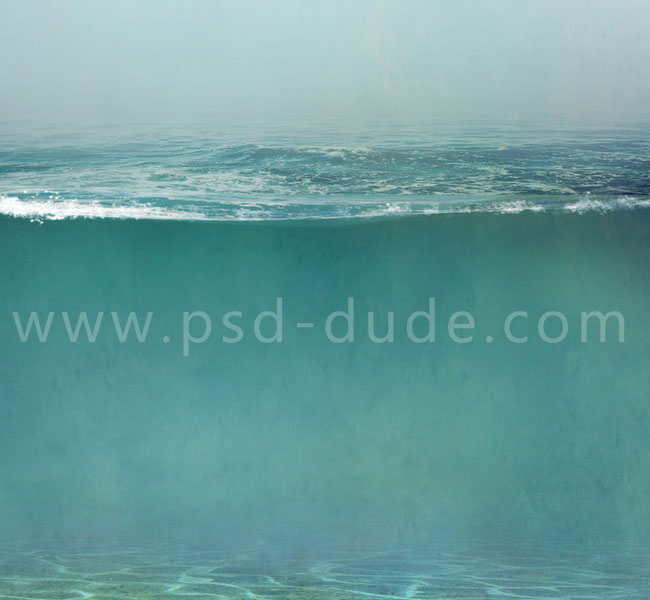
Let's start with a beautiful underwater premade background. You can pick from this list whatever background you like or even make combination between them. I will use for my tutorial, this underwater landscape. Call this layer Underwater
In a new layer add this mermaid stock image. Call this layer Ghost Mermaid.
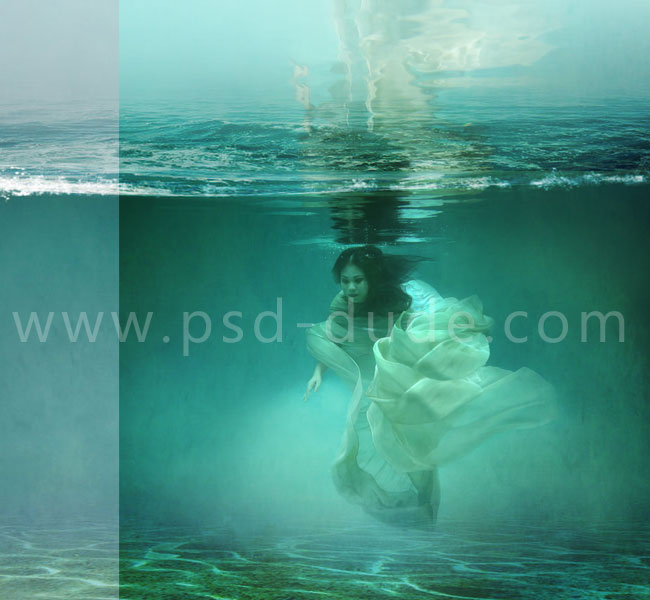
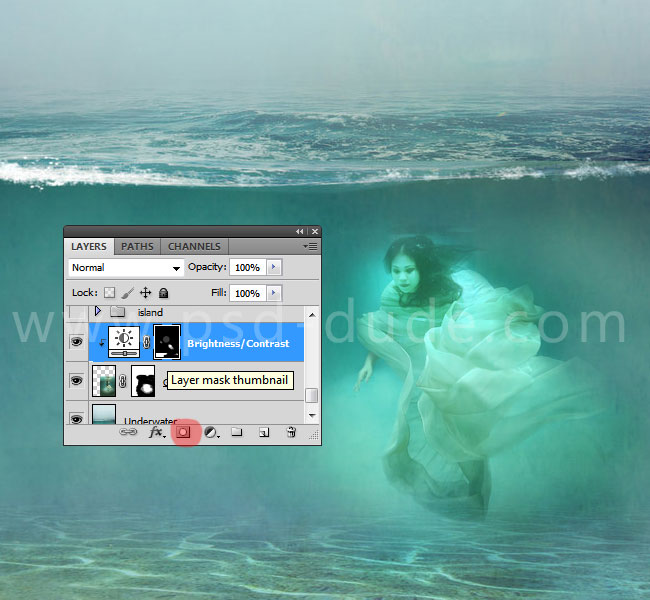
Add a layer mask to the Ghost Mermaid and use a Soft Round Brush, color black and different opacity levels to blend the mermaid image with the background.

Add a Brightness/Contrast adjustment layer to the Mermaid layer. Fill the Adjustment Mask with black color. Use a soft round brush, color white, different opacity levels and paint inside the mask to lighten the mermaid face, etc.
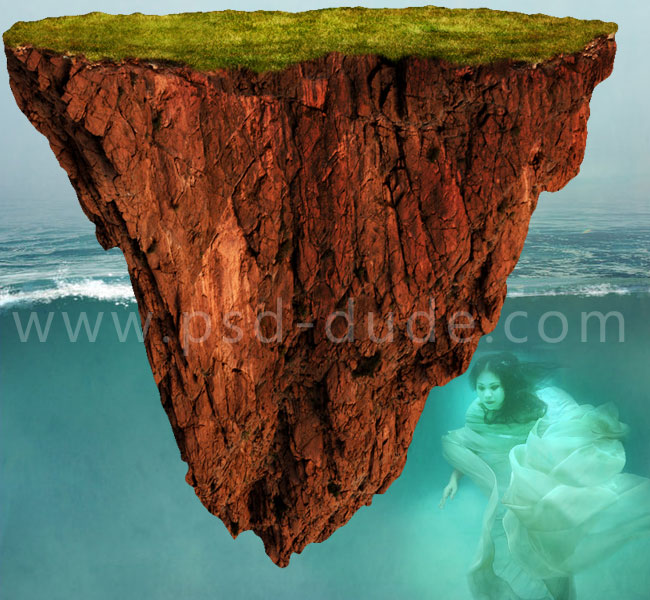
Add this floating island and place it like shown in the image. You can also check out this collection of floating island images and use those instead.
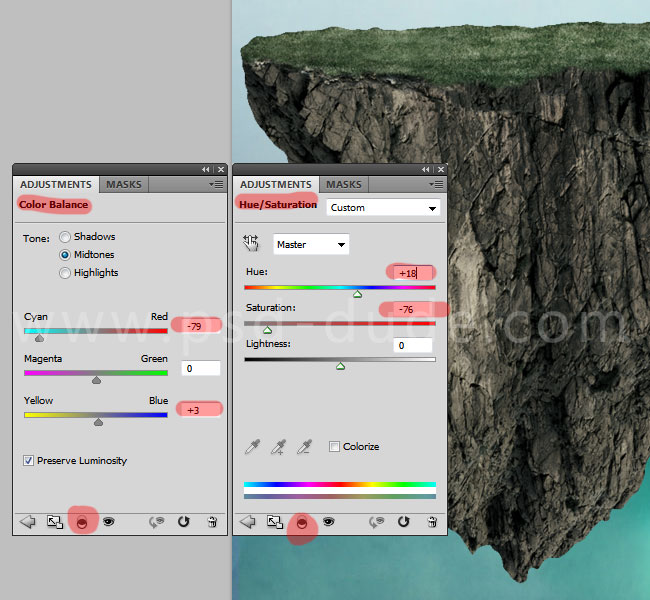
As you can see this photo needs a color correction to blend seanlessly with the rest of the image. You actually need to learn some useful blending and editing techniques for creating perfect photo manipulations; so you might want to take a look at these tutorials: Blending Techniques and Blending and Non-destructive Editing if you are a Photoshop beginner.
So, I will add a Color Balance and a hue/Saturation adjustments with these settings. Make sure you make both adjustments clipping mask only for the Island Layer.
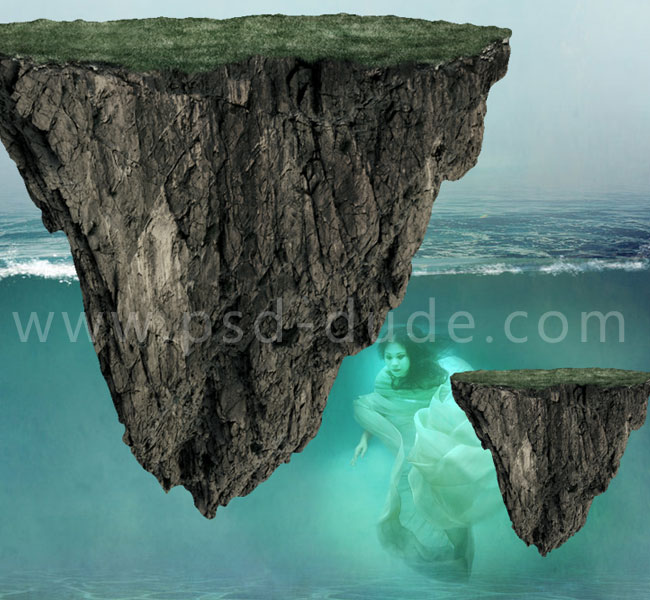
Duplicate the Island Layer resize it and place it like shown in the image.
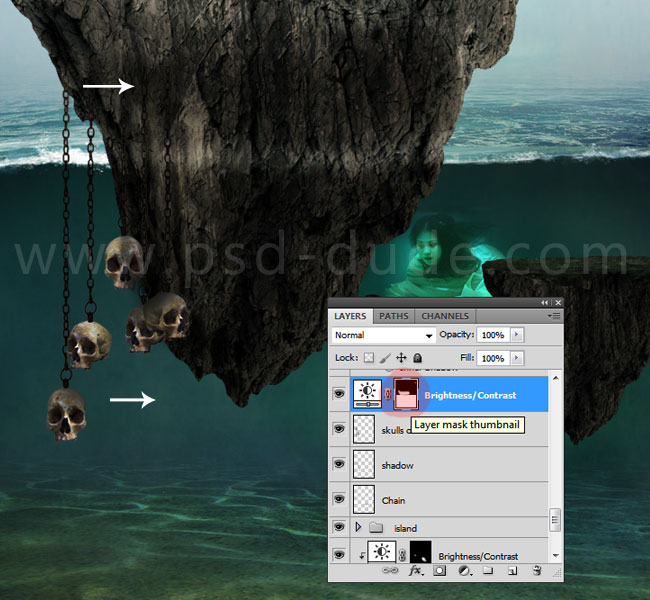
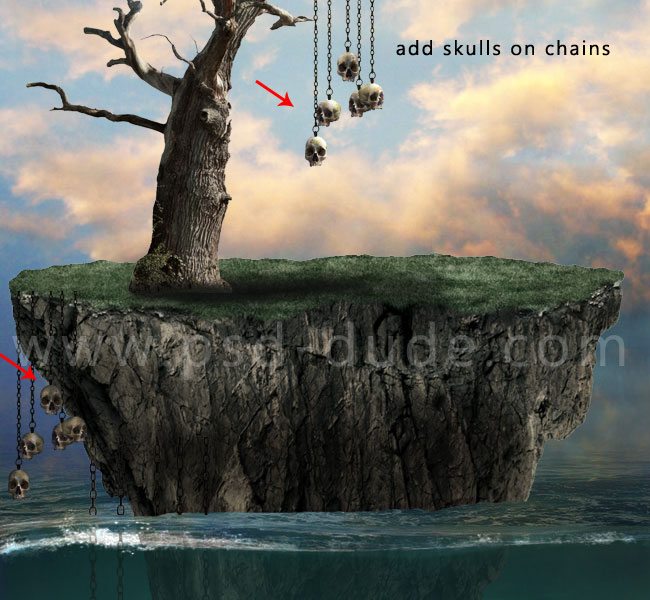
Use this skulls on chain stock image to add some creepy skulls hanging on the island rocks. Also use the chian to link the two islands. You might have to use the Burn Tool to adjust the skulls creating some contrast. Also you will have to create the skulls cash shadow effect on the island.
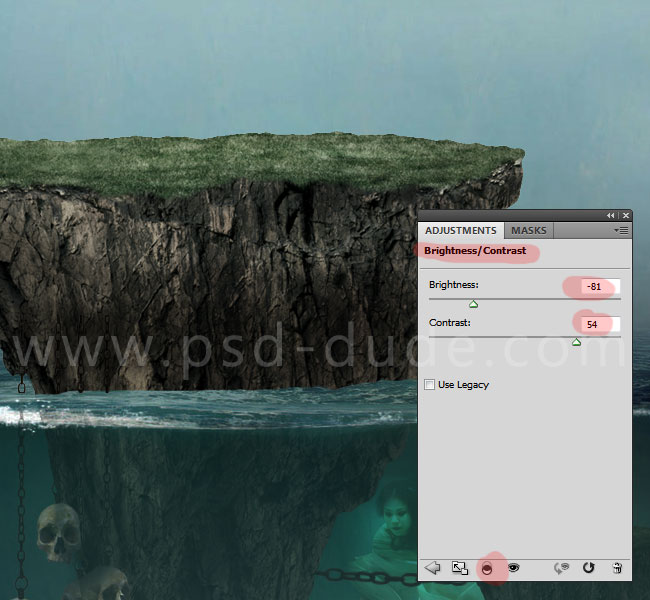
Now come a little more complicated part. Add a Brightness/Contrast adjustment layer and fill the layer mask with white. Now pick the Brush Tool, color white and in the layer mask simply paint over the underwater area and part of the island.
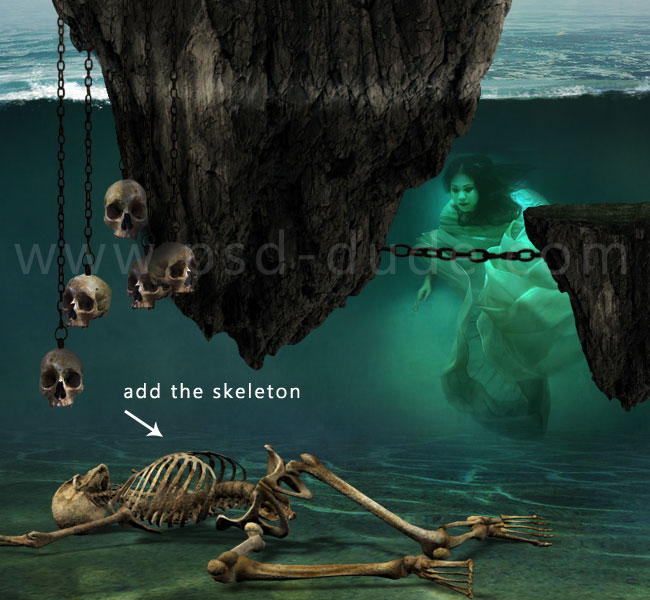
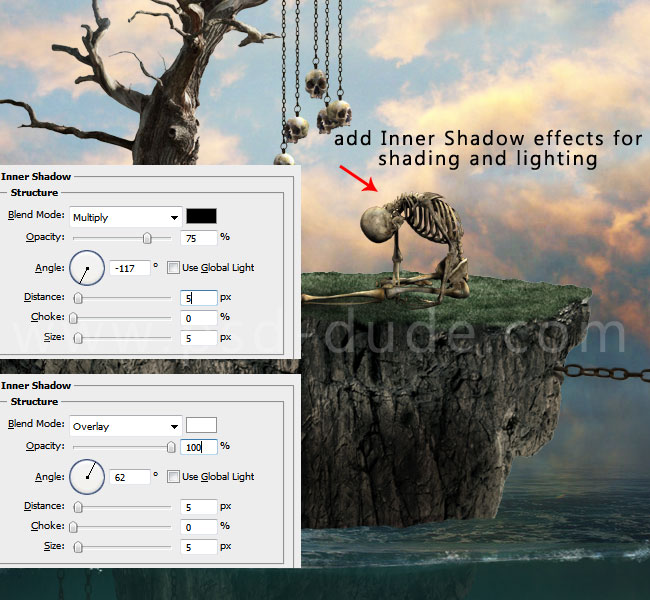
In a new layer add this skeleton PNG; it is great because it has the background removed. Call this layer Skeleton 1.
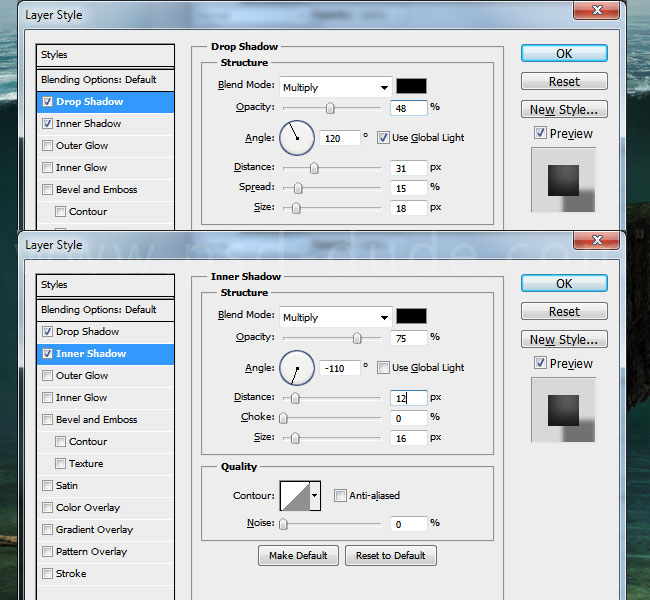
I will make some adjustments to the skeleton layer. So open the layer style window and add a drop Shadow and a Inner Shadow effects.
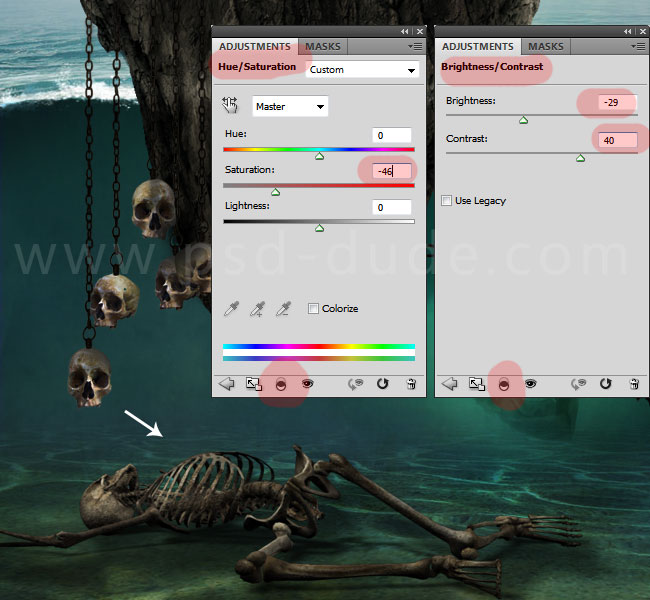
Add also a Hue/Saturation and a Brightness/Contrast adjustment layers with clipping mask for the Skeleton 1 Layer
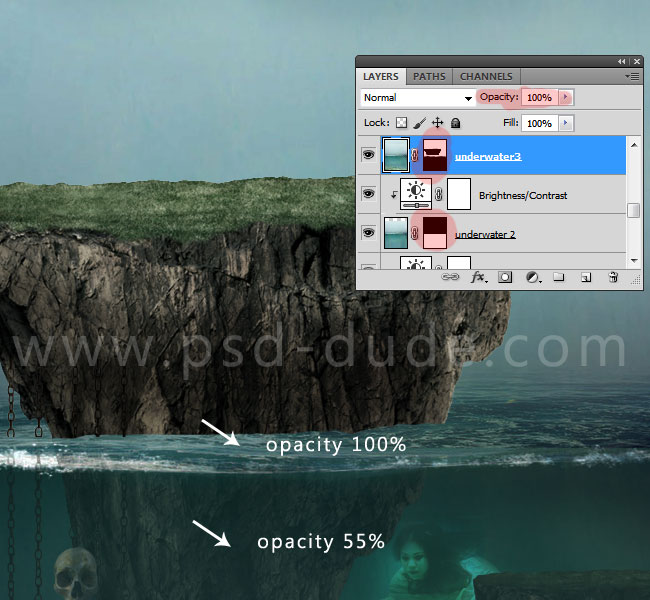
Duplicate the Underwater Layer and call it Underwater 2 Layer. Place it above all the other layers, Set the opacity of the layer to 55%. Add a layer mask and use Brush Tool with black color, opacity 100% to keep visible only the underwater area.
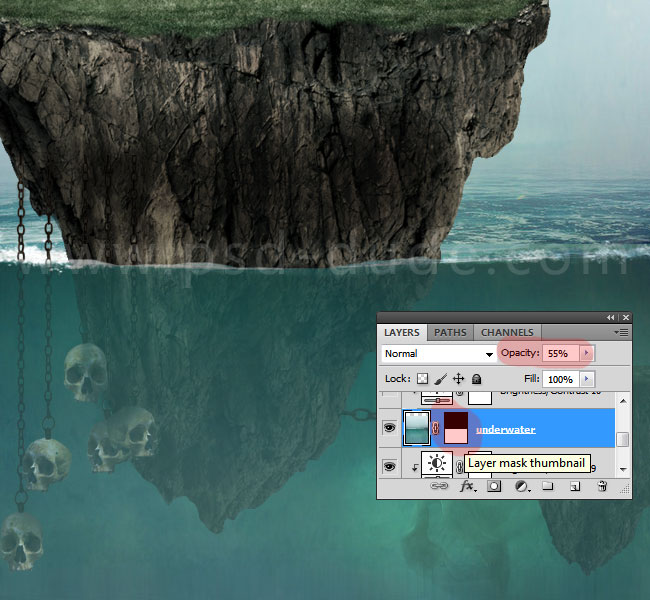
Add a Brightness/Contrast adjustment layer only for the Underwater 2 Layer.
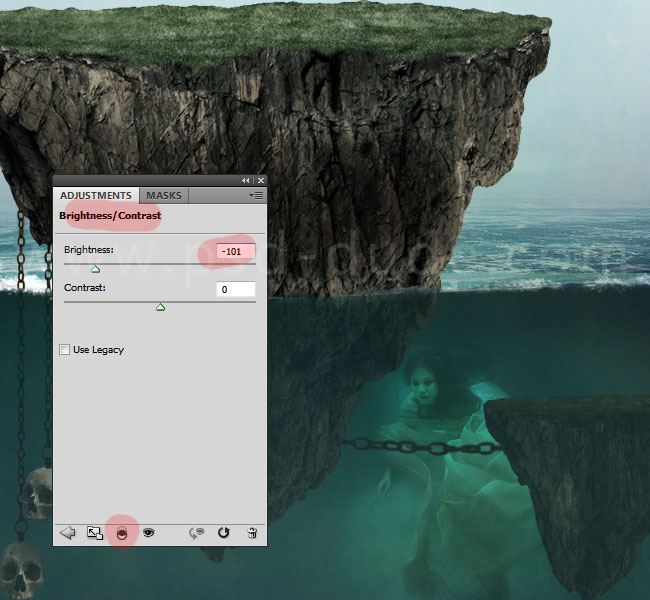
Duplicate again the Underwater Layer and call it Underwater 3 Layer. Place it above all the other layers. Add a layer mask and use Brush Tool with black color, opacity 100% to mask the underwater area and the island that is above the water.
Add a Brightness/Contrast adjustment layer only for the Underwater 3 Layer.
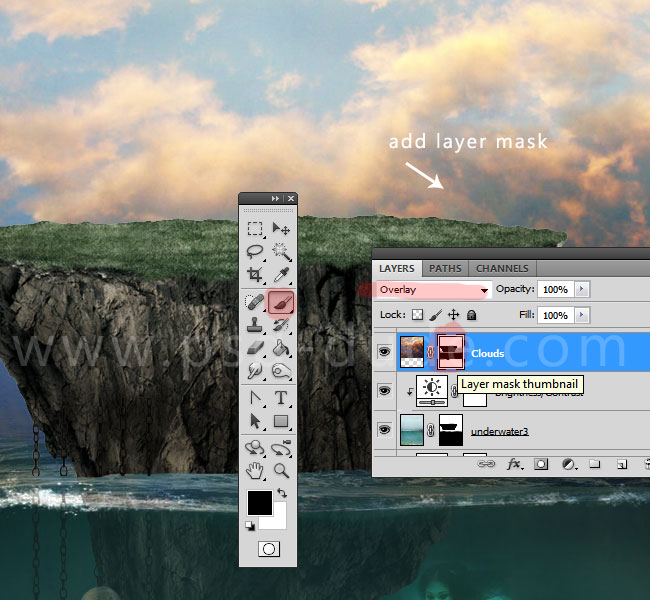
In a new layer add this sky clouds with Overlay blend mode. Add a layer mask and use a soft round brush, color black, opacity from 10 to 100% to mask the island and also to blend the new added layer with the sky beneath. You can also choose other clouds from my collection of free Clouds Textures. Alternatively choose one of the clouds overlay textures.
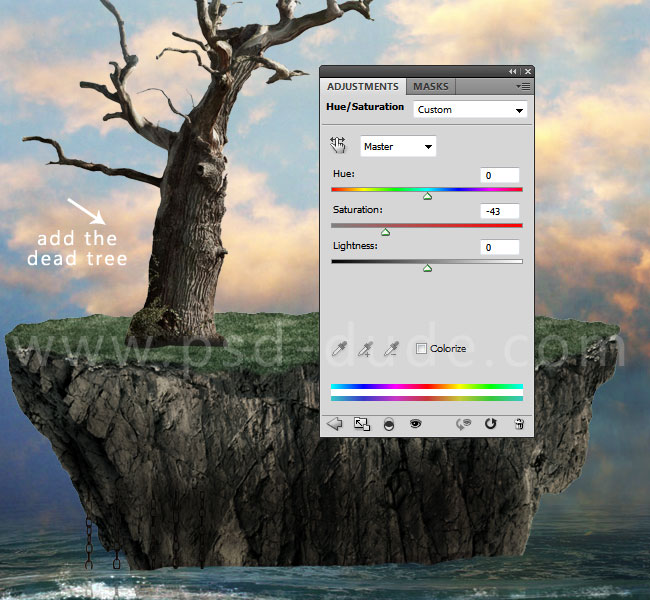
Add the dead tree in a new layer. Flip it horizontally and also add a Hue/Saturation adjustment.
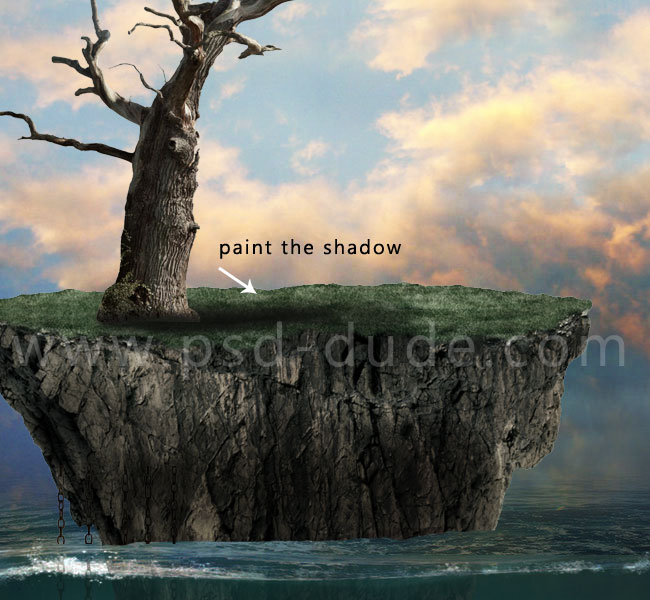
Use the Brush Tool with a soft round brush, color black to paint a shadow for the dead tree.
Duplicate the Skulls on Chains layer two times, resize it and place it like in the image. Edit the brightness and contrast and maybe add an Inner Shadow effect to create lighting and shadow.
Add this skeleton PNG in a new layer and place it on the island. Desaturate the image a little. Add two Inner Shadow effects; after adding the first inner shadow convert the layer into a smart object to add the second inner shadow.
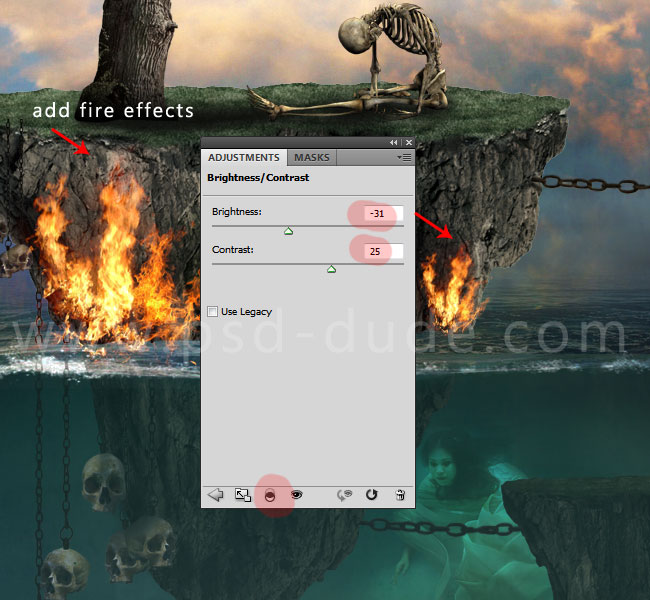
Time to add some fire flame effects; I will use this fire stock image in a new layer with Screen blend mode. Add as many images as you want, resize, combine and place them around the island. Adjust the contrast of the image. You can also use fire brushes instead of the fire stock image.
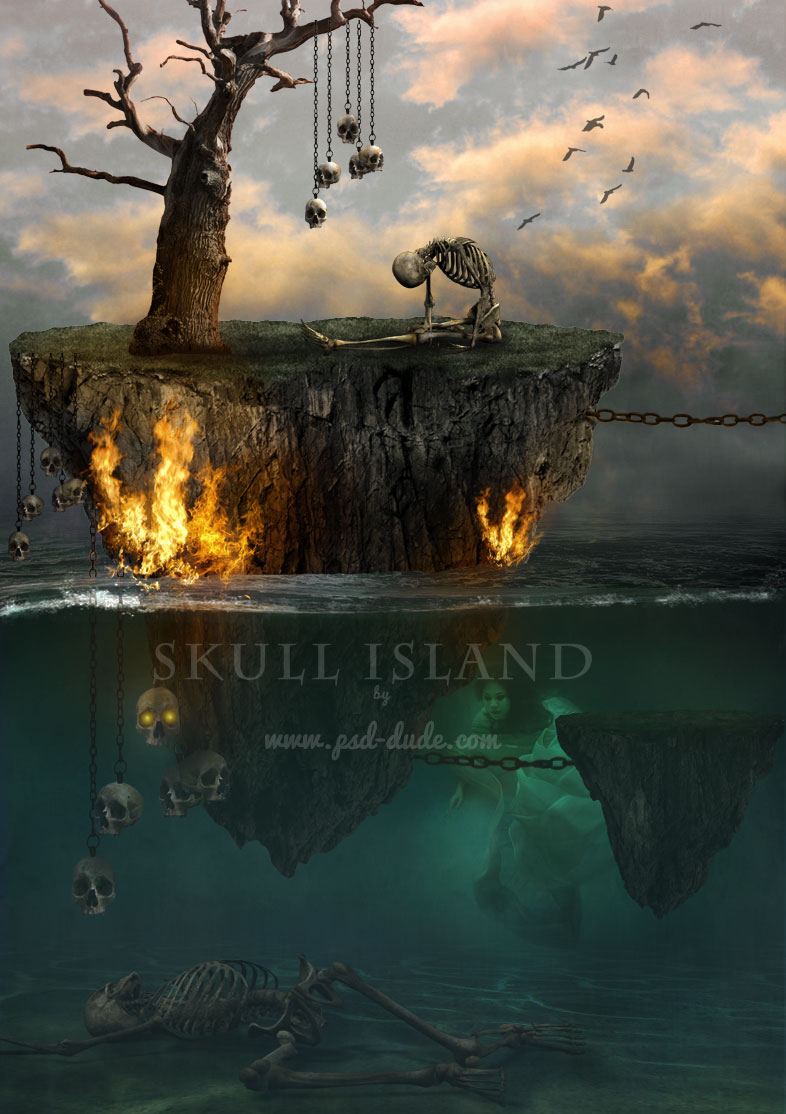
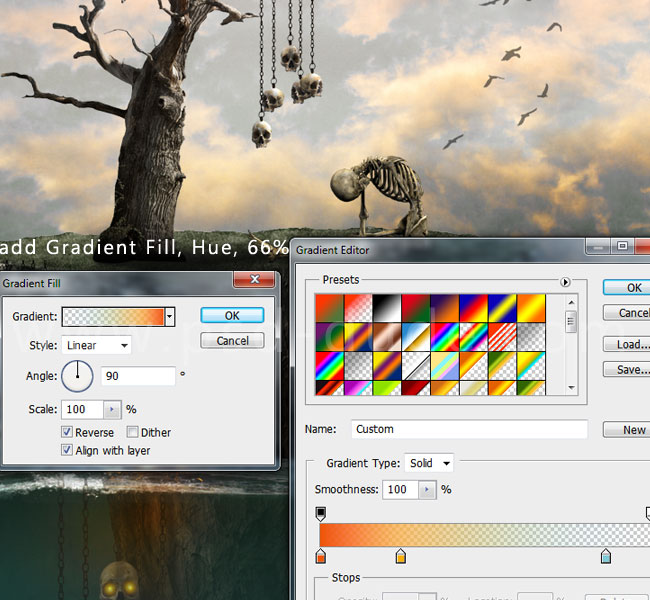
For the final touches I have added some bird brushes and that is pretty much all. To make all the images blend together I have added a Gradient Fill adjustment with Hue blend mode and 66% opacity level .
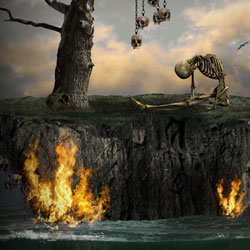
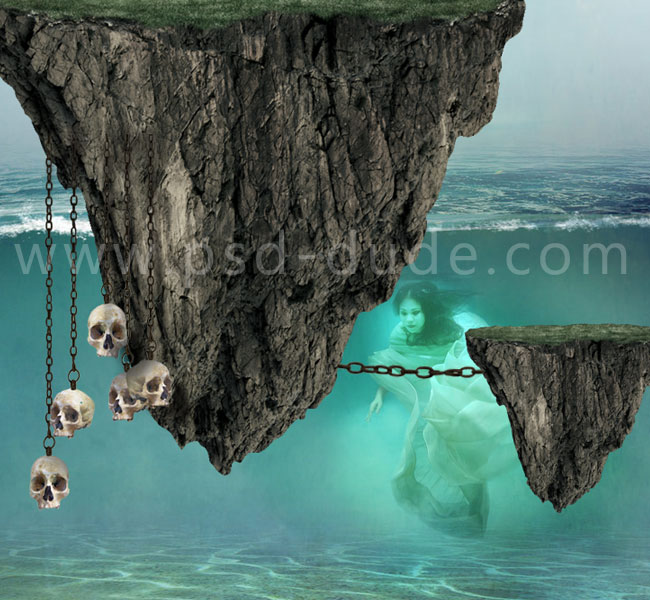
So here is the final result for the Sull Island Photo Manipulation. You can choose if you want to darken the image even more or leave it like that.
6 comment(s) for "The Skull Island Photoshop Tutorial"