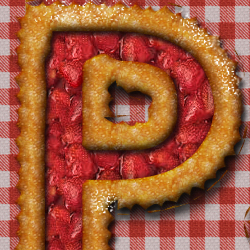
In this tutorial I will show you how to create a realistic fruit pie text effect in Photoshop using any font type. All you need are some sweet cake patterns that you can download from our blog. Or you can use any other texture that you have and like. You can easily adapt this effect to create other types of cakes like cheese pie for example.
Download Source Files
This tutorial has downloadable files like ABR, PAT that you need to install to create this effect. The pack also includes the PSD source file. DOWNLOAD SOURCE Files
Related Tutorials and Resources
Here are some useful Photoshop tutorials and resources that are related to this tutorial and you might want to take a look at.
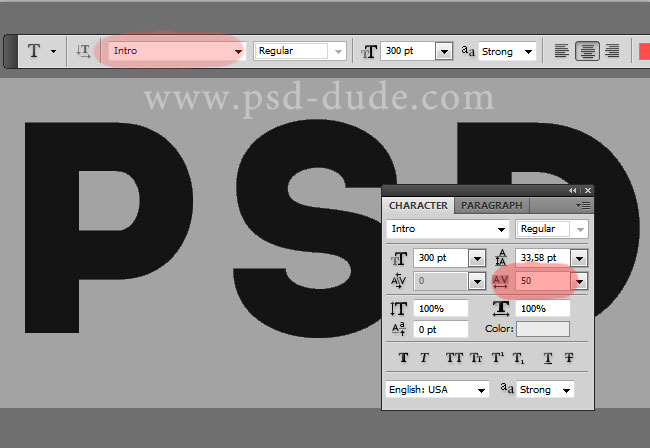
Let's start with a simple Text layer; type any message you want. You can use any font type. First you have to download the Intro font type, which is a free font type. Learn how to install new font in photoshop from this quick tutorial for beginners.
You can also check out this awesome list with over 25 free Cake Fonts that you can download and use for commercial projects. Use the cake fonts online with the MocoFun text editor or install the fonts on your computer and use them in Photoshop.
Next you have to modify the text to create round corners. First rasterize the text layer; right click on the layer and choose Rasterize type. Use this tutorial to create round corners in Photoshop .
Or, you can use this rounded corners Photoshop action to create a rounded font.

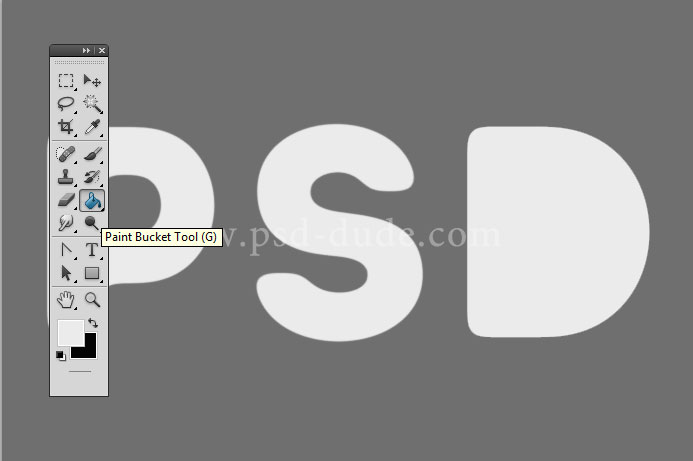
I will now use the Paint Bucket Tool to fill the "D" letter; this step is optional.
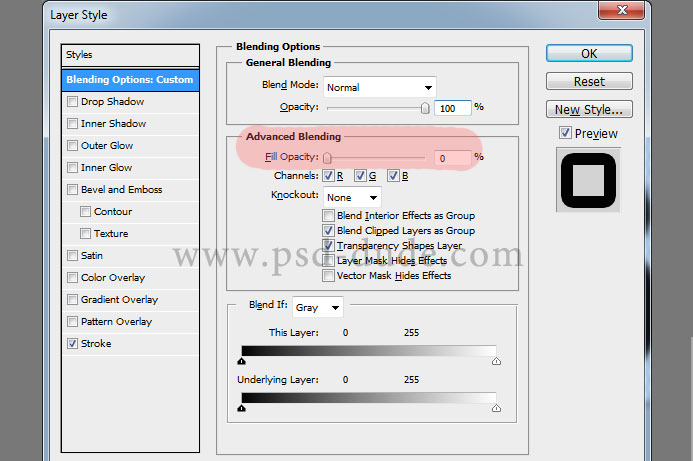
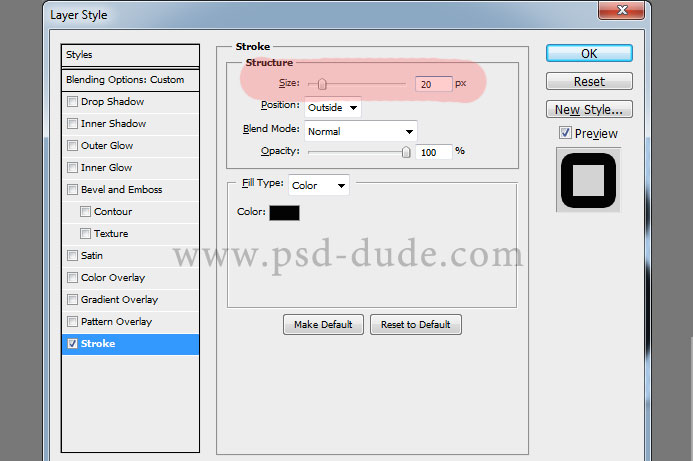
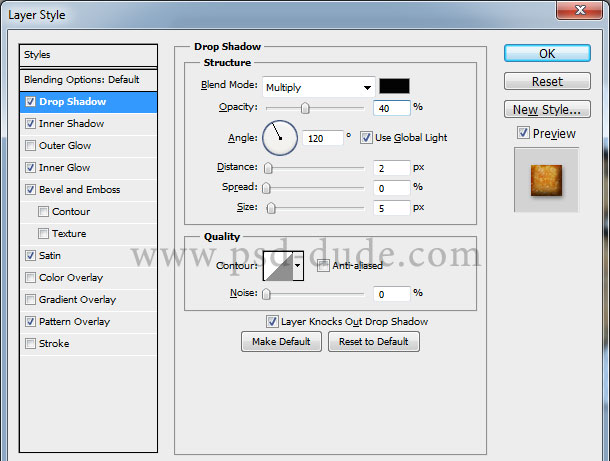
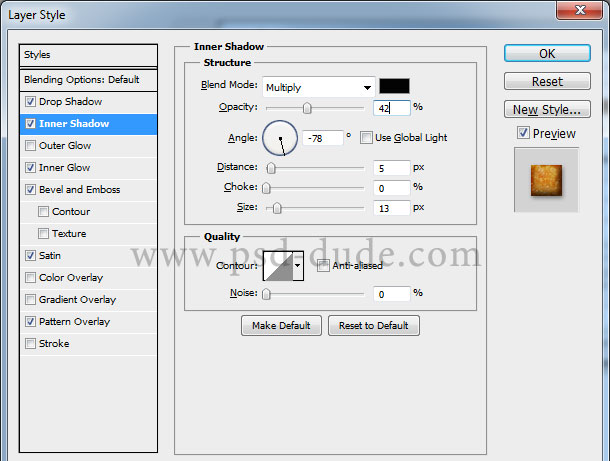
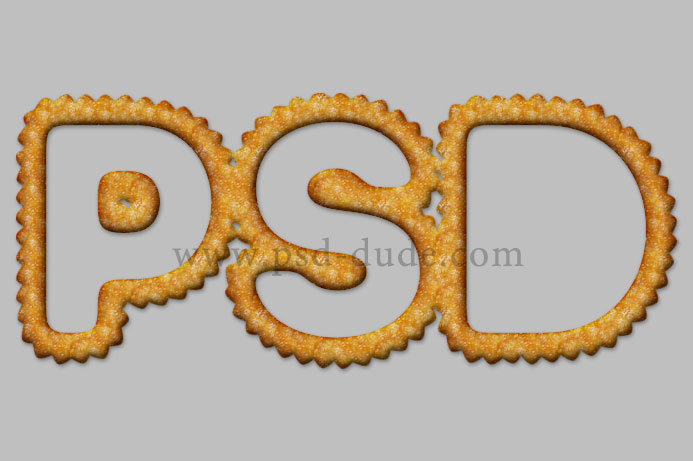
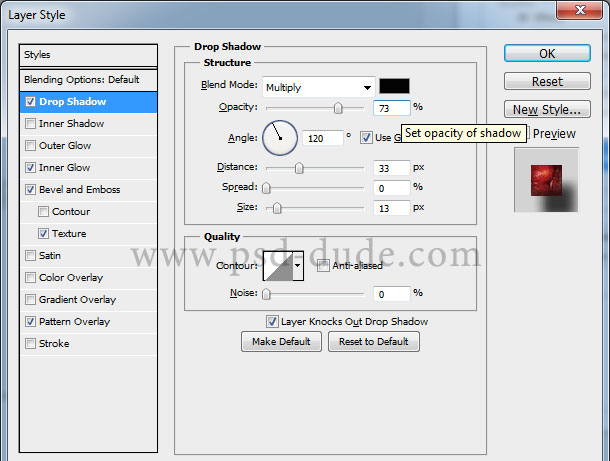
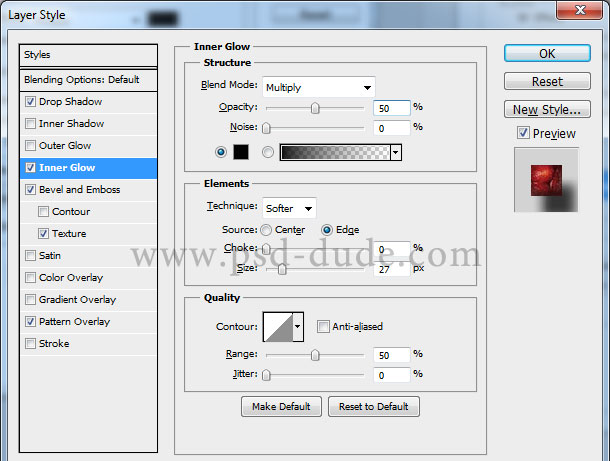
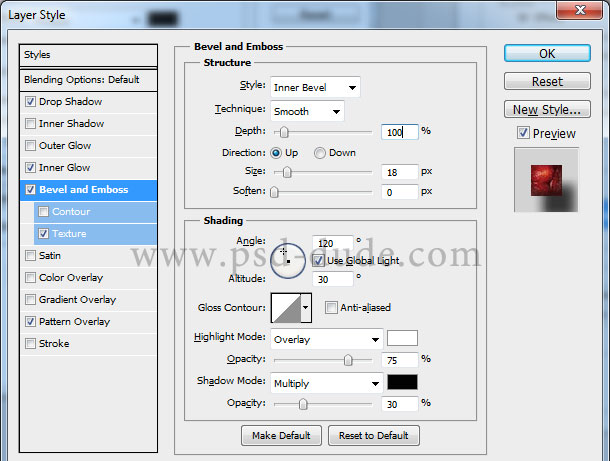
Call the text layer Strawberry Pie Text. Duplicate the Strawberry Pie Text layer and call it Pie Border. Now we are going to add different layer styles and effects to each layer. We'll start with the Pie Border by adding these styles.
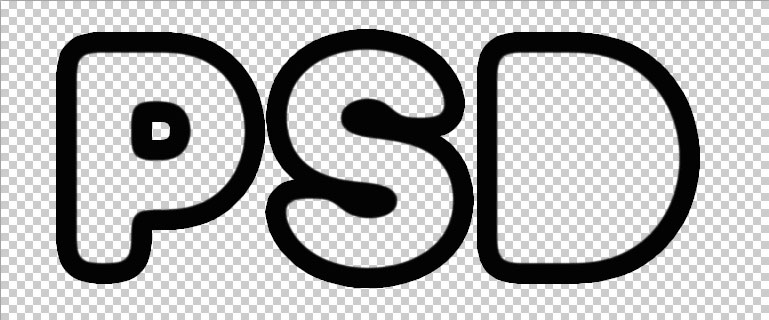
The Pie Border layer should now look like this:
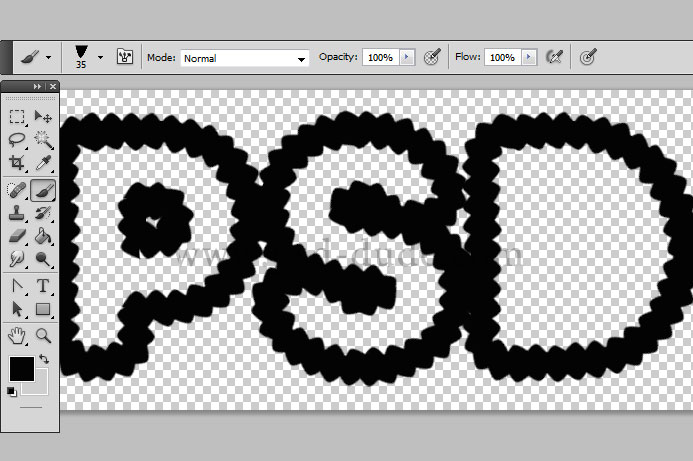
Now create work path using the Pie Border layer. After creating the work path, make a new layer just below this one and call it Pie Deco Border. Download the pie border brush and stroke path using this brush. Make sure you are in the Pie Deco Border layer before you stroke the path. Now delete path (press delete) .
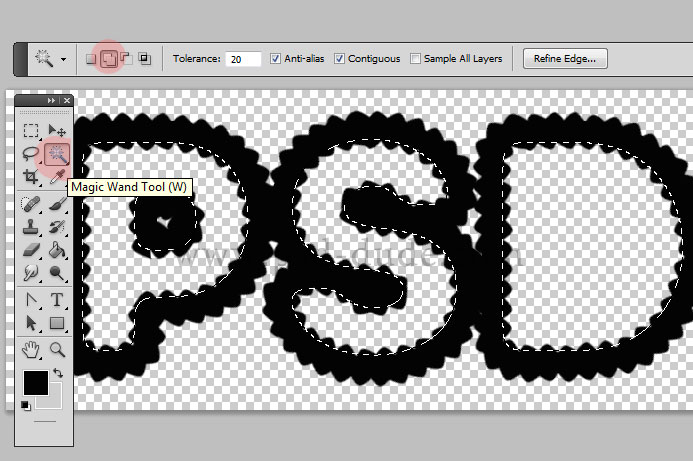
Select the interior of the Pie Border letters using the Magic Wand Tool.
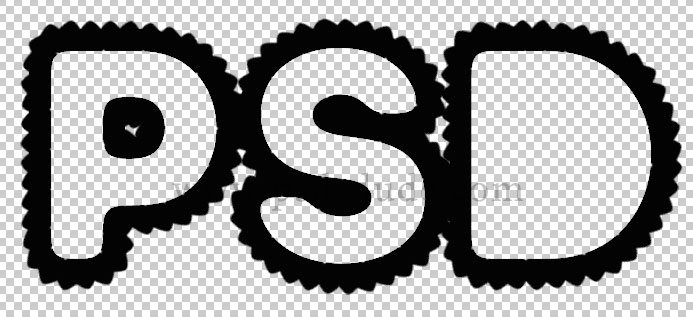
Delete this selection from the Pie Deco Border layer. Merge the two layers and your result should now look like this:
This is the final pie border shape; now all we have to do is to add some layer styles to make it look like a real pie.
The pie border should now look like this:
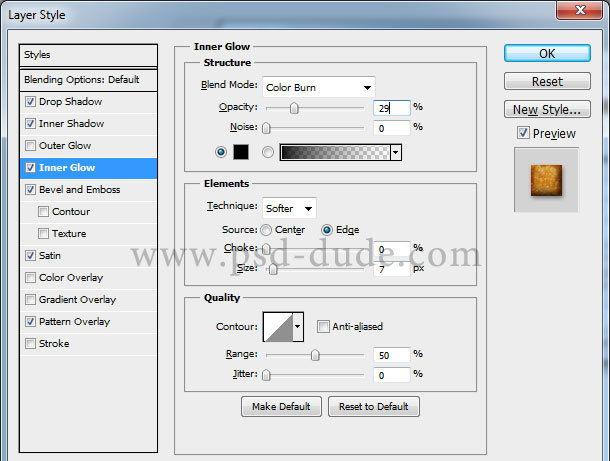
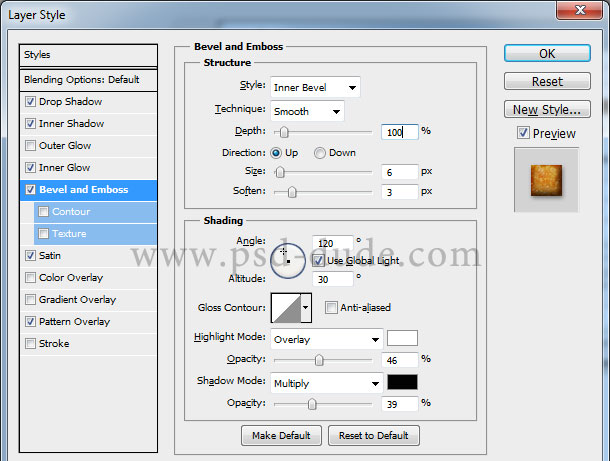
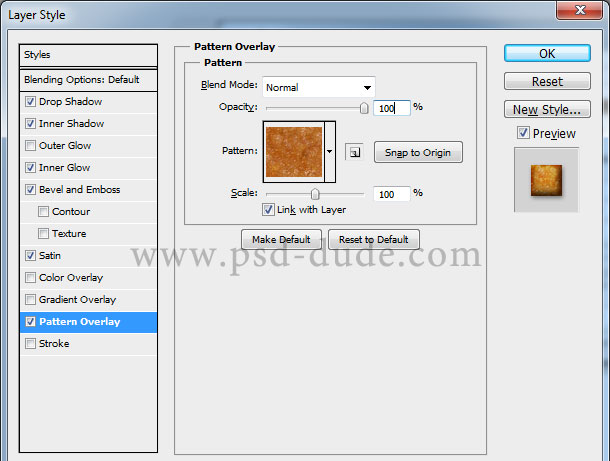
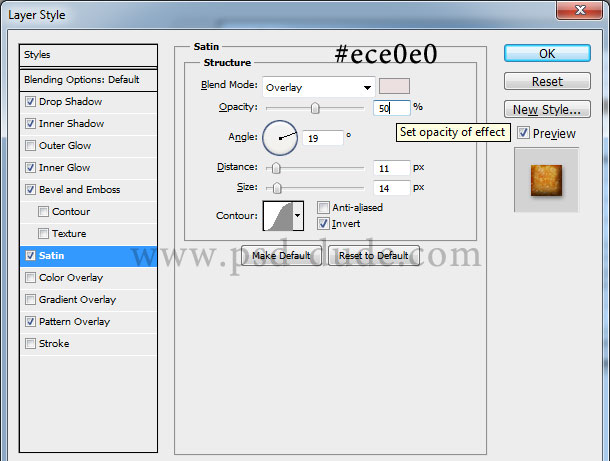
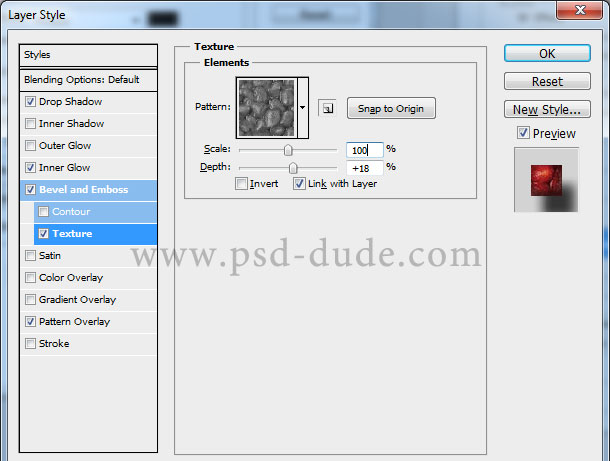
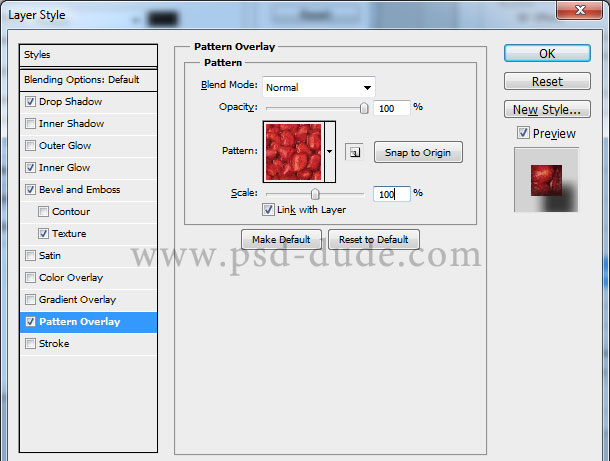
Return to the Strawberry Pie Text layer and add these layer styles. The strawberry pie texture is included in the PAT pattern file that you will find inside the ZIP file.
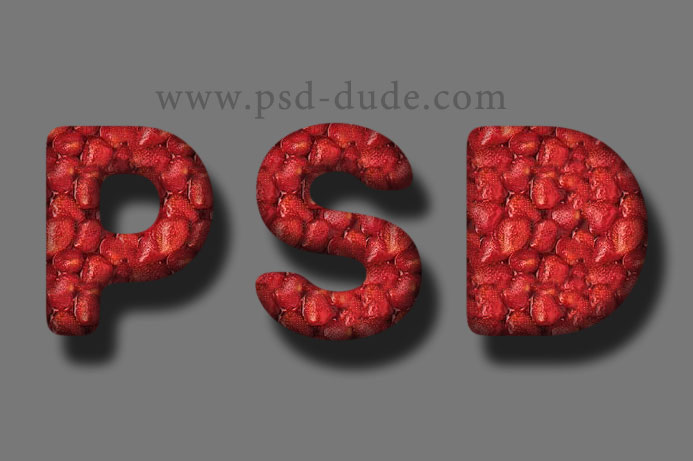
Your b>Strawberry Pie Text layer should now look like this:
For the final touches I have added some sugar over the strawberry pie. Pick the Brush Tool, color white and use the sugar brush included in the ZIP file. I have also added a background layer using the table cloth pattern included in the same pack.
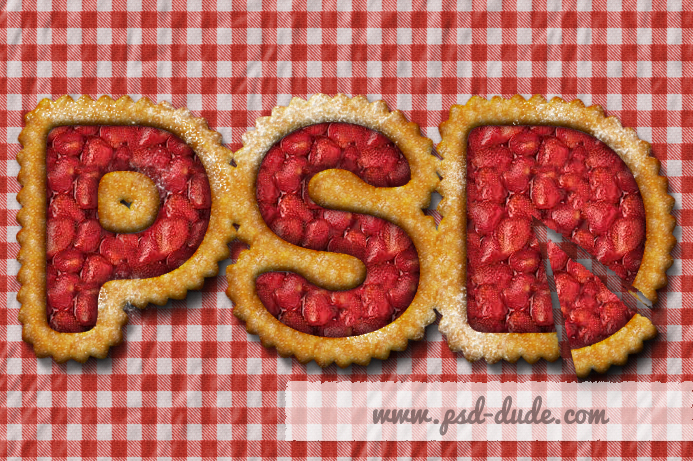
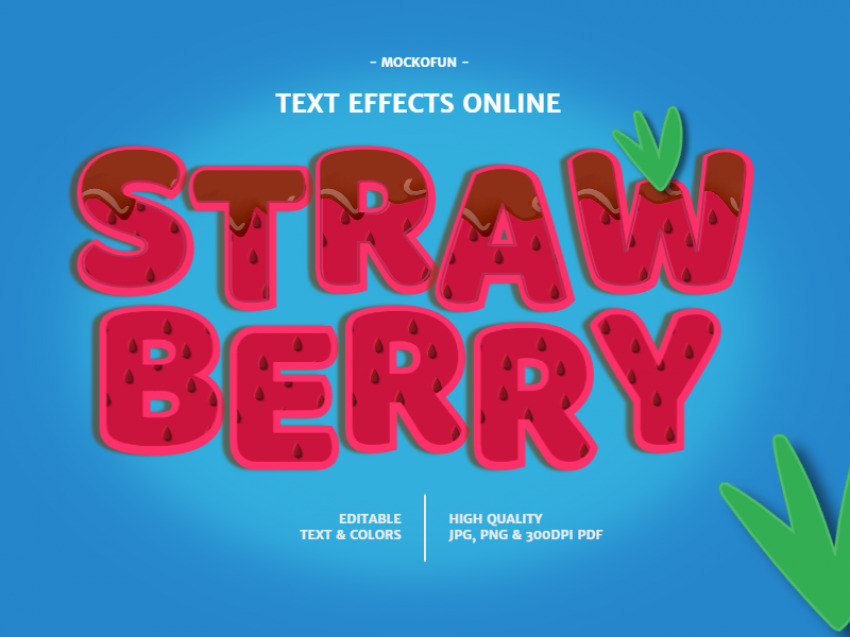
So here is the final result for the strawberry pie text effect made in Photoshop using layer styles and pie textures. The tutorial can be practiced also by Photoshop beginners, as it has plenty of references to step by step newbie tutorials.
Hope you enjoyed this delicious tutorial. For a quick result just as delicious, try the online strawberry font from MockoFun.
19 comment(s) for "Strawberry Fruit Pie Text Effect Photoshop Tutorial"
again a great result, very creative. I like all the details that you added like the silver plate, the coffee cup, etc. Keep up the good work my friend! reply
About your issue, please upload a preview with step 8 and step 9 so I can figure it out what is the problem with the border brush. reply
I love the look though! Thanks for another fun tutorial!
again a great tutorial. Here is my version.
My realization:
http://cartes-mireilled.eklablog.com/effet-de-texte-tarte-aux-fraises-a108627722