Stroke Path Photoshop
In this tutorial you will learn how to use Paths in Photoshop and how to stroke path in Photoshop. You can stroke open path in Photoshop; make an open path with the Pen Tool. The Photoshop stroke selection option using the Brush Tool, is available if you turn the selection into a work path first.
This tutorial is applicable for Photoshop CS and CC 2015, 2018 and 2019.
How To Make The Work Path
To stroke path in Photoshop first you have to make a path, so this is the first step that you have to make. Learn how to make a path in Photoshop from this quick tutorial for beginners. As you will see you can make a Photoshop work path from pretty much everything.
Create a New Layer For The Stroke Path
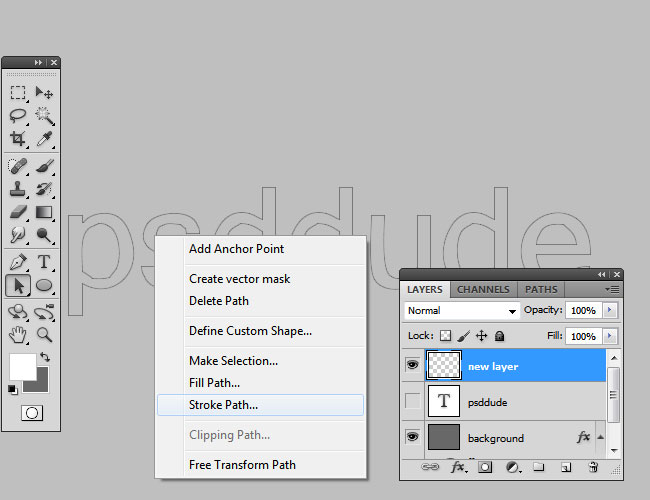
The second step is to create a new layer for the stroke path effect. If you do not create this new layer, the stroke path will not work for text layers and vector shape layers. So, it is better to use a new layer for the stroke outline.
[QUICK TIP] Why Is My Photoshop Stroke Path Greyed Out?
Stroke path not working? This is one mistake I made a lot when I started to work with paths in Photoshop.
Looking at the use of Pen Tool in Photoshop to draw a path. Let's say I tried to do Stroke Path.
Why is Stroke Path greyed out or disabled?
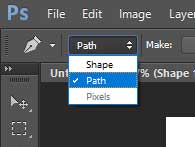
1. Because when drawing a path in Photoshop, in order for Stroke Path to be enabled you need to select Path when drawing with the Pen Tool
Here's how it looks in my Photoshop CC
2. Please note that Stroke Path will also be greyed out if you try to use use it within text layers or vector shape layers. To solve this you will need to create a new layer.
How To Use Stroke Path In Photoshop
Let's say we already created a work path from a text layer, using a quick selection like shown in the tutorial about how to make path in Photoshop.
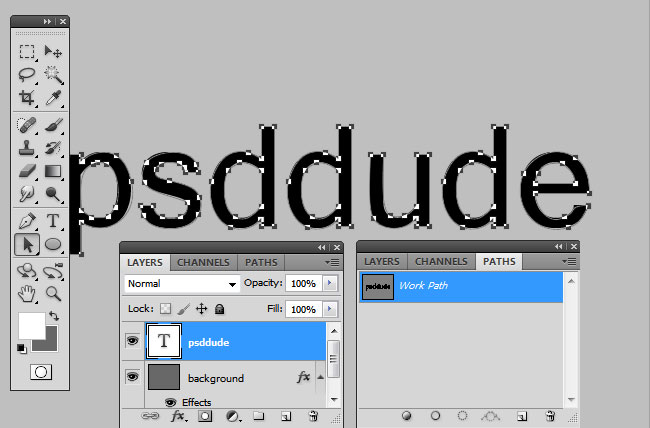
In Photoshop you can use the Stroke Path option with all the main tools: Brush Tool, eraser Tool, Smudge Tool, Burn Tool, etc. But the most used tool for stroking paths in Photoshop is the Brush Tool; so in this tutorial I am going to explain how this works.
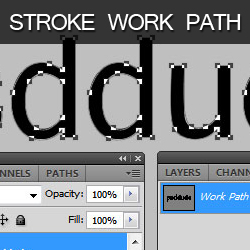
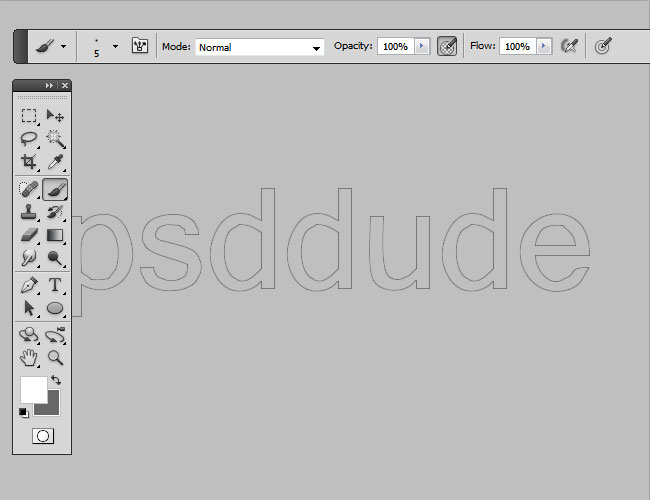
Pick the Brush Tool and choose a brush that you like. I will choose a simple dotted brush
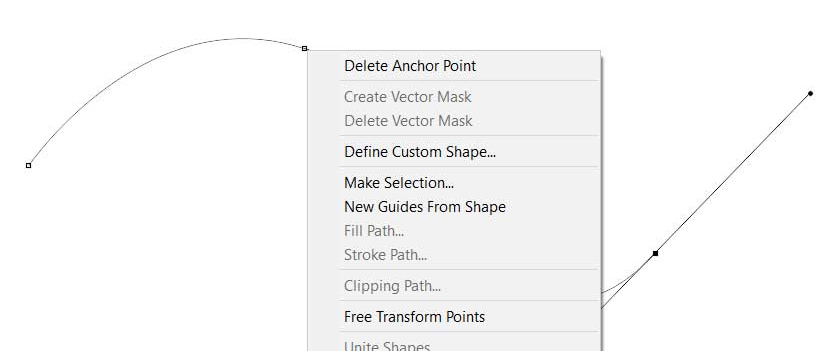
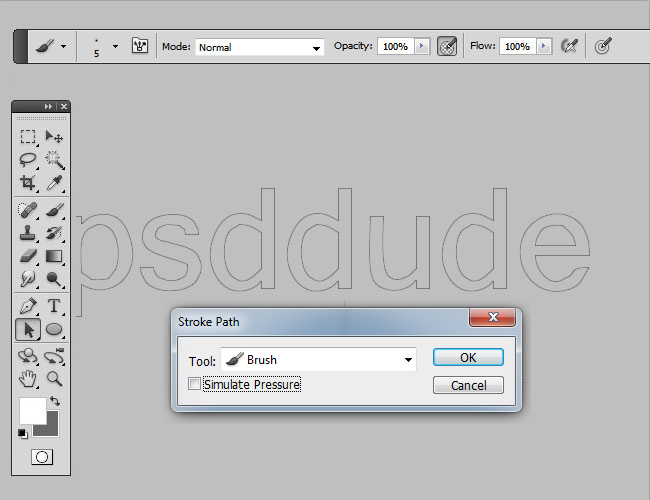
Pick the Path Selection Tool and right click on the path. Choose Stroke Path and from the tools drop-down list choose Brush, which is actually the default setting.
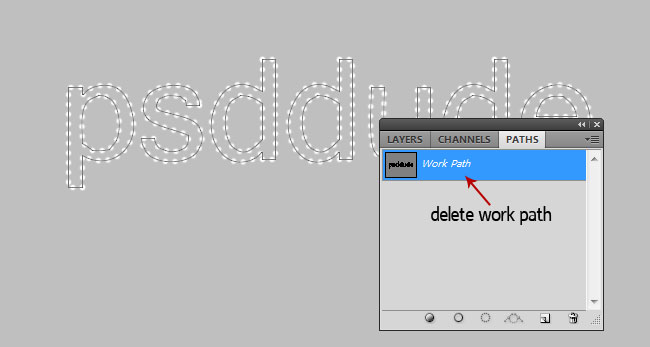
Press the bacspace key to delete the path. Or right click on the Path Tab and choose delete path to see the result.
So here is the final result for the stroke path using the dotted brush.

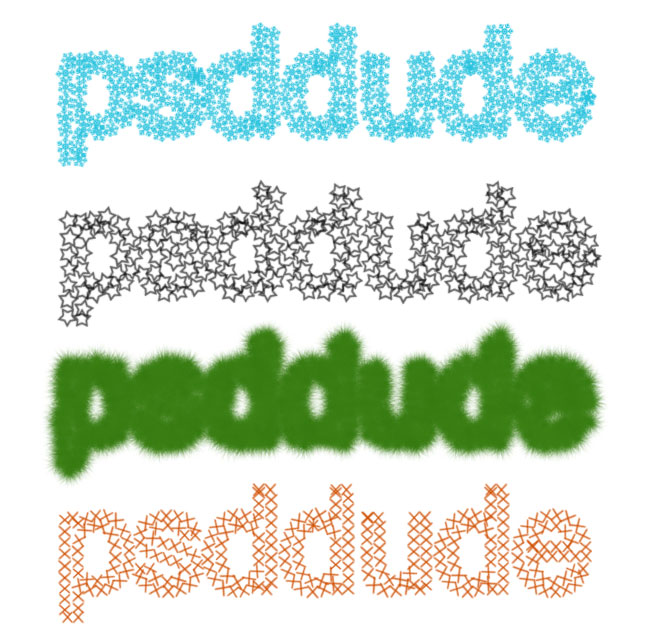
You can use the same path to create the stroke outline effect using other brushes. It is better to keep the path and use the stroke option in different layers. That way you don't have to create the path every time. You simply switch the brush type, create new layer and stroke path. You can even save the path and export path in Illustrator. You can save the path as Clipping Path which is an isolated object .
So here are some quick samples of stroke path effect using different brushes. You can use the same technique for vector shapes, raster objects and so on.
4 comment(s) for "Stroke Path in Photoshop"
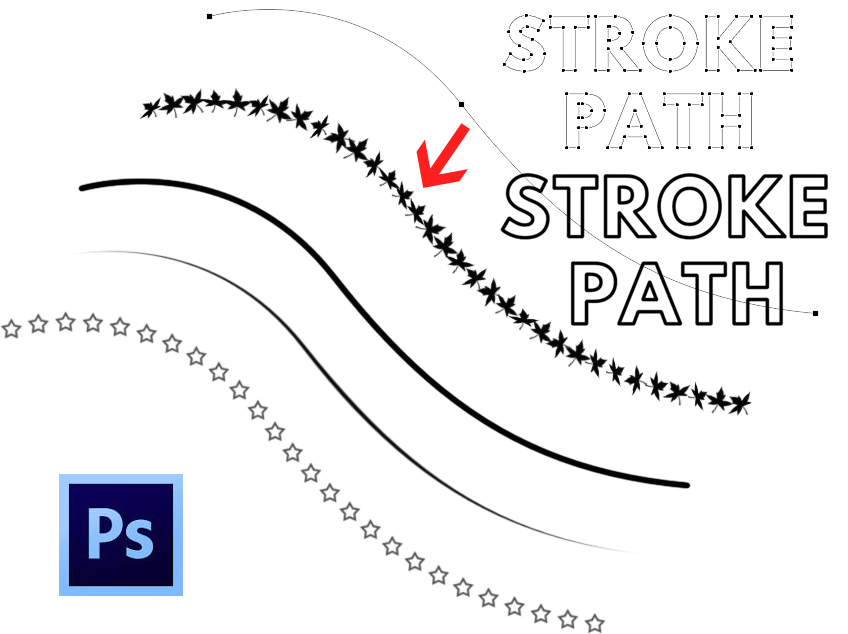
So In order to simulate pressure sensitivity when stroking a path you have to check Simulate Pressure from the Stroke Path fly out menu.
So the result when you Stroke a path with a tapered brush (tapered on both ends, in size and/or opacity) is a tapered line as shown in the image below.
The second line is a line tapered at both ends with fading opacity level. The third line is a tapered line both is opacity and in size.
Than use the Stroke Path option and check the Simulate Pressure setting with Brush Tool.