
In this Photoshop typography tutorial I will show you how to create an amazing Christmas tree text effect in Photoshop using a very realistic Christmas tree brush and also some cool oranaments like Christmas balls, shiny stars and a cool silver bow. You can also add some tinsel, sequins and decorate it in your own personal way. You have to try this text effect for the upcoming Christmas holidays. For more fantastic tutorials like this, check out this list of beautiful Photoshop Christmas tutorials.

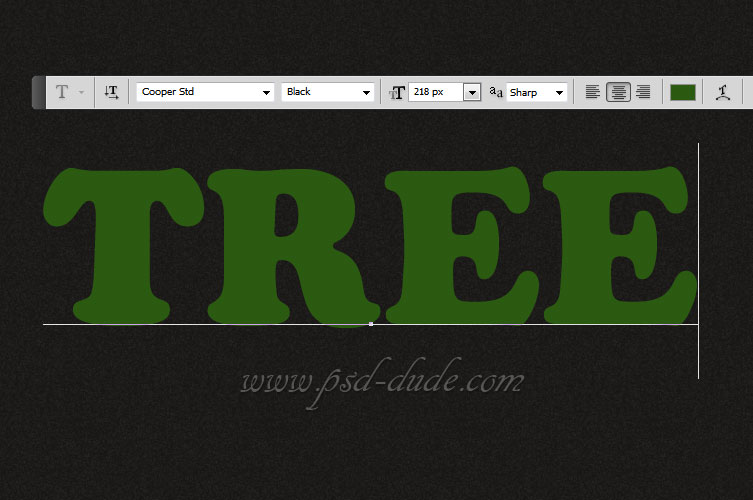
Write a simple text using your favorite font family; I will choose Cooper Std font. Call this first layer Tree Text layer.
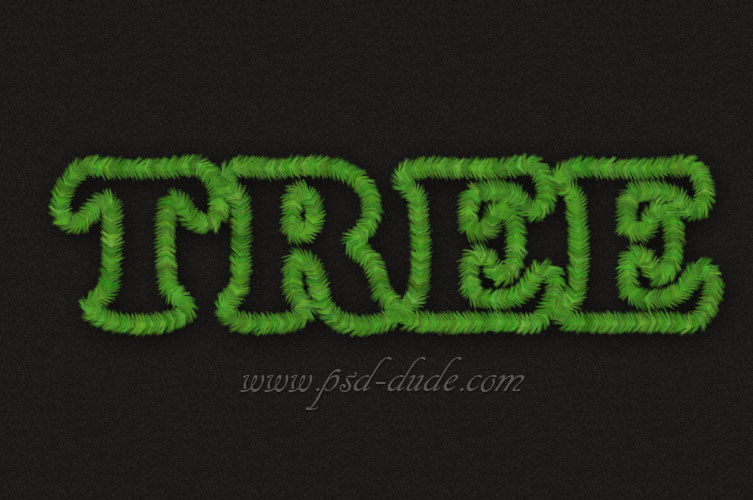
Download this amazing Christmas tree brush that we will need in the next step. Make a new layer and call it Christmas Tree Text 1. Set the Foreground colo #4c9021 and the Background Color #425508. Make a selection out of the Tree Text layer and pick the Christmas tree brush to Stroke Path. For the brush use a 30px size like shown in the image.
Very Important: Make sure you are in the right layer (Christmas Tree Text 1) before you press Stroke Path.

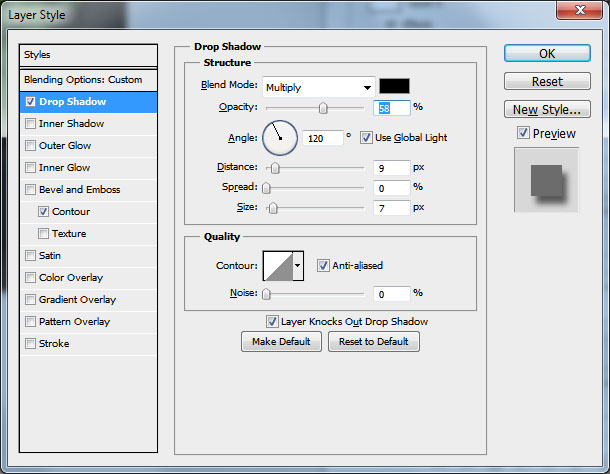
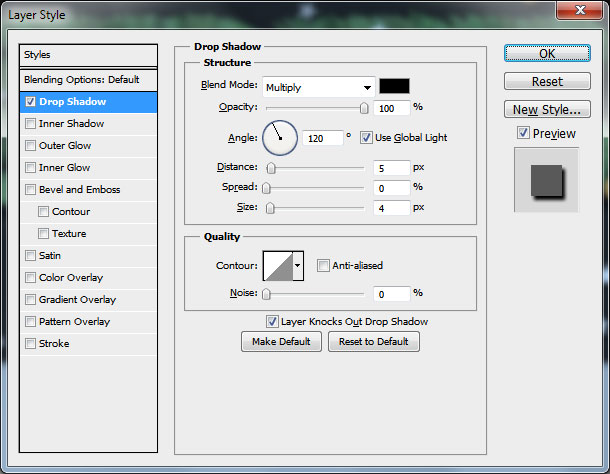
Open the layer style window of the Christmas Tree Text 1 and add a simple Drop Shadow effect. Hide the Tree Text layer; and make sure not to delete the Work Path because we will need it in the next step.
Create a new layer and call it Christmas Tree Text 2. Stroke Path using the same Work Path but this time change the brush size to around 45px. Also change the the Foreground colo to #3b6128 and the Background Color to #112709.
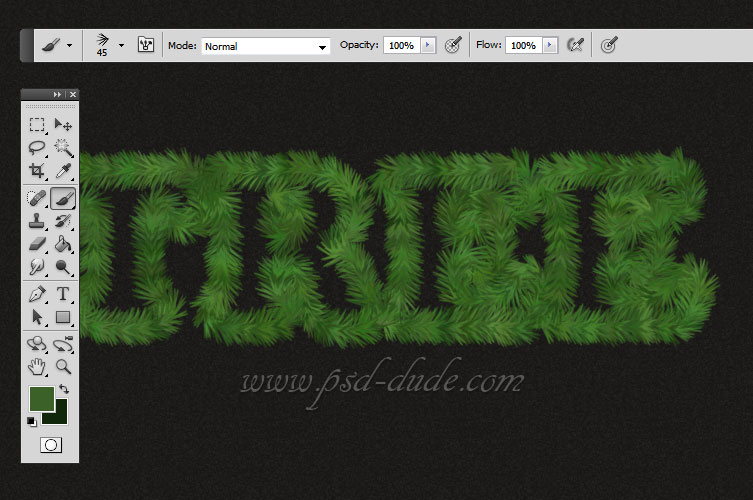
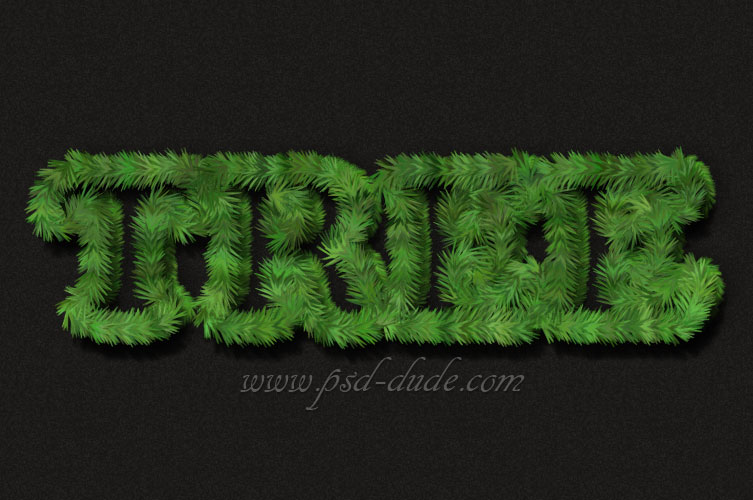
Open the layer style window of the Christmas Tree Text 2 and add again a simple Drop Shadow effect. You can also add a Smart Sharpen filter to obtain a more defined look. Return to the Christmas Tree Text 1 layer and move it to the right like shown in the image.
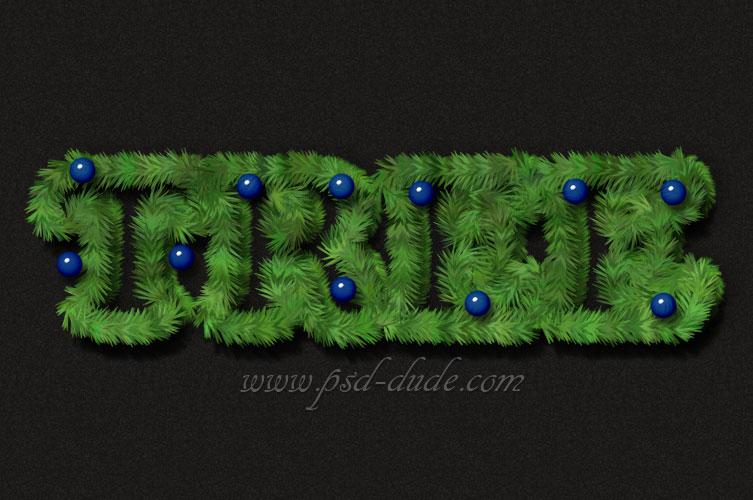
Time to decorate our Christmas tree text effect; I will start by adding some Christmas Balls in a new layer called Blue Christmas Balls. You can use a Hard Round Brush or you can use the Ellipse Tool to create the Christmas balls.
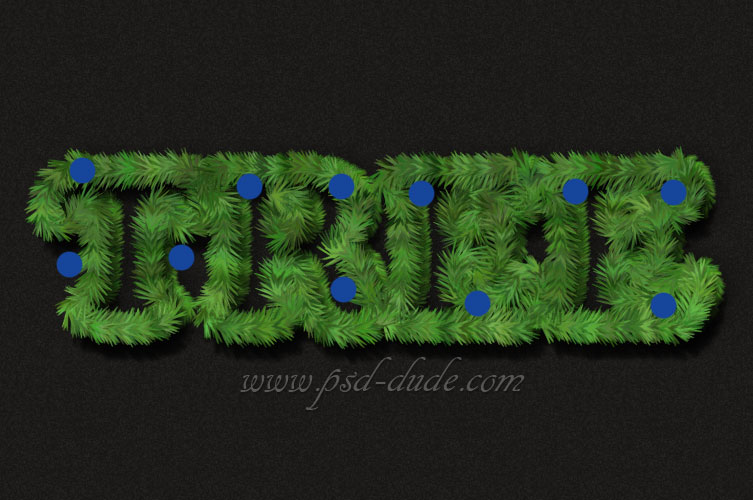
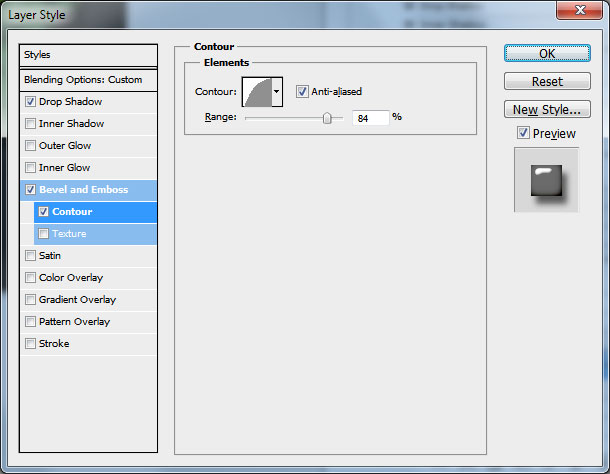
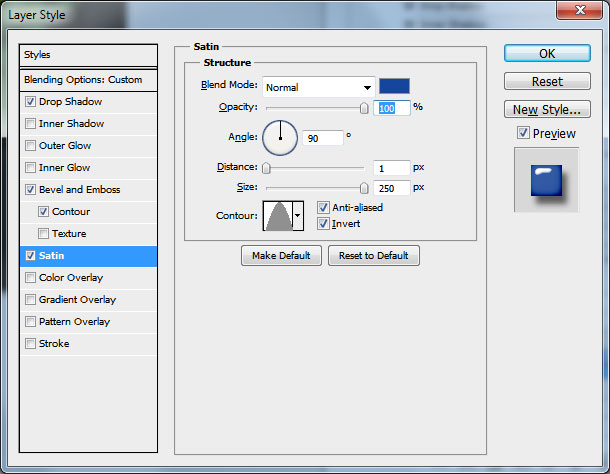
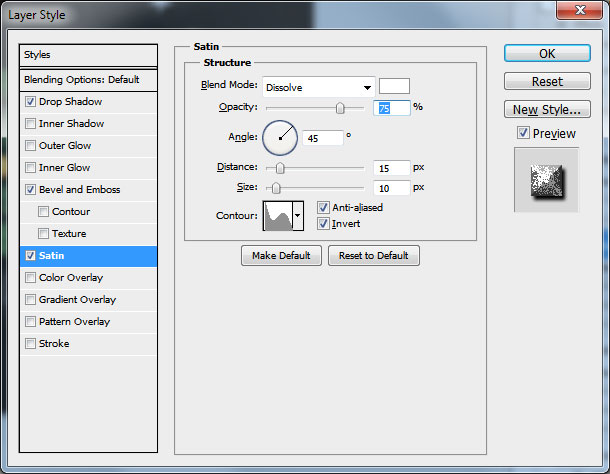
Open the layer style window and add the following styles for the Blue Christmas Balls layer. Set the Fill to 85% and for the Satin layer style choose the color #16459b.

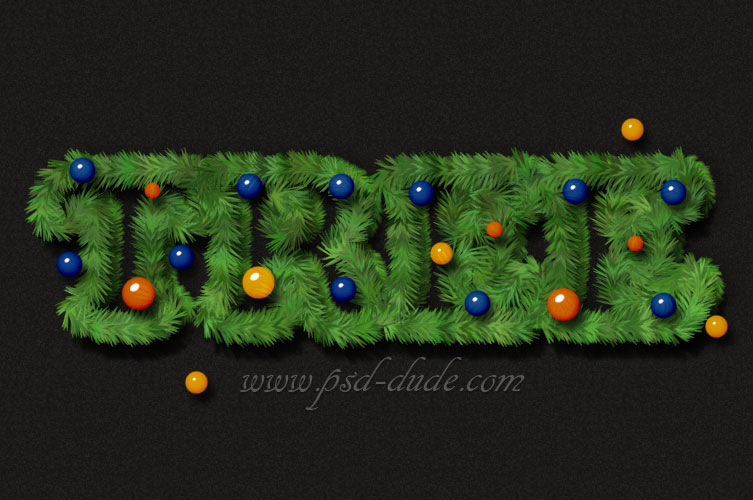
Your text effect should now look like this. If you want you can add another layer style for the decorations or you can use real Christmas balls it is up to you.
Create two more layers and call them Orange Christmas Balls and Yellow Christmas Balls. Copy the layer style from the Blue Christmas Balls and paste the layer style to the new created layers. You have to make small adjustments so for the Satin color choose #e76b06 and #fbb100. You should obtain a similar result.
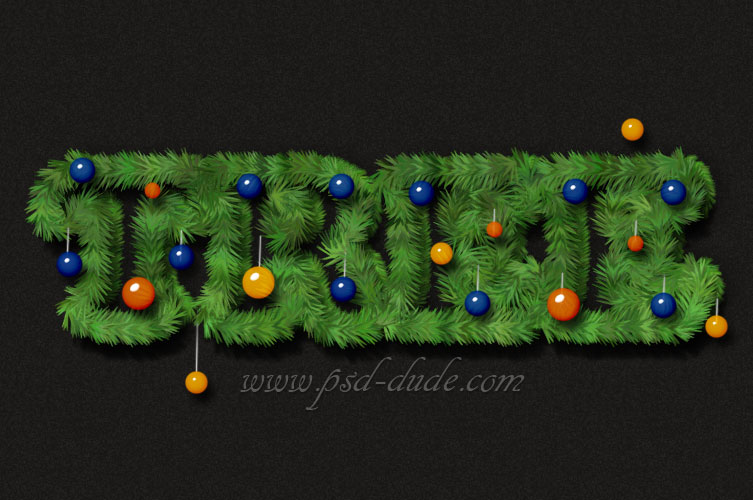
To hang the decorations in the tree I will add another layer and draw some simple threads using a gray color #aaa9a9.
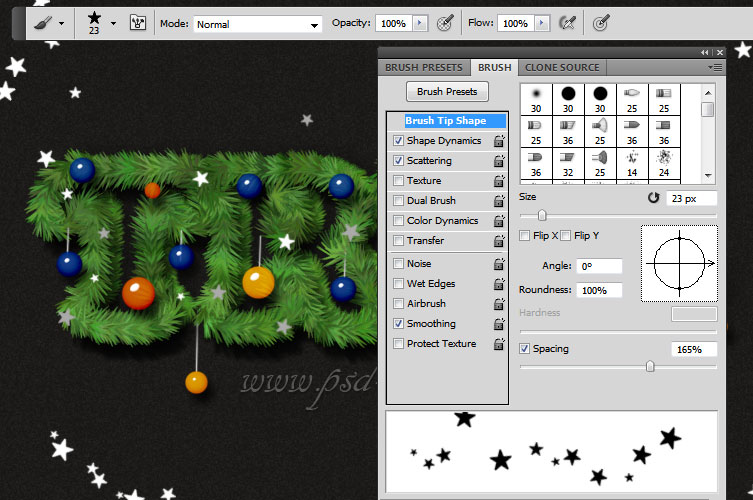
To make the text look more festive I will add some silver stars using a custom made stars brush that you will find in the ZIP file at the end of this tutorial. Use soft tones of gray and white for the stars.
Open the layer style window and add the following styles for the silver stars.

Download these amazing Gold Silver Bow PSD file and choose the silver bow, resize and place it on the center of our Christmas text effect.

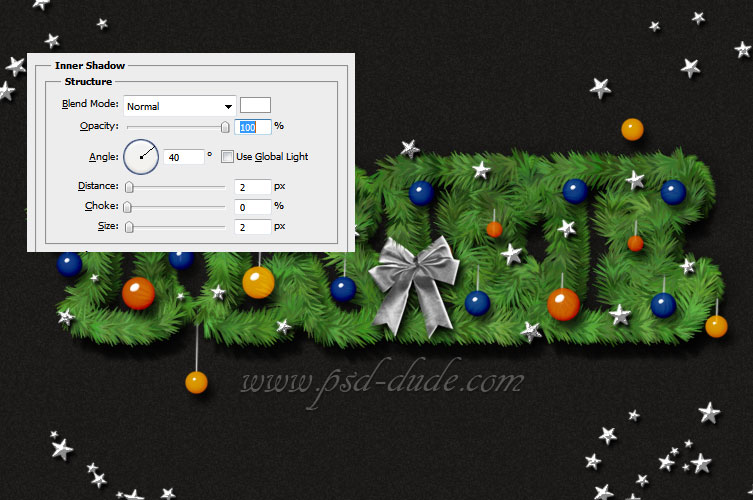
To blend the bow with the rest of the image I will add a Drop Shadow effect and a Inner Shadow for adding more depth. I will also used the Smudge Tool to make the bow look like it is in some areas behind the tree branches.
How to Create Falling Snow Effect in Photoshop
If you want to add falling snow effect you can add the falling snow texture and set the blend mode to Screen. You can use these textures snowfall 1 and snowfall 2 with Screen blend mode. Also you can download this snow brushes and add snow using the Brush Tool and color #ffffff.
Here are some more snowfall textures that you can use with Screen blend mode.
Download the PSD FILE(2.80 MB)
Free PSD file with all the layer styles intact and also the ABR file containing the star brush that I have used in one of the steps.
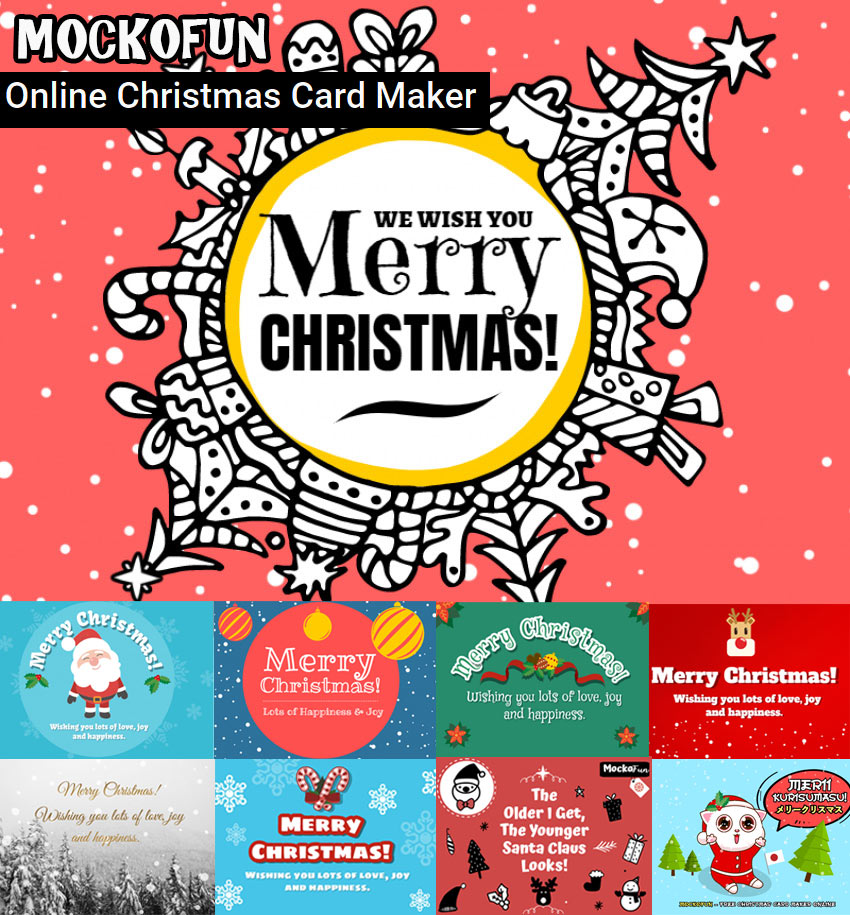
Online Christmas Card Maker
Did you know you can use online tools like MockoFun to make Christmas cards? Combine Christmas vector shapes with text and create some amazing Christmas cards. MockoFun provides pre-made templates for making Christmas cards online in just a few minutes.
Check out this awesome list of over 50 Christmas fonts that you can use online or download for free to use in Photoshop. Combine Christmas fonts with text symbols like a star symbol for example.
Check out this tutorial on how to use the online Christmas Card Maker and all the awesome features that MockoFun has to offer.
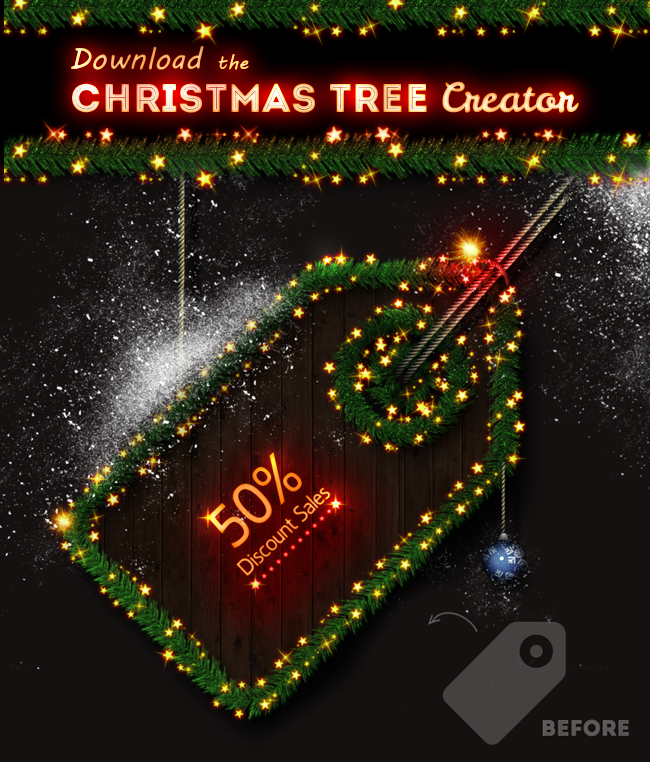
Christmas Tree Creator Photoshop Action
You can create unique Christmas effects using this one of a kind premium Photoshop action set. The pack contains 2 Photoshop actions that will allow you to create realistic Christmas tree effects out of any text, shape, raster or hand drawn path. It comes included with a fully detailed PSD Help File for you to obtain the best results.
18 comment(s) for "Create a Christmas Tree Photoshop Text Effect"
Upload your result when it is done :) I am curious to see your Christmas tree text effect. reply
FELIZ NAVIDAD. un abrazo.
----
Hello, I send you my work here hope you like it, thanks for the tutorial, as always a pleasure to do.
MERRY CHRISTMAS. a hug.
Un abrazo a ti tambien amiga y Feliz Navidad :) reply
Merry Christmas and a happy new year :) reply
Made by Svetlana