
There are several good tutorials on the internet that are teaching how to make text transparent in Photoshop but, that was another reason for me to try to create my own effect. There is a similar one on psdtuts with glass text filled with liquid, so plenty to choose from.
How To Make Transparent Text in Photoshop
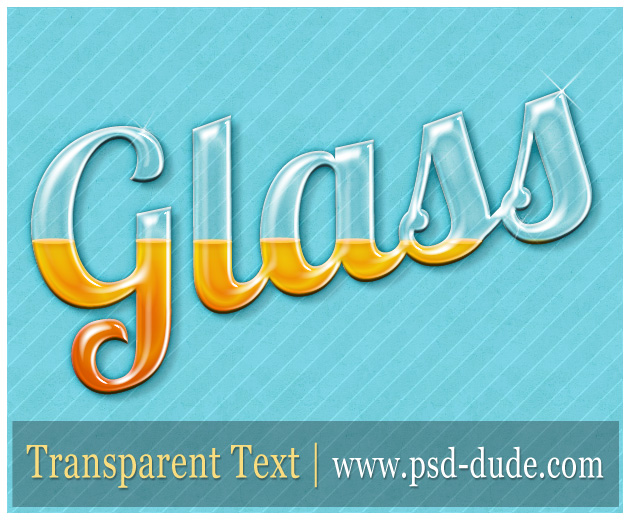
In this brand new tutorial I will show you a quick way to create a transparent text effect in Photoshop. We are going to add five text layers with different layer styles. Before we begin, let's take a quick look at the preview of the final image for this glass text effect.
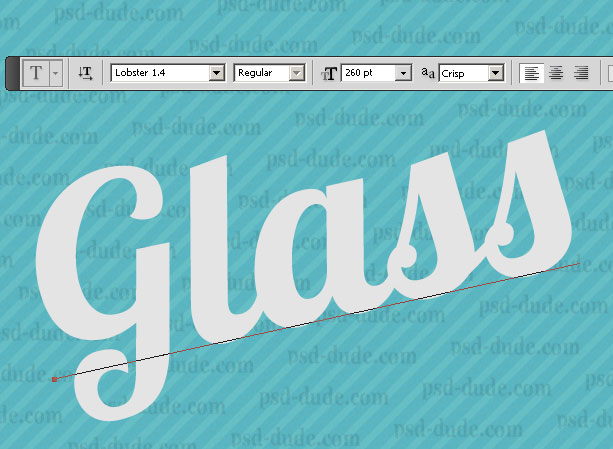
Start with a simple text message and use whatever font you want. I've picked a free font, named Lobster, which I like a lot. The color is not important because we will reduce the Fill of this layer to 0%.
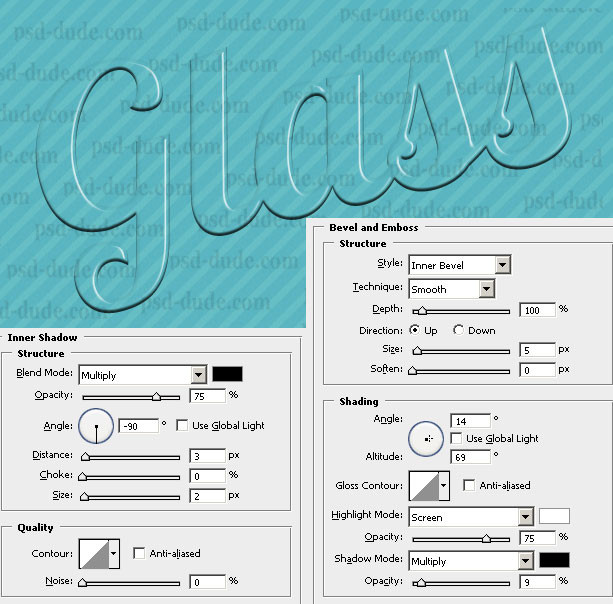
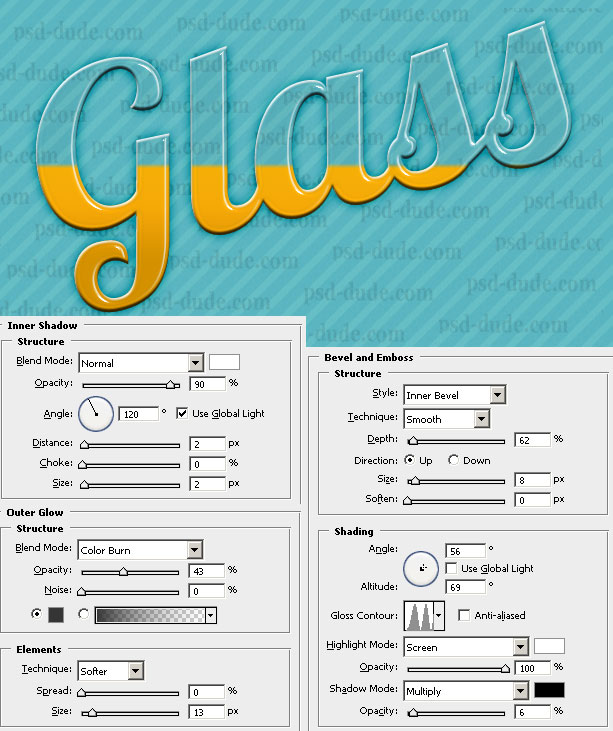
Duplicate this layer 5 times, to obtain Glass 1 Layer, ...., Glass 5 Layer. Add to the first layer the following layer style: Inner Shadow and Bevel and Emboss. Don't forget to reduce the Fill of this layer to 0%.
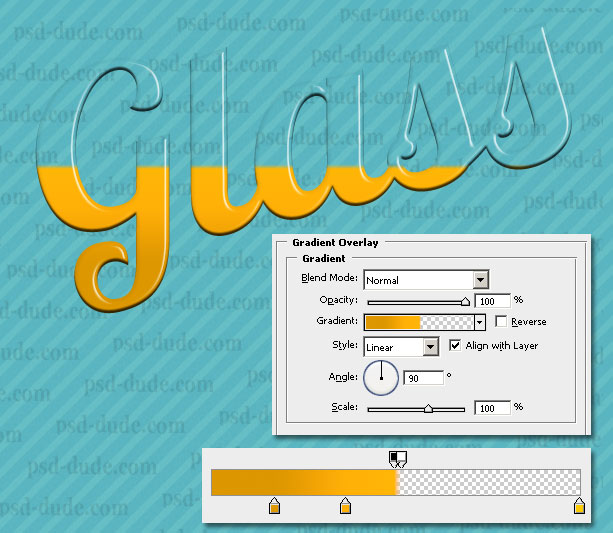
Now let's add a Gradient Overlay to the Glass 1 Layer, with the following settings. The colors for the gradient are not as important, you can choose any combination you want.
Now add these layer styles to the Glass 2 Layer: Inner Shadow, Outer Glow and Bevel and Emboss.
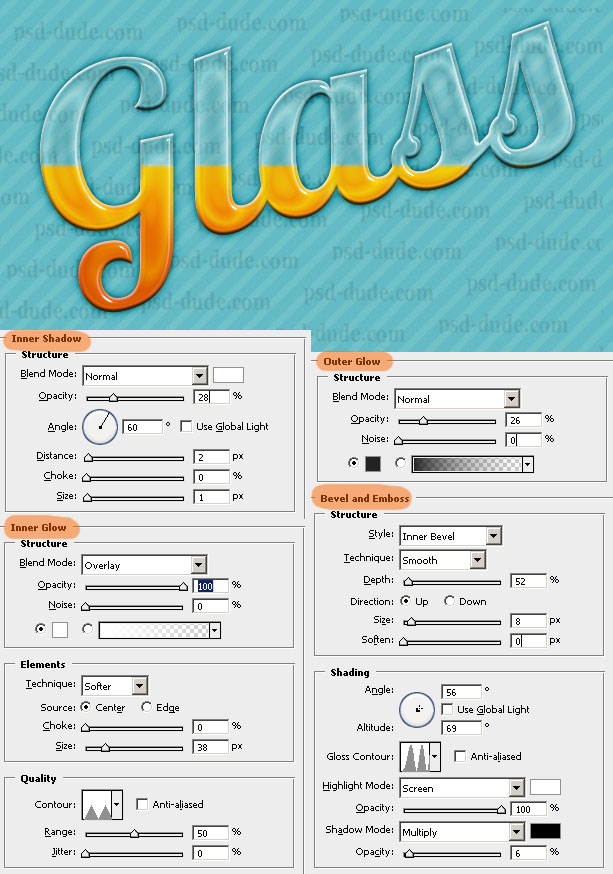
The third layer, Glass 3 has the following layer styles: Inner Shadow, Outer Glow, Inner Glow and Bevel and Emboss.
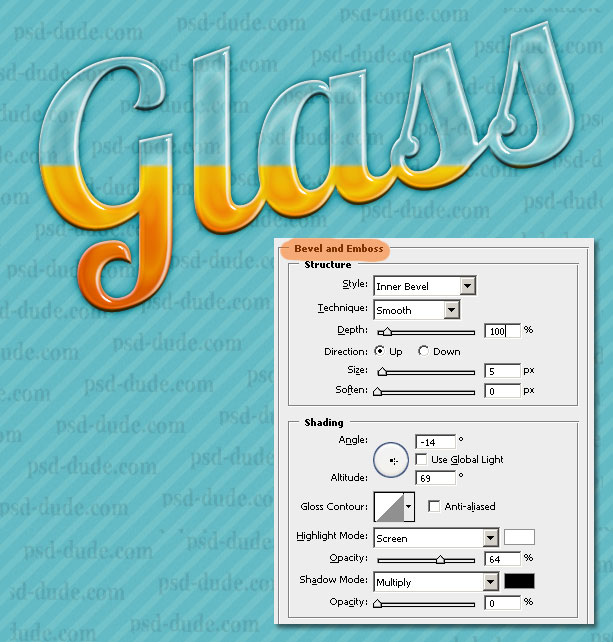
Go to the Glass 4 Layer and add Bevel and Emboss.
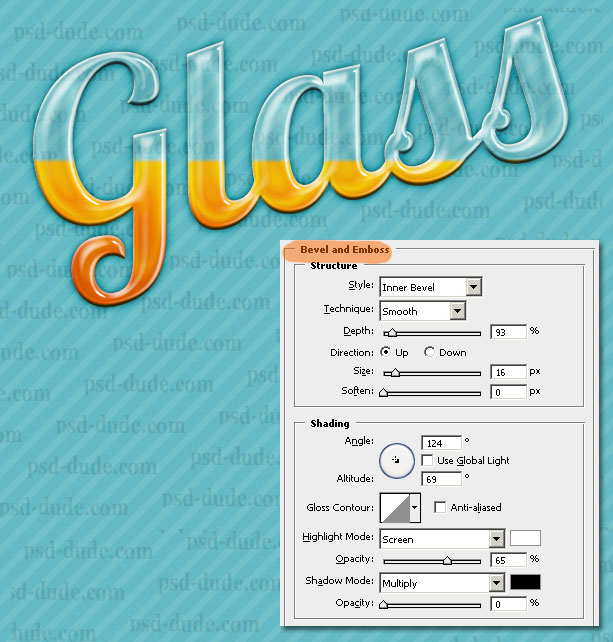
Go to the last layer Glass 5 and add again Bevel and Emboss but with another settings.
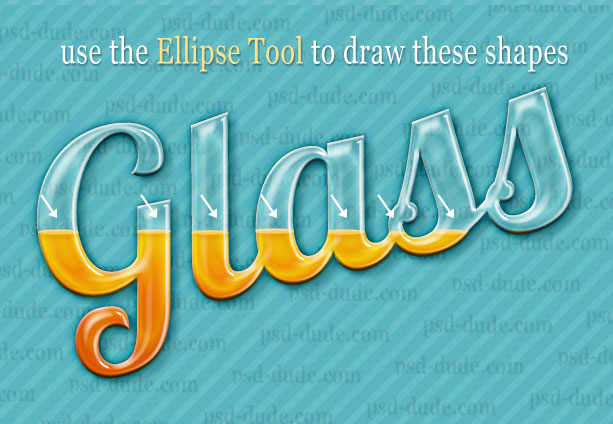
Create a new layer called Horizontal Liquid and draw 7 horizontal ellipses where the liguid ends, like shown in the image. Use the Ellipse Tool to draw the shapes.
Don't worry if they are exceeding the glass text area. Select one of the Glass Layer (press CTRL and click the layer thumbnail).
Add this selection as Layer Mask for the Horizontal Liquid layer. You can do that by pressing the Add layer Mask button found on the bottom of the Layers Tab.
To make it shine, add some sparkle brushes. You can make sparkle brushes yourself, or you can use one of the many brushes already available for free on the internet.
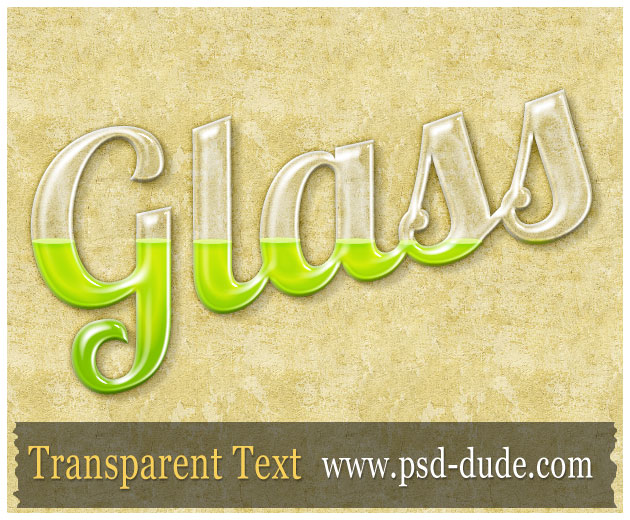
Ok, so here is the final result for my Transparent Text Effect or Glass Text Effect made in Photoshop CS4. As I am aware that this is not a very easy to make tutorial, mainly because of the many settings I am planning to release a Photoshop action to save you time.
My glass text works nicely with many background colors and even with backgrounds with patterns and textures, so it's a pretty realistic transparent effect as you can see from the second final image. You can also change the color of the liquid and create new and unique effects. I Hope you give it a try and if you do we are waiting, as usual, to see your results !
Drinks Text Style Photoshop Action

7 comment(s) for "Create a Transparent Text in Photoshop"
thanks a lot! reply
reply