How to Create a Steampunk Text Effect in Photoshop
Learn how to create an animated Photoshop GIF background in just a few simple steps from this quick tutorial for beginners. But before we go to the animation part we first have to create the background. I will use the Victorian Steampunk theme for this Photoshop tutorial.
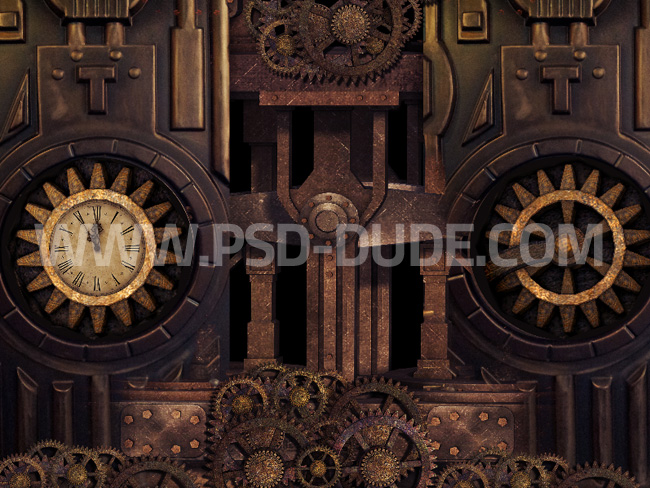
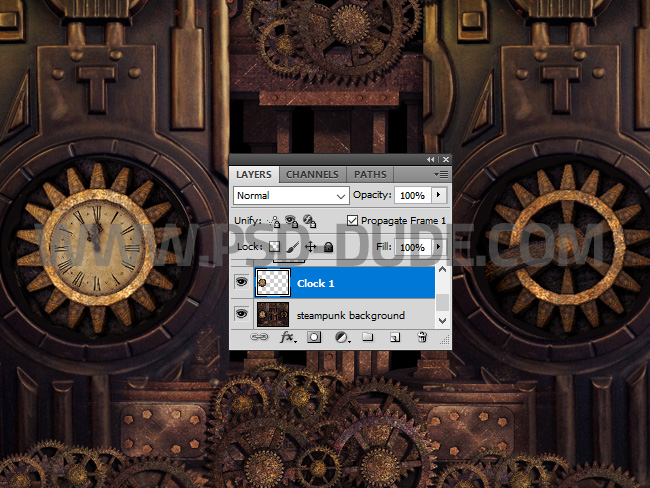
So create a new layer and add this Steampunk texture as background for our animation.
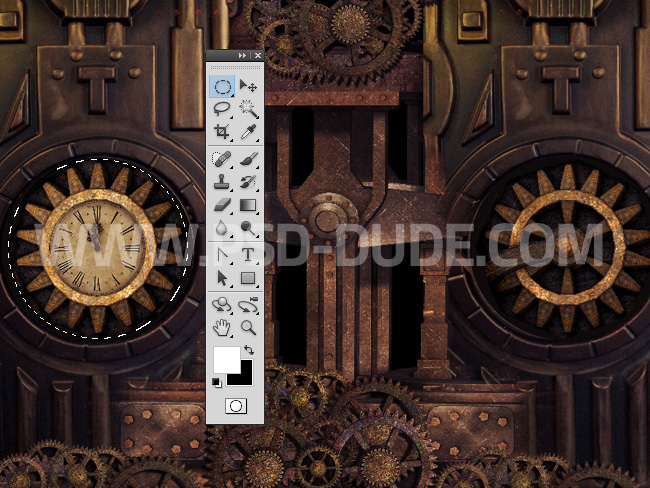
Now we are going to prepare the layers that will be animated in the next steps. Use the Elliptical Marquee Tool and make a selection around the steampunk clock.
Rotating Objects in Photoshop Animation
Press Control-J to make a new layer from the selection. Copying a selection to a new layer in Photoshop can also be done by going to Layer > New > Layer via copy. Call this new layer Clock 1.
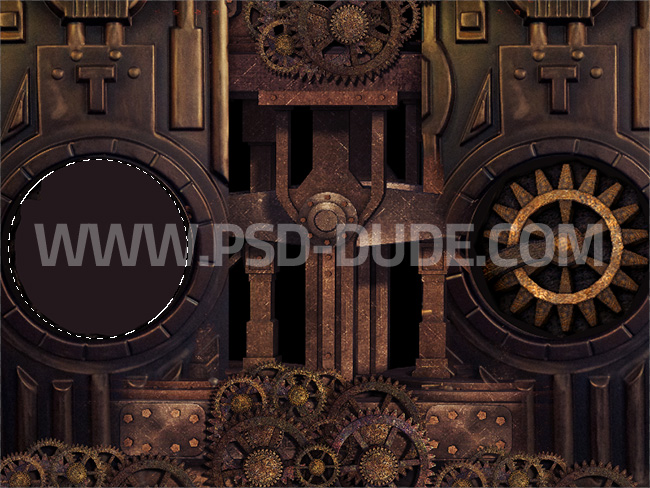
Keep the Control key pressed and click on the Clock 1 layer thumbnail to make the selection again. Go to the Steampunk Background layer and fill the selection with color #23181c ; press Control-D to deselect.
Make a copy of the Clock 1 layer by pressing Control-J. Call this new layer Clock 2. Press Control-T to transform and set the Rotate to 50.
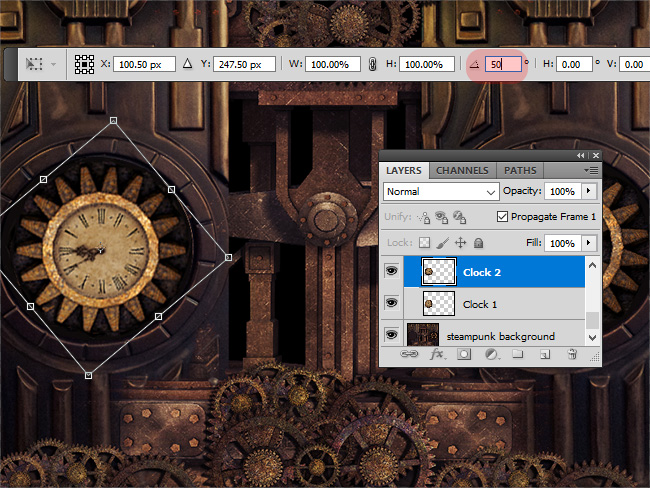
Repeat the process by making a copy of the Clock 2 layer. Call this new layer Clock 3. Press Control-T to transform and set the Rotate to 50.
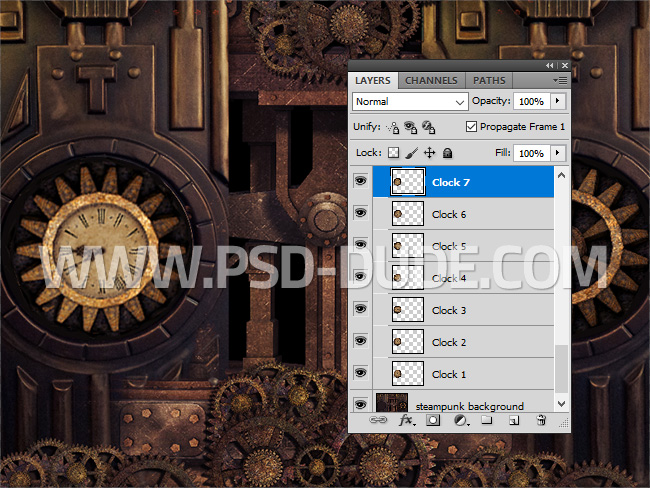
Repeat until you get to the Clock 7 layer. We are going to use these layers to create a rotating animation effect in Photoshop.
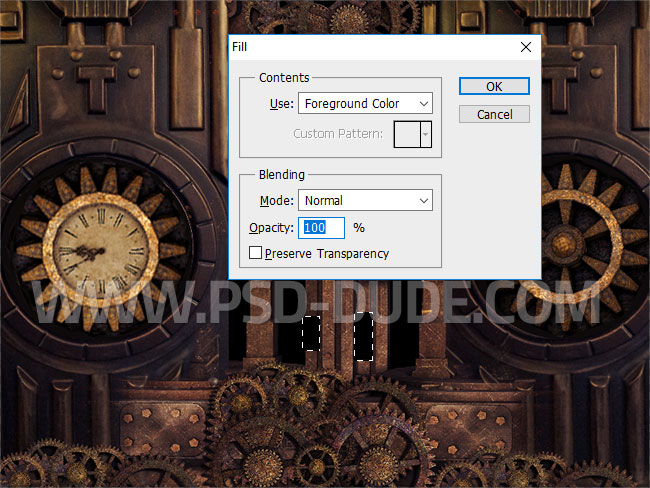
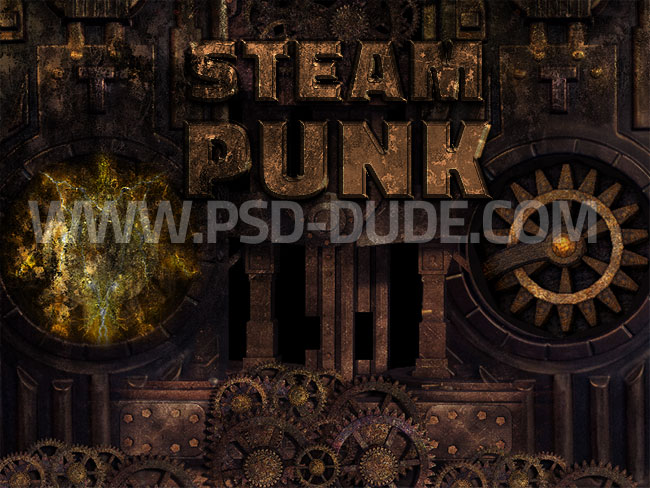
Create a new layer and call it Rectangles. Use the Rectangle Marquee Tool to make two selections like in the preview. Keep the Shift key pressed to make multiple selections.
Press Shift-F5 to fill the selections with color black. Press Control-D to deselect.
Add Lightning Effect In Photoshop
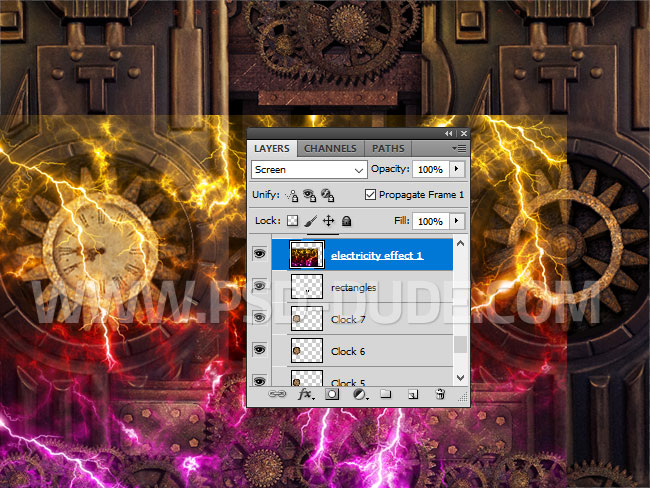
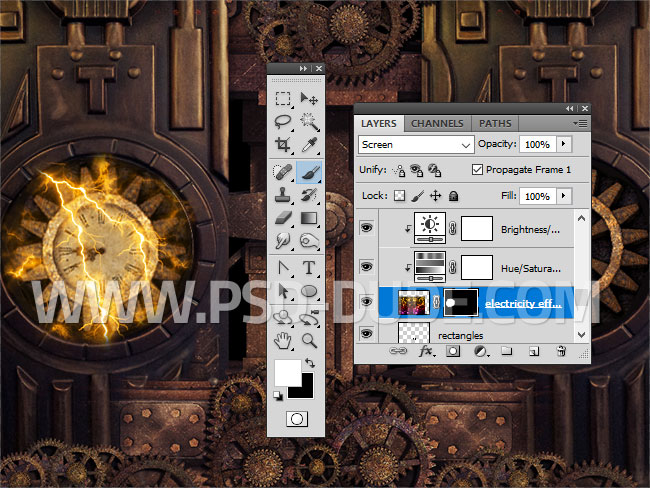
Create a new layer called Electricity Effect 1. Paste this Lightning texture in this layer and set the blend mode to Screen.
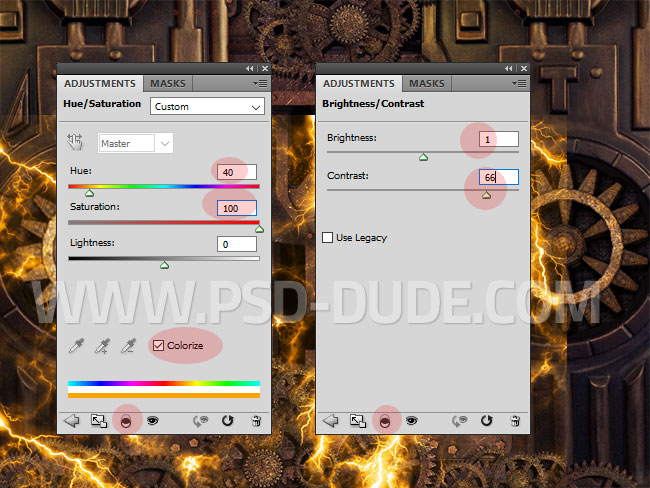
Add a Hue/Saturation and a Brightness/Contrast adjustment only for the Electricity Effect 1; right click and choose Create Clipping Mask.
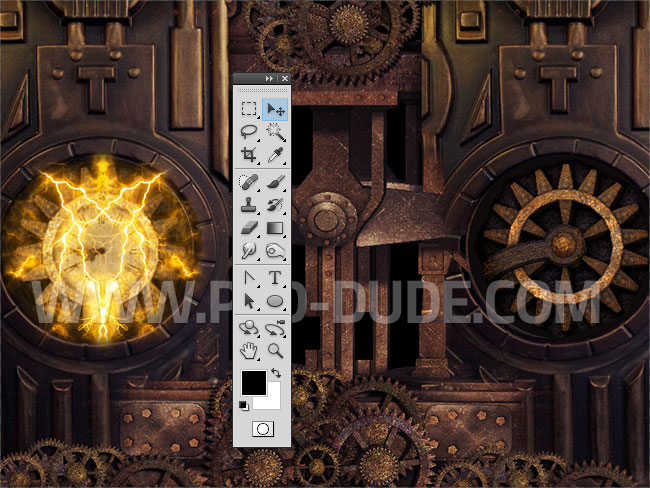
Add a Layer Mask to the Electricity Effect 1 layer and press Control-I to invert the mask from white to black.
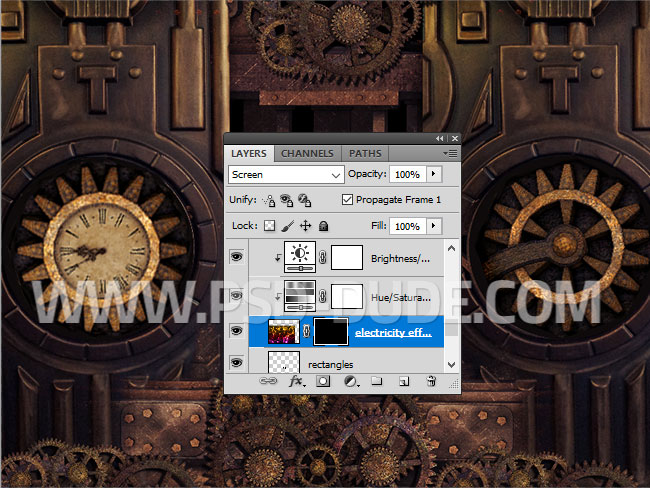
Use the Brush Tool and color white to paint inside the mask to reveal some lightnings like shown in the screenshot.
Select the Electricity Effect 1 layer and its two adjustments and right click to duplicate them.

Press Control-T to transform the copy layers. Set the Horizontal Scale to -100% to flip horizontaly.
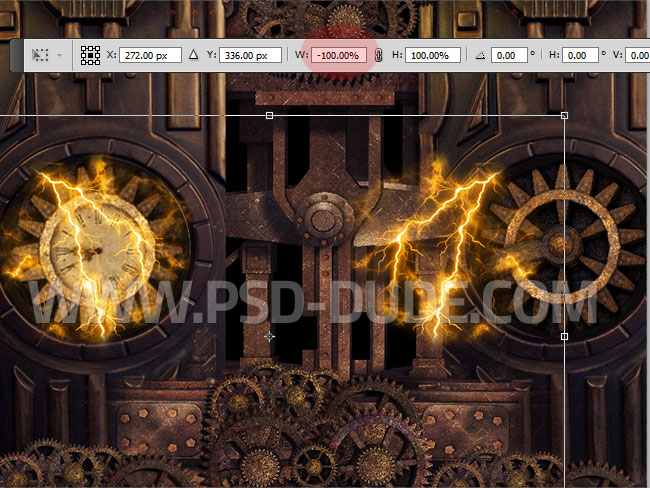
Use the Move Tool to move the copy layers over the clock.
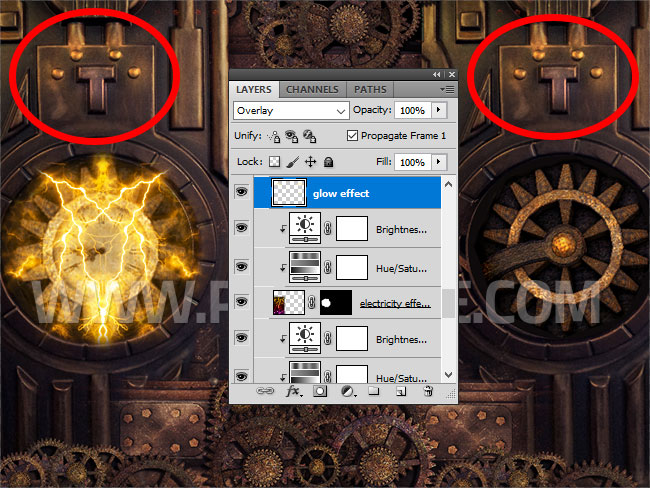
Create a new layer and call it Glow Effect. Use the Brush Tool with a soft round brush and paint over these bolts and the "T" letters. Set the blend mode to Overlay. For the color use a light yellow color #ffef94 .
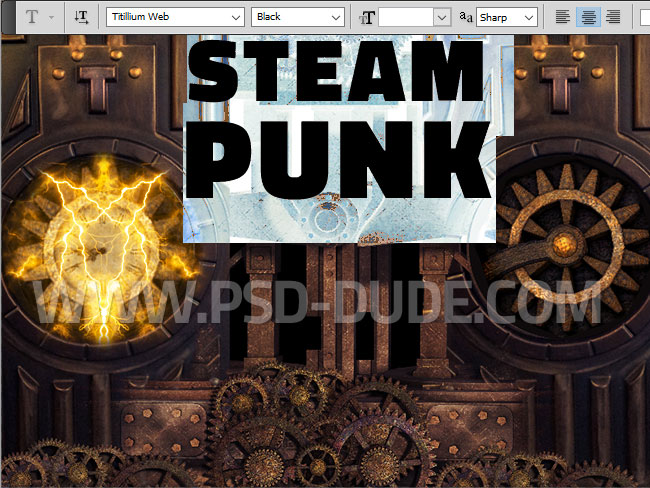
Create a new Text Layer and use the font Titillium Web to write a text; I will type Steampunk on two lines. This is a free font type that you can find on many font websites. Here is how you can Install New Font in Photoshop if you don't already have it.
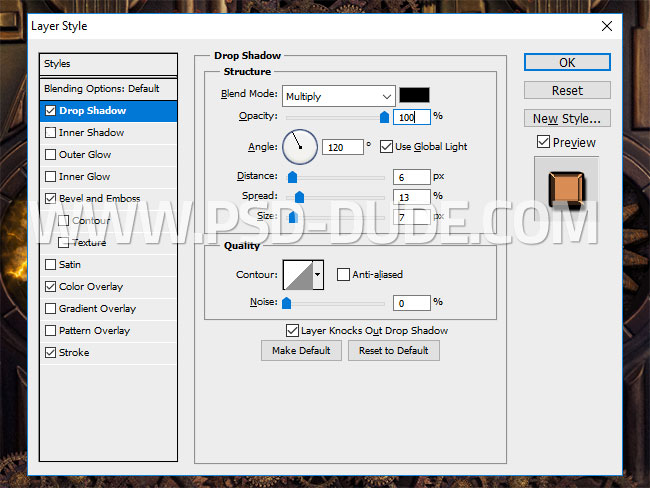
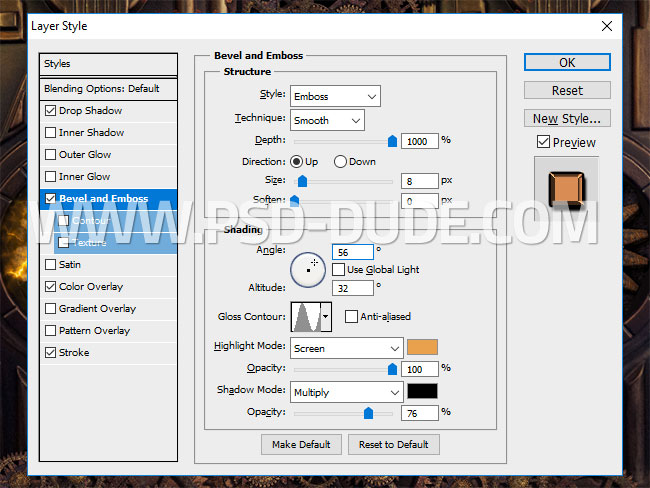
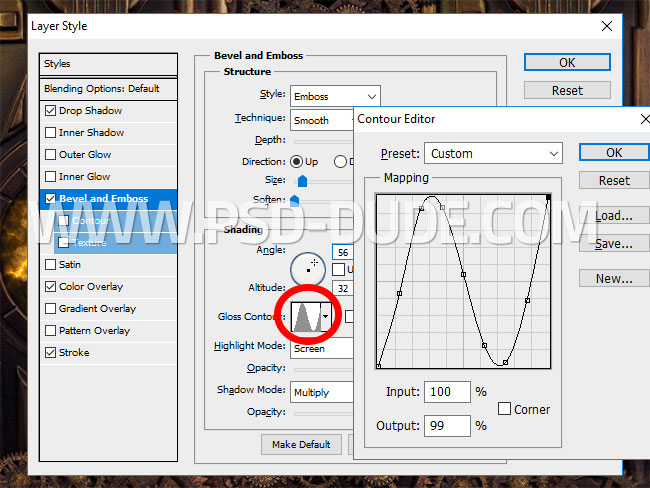
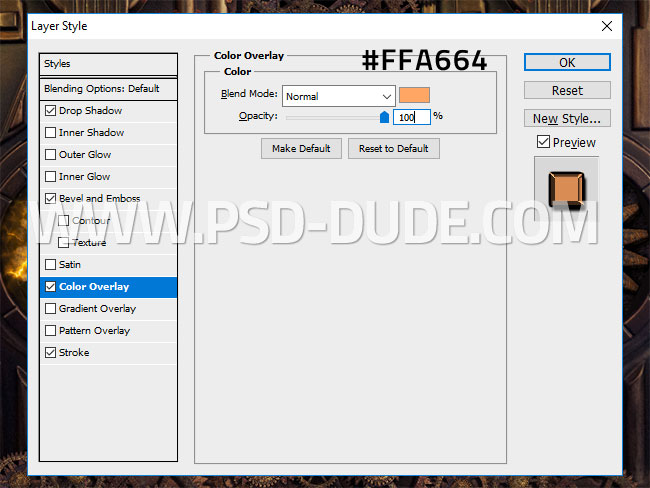
Add this layer style to the Steampunk Text. For the Color Overlay use the color #ffa664 and for the Bevel and Emboss use the colors #e9a14d and #000000 . For the Gloss Contour choose from the list the contour Ring.
Use Grunge Texture to Create Vintage Text Effect in Photoshop
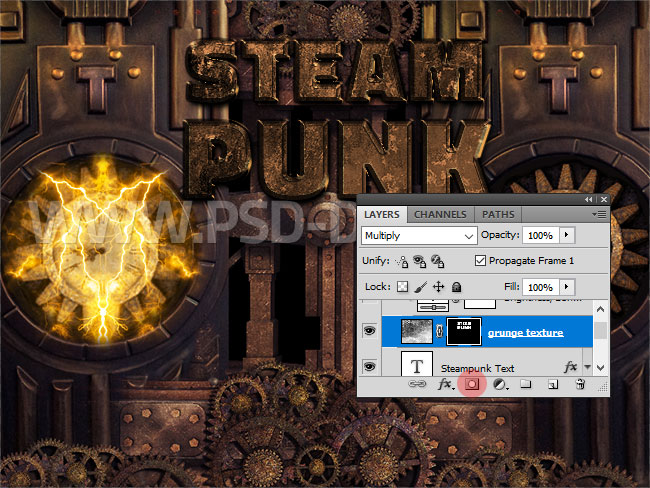
Create a new layer and copy this grunge texture and set the blend mode to Multiply.
Keep the Control key pressed and click on the Steampunk Text layer thumbnail to make a selection.
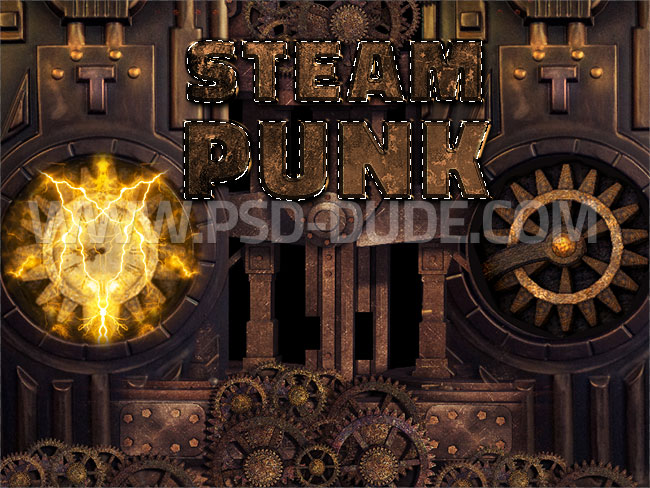
Click on the Add Layer Mask button to add the text selection as mask for the Grunge Texture layer.
Add a Brightness/Contrast adjustment layer just for the Grunge Texture layer.
Create a new layer below the Steampunk Text layer and copy again the grunge texture.
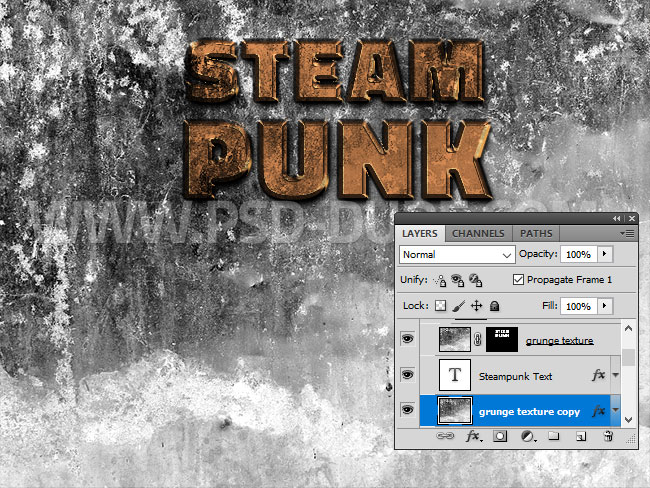
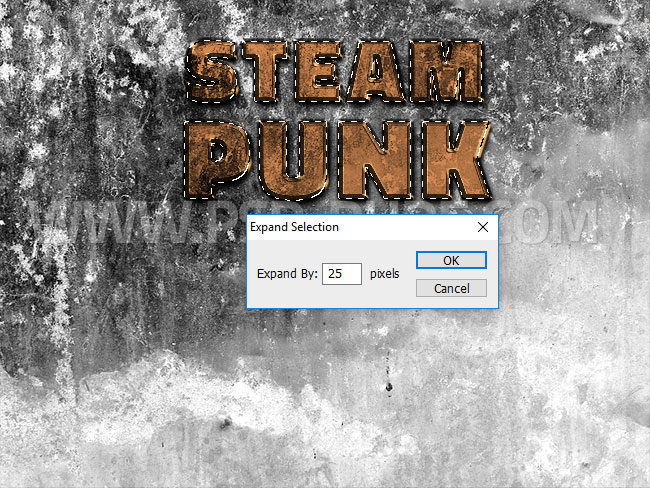
Keep the Control key pressed and click on the Steampunk Text layer thumbnail to make a selection. Go to Select > Modify > Expand and expand by 25 pixels.
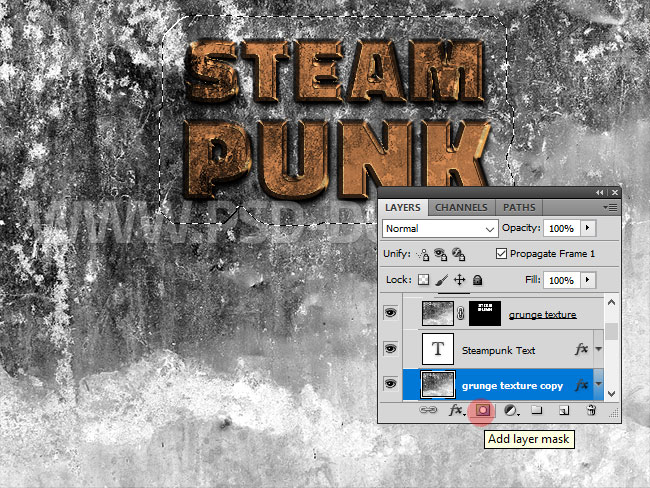
Go to the Grunge Texture copy layer and add the selection as layer mask.
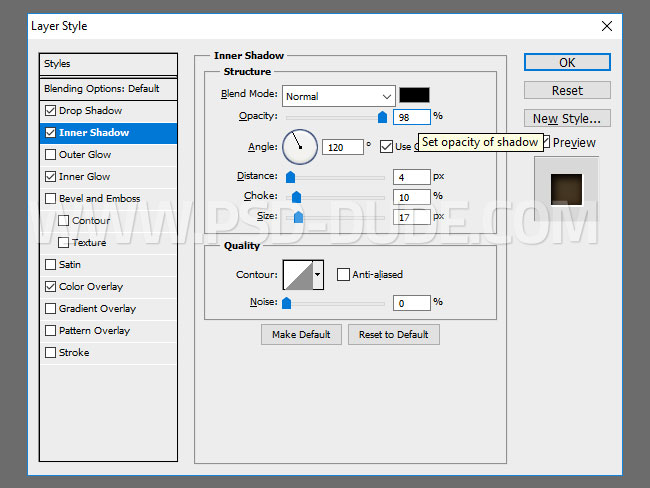
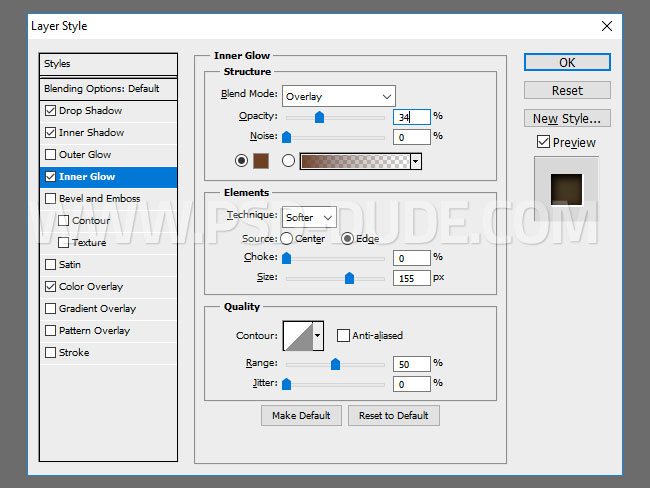
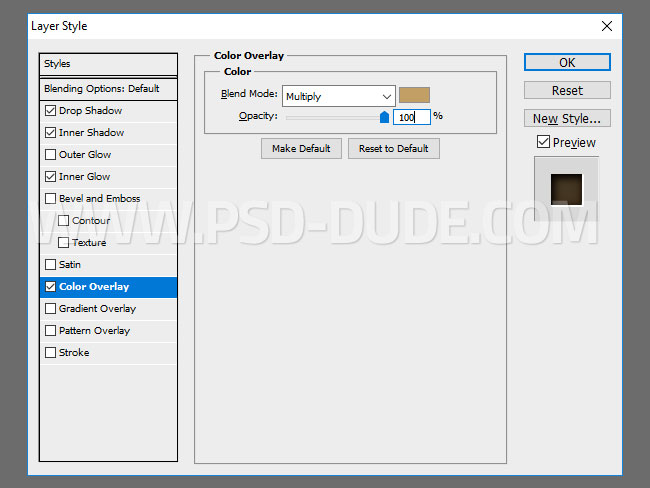
Add this layer style to the Grunge Texture copy layer to create an engraved effect: Drop Shadow, Inner Shadow, Inner Glow (color #6f4023) and Color Overlay (color #c19f65).

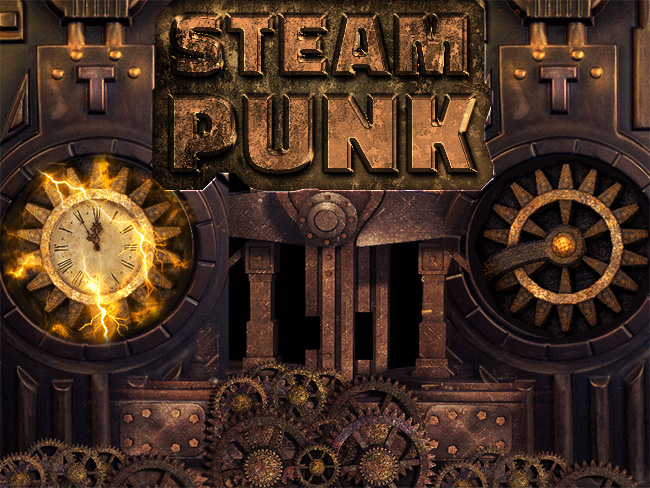
So here is the final result for the steampunk text effect in Photoshop before creating the animation effect. So stay tuned for the second part of this tutorial in which we are going to animate the background.
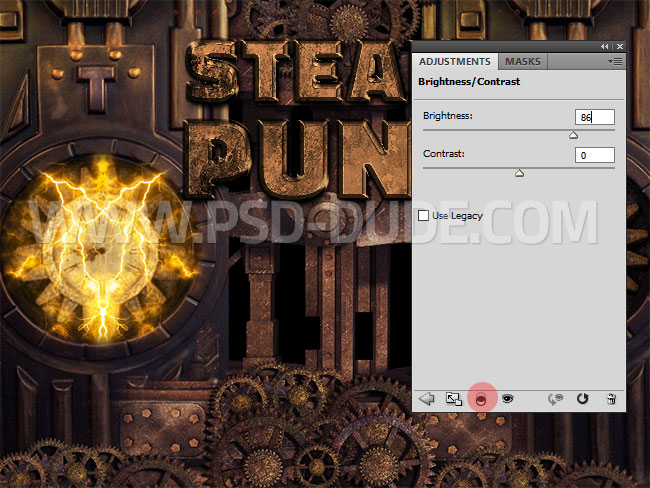
To make the image more sharp you can add a Levels or a Curves adjustment. Or you can simply add a Brightness/Contrast and increase the contrast.
Create the Frame Animation in Photoshop
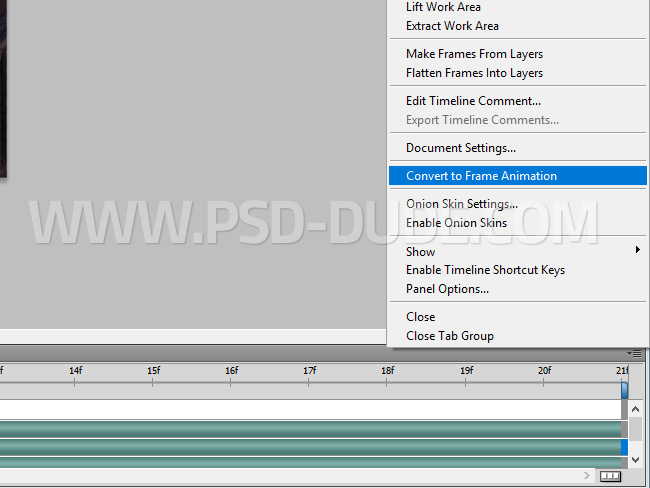
Go to Window > Animation and click on the right button and choose Convert to Frame Animation.
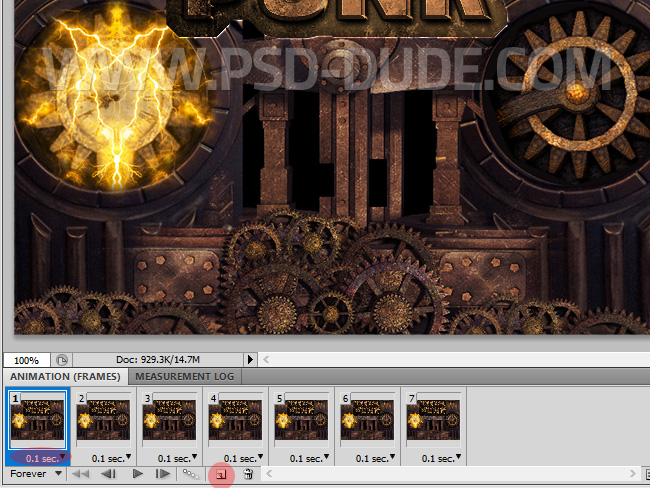
Set Frame delay time to 0.1 sec. And click on the Duplicates selected frames button 6 times to obtain 7 frames.
Rotate Animation in Photoshop
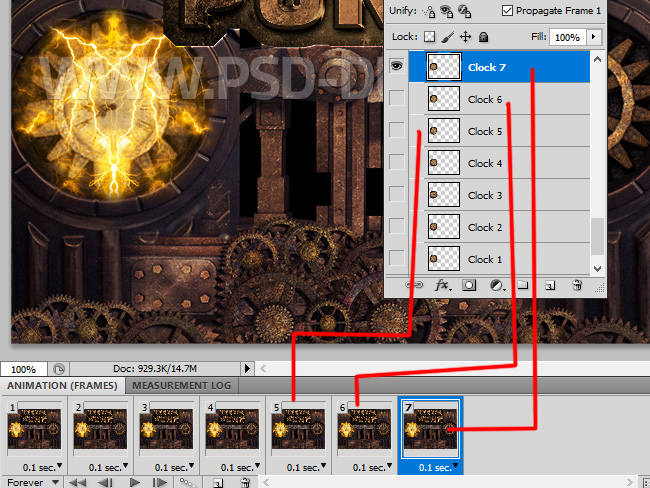
Select all the frames from 1 to 7. Now hide the 6 layers from Clock 2 - 7.

Now go to Frame 2 and hide the Clock 1 and make visible Clock 2 layer. Do the same for the other 5 frames; the only visible Clock layer is the one that has the same number with the frame.
Lightning Animation in Photoshop
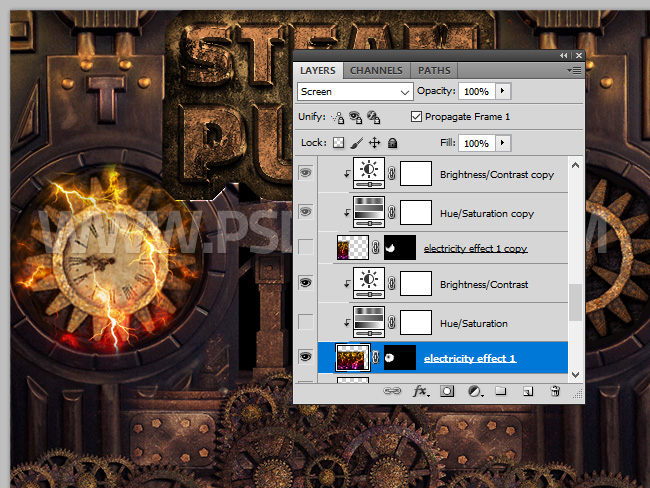
To create the lightning animation you have to play with the layers Electricity effect 1 and the Electricity effect 1 copy. For example the frames 1,2,3 and 7 have the Electricity effect 1 visible and the Electricity effect 1 copy not visible. Also you can for the frames 2 and 7 to hide the Hue/Saturation adjustment of the Electricity effect 1 layer.
For the other frames to the opposite, the Electricity effect 1 not visible and the Electricity effect 1 copy visible.
For the final touches I will add other animation effects. For example for the layer 2,4 and 6, hide the Glow Effect layer. Also for the same layers move the Rectangles layer on the vertical scale using the up and down arrow keys.
how to save an Animated gif in photoshop
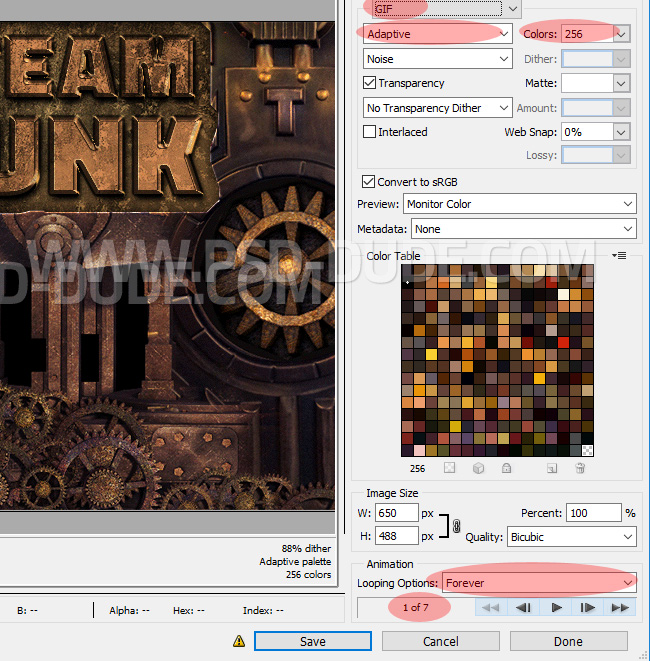
To save the animation go to Edit > Save for Web and Devices and choose GIF. A animated GIF is higher in size than a JPEG; the quality depends on the Color reduction algorithm (I will use Adaptive) and the number of colors (256 or less).
Congratulations, You Made It!
So here is the final result, the retrofuture steampunk background with the animation effect.
No comment(s) for "Victorian Steampunk Text Effect in Photoshop with GIF Animation"