Letterpress Effect Photoshop Action
If you want a Photoshop action that creates letterpress and emboss effects very quickly, you can check out this item:
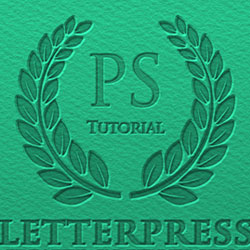
Preview of the Letterpress Text Photoshop Effect
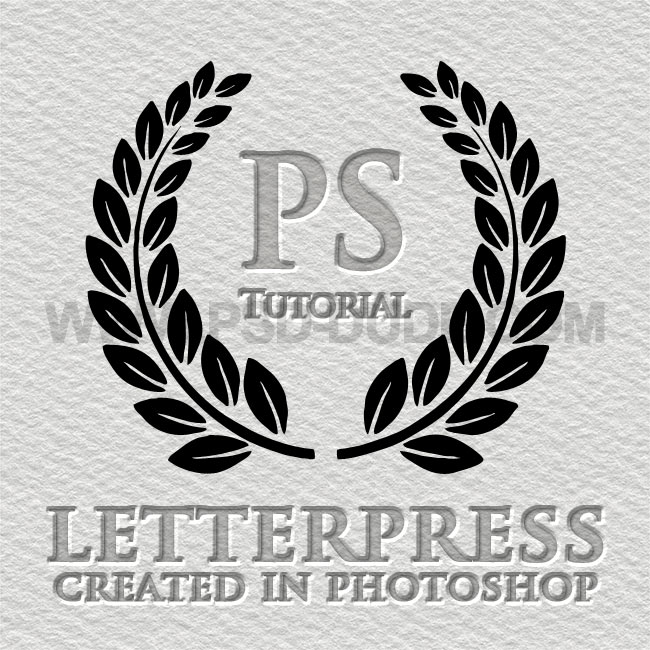
Here is the letterpress text style that we are going to create in this tutorial. The engraved letterpress layer style can be applied to text layers and also to custom shapes.
First we have to create the paper texture background for the letterpress effect. So let's copy this seamless rough paper texture and add it in a new layer. This is a white paper texture but we can colorize it using any color. We'll do that later on.

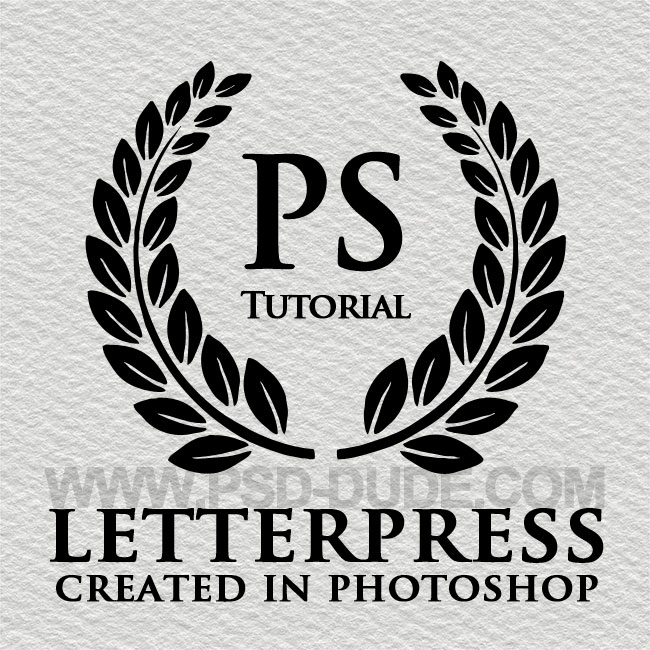
Create a Vector Badge in Photoshop
Add your design; you can use text layers, vector shapes or even raster cutout images. You can find here lots of custom shapes to choose from. For the text I have used a font called Trajan Pro bold that you can find with a quick search online, and a laurel wreath custom shape. Using text layer and custom shapes you can easily create a customized vector badge.
If you are a beginner here are two useful tutorials on how to install a new font and how to install custom shape CSH file in Photoshop:
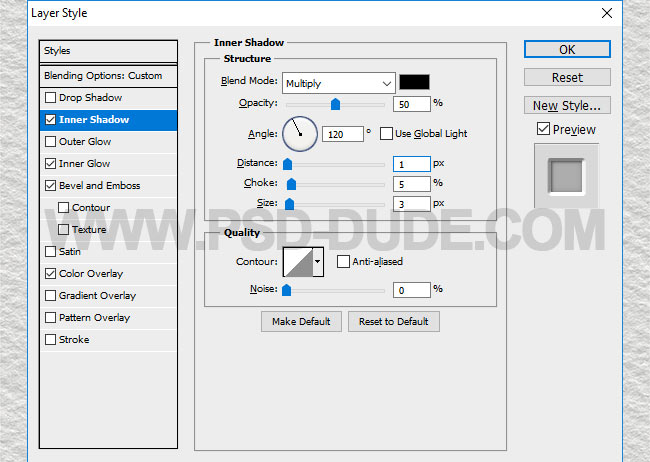
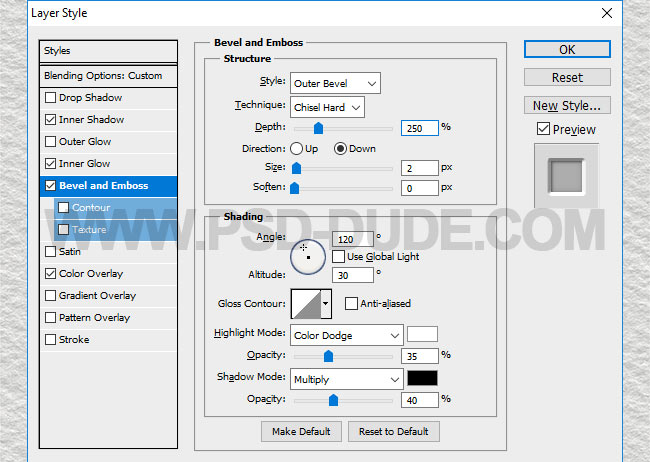
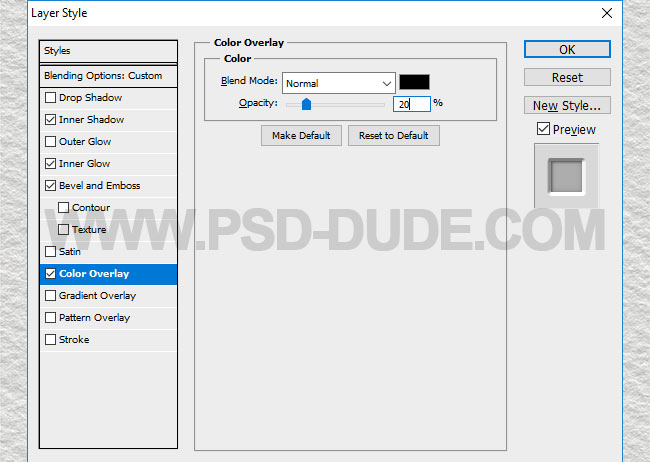
Create the Letterpress Style in Photoshop
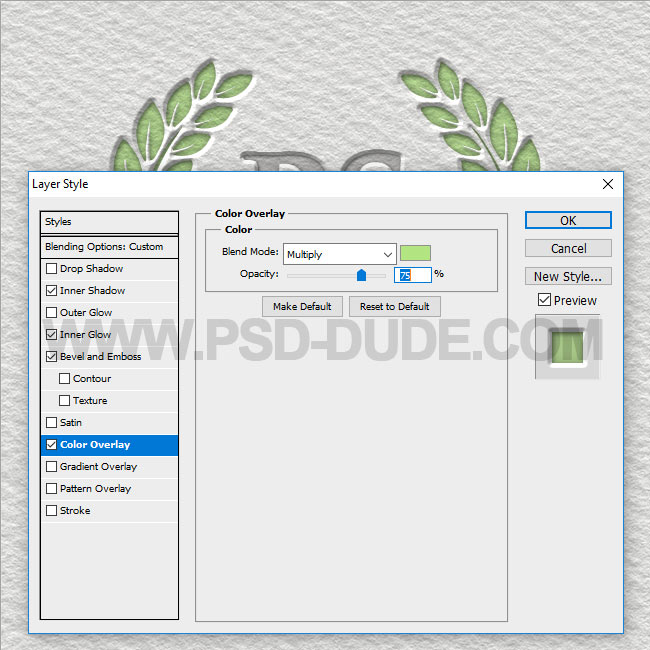
To create the letterpress effect in Photoshop we will use only one layer style. So open the Layer Style Window and add these effects: Inner Shadow, Inner Glow, Bevel and Emboss and Color Overlay.

After adding the layer style, the letterpress text effect looks like this.
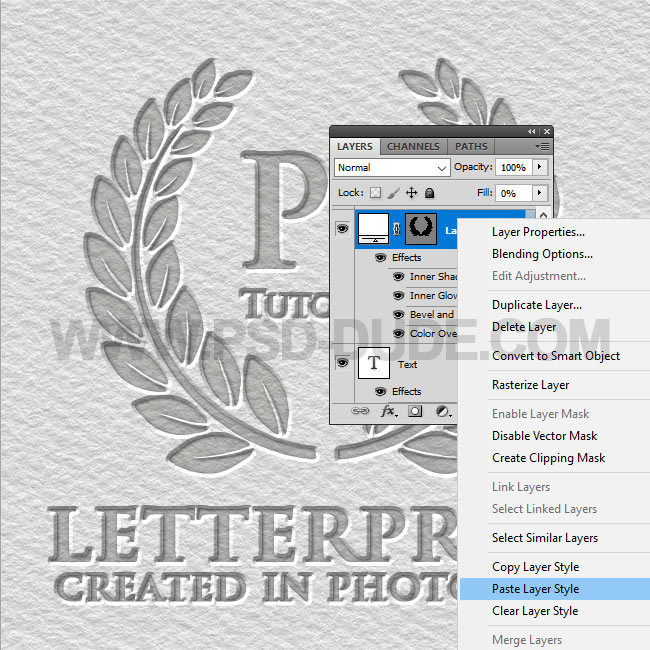
To add this layer style to the vector shape layer, simply right click on the Text Layer and choose Copy Layer Style. Go to the Laurel Wreath layer, right click and choose Paste Layer Style.
If you want to change the color of the Lauer Wreath you can do that by modifying the layer style. Set the Color Overlay to Multiply and use the color of your choice. I used a green color tone #b3e582.
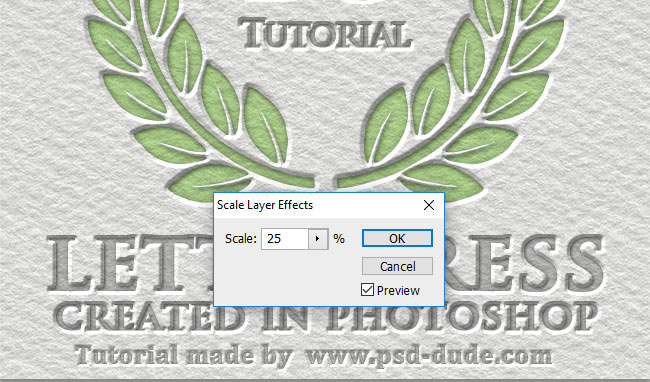
Scale Layer Style in Photoshop
If you want to add a new text that is different in size, you can copy paste the same layer style and use the Layer > Layer Style > Scale Effects option.
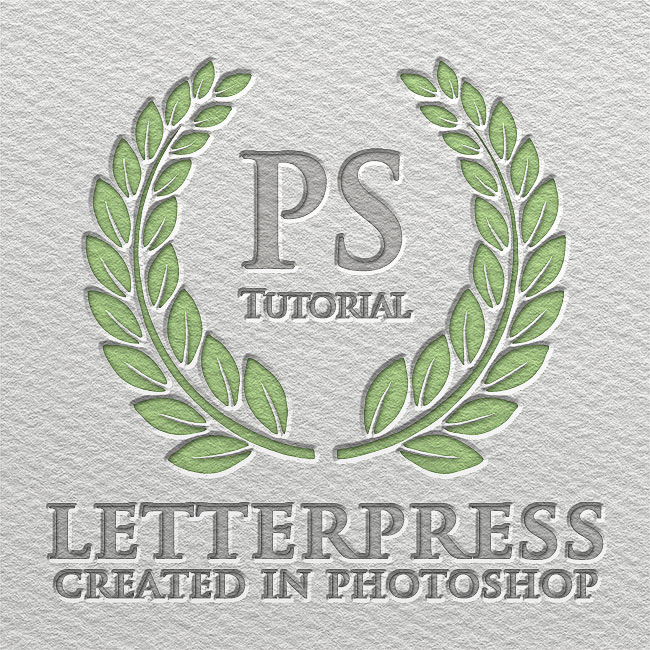
Congratulations, You Made It!
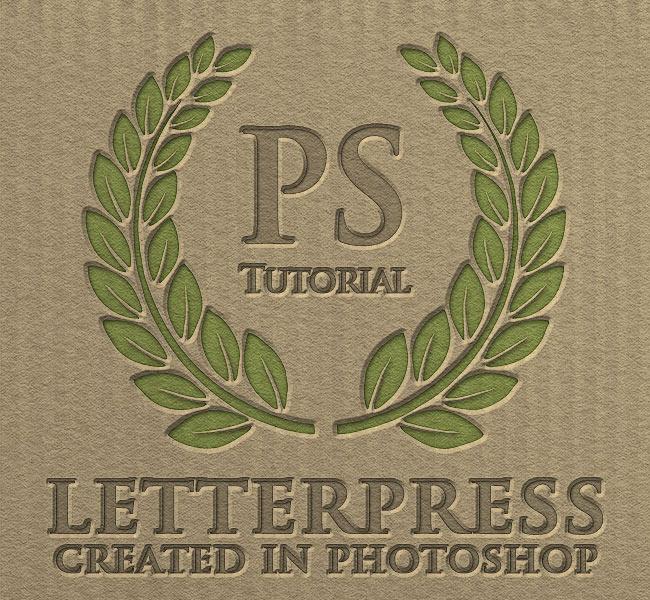
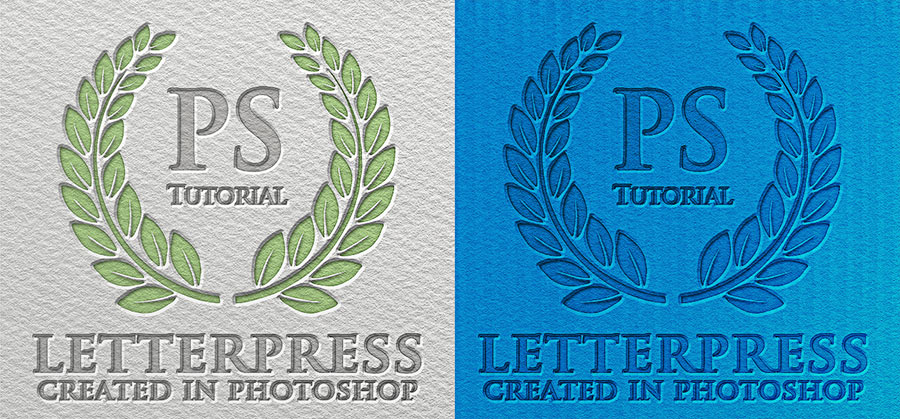
So here is the final result for the letterpress text effect made in Photoshop.
This effect works great with other kind of paper textures like cardboard paper for example.
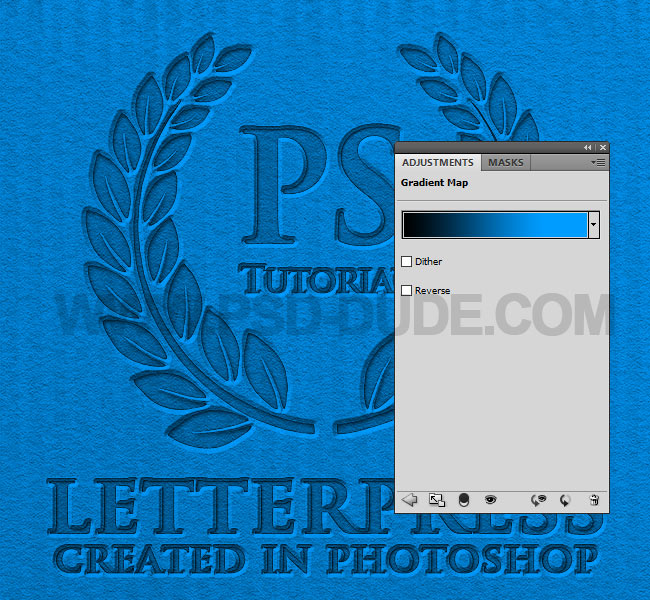
If you want to change the color of the imgae you can add a Gradient Map adjustment layer with color black and the color of your choice.
Using other textures you can create carved engraved Photoshop effects using similar layer styles.
Letterpress Effect Photoshop Action
No comment(s) for "Letterpress Text Effect Photoshop Tutorial"