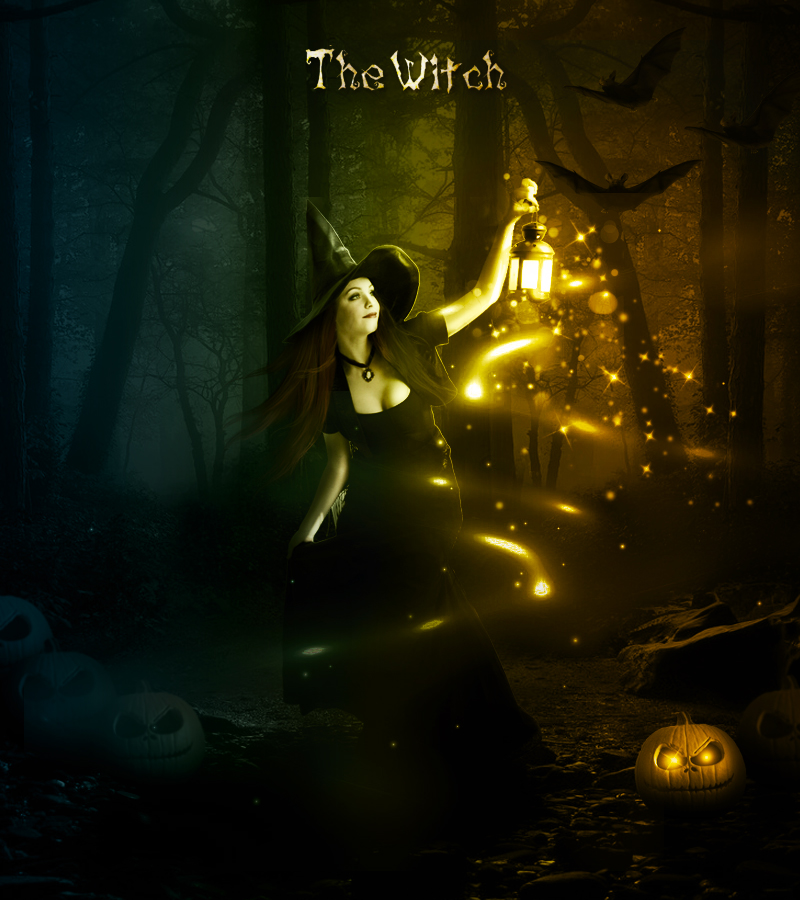
Let's start our photo manipulaion with this beautiful premade forest stock image, perfect for dark creepy artworks.
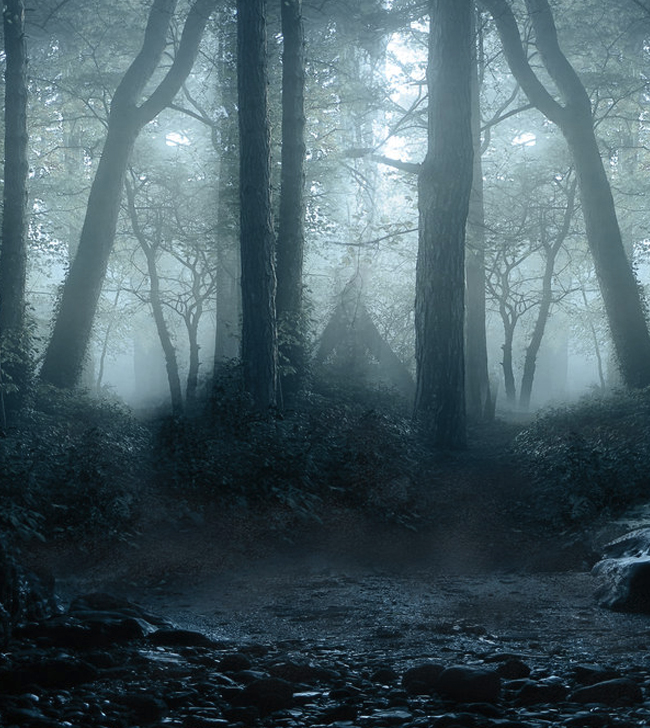
Open the layer style window and add a Gradient Overlay style using a black and white map with the following settings:
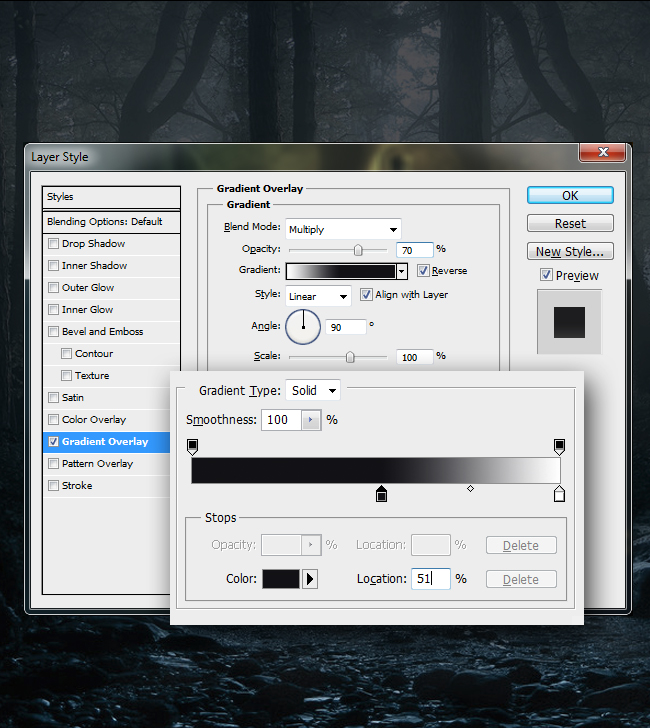
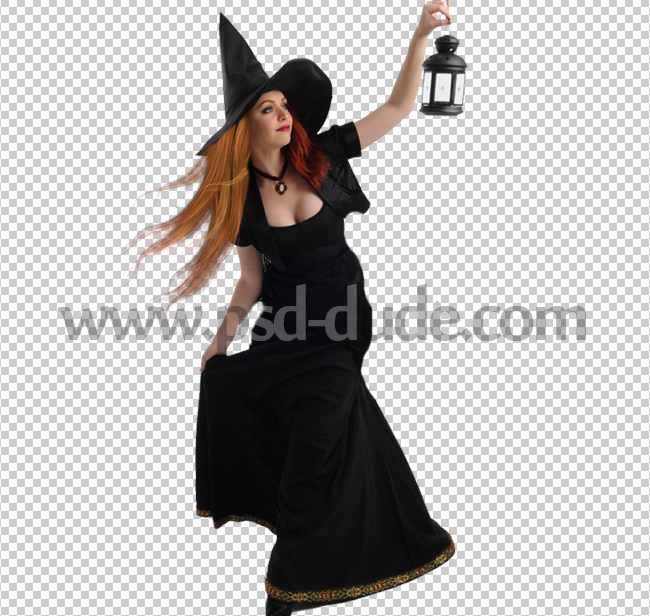
Now let's add the witch stock image into our PSD file. You have to cutout the witch. The best way to remove background in Photoshop is by using one of the Selection Tools ; I prefer to use the Pen Tool as it is the most precise cutout tool that Photoshop has to offer.
Don't worry about the hair area as we are going to replace it lter on. So you can make a rough cut around the hair.
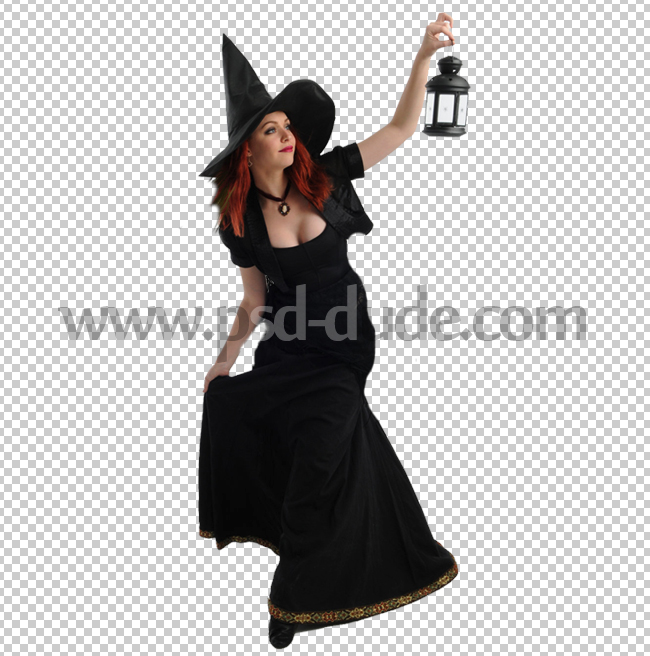
As I said in the previous step, it is time to add the hair. For that I will use this painted hair strands. All you have to do is to save the PNG image and to place it in Photoshop. It will be added as smart object so you have to right click on it to rasterize it.
Resize and Rotate the image to obtain a natural look. Use the Eraser Tool to delete the unnecessary areas like shown in the image.
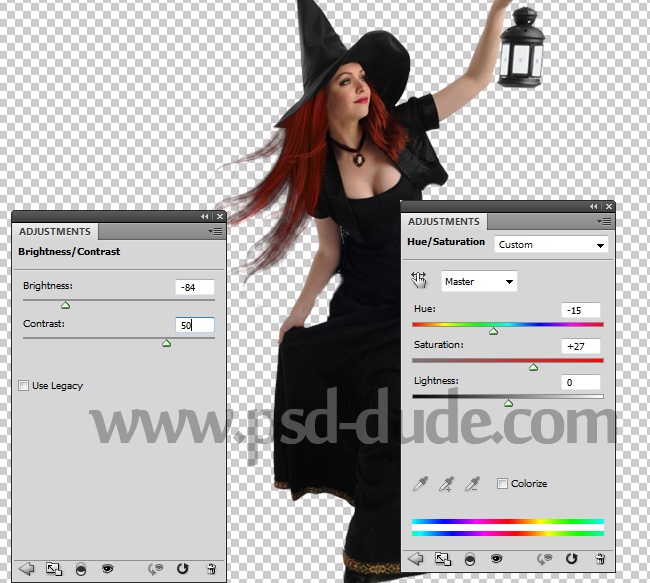
Now we have to add two adjustment layers just for the Hair layer to make the hair strands identical in color with the original hair. Add a Brightness/Contrast and a Hue/Saturation adjustments with the following settings. Right click and choose Create Clipping Mask .
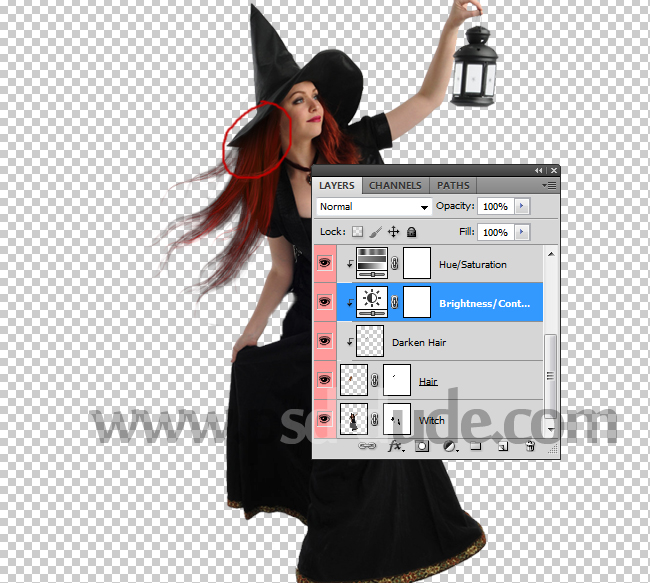
Add a new layer above the Witch Layer and turn it into Clipping Mask. Use the brush Tool, color black, to darken this area:
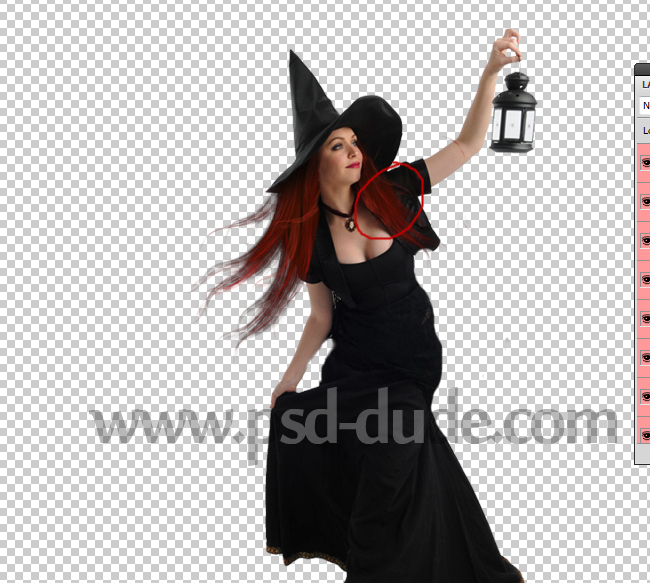
Now let's add the second hair strands by repeating the same steps.
Group all the girl witch layers into a smart object and rename it Witch. Add these layer styles to the new created smart object:
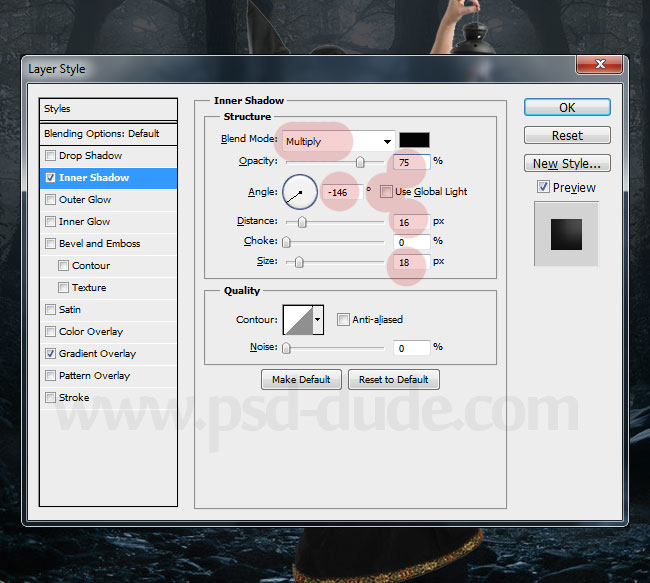
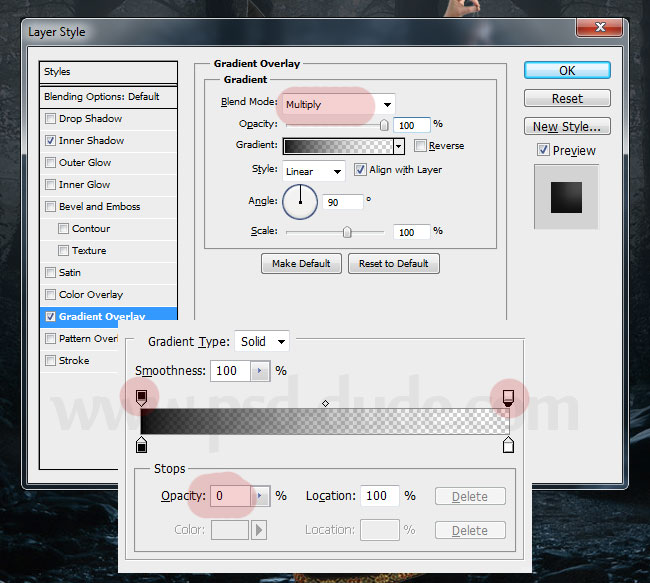
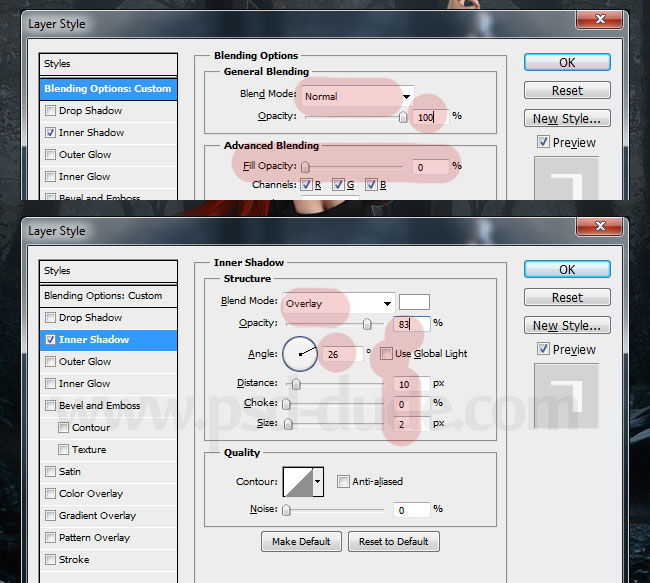
Duplicate the Witch smart object. Reduce the Fill of the new smart object to 0% and add an Inner Shadow layer style:
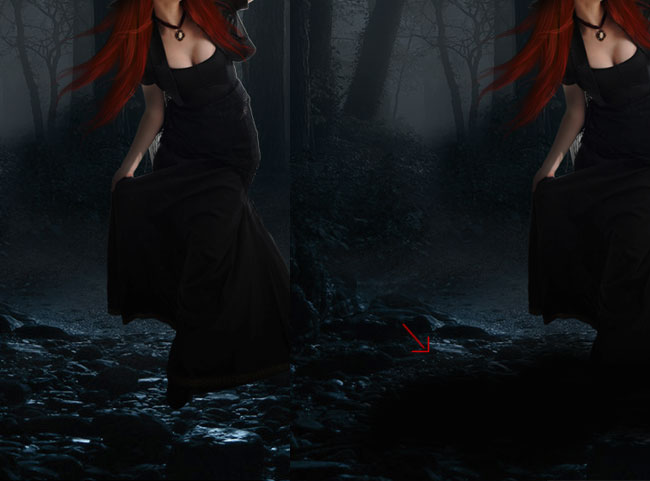
Create a new layer above all the other layers and call it Shadow; use the Brush Tool, color black and simply create the cast shadow effect using a soft round brush.
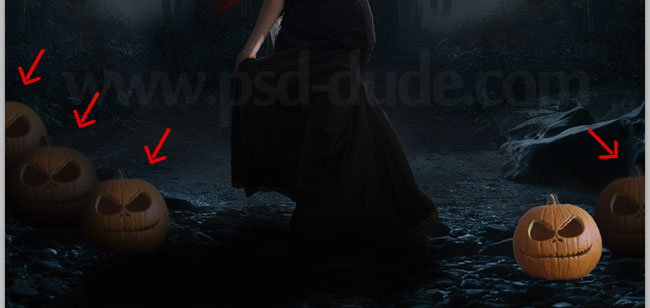
In this step we'll add some Halloween pumpkins aligned around the witch. Download the Halloween pumpkin from here. Make 5 copies. Add each pumpkin in a different layer.
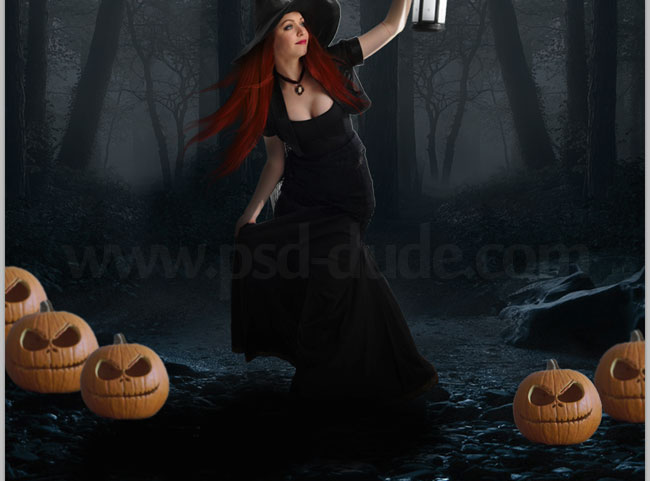
Add these following layer styles to the 4 pumpkin layers that are marked in the preview:
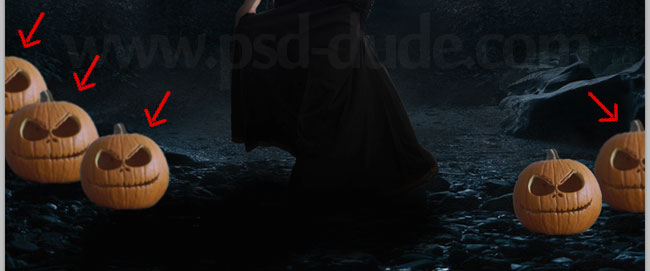
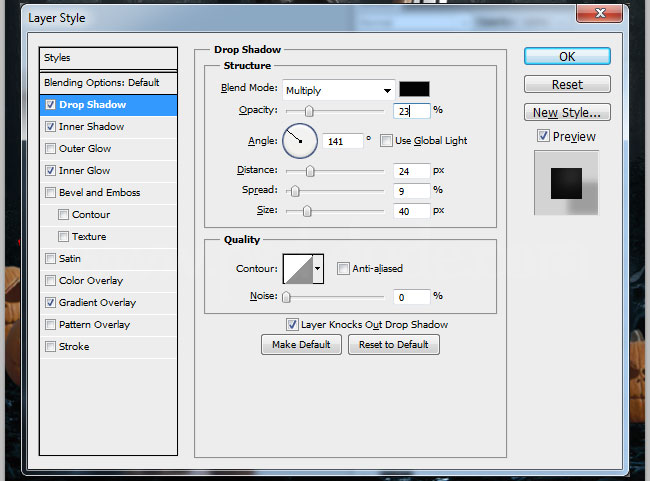
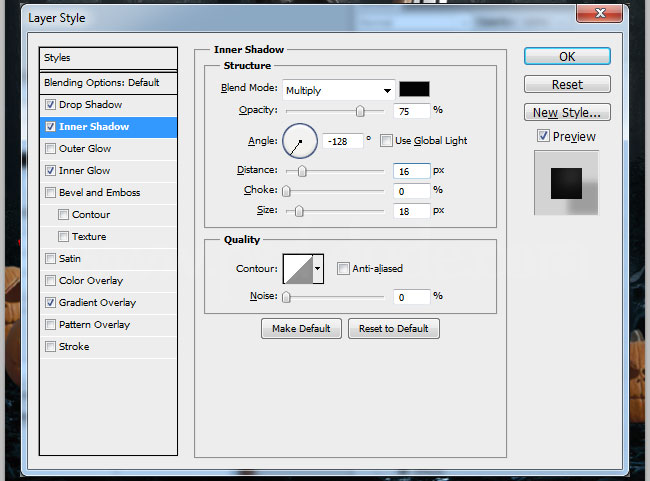
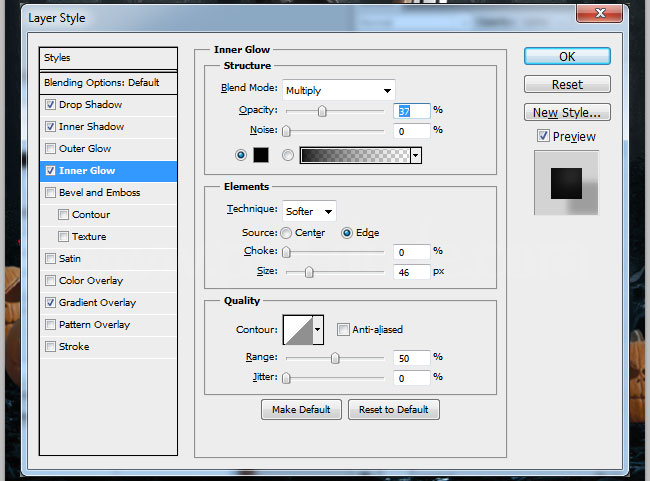
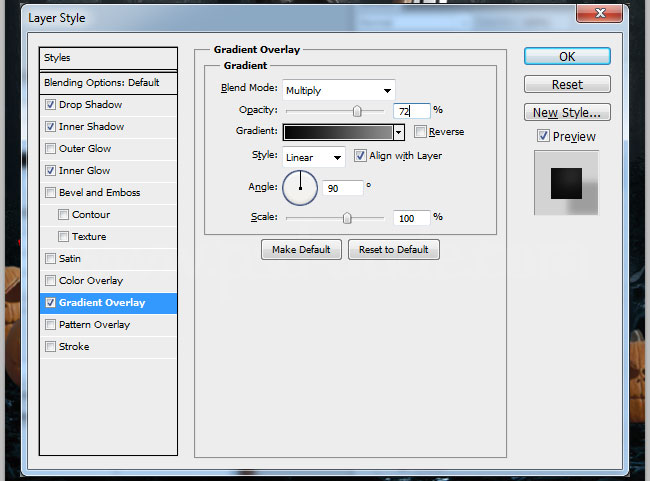
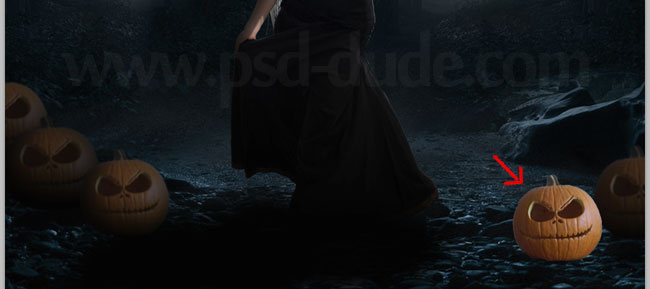
Let's add some layer styles to the last Pumpkin Layer.
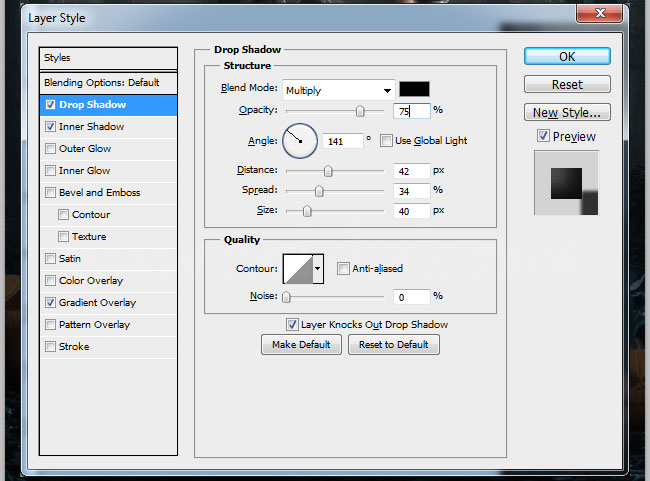
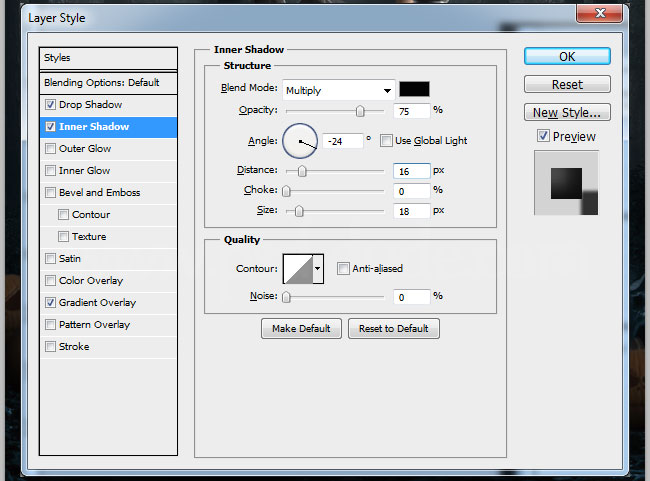
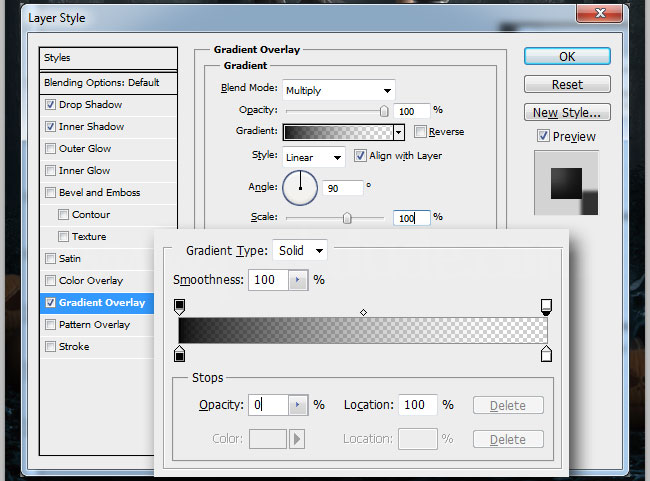
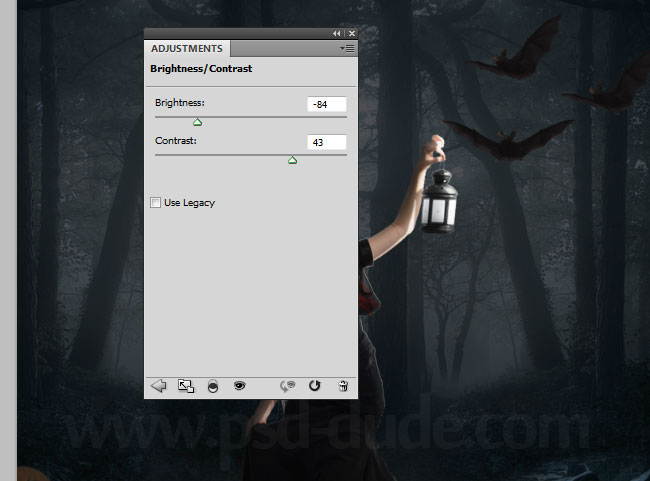
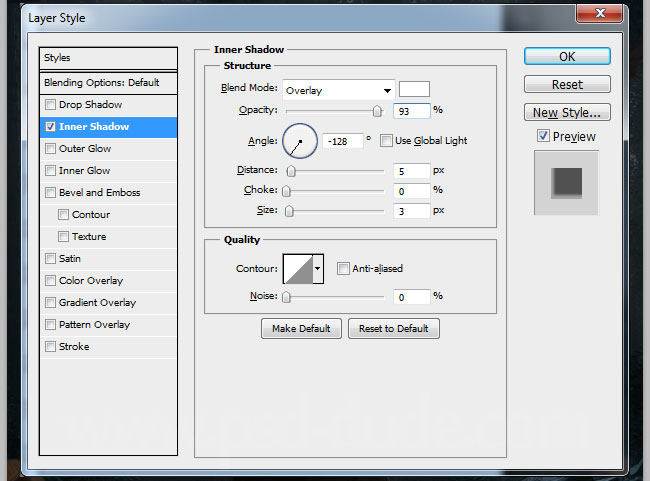
Add some bats near the lamp. Use one or two bat shapes and display them as realistic as possible. Use a Brightness/Contrast adjustment layer to darken the image. Also add a Inner Shadow layer style with these settings:
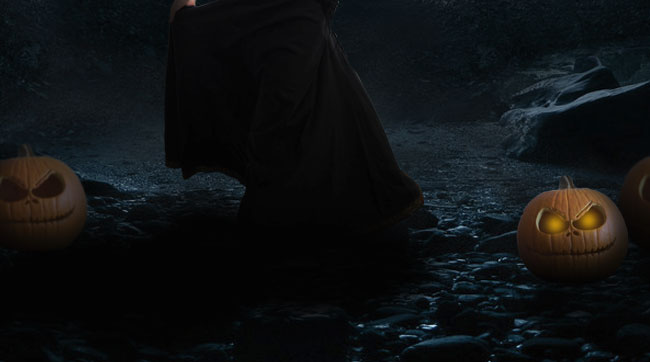
Pick the Brush Tool, and use a soft round brush, color white, opacity 25% to create the pumpkin eyes. To make the eyes glow in the dark add outer Glow and Inner Glow styles.
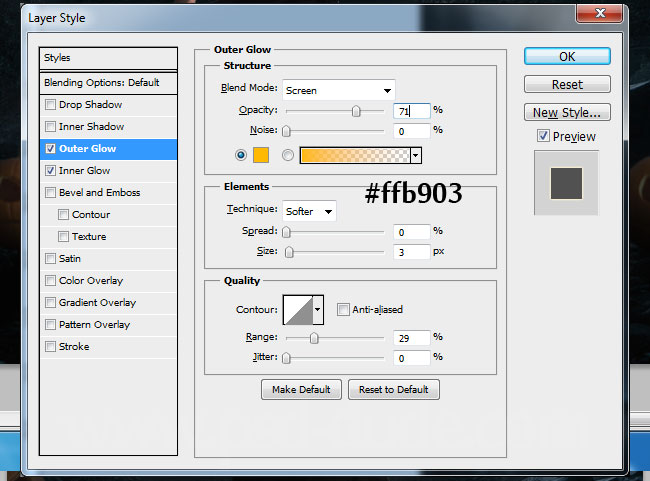
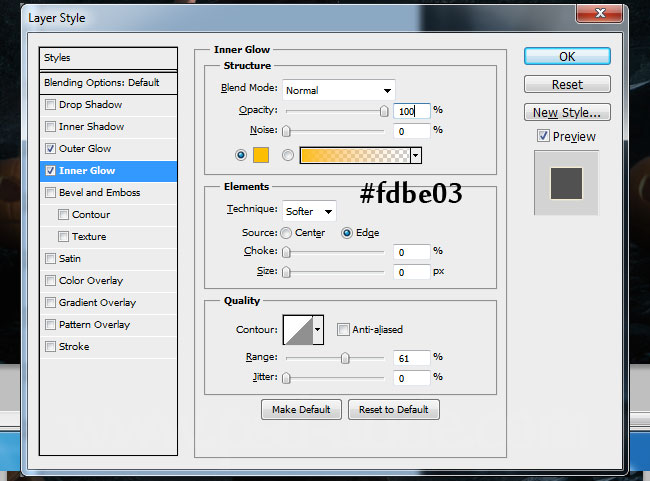
Create a new layer and call it Glowing Lights. Again pick the Brush Tool, color white, opacity 25% to create lights around the lamp. Use the same layer styles that you used in the previous step.
You can create your own "lights brush" using the Brush Preset Settings. Use the Shape Dynamics option and increase the Size Jitter to 65%. Also set the Scatter to 500% as shown in the image.
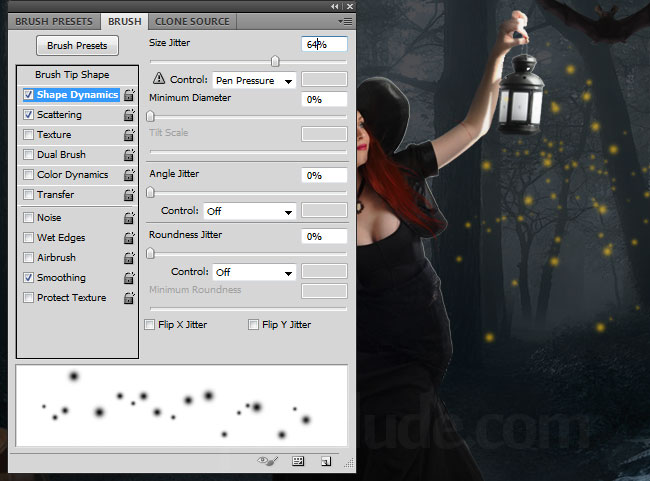
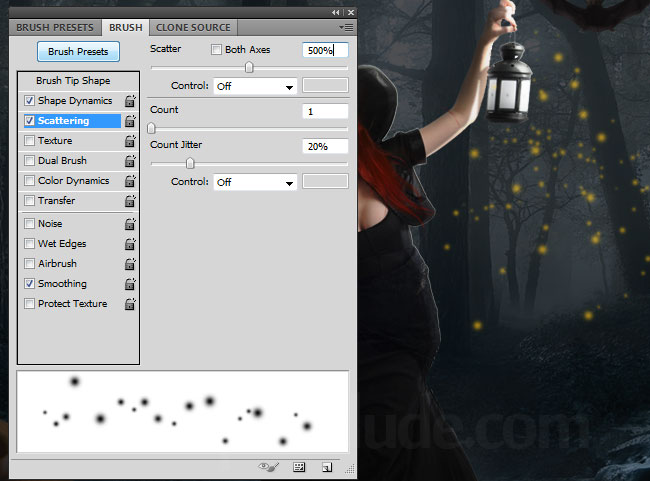
Create a new layer and use the Brush Tool to add some sparkle brushes using white as color. Set the blend mode of this layer to Overlay. You can also use a soft round brush to intensify the pumpkin glowing eyes.
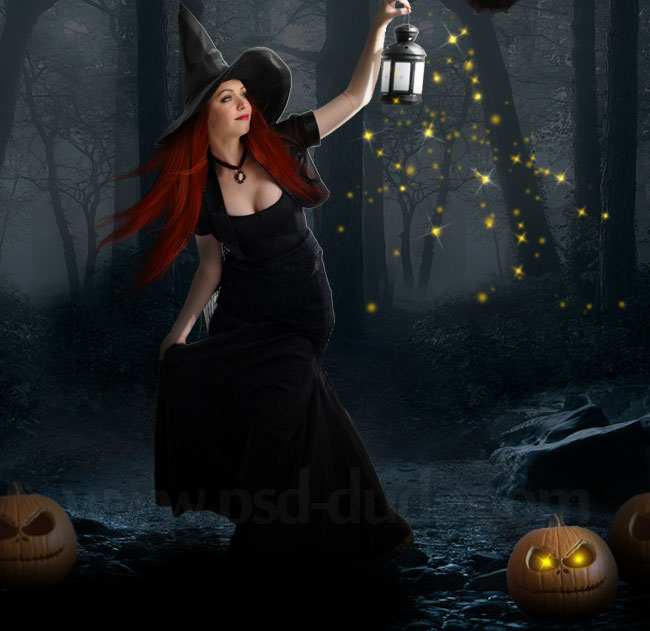
Create 3 more layers and call them Highlights. Set the blend mode of each layer to Overlay. Use a soft round brush, color white with different opacity levels to add highlights in different areas (on the girl face, arms, hat, on the pumpkin, etc).
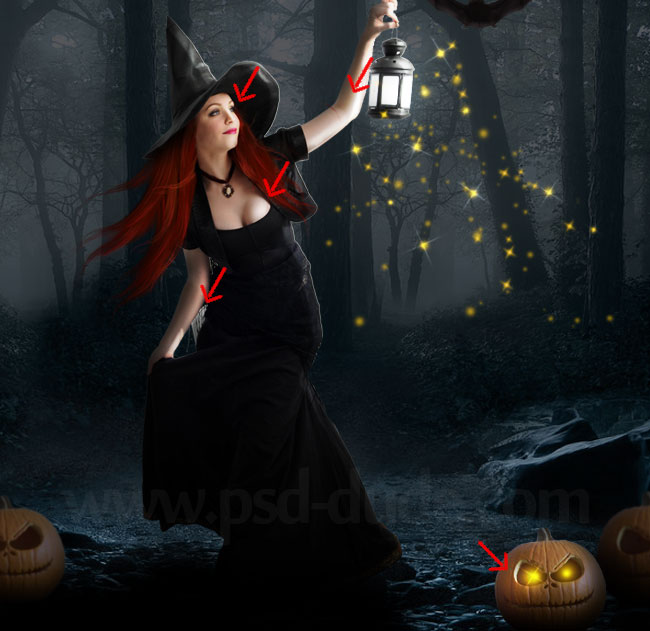
If you want you can create a new layer to add some bokeh lights around the lamp. Set the blend mode of the layer to Lighten or Screen.
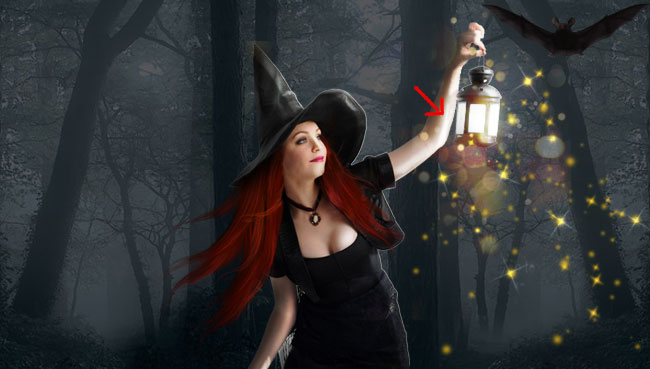
Let's add more light effects around the Halloween Witch to create a more vibrant, magical feel. There are a huge array of free amazing light textures and light effect brushes that you can choose from:
I decided to use this beautiful abstract light texture but you can choose any light effect you want. Copy the texture in Photoshop, set the blend mode to Lighten and add a Brightness/Contrast adjustment layer just for this texture layer.
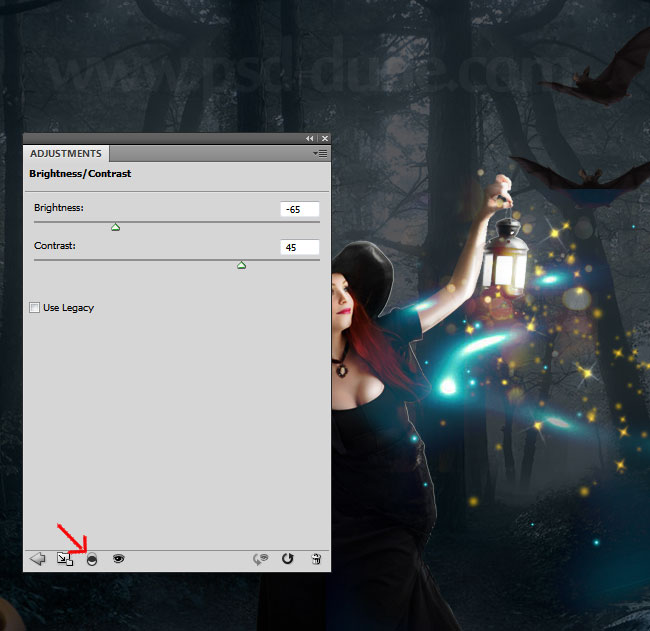
Make another copy of the Light Texture layer and position it like shown in the image. Make the same settings and add a Brightness/Contrast adjustment layer just for this texture layer with these settings. For each of the two layers you can add a layer mask and simply hide some areas using a soft round brush, color black with different opacity levels.
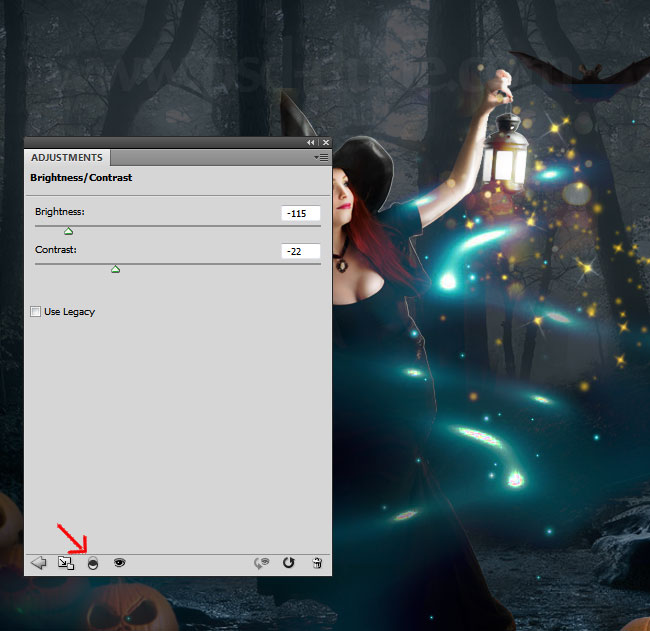
As you can probably see the images that we added have different color tones and do not blend well together. To fix that problem we'll add a Gradient adjustment. Go to Layer>New Fill Layer and choose Gradient, or you can use the Layers Tab shortcut buttons.
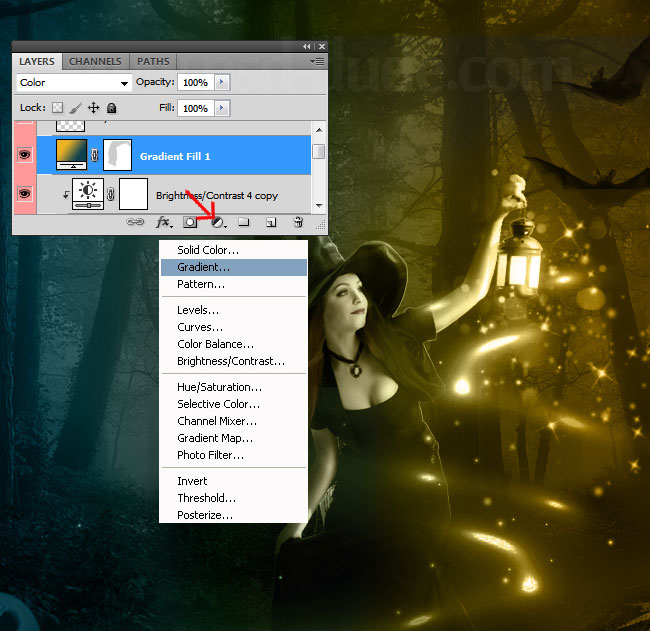
Set the blend mode of the Gradient Fill adjustment to Color. For the map gradient we'll use only two colors: #ecb227 and #0f4250.
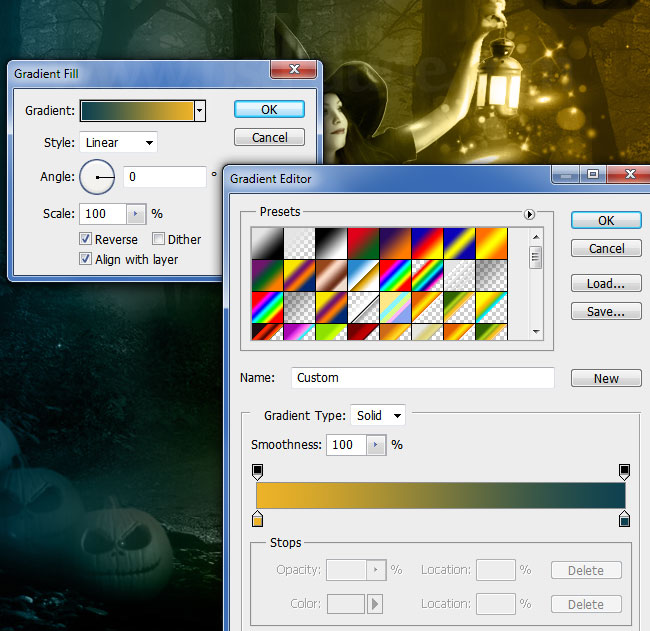
The Halloween photo manipulation is almost completed. We only have to add some adjustments and lighting effects. So create a new layer and fill it with any color. Set the Fill to 0% and add a Gradient Overlay with these settings. We are actually creating a vignette.
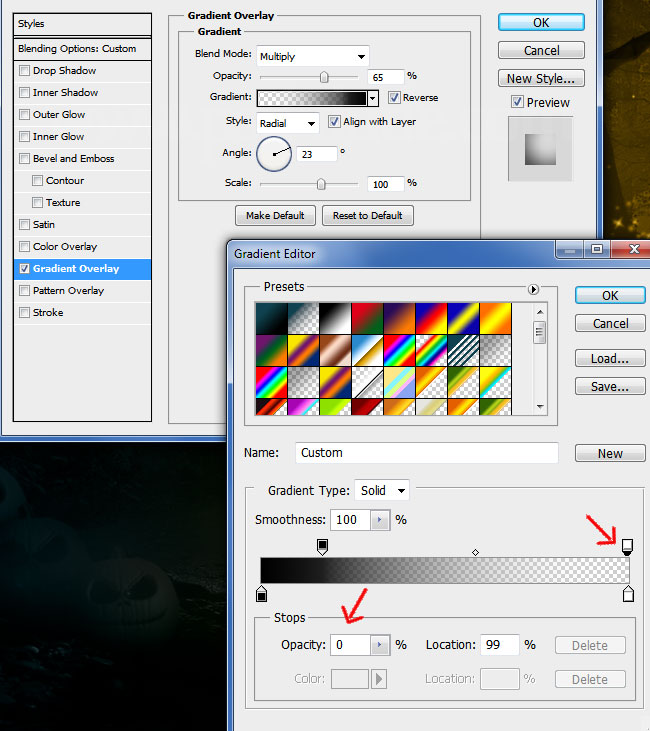
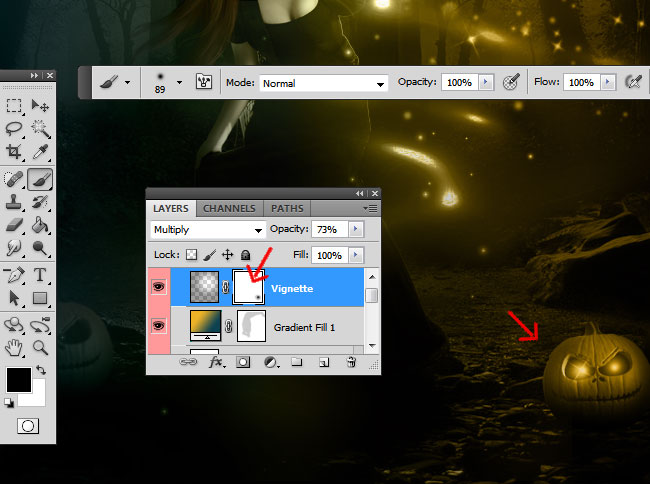
Convert the Vignette layer into a smart object and right click to rasterize it. Set the blend mode to Multiply, 73% opacity level. Add a layer mask to this layer. Use a soft round brush, color black, and simply paint inside the mask to
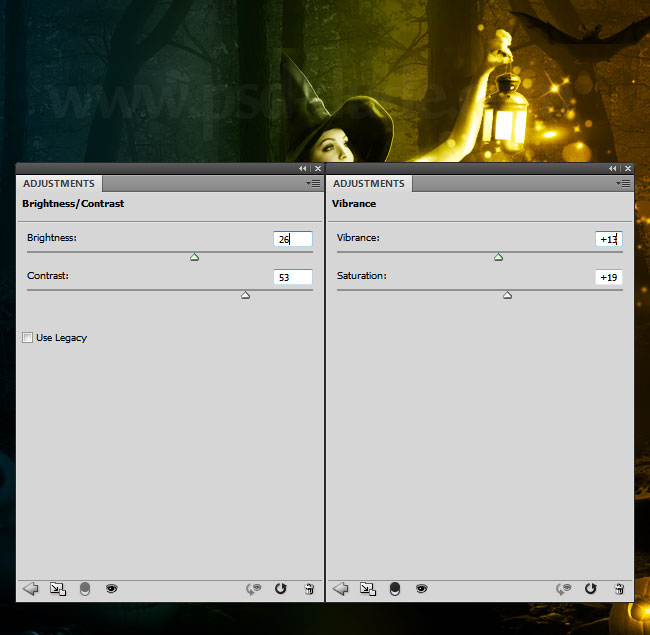
For the final touches add a Brightness/Contrast and a Vibrance adjustments with these settings; we increase the contrast of the image, make the colors brighter and more vibrant.
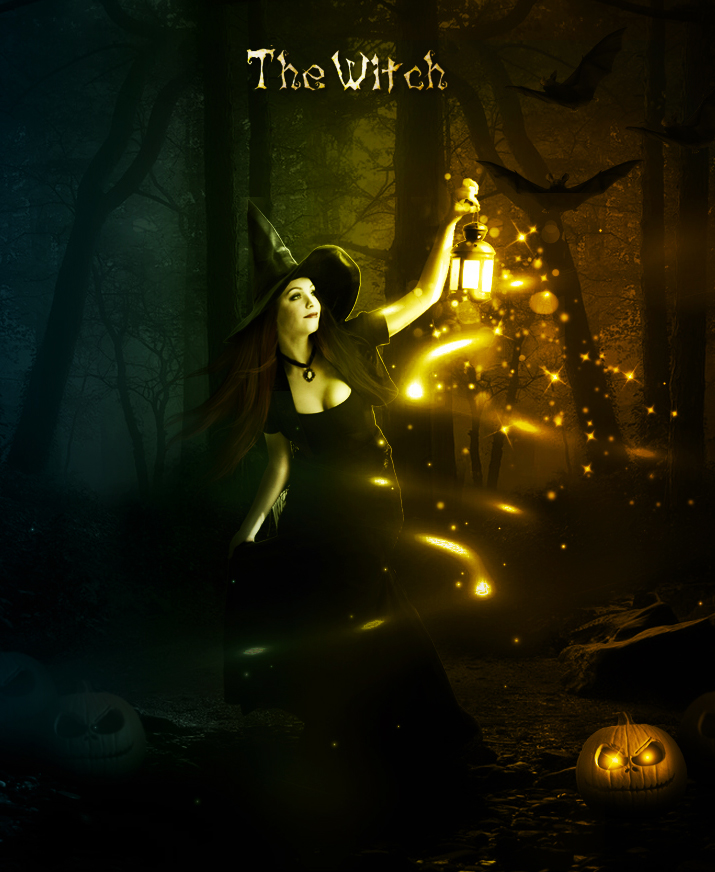
So here is the final result for our Halloween Night Witch Photoshop manipulation tutorial. Hope you all enjoyed reading this new tutorial, see you all soon.
15 comment(s) for "Halloween Night Witch Photoshop Manipulation Tutorial"
You make an account on gravatar.com and upload an image there. And when you add your email on my blog it automatically ads your image. reply
Photo Manipulate a Dark, Fiery Halloween Witch in Photoshop
http://www.psdstack.com/photoshop-tutorials/photo-manipulation/photo-manipulate-a-dark-fiery-halloween-witch-in-this-halloween/
Here is my contribution:
http://cartes-mireilled.eklablog.com/montage-nuit-halloween-avec-sorciere-a112855214