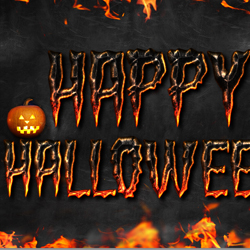
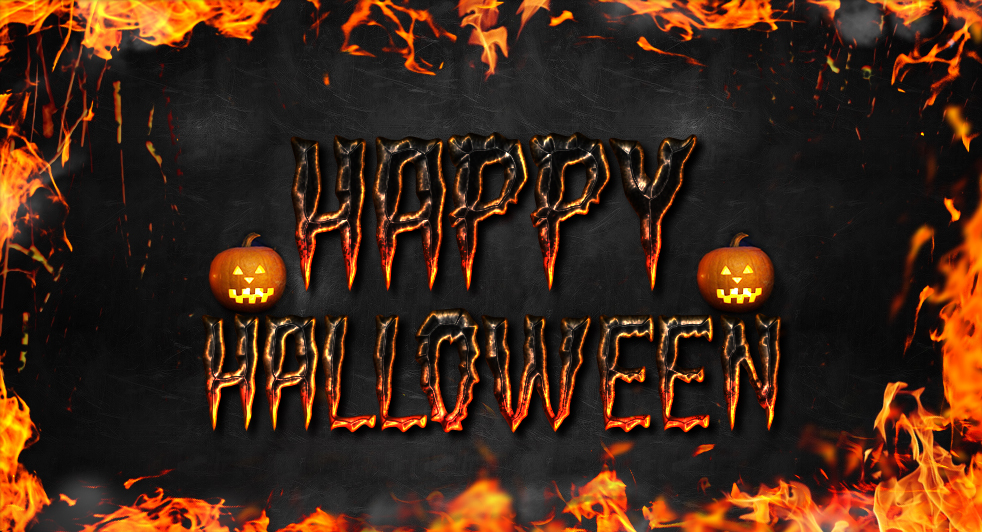
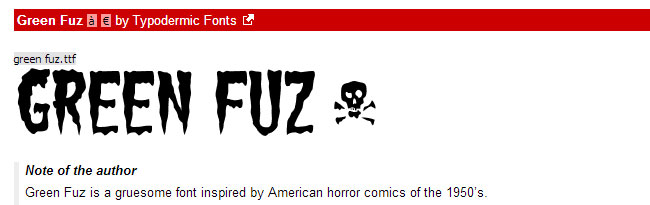
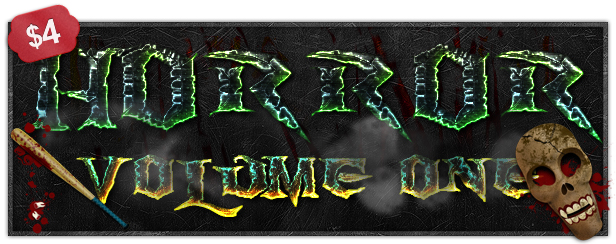
In this tutorial you'll learn how to create a horrifyingly cool Halloween inspired text style in Adobe Photoshop using only 1 layer style. Let's take a look at the final result. Pretty cool, right? So let's get to it. First head over to Green Fuz and download and install the font. Green Fuz is a gruesome font inspired by American horror comics of the 1950's.
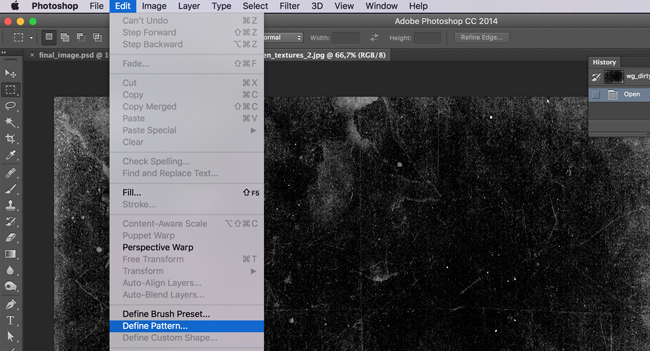
Then head over to wegraphics and download the free Dirty Screen Textures(they're free for both personal and commercial projects). Open the texture called "wg_dirty_screen_textures_2" in Photoshop, then go Edit -> Define Pattern and name it what you want. Hit OK.
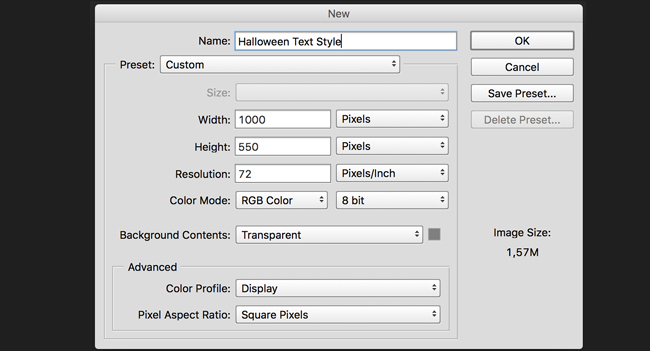
It's not a seamless pattern but don't worry about that, it's going to look great. Now make a new canvas (Ctrl + N (mac: cmd + N)) with the size of 1000x550 and name it "Halloween Text Style".
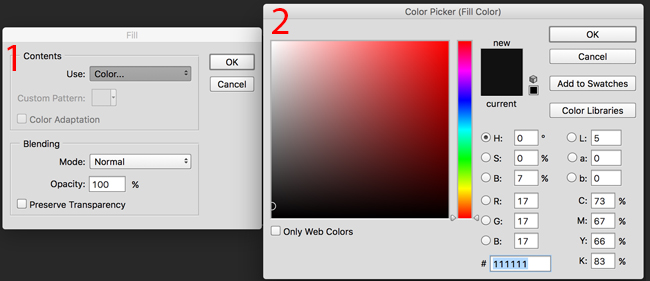
Fill it with #111111 (Ctrl + A (mac: cmd + A) -> Right click -> Fill , then "Use: Color " -> Type in 111111). Hit OK and deselect (Ctrl + D (mac: cmd + D)). Alternatively, use a dark pattern.
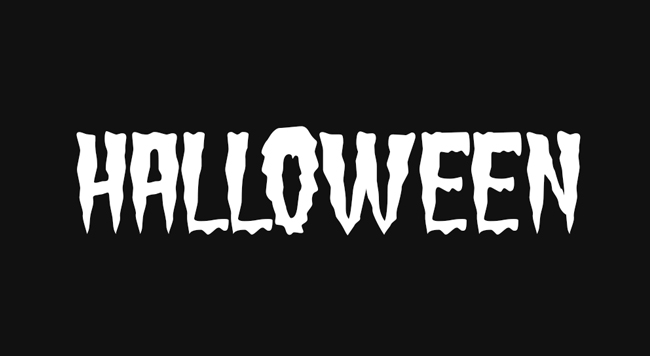
Now hit T to select the Text Tool and click in the center of the canvas. Type "Halloween" and change the font to "Green Fuz Regular" like you would in Word. Change the font size to 194 pt. This is how it should look by now:
Then double click the text layer to open Layer Styles.
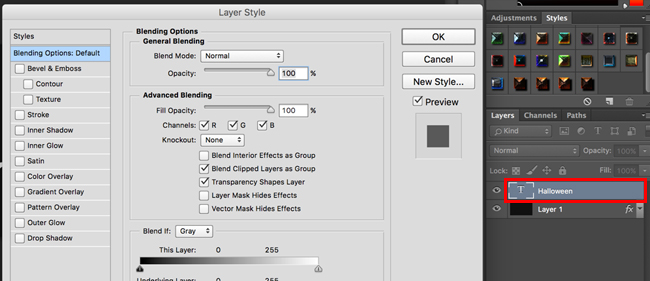
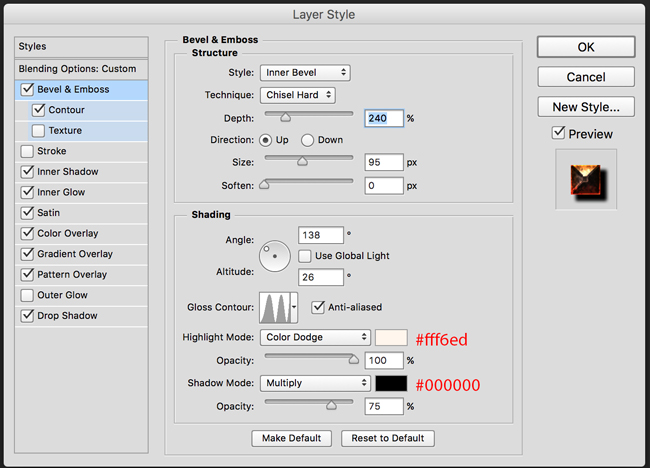
Change Bevel & Emboss to the following:
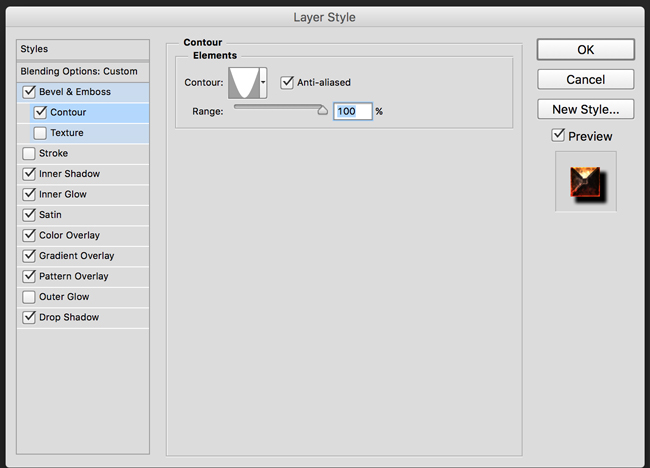
Change Contour:
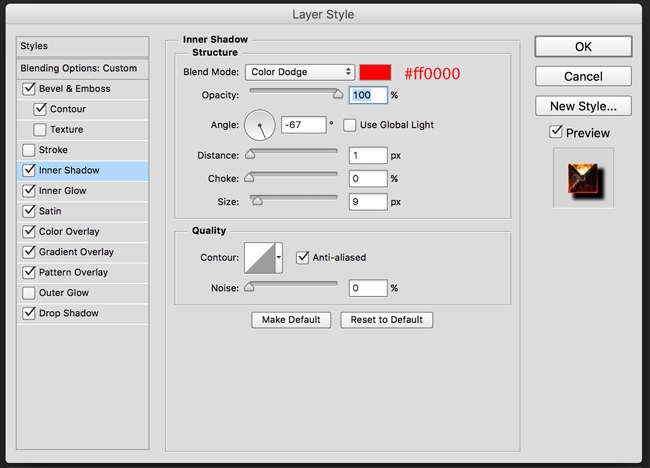
Change Inner Shadow:
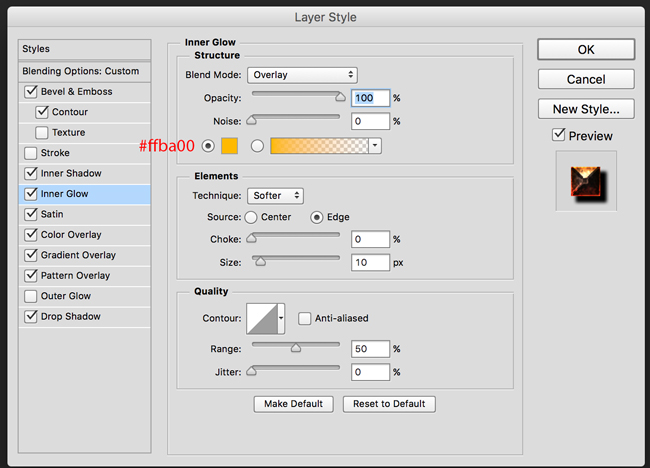
Change Inner Glow:
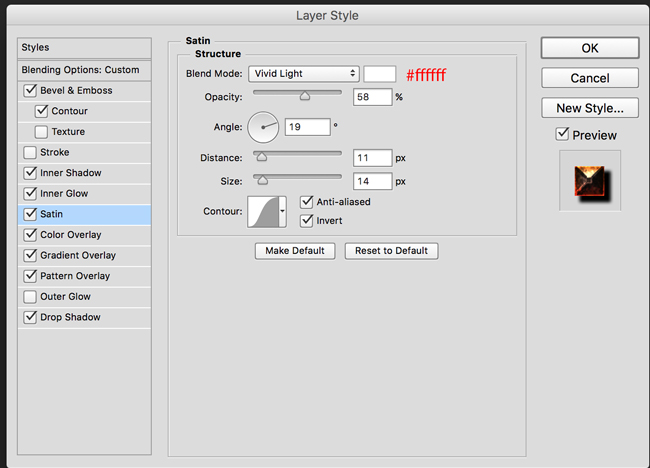
Change Satin:
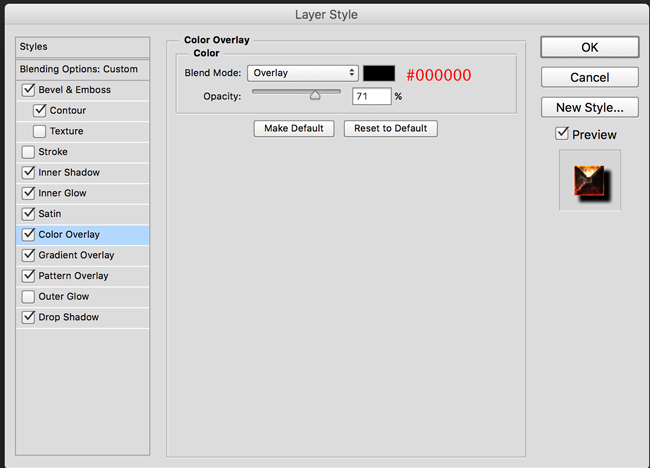
Change Color Overlay:
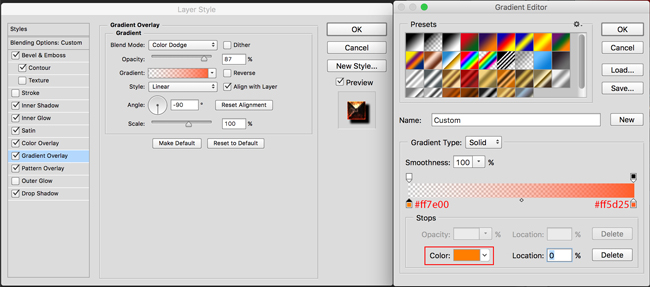
Now change the Gradient Overlay. Click the small arrow in the bottom corners of the gradient, and then the colored square to change the colors:
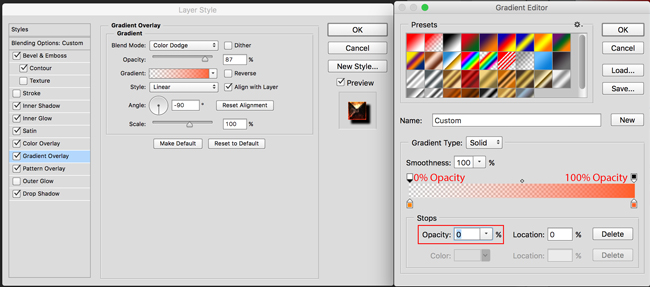
Then click the small arrow in the top corners of the gradient to change the opacity:
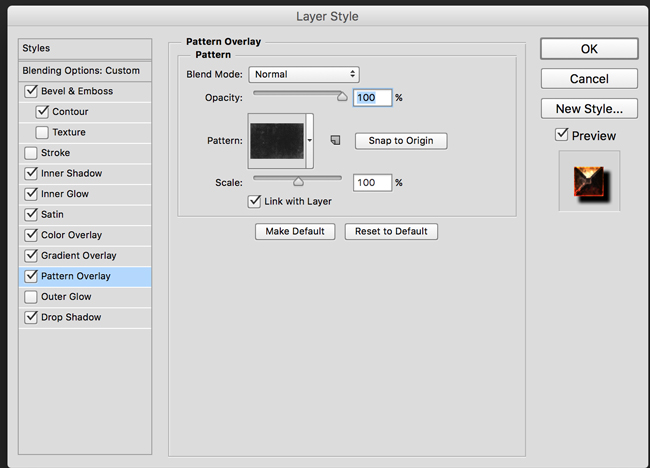
Change Pattern Overlay. Locate the pattern you defined earlier:
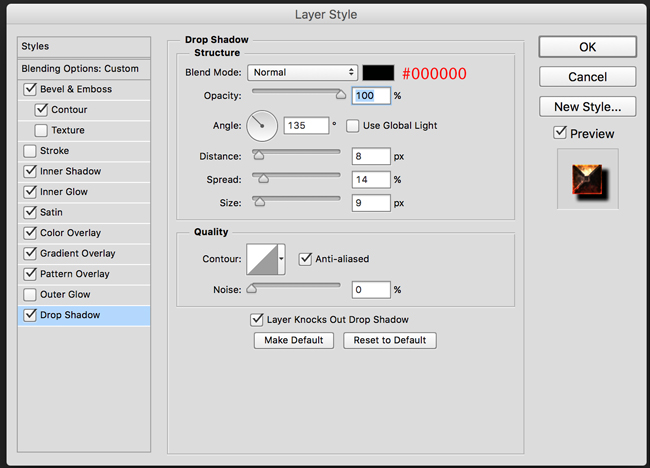
Change Drop Shadow:
For the background use the dirty screen texture pattern that you created in the first step. Also add a Gradient Overlay like show in the preview to darken the pattern.

For the flames border you can either use some of these fire textures(set the blend mode to Screen or Lighten), or you can use some of these fire brushes with some layer styles.
And you're done! Add some other elements like a lighted Halloween pumpkin and you could end up with some nice looking effects.
Easy, huh? I encourage you to try out different settings, and see what you can come up with. You can come up with some pretty cool color variations for instance. Go nuts and enjoy!
Premium Halloween Text Styles
Check outh these premium Halloween text styles that you can buy from graphicRiver.
No comment(s) for "Halloween Fire Text Style Photoshop Tutorial"