
Step 1
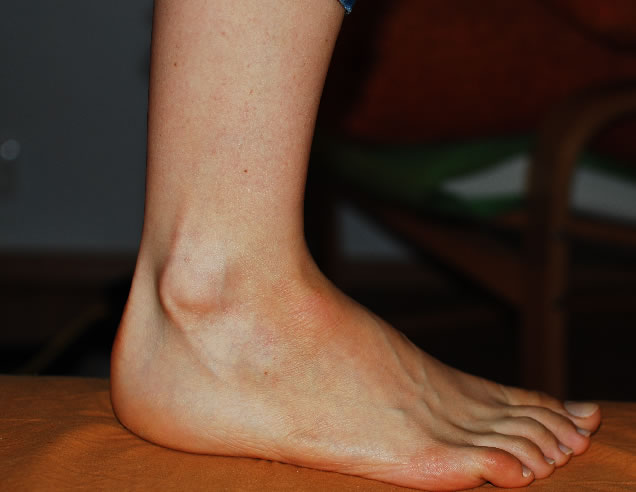
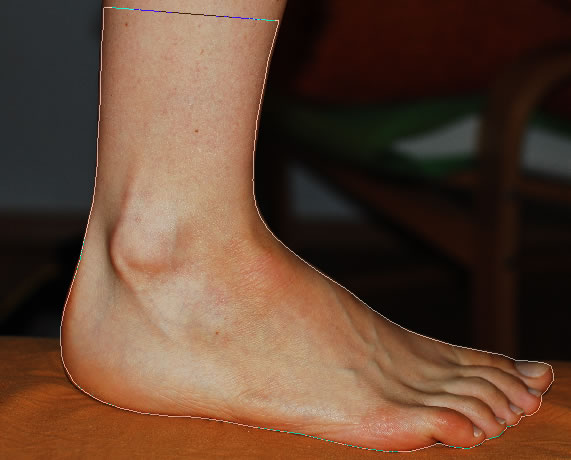
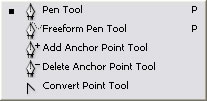
For the first step open a new document and import an image with a foot. I used my own foot. Now we have to extract the foot from the background. Some use Lasso Tool but I find it very hard to use with the mouse, others use Polygonal Lasso Tool, I use Pen Tool. So take the Pen Tool and set the opacity of the new layer(call this layer Shape) to 0%...it is easier to trace the shape of the foot.
Step 2
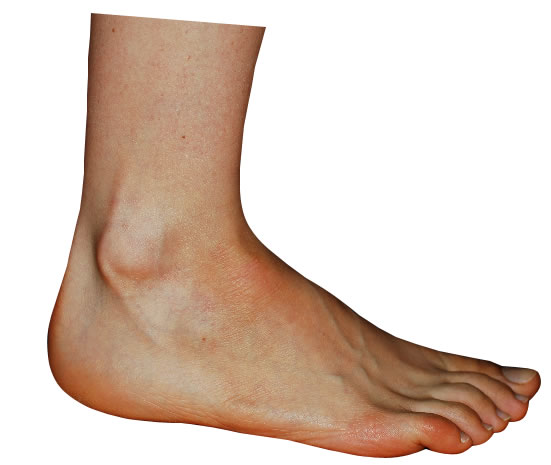
Now hold press CTRL and click the layer Shape thumbnail (the thumbnail is near layer's name in the Layers Toolbar. You will see that the shape was selected. Now go to the foot layer and press CTRL+C and than CTRL+V (you actually copy this shape and paste it into a new layer) Call this new layer Foot 1.
You have the advantage that if you don't like the selection you can modify the Shape layer with Pen Tool family like Convert Point Tool
 and than you can simply select and copy/paste again for a better result.
So, i start with this :
Step 3 - Modifying the skin and texture.
Duplicate this new layer and apply the FILTER/Noise/Median radius 5. Set the Blending mode of this layer to Darken 100%.
Step 4 - Adding detail to the foot
Create 3 vector areas like in the picture above with Pen Tool. As you can see I have also deleted the top part of the foot.
Now we have 4 layers as you can see above.
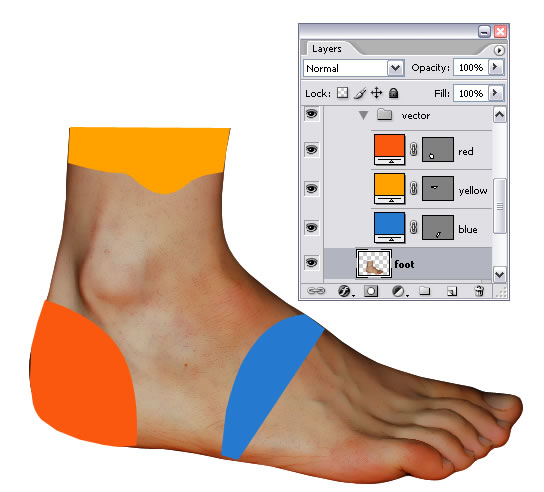
Press CTRL and click on the layer Red thumbnail and than go to Foot Layer and press CTRL+C and CTRL+V.
Do the same for the layers Yellow and Blue. You will have 3 copies of skin from the foot( I call them Skin red, Skin blue and Skin Yellow).
Hide layers red, yellow and blue because we don't need them for now.
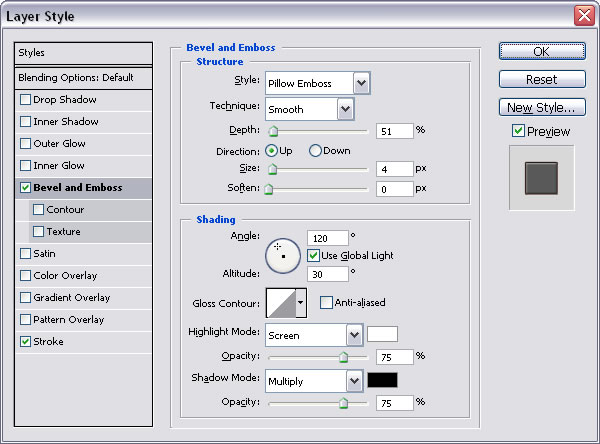
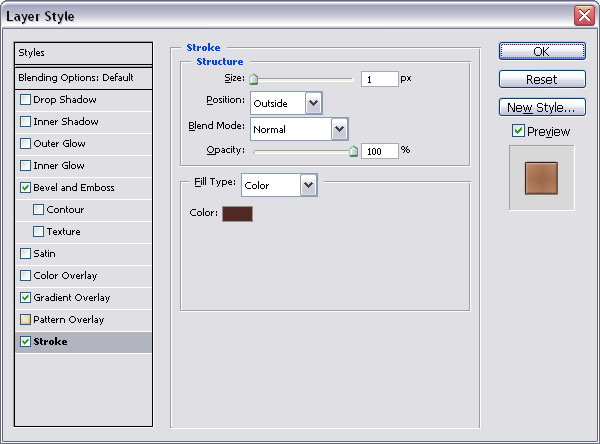
Go to Blue Skin Layer and do the following settings:

Do the same for the other 2 layer, red skin and yellow skin. Blue Skin Layer has an edge that we don't need so take the Eraser Tool and delete it BUT before that we have to make the blue skin layer image so dulicate the layer and merge the two layers and call the result Blue skin.
Now we have something like this:

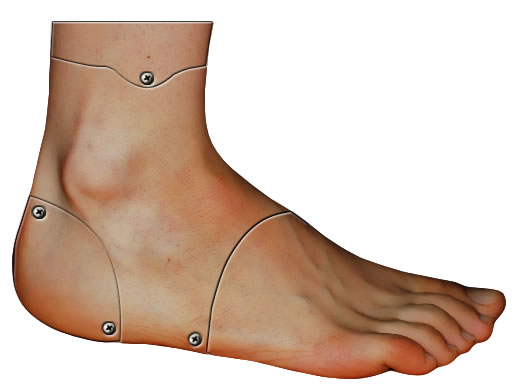
Step 5 - Adding more detail to the foot
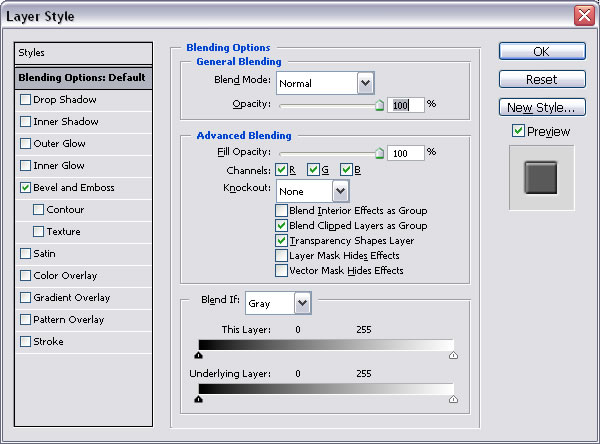
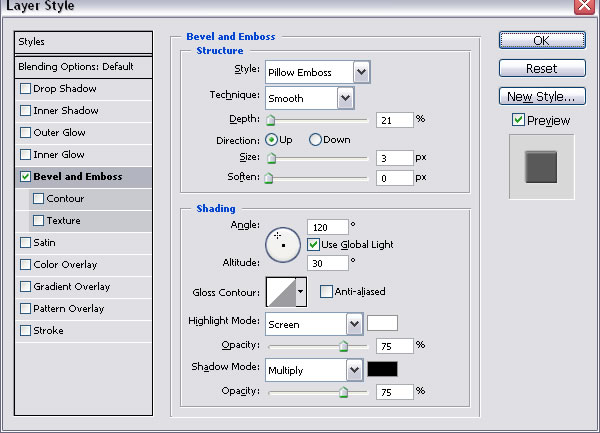
We need 4 Screw Layers for each of this layers at blending options make the following settings:
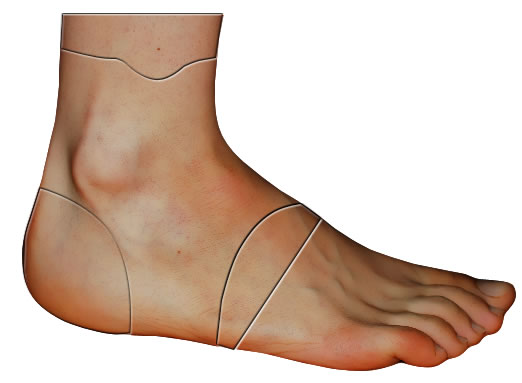
Step 6 -A hole in the foot
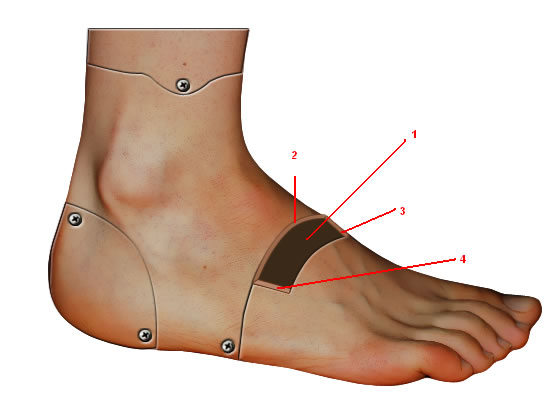
I decided to make a hole in the bottom area of the foot. So take the Pen Tool and make 4 areas.
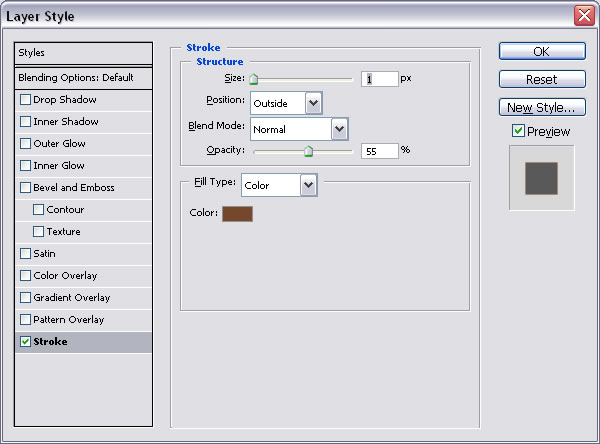
For area 1 (color # 3e3021) make the followins settings at blending options:
For the other 3 layers (2 ,3,4(color#9e694b)) make this settings:
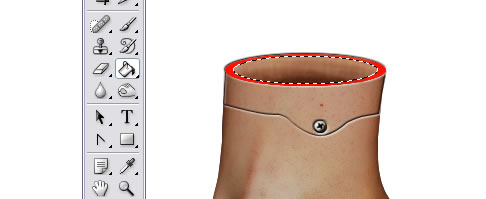
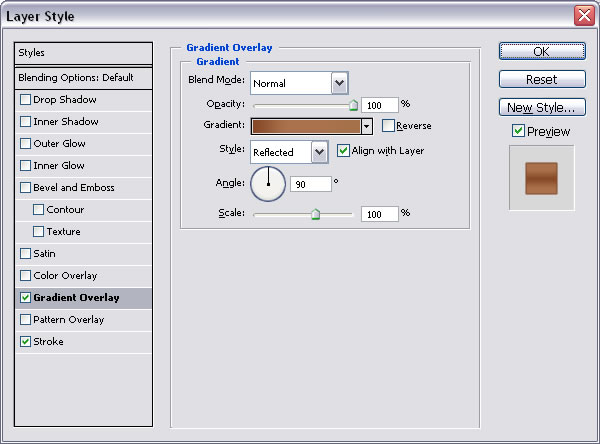
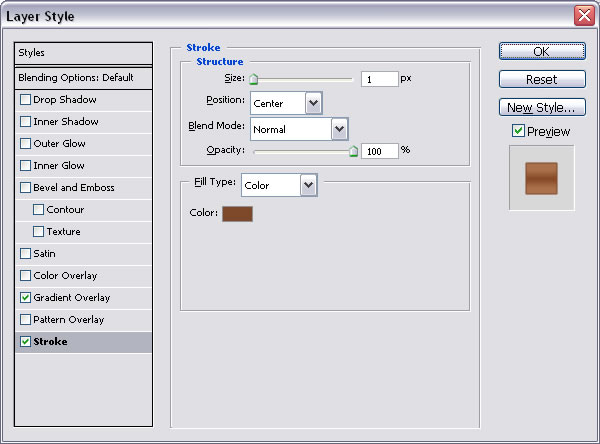
Step 7 - The top part of the foot
For the top part of the foot we will make a section and the foot will be empty inside.
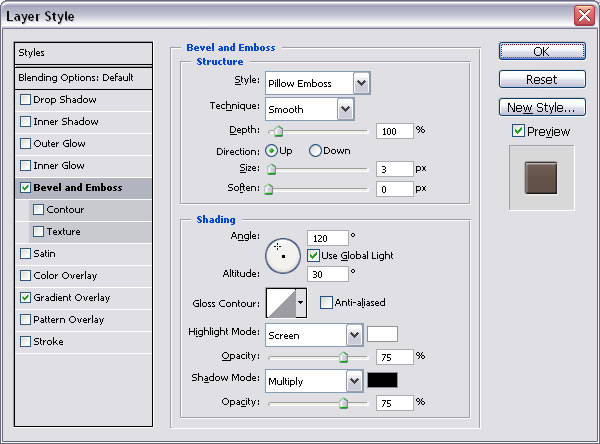
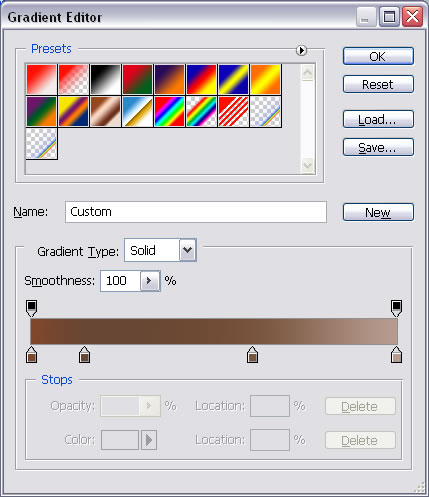
Draw a circle on the top part of the foot (color #b57e57) and make for it the settings:
And
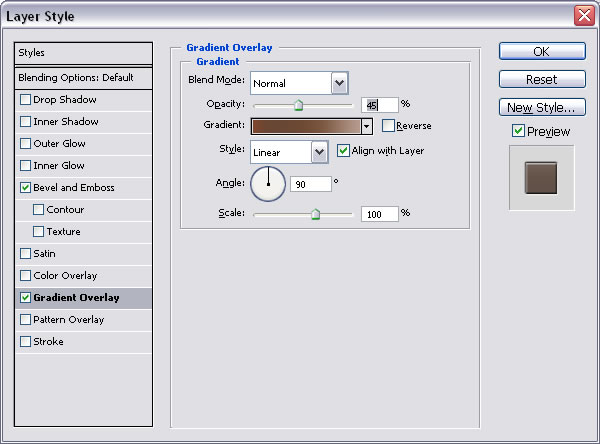
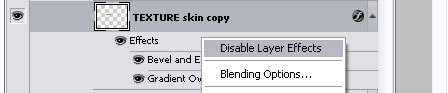
Duplicate this layer and rasterize it and disable layer's effects .
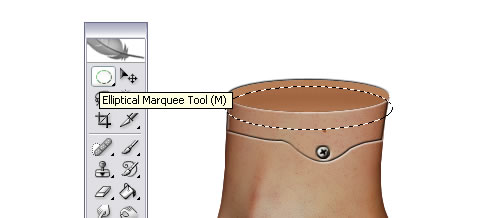
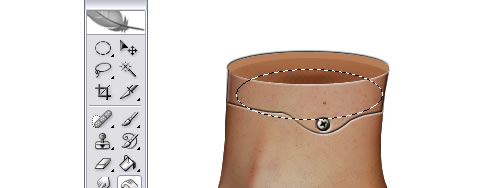
In this new rasterized layer make a selection with Elliptical Marquee Tool like in the picture below, and with Burn Tool(see the settings) gently darken the area.

Make a new selection this time lower and burn some more. Now Blur the entire area for color to blend. You can use Dodge Tool and Burn Tool some more until you obtain a good result. You can make vertical lines with dodge tool and burn tool to obtain a 3d result.
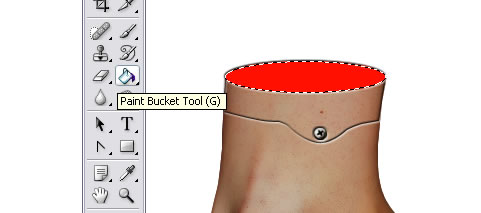
Press CTRL and the thumbnail of the layer above and create a new layer and call it margin. Use the Paint Bucket Tool and make it red. Now with the same sellection create a new layer, make it blue with Paint Bucket Tool and than resize it to 90%
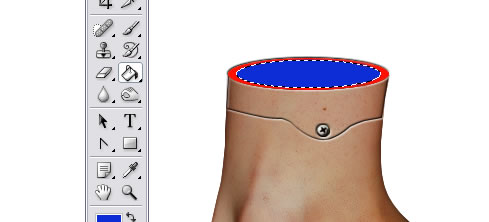
With this sellection go to red layer again and press delete. Now you can delete blue layer or hide it. The result should be this.
For this layer make the following settings:
Step 8 - Add wires to the foot
As you can see there are lots of veins on the foot so with Pen Tool I will try to draw some of them. Select all of these layers(CTRL+click on the layers name) and go to Layer - New - Group from layers. Call this group VEINS.
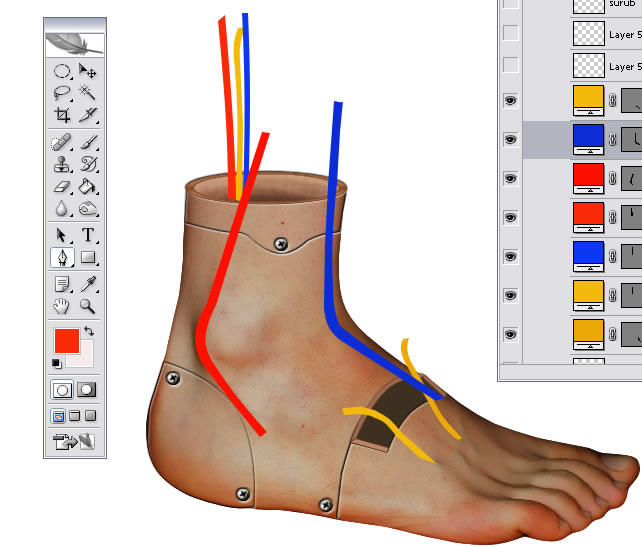
For every one of these veins go to Blending options and make the following settings:

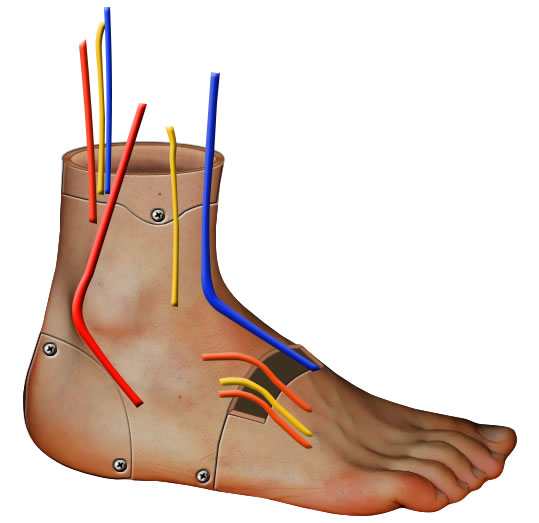
After that part duplicate this group and call it Veins Copy. Select all the layers from this group and merge them. Now delete parts from the veins like in the picture. Take the Burn Tool, Sponge Tool(desaturate), Dodge Tool and darken/lighten/desaturate parts of the veins. Add some little copper wires to the veins.
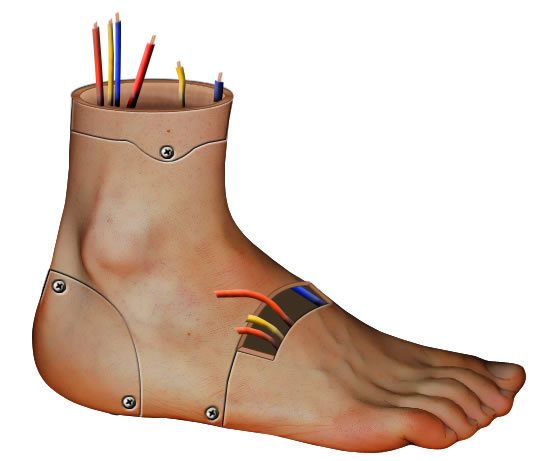
Step 9 - Final Touch
Add a new layer and draw Brush Tool size 1 little opacity 100% veins. Put the opacity of the layer to 50 %.
Add a text a choose something stupid like "Fut re Foot"(font family Impact, size 72 pt Sharp)
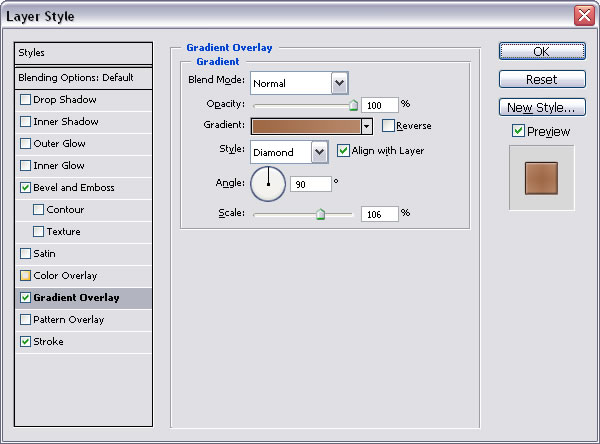
Write an "U" the same font and size as the text above, rasterize it and delete it to make it thiner; as you can see it is bevel embossed, color red and has a stroke.
Make 2 copies of that layer and color them blue and yellow .resize each "U" to fit inside the previous "U".
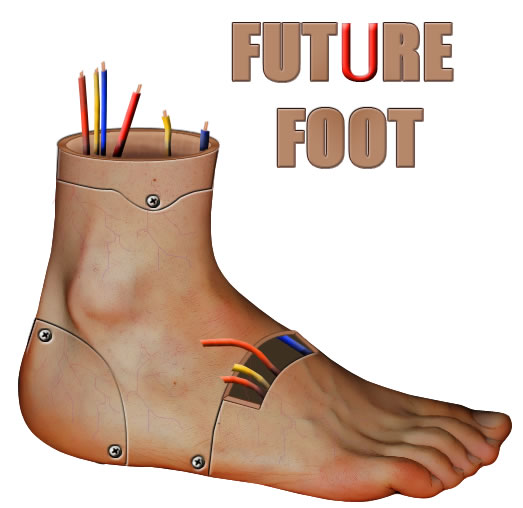
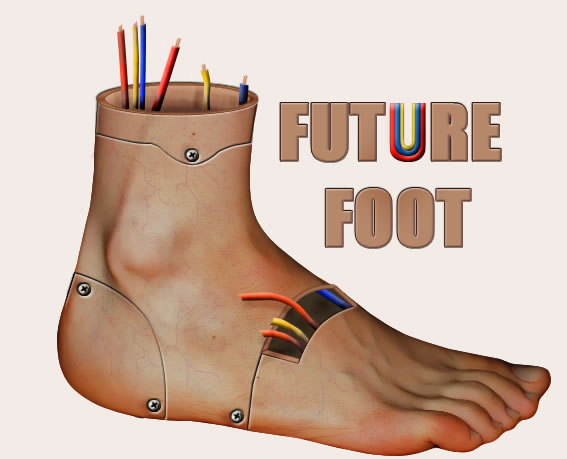
The result is this:
6 comment(s) for "Future Foot"
good reply