Stock Images : Nude Mermaid , Beautiful beach , Beach rock , Sea foam , Dark clouds ,
Beautiful golden texture , Little sea stars , Fish texture , Paper texture
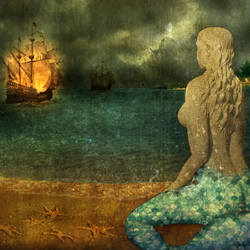
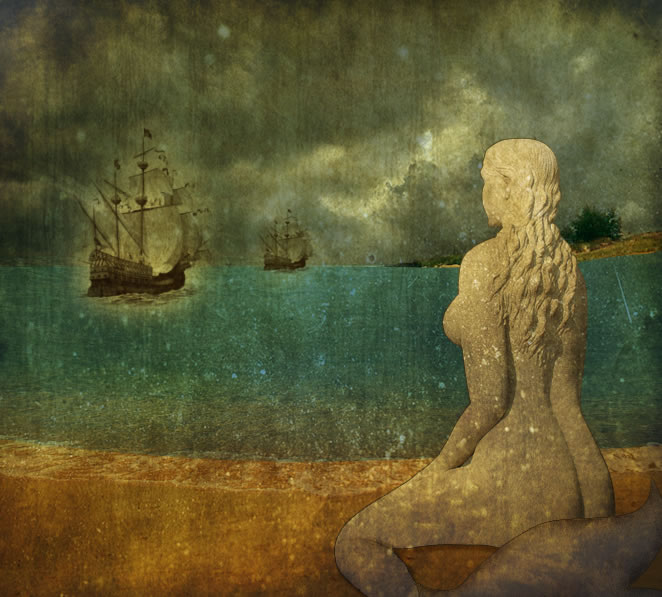
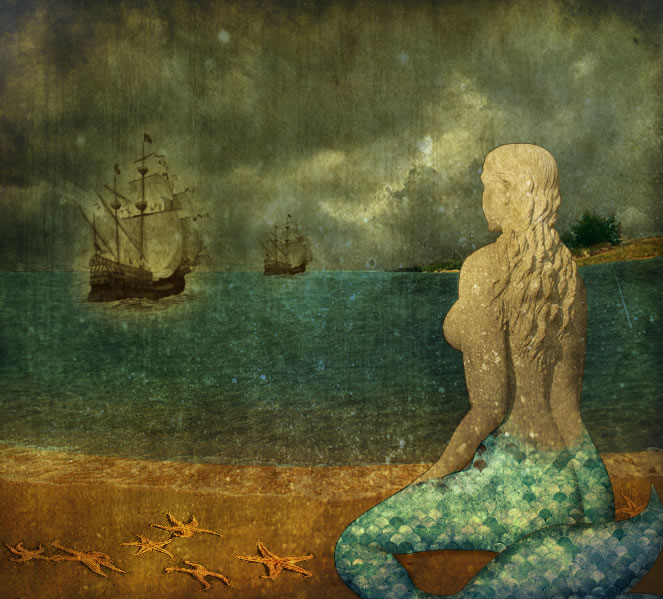
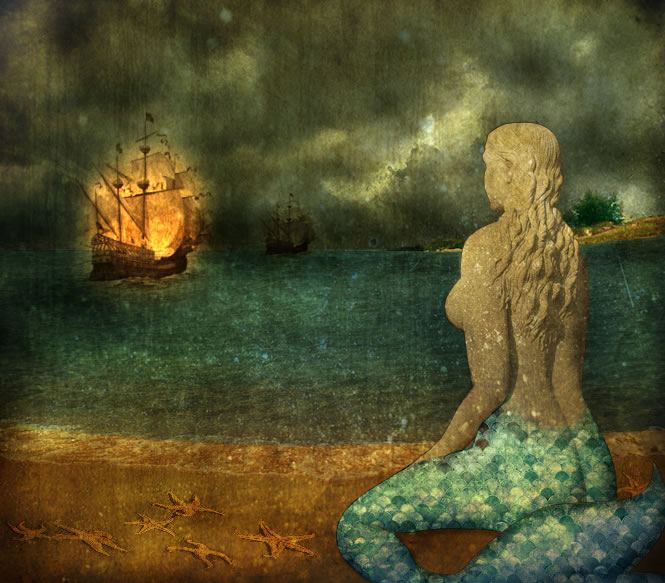
Preview of The Final Image

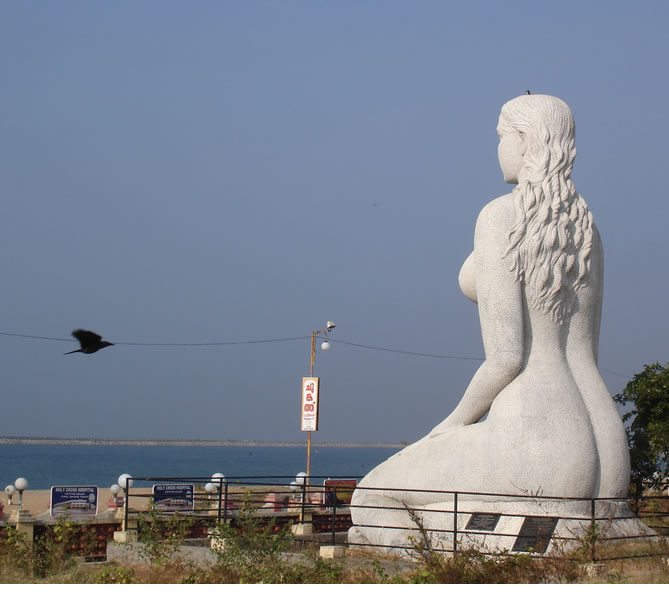
Step 1 – The Mermaid
Open a new document with the size 670 / 625 pixels. Open this beautiful photo Nude Mermaid by rajeevnair1981. The statue stands beautifuly on Kollam Beach , India . Scale the image to 80 % .
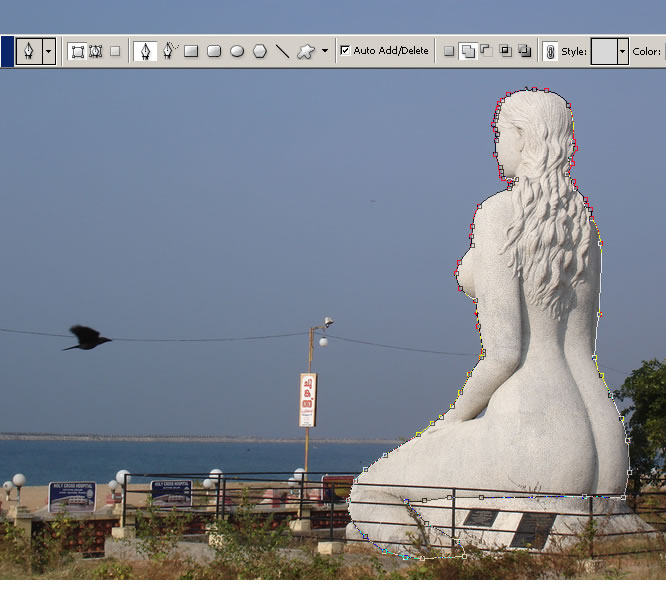
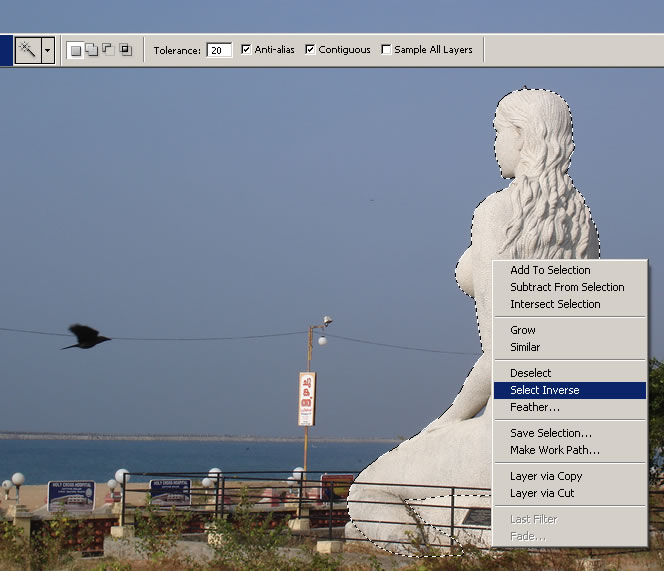
It is now time to crop the mermaid from her natural landscape. With the Pen Tool trace the mermaid shape. Call this shape layer - Mermaid Shape layer. Press CTRL and click the thumbnail of the Mermaid Shape layer . Now make sure that the Mermaid Layer is selected. Pick the Magic Wand Tool , right press inside the selection and choose Select Inverse. Press delete.
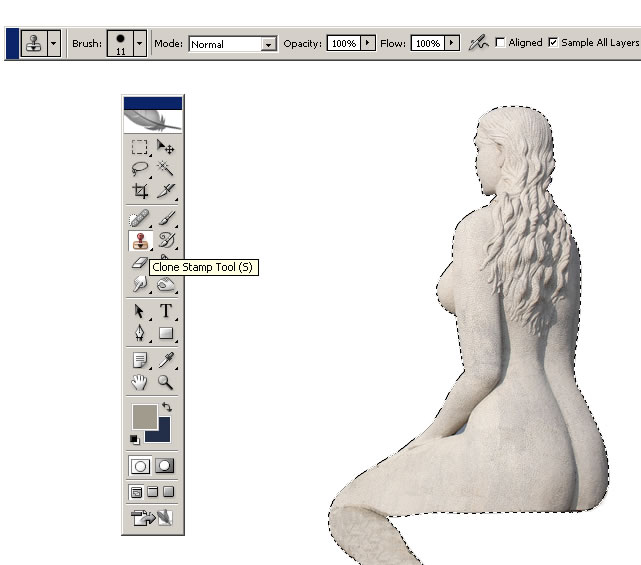
Step 2 – Adjust the Mermaid Photo
As you can see the mermaid has a leftover from a metal fence or something and some grass. So we really have to get rid of that. So for that you can use many tools: Spot Healing Brush Tool , Smudge Tool or Clone Stamp Tool. I will use the last one because I will obtain not only an propriate color but also the stone statue texture.
First Press CTRL and click the name of the layer to create a selection. That way you make sure that you not exceed the edges of the mermaid. Use ALT + click to choose the starting point.
Now another problem is with the behind of the woman. She intially stands on a hard surface. This time I will sitt her on the sand so I want to make her shape a little curved.
Because I don’t have a graphic tablet I will draw the extension with the Pen Tool (paths).
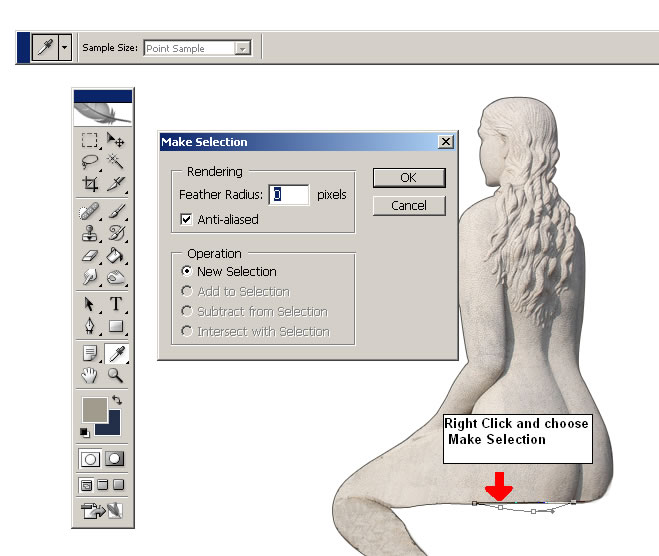
Use the same Clone Stamp Tool to fill the selection. Be carefull how you choose the start point because you want the girl to look real.
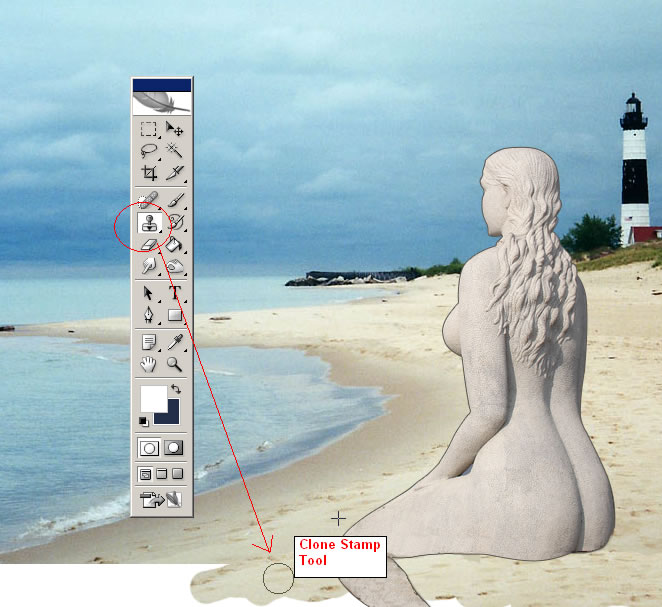
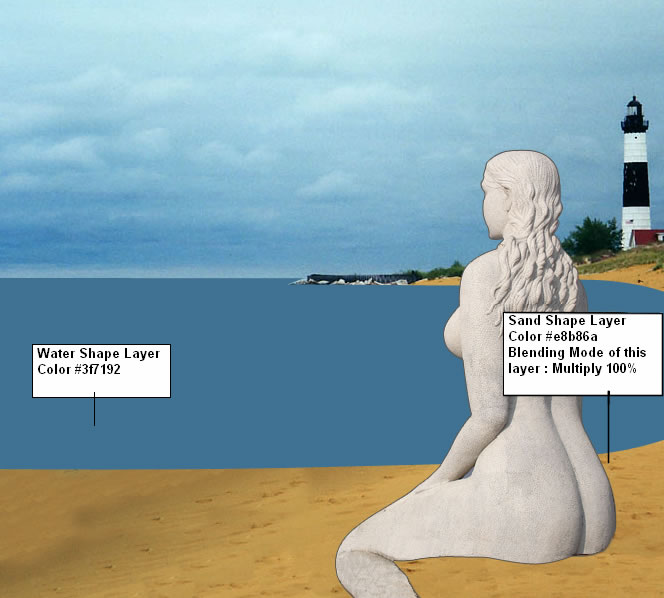
Step 3 –The Sand Beach Background
I am placing the mermaid on a different beach . The blending process is never easy for me …. There is always a struggle for finding the right photo . This time I have choosen this beautiful beach photo. Resize the photo and place it like in the image below. Call this layer Sea Beach Layer.
Use the Clone Stamp Tool to fill out the empty sand space.
I will use the photo but I will draw the sand shape and the water shape with the Pen Tool.
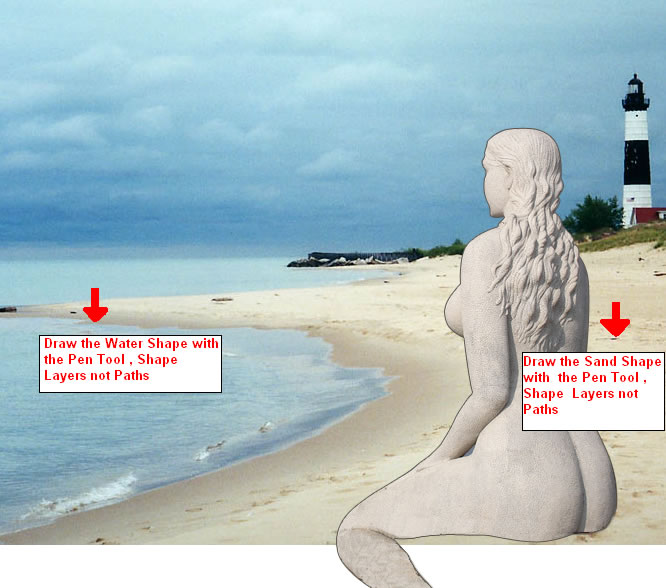
So draw two shapes, one for the sand and one for the water with the Pen Tool (Shape Layers Option) above Sea Beach Layer. Call the two layers Water Shape Layer and Sand Shape Layer. Change the blending mode of Sand Shape Layer from Normal to Multiply 100%.
Step 4 – Water Texture
Finding the water texture, here is another adventure . I will use this beach rock photo because I like the texture of the water even though it is just a small part. I will crop parts and try to blend them. So duplicate two times the selection below three times and merge the layers. Call the layer Water Texture Layer.
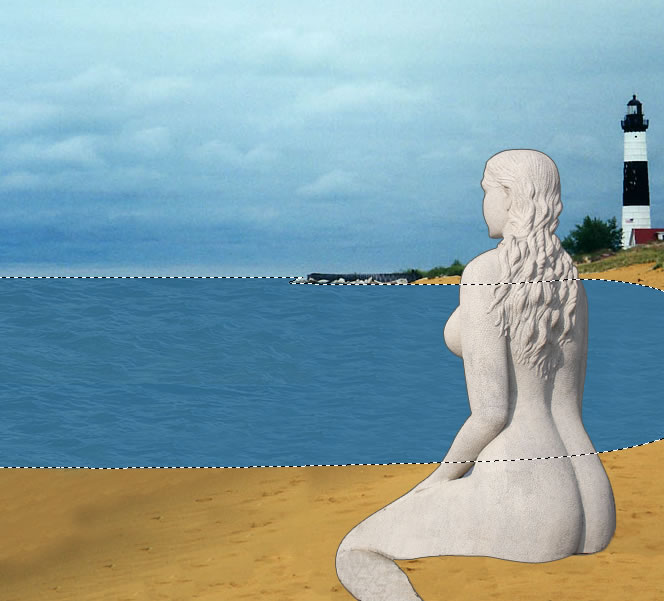
Now make a selection from Water Shape Layer and crop the Water Texture Layer with this shape. Call this new layer Water Texture Layer and delete the old one . Set the blending mode of this layer to Soft Light 50%.
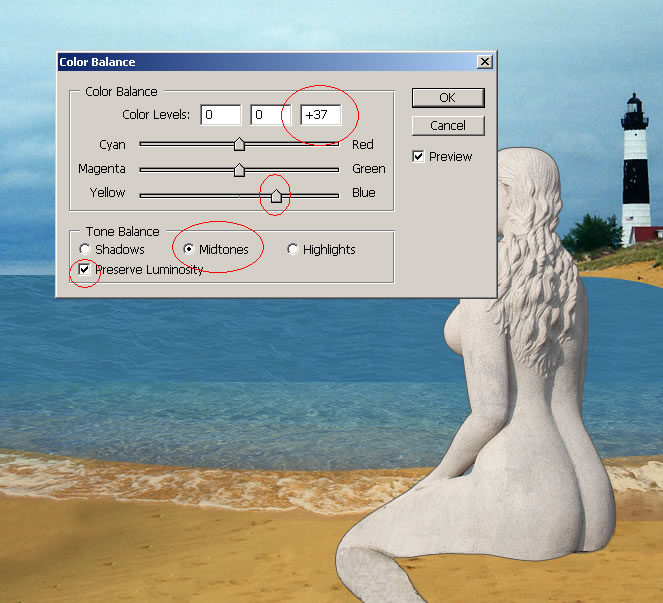
The next thing that we have to do to make this water real is to add sea foam. I have found this sea foam photo . Resize it to fit the screen. Call this layer Sea Foam Layer . Select and delete the sky and part of the sea. Cange the opacity of this layer to 50 % . Than adjust the Color Balance as shown in the image below.
Carefully delete the areas that don’t blend ok with the rest ; for example the area where the sand meets the sea foam. With the Eraser Tool this time a lower opacity, 20 % blend the 2 sea images.
Step 5 – Mermaid Details
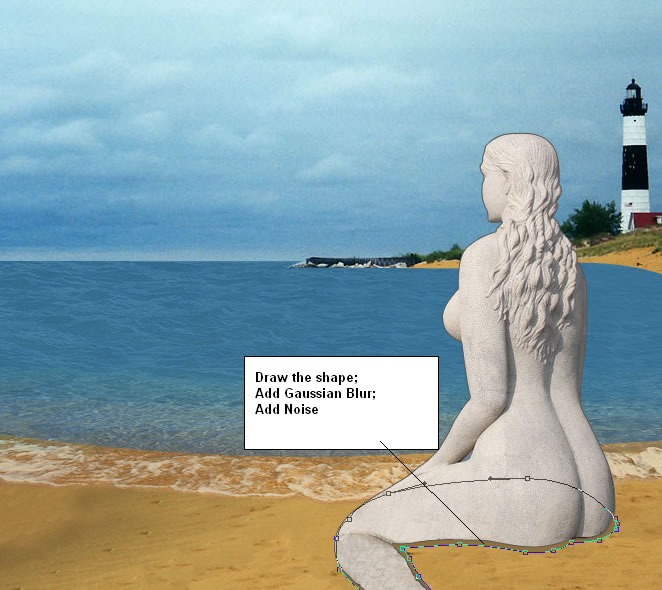
The first thing I want to do is to add the mermaid shadow on the sand. Choose the foreground color # 8e6f3e and draw the shape with the Pen Tool. Than go to Filter – Blur – Gaussian Blur 0,8 andthan Filter – Noise – Add Noise 3.
Another important detail is to add a nice mermaid tail. With the same Pen Tool draw the tail shape. Make sure the Paths option is selected. Create a new layer and call it Mermaid Tail.
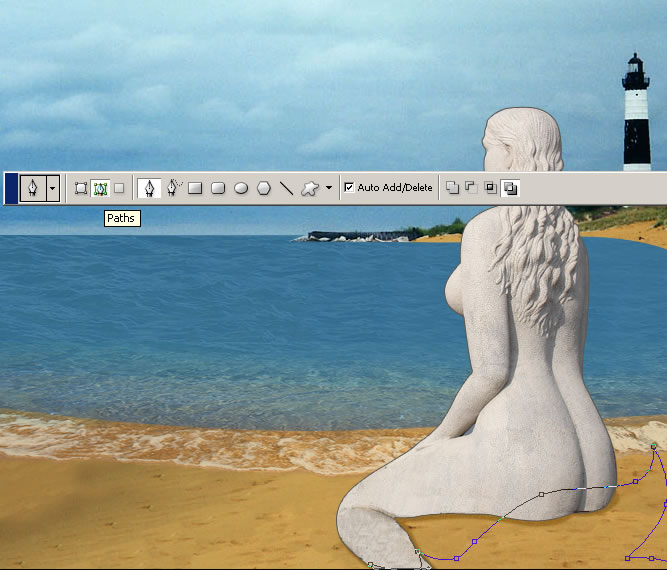
Right click and choose Make Selection.

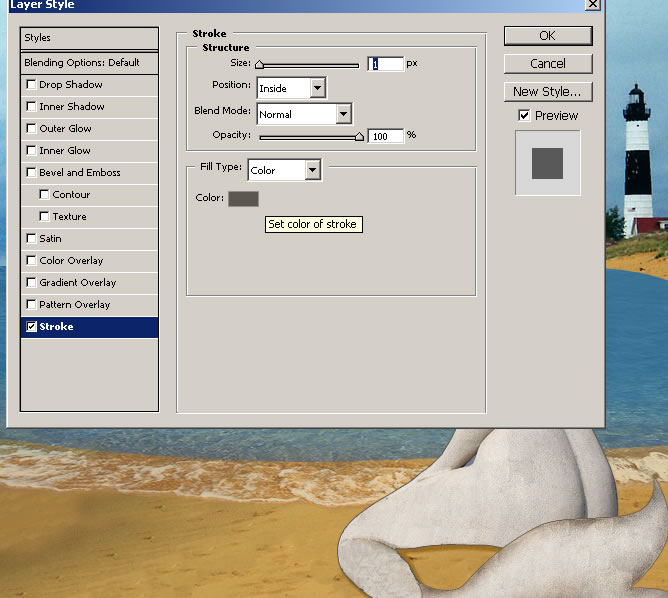
Now with the Clone Stamp Tool fill the shape with the mermaid skin color and texture . Make sure the Sample All Layers box is checked. With the Burn Tool Darken the edges of the tail. Go to the Blending Options of this layer and add Stroke , color # 5b564e.
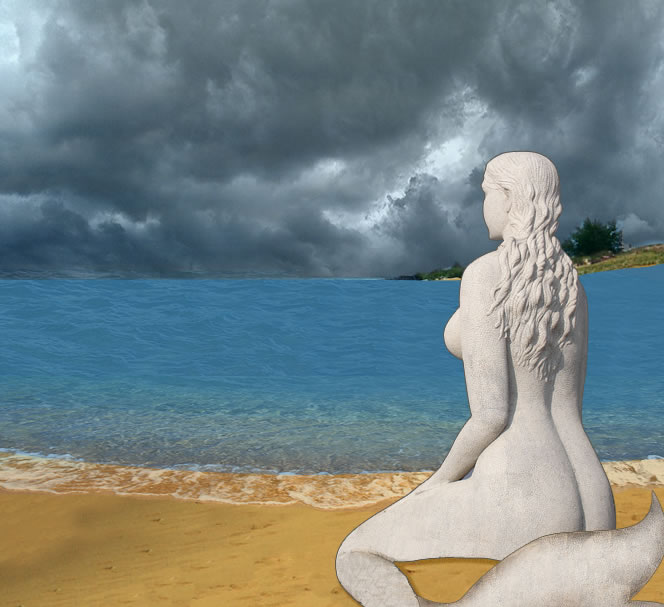
Step 6 – Add Clouds
With the Clone Stamp Tool I have covered with clouds the lighthouse and the house from the background image. Than I have added another image with dark clouds. Change the opacity of Dark Clouds to 65 % . Resize the image to fit the screen and crop the image to keep only the sky and clouds.
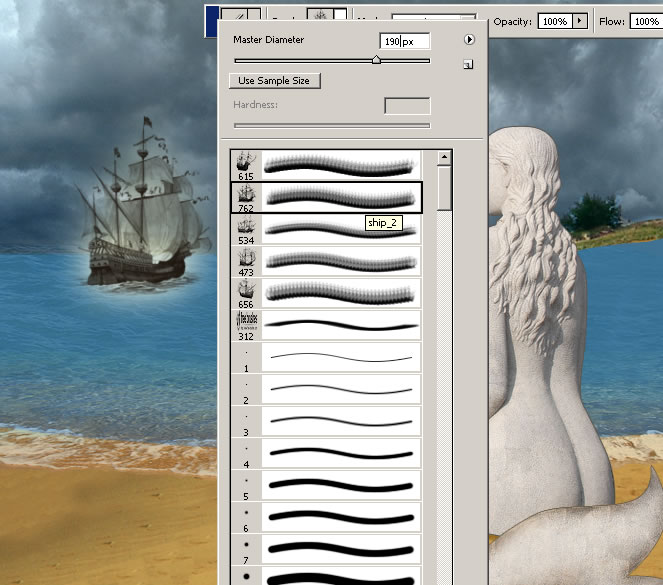
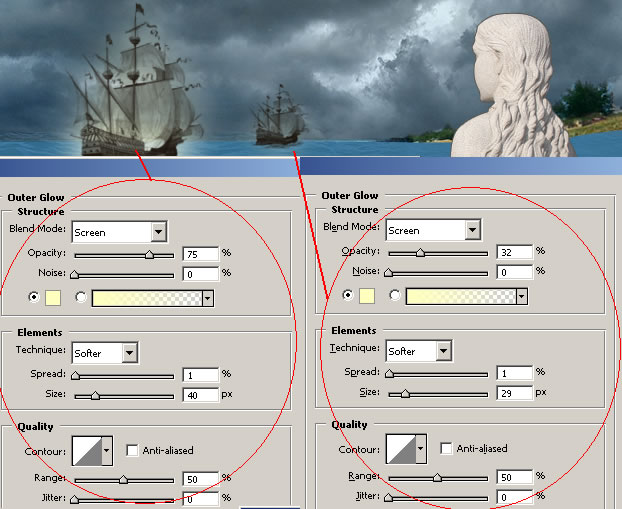
Step 7 – Add the Ships
Download this brushes: Warships Brushes . Create a new layer above all the other layers that we have created so far. Call this layer Ship1 Layer. Use the Brush Tool , color # 0d0801 , opacity 100% , size 190 to draw a ship like in the image. Create a new layer Ship2 Layer and do the same, add a boat this time smaller , the size of the brush is 80 pixels.
I will add now for both layers Outer Glow option like in the image. The color for the glow is # ffffbe :
Step 8 – Add Texture
I will now use this beautiful golden texture to add an old misterious look to the image . Change the Blending Mode of this Texture Layer to Multiply 65%. I will add this texture in a new layer but this in a next step. For now the image looks like this:
Step 9 – Add Little Sea Stars
In the left corner of the beach I will now place a few little sea stars. Go to Edit – Transform –Distort and create the right perspective :
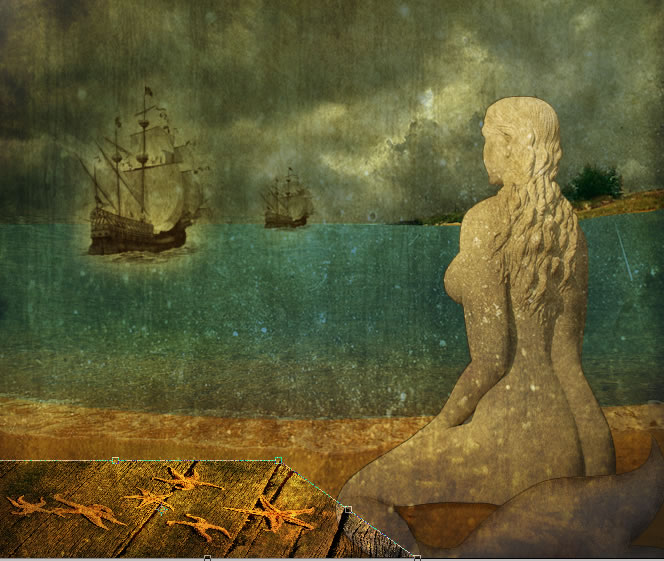
Change the Blending Mode to Overlay 50%. Erase the background of the stars to blend with the sand.
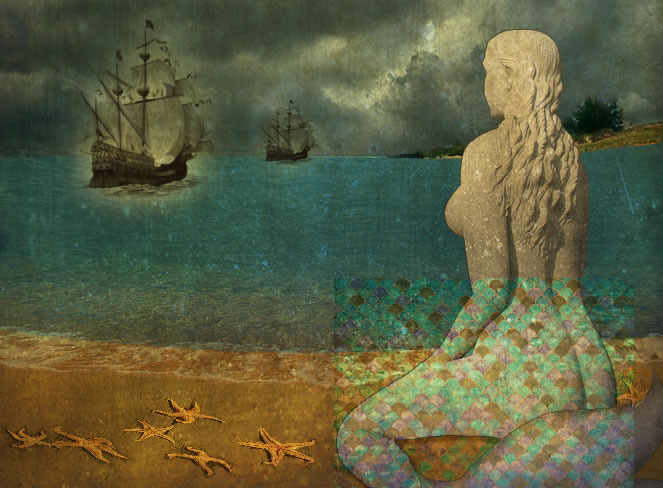
Step 10 – Fish Texture
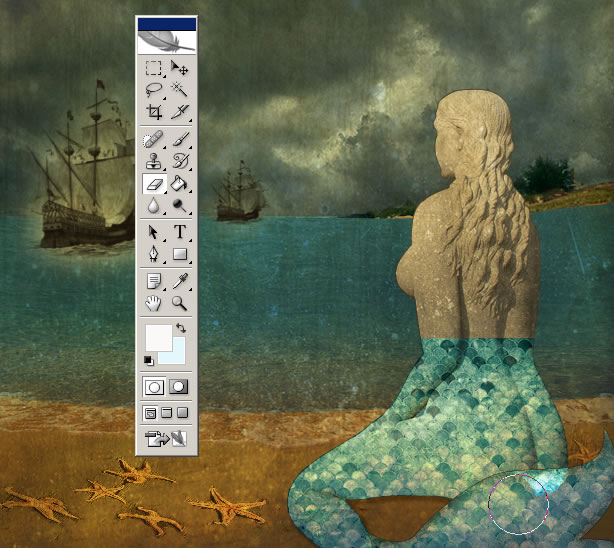
As much as I wanted to the mermaid did not looked good so I wanted to add it a texture on the tail area. I was lucky enough to find, after many searches,this interesting fish texture .
So copy this texture two time in two different layers.
Scale the first layer to 70%.
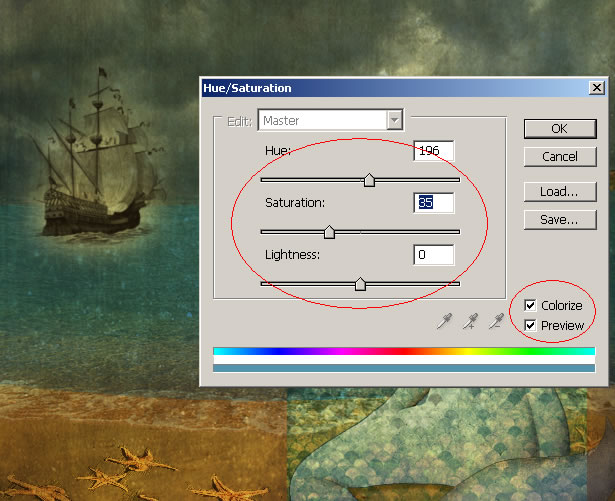
Now change the color of the texture : Image – Adjustments – Hue /Saturation , colorize Hue : 196 , Saturation: 35 , Lightness : 0.
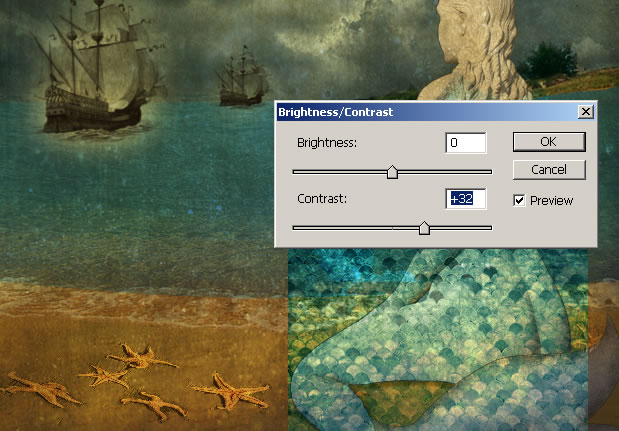
Add Brigtness / Contrast : Contrast +32.
Now duplicate this layer. Now select the mermaid shape and delete the extra texture from the first layer . Than select the mermaid tail shape and delete the extra texture from the second layer.
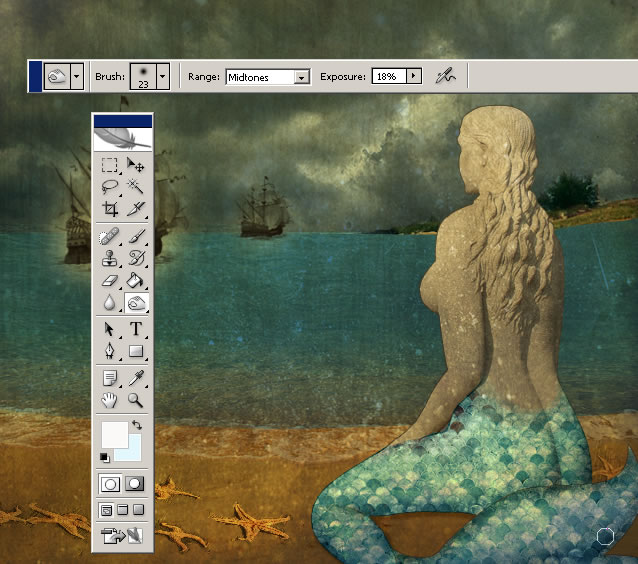
With the Eraser Tool easily delete the areas where the two textures intersect. Erase also the hand texture and for the back give the tail texture a round shape. Lower the opacity of the Eraser Tool to blend the texture.
With the Burn Tool add shadows on the two texture layers.
Step 11 – Final Details
Add the beautiful golden texture in a new layer . Set the Blending Mode to Soft Light 40%.
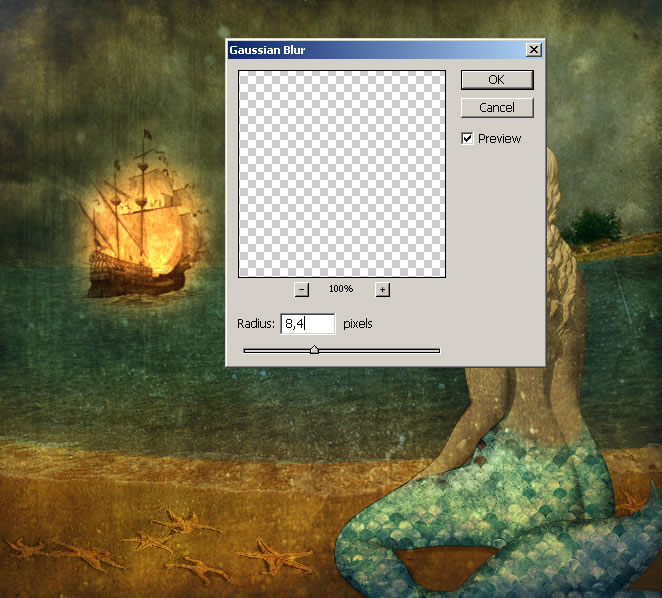
Copy this paper texture and place it obove the ship . Crop a round shape and the rest delete it. Change the Blending Mode to Color Dodge 100% . Add Gaussian Blur , radius 8,4.
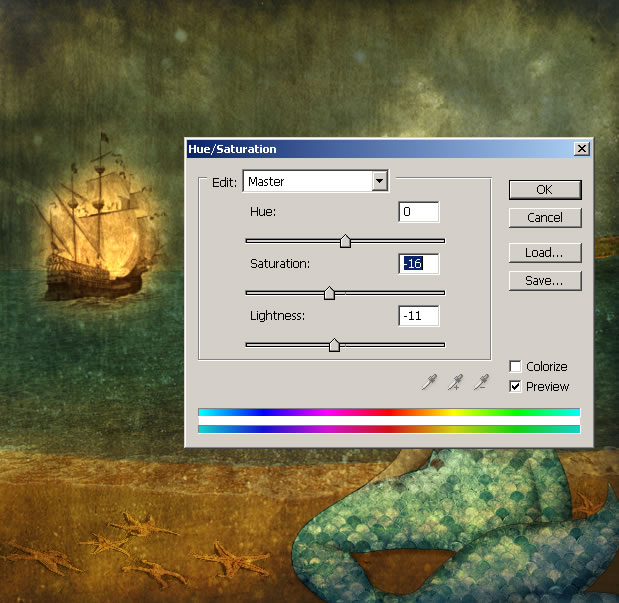
Change the Hue / Saturation settings as shown in the image :
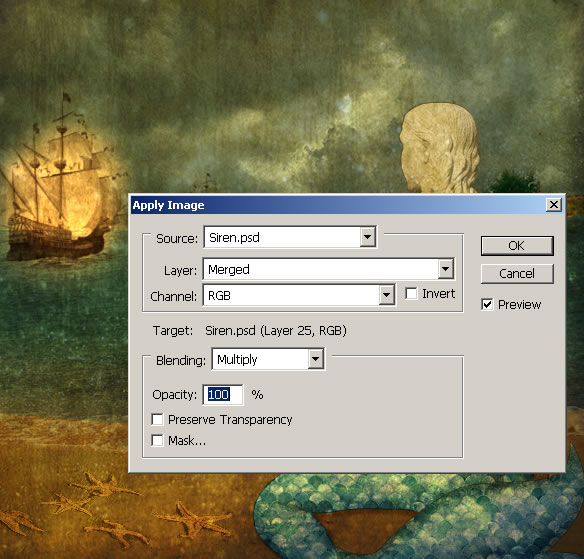
The last this that I usually do is to create a new layer and Apply Image (Image – Apply Image). I do that because the new layer is in fact an image of all the visible layers merged. In this image I like to play with Burn Tool , Dodge Tool to add contrast , to lighten or darken parts of the image.
This is the Final Image !
15 comment(s) for "Fairytale Photo Manipulation - The Mermaid"
reply
I am glad you like my work :) reply
I don't know why the link is broken but here is another fish texture that is very similar to the original.
By the way, thank you for practising my tutorials !!! reply
reply