If you like clocks you might be interested in reading these articles also, 6 Free Clock Social Icons and +70 Clock Photoshop Custom Shapes.
Drawing the Clock Background
Open a new PSD file, size 500/500 px. Create a new layer and fill it with a light
gray. This will be our background.
Go to View > Show Menu and check Grid (shortcut: press CTRL and '). As a result you
can see that the canvas has now a grid over it. Using a Photoshop Grid helps you draw
better shapes.
Let's draw the clock. As you know a clock has the shape of a perfect ellipse called
circle. The first thing that we have to do is to pick the Ellipse Tool,
press SHIFT on our keyboard and draw a circle. The color is not important, I picked
white. Call this layer Clock Layer.
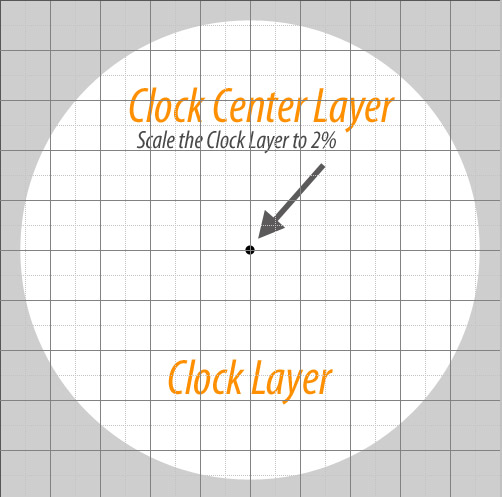
Duplicate this layer. Scale this new layer to 2%. Be careful to check Mantain aspect
ratio so that horizontal scale is the same with vertical scale. Call
this layer Clock Center.
A Little Math to Create a Perfect Clock
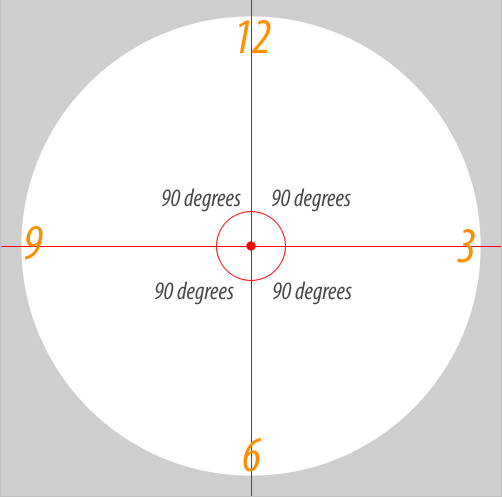
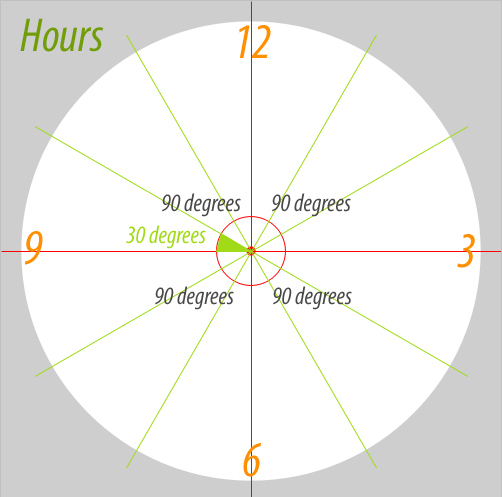
Drawing shapes always involves knowing something about math and geometry. The Photoshop has tools to draw vector like square, polygon, circle, ellipse, etc. The clock being a circle has no corners to guide so we will work with angles. A clock has 12 hours so we have to divide the clock in 12 equal parts. You can see in the image below that the circle has an angle of 360 degrees. Divide the circle in 4 areas, each area has an angle of 90 degrees (360 degrees / 4 = 90 degrees). Now we have represented the hours 12, 3, 6 and 9.
If we divide the circle in 12 areas we obtain all 12 hours, separated by an angle of 30 degrees (360 degrees / 12 = 30 degrees).
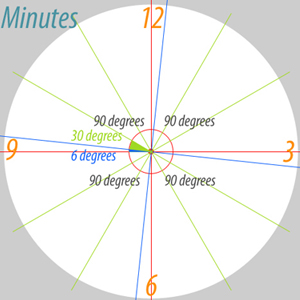
We know that an hour has 60 minutes. So we have to represent also the minutes on our clock. The hours are also the minutes: (hour 1 is minute 5, hour 2 is minute 10, hour 3 is minute 15, ..., hour 11 is minute 55. So to represent the minutes we have to divide the 360 degrees to 60 equal 6 degrees.
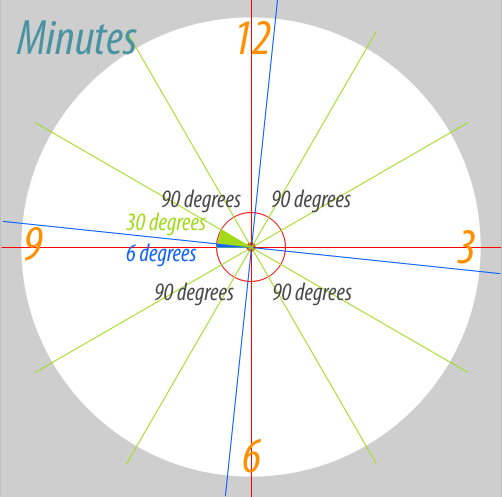
This means that at every 30 degrees we have an hour and at every 6 degrees we have a minute. That will help us to easily and corectly create our clock face.
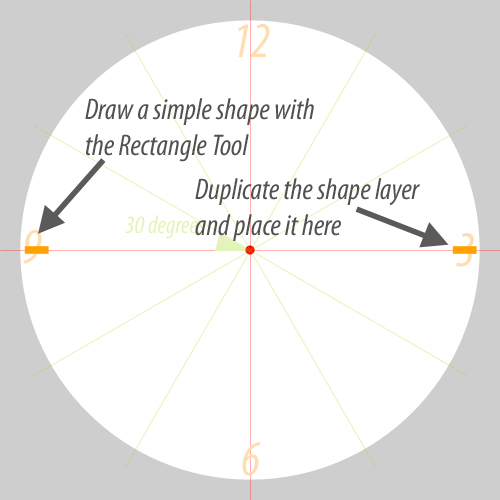
Drawing the Hours
With the Rectangle Tool draw a shape like in the image. Duplicate this shape and place it like in the image moving it on the horizontal scale.
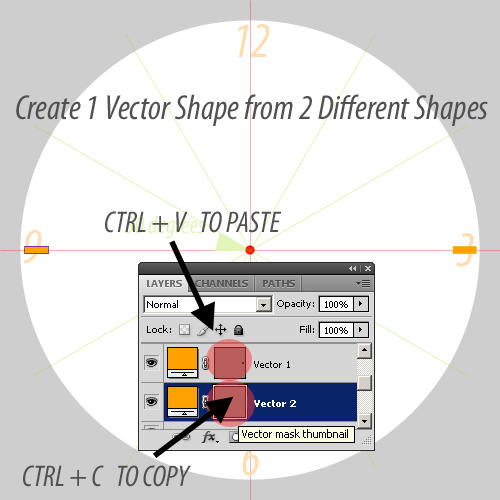
Now we have two vectors in two different layers. I want to merge the two shapes into one layer without loosing the vector properties. Select the Vector Mask Thumbnail of the Vector 2 Layer. Press CTRL + C to copy the shape. Now select the Vector Mask Thumbnail of the Vector 1 Layer. Press CTRL + V to paste the shape. Now you can delete the Vector 2. You can see that Vector 1 contains now the 2 shapes that are still vectorial.
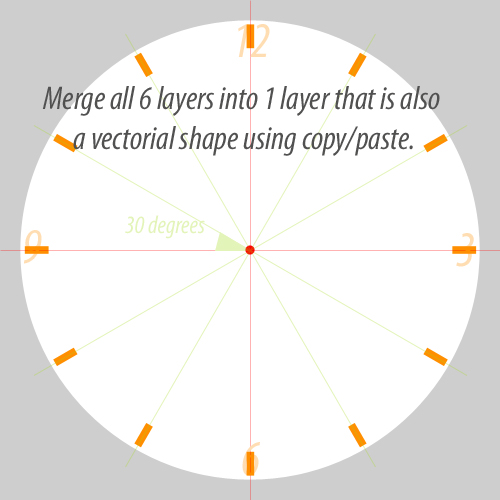
Now it is simple to create the hours. Simple duplicate Vector 1 Layer and press CTRL + T to transform the layer. Remember that to create an hour we have to rotate with 30 degrees so simple input 30 in the rotate field. Duplicate the second layer and rotate it again by 30 degrees. Repeat the process 6 times.

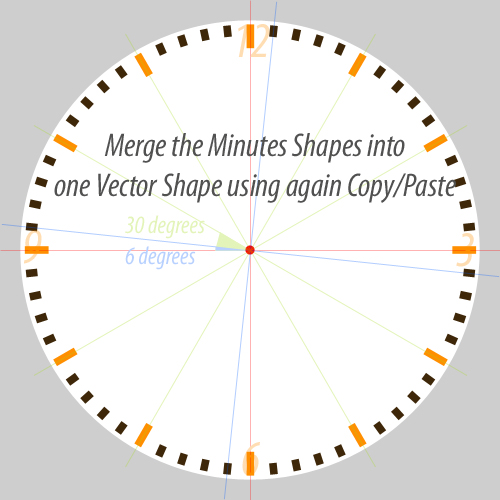
Now we have again 6 different vector shapes. Copy/Paste to transfor the 6 layers into one vector shape layer.
Drawing the Minutes
For the minute create another shape layer with the rectangle tool, this time smaller. Duplicate the new vector and rotate it by 6 degrees. Duplicate multiple times and rotate again until all the minutes are marked. For a faster process you can merge the first 4 layers and rotate the resulted layer by 30 degrees. Than merge this 8 layers and rotate by 60 degrees and so on, this way it is a faster process.
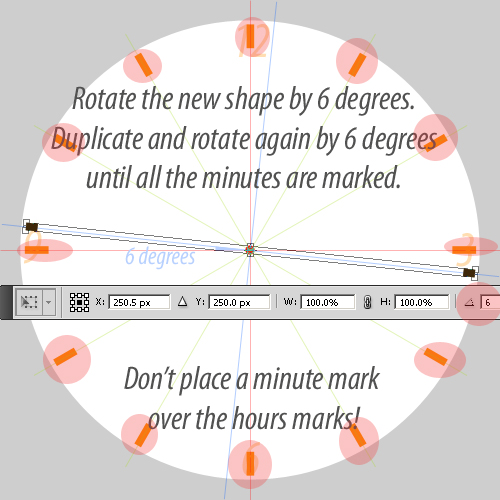
In the same way as we did for the hours we have to copy/paste all the minutes marks into one shape layer.
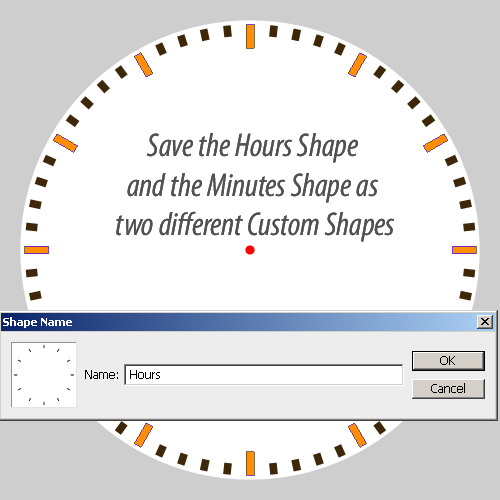
Save the Clock Custom Shape
Ok, so this tut is almost done. We now have 4 layers and we can create some cool clock faces with them. 1. First we can save the Hours Shape and the Minutes Shape like two different shapes. Go to Edit, Define Cutom Shapes menu. This way when we use them we can put different colors, styles, etc.
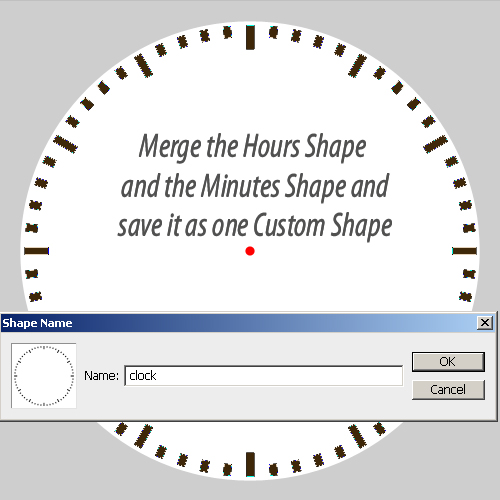
2. Merge the two shapes Hours and Minutes into one shape and save it as custom shape. But you will not have two different colors anymore.
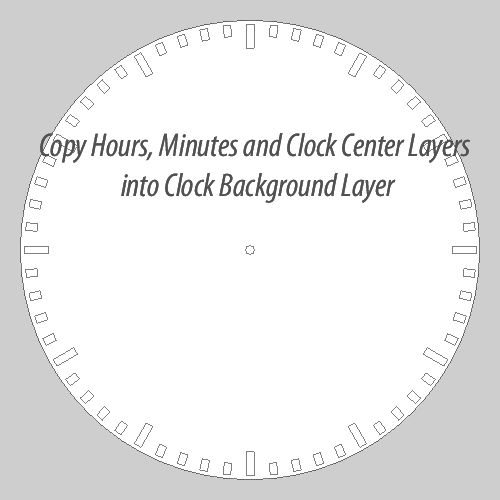
3. Another idea is to copy Hours, Minutes and Clock Center Layers into Clock Background Layer. As you can see we have all the points into one layer.
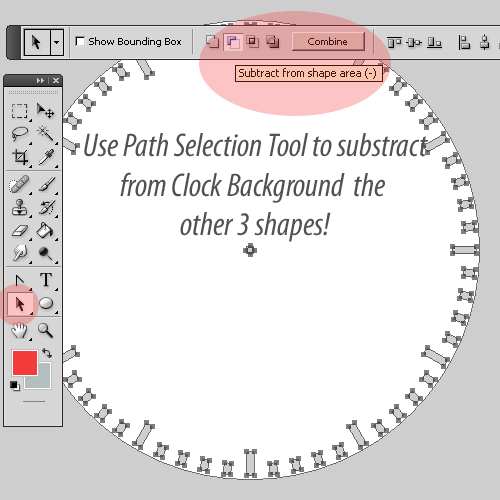
Pick the Path Selection Tool. Select only the points that belong to Hours, Minutes and Clock Center Layers. Now click the Subtract from shape area button and you have a new clock skin that you can save.
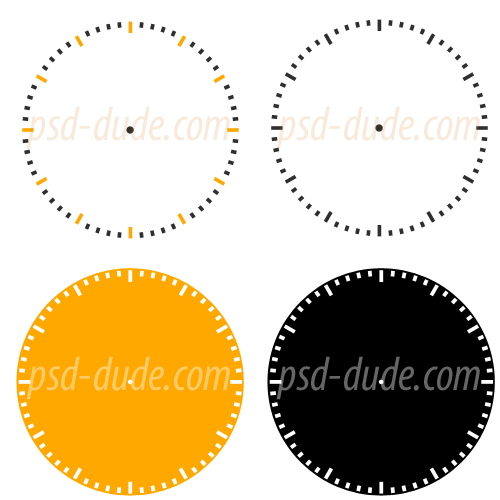
This is my result but you can do so much more with vector drawing!
Create a Custom Shape in Photoshop Tutorial
4 comment(s) for "Create a Clock Custom Shape in Photoshop"