To create a candy cane text you need only 15 minutes and intermediate Photoshop level skills. I will not use textures or other stock images so this is a text effect made from scratch. Let's start!
Choose a font type from this awesome list with over 25 free Cake Fonts that you can download and use for commercial projects. Use the cake fonts online with the MocoFun text editor or install the fonts on your computer and use them in Photoshop.
The list also includes bakery fonts and coffee fonts for making your own logos for free. You can also create interesting food typography usingthese free fonts.
Candy Text Effect
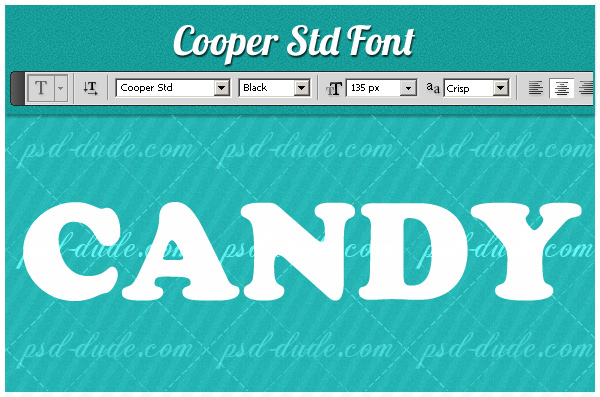
As I mentioned in the tutorial description, the font text is very important. It has to be a big bold and rounded text. You can of course choose any font you like even a thin text but it will not look as good as this. Ok, so I have choosed a default font found on any Photoshop CS4 version, Cooper Std family font, size 135 px.
Duplicate this layer three times, because we will need some extra effects for obtaining a glossy text look. Call them Candy 1, Candy 2 and Candy 3 layers.
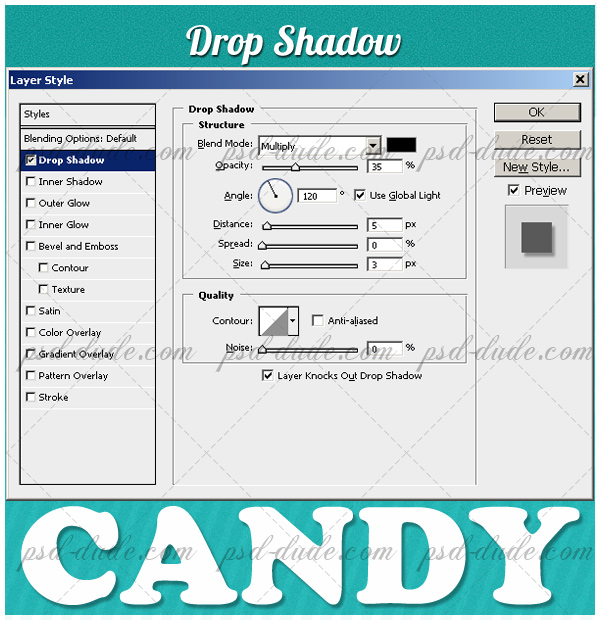
Select the Candy 1 Layer. Now we will quickly add some layer styles to this Layer. First let's add a Drop Shadow effect because we want to visualy link the candy text with the background.
Add an Inner Shadow like in the image; this effect makes the candy cane text look like a 3D text. You can see the result. I forgot to tell you, but you probably noticed that the text color is white.

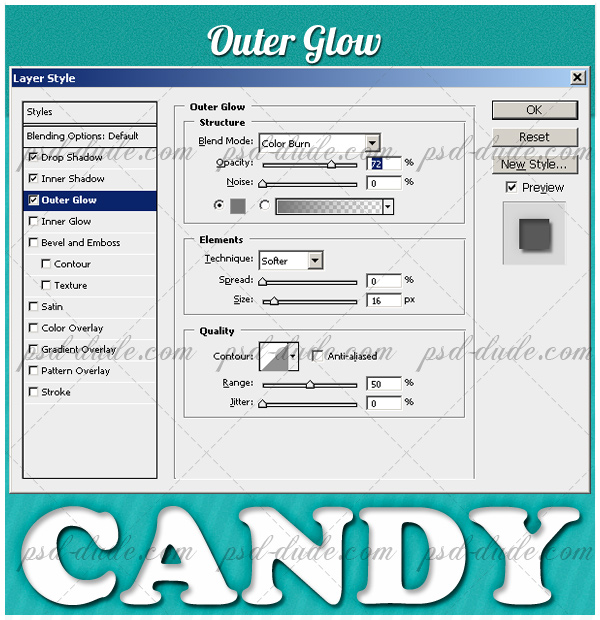
The Outer Glow effect has the same purpose as Drop Shadow, to connect the text with its background.
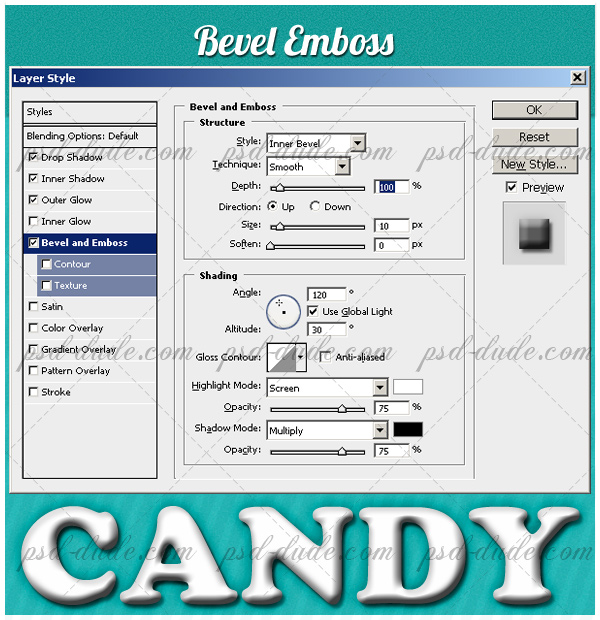
Bevel and Emboss added to the layer style make the text look like is bumped, it's not a flat text anymore. Make sure you set all the items like in the image otherwise you will not obtain the same effect.
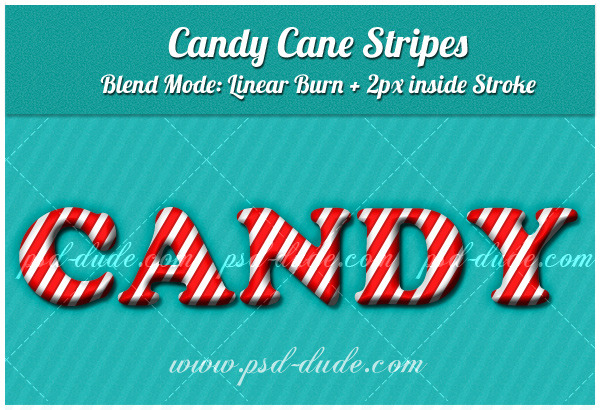
Candy Cane Stripes
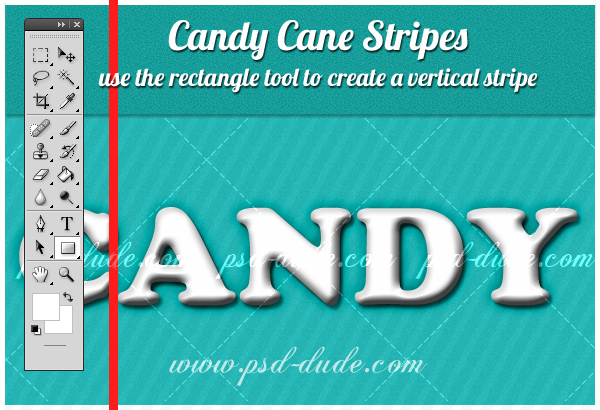
Now I will create some vertical stripes with the help of Rectangle Tool. I could use an easier method and make my vertical stripes using the Wave Filter but I prefer to obtain vector shape stripes. This stripes turn the text into candy cane.
Ok, so let's create a vertical stripe with the Rectangle Tool. Choose a red color, #ff1c1c.
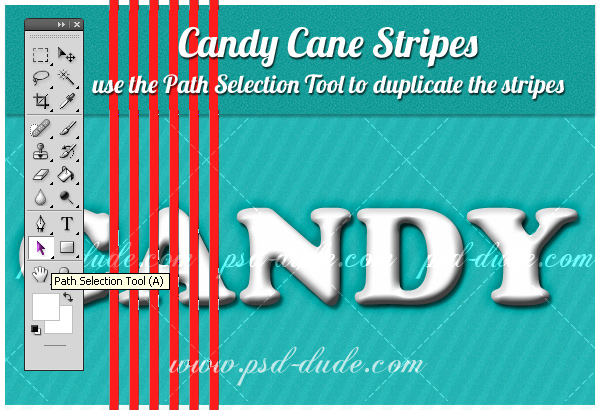
With the Path Selection Tool select the stripe and duplicate it with CTRL+C and CTRL+V. Move the duplicate stripe and duplicate it again. Repeat the process to obtain multiple stripes. To make the process faster you can select with the Path Selection Tool more than one stripe and duplicate.
Use the Skew Tool (Edit, Transform menu) to make the stripes oblique. The next step is to select the Candy 1 Layer (CTRL pressed and click the Candy 1 Layer Thumbnail). With the Stripes Layer selected, press Add Layer Mask.
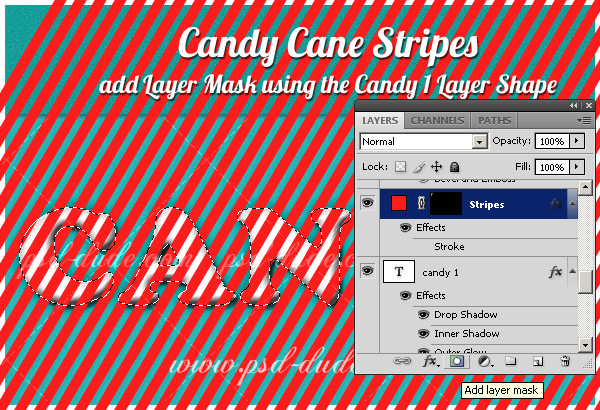
Change the blending mode of the Stripes Layer to Linear Burn, opacity 100%. And also add Stroke 2px size, inside, blend mode Multiply, color #cd1717.
Add Glossy Effect to Candy Text
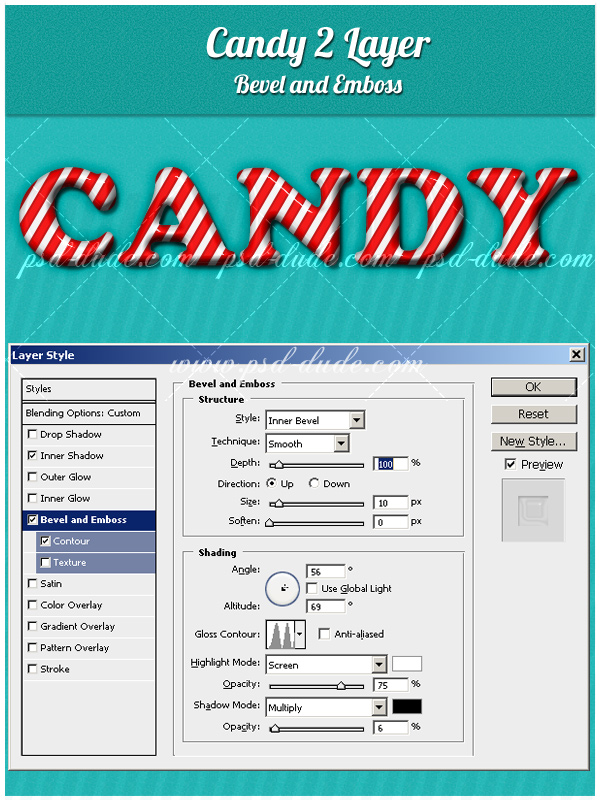
For the final touches I will add some layer styles to the other two layers, Candy 2 and Candy 3 layers. Make sure you set the Fill of Candy 2 Layer to 0% and add Bevel and Emboss.
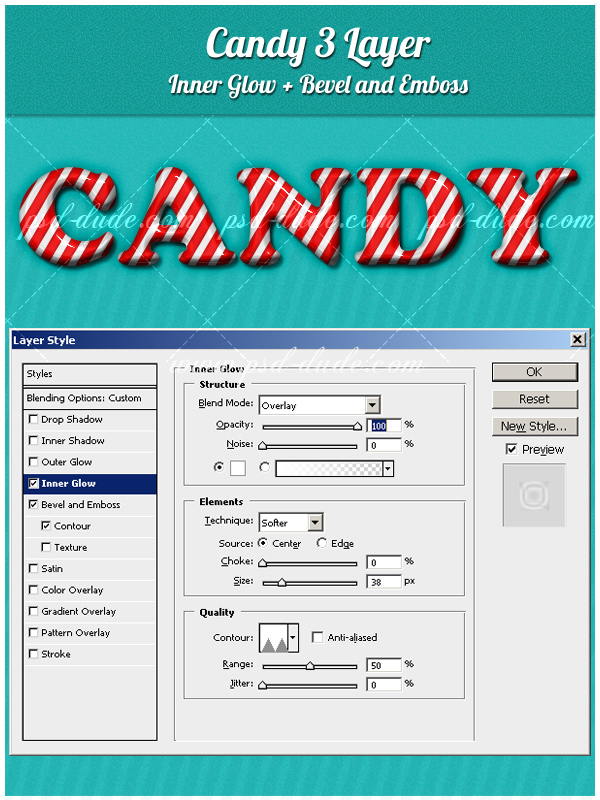
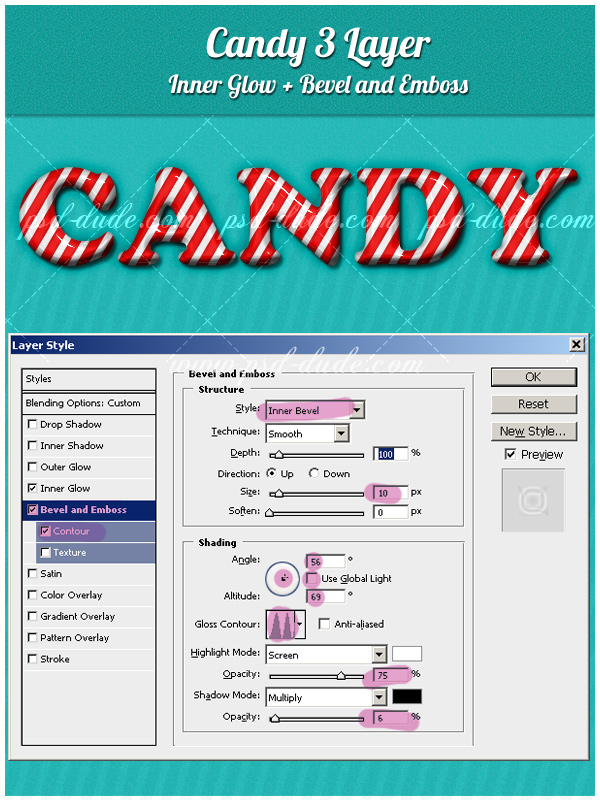
Make sure you set the Fill of Candy 3 layer to 0%. Add Inner Glow and Bevel Emboss to this layer. Make sure you make the right settings. As you can see the Bevel Emboss has some major changes, has contour and gloss contour added.
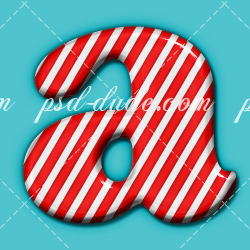
This was the final step of our tutorial, you should now have a result similar to this one. As you can see it looks beautiful not only as red candy cane but also as blue or green candy. You can play with this effect and obtain really nice results.
I would be happy if you share your work inspired by this tut with us. Use the "Upload your fan art" button on the comment section to upload your result!
Candy Cane in Photoshop

Download the candy PSD file with all the layer styles intact. The file is only for learning purposes so the redistribution/selling the file on other websites is not allowed.
DOWNLOAD!(1MB)Online Christmas Card Maker
Did you know you can use online tools like MockoFun to make Christmas cards? Combine Christmas vector shapes with text and create some amazing Christmas cards. MockoFun provides pre-made templates for making Christmas cards online in just a few minutes.
Check out this awesome list of over 50 Christmas fonts that you can use online or download for free to use in Photoshop. Combine Christmas fonts with text symbols like a star symbol for example.
Check out this tutorial on how to use the online Christmas Card Maker and all the awesome features that MockoFun has to offer.

14 comment(s) for "Candy Cane Photoshop Text Effect"
this is the initial draft for this candy effect and I thought I should put this candy cane also to get an idea on how this effect might look on other shapes.
Maybe you get inspired for Christmas cards :)
Candy 1 Layer (keep the CTRL pressed and click the Candy 1 Layer Thumbnail - the result is that little dotted selection around the text - this means that we have a selection of the text)
Stripes Layer ( make sure your current layer is Stripes layer - this means to click on the Stripes layer name )
Now you have a selection of the Candy 1 layer and the Stripes Layer selected - and the Add Layer Mask button is available ! reply
I am really enjoyed doing this one. it was fun. I hope others will be inspired.
I can't seem to get anything to happen..it just stays selected..help? reply
I really don't understand why it doesn't work for you...I have made the steps again and they work just fine.
If you have a Text layer Candy 1 and a Stripes layer that is a vector layer, this are the 2 simple steps that you have to make:
Excellent work. My image is going into an advert in the independant magazine this sunday 17/12/12011.
Thanks
Dan reply
:) reply
If I have both Candy 1 and Stripes layers selected, the "Add Layer Mask" button is disabled. How do you get the dotted selection lines around the letters as shown or remove the stripes around the letters? reply