Tutorial Assets
For this tutorial you will need these stock images, textures and other resources.
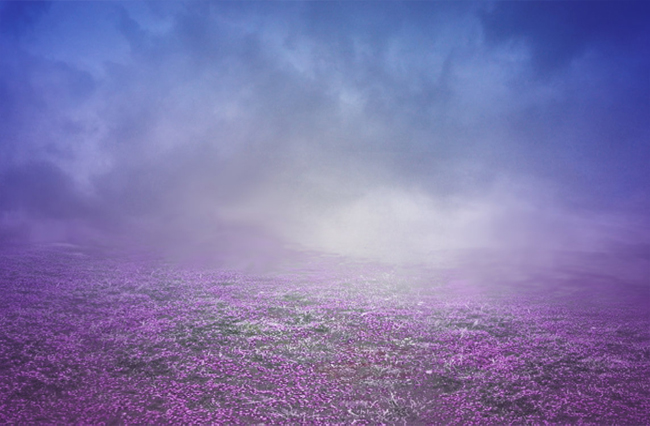
- Flower field premade background
- Dead Tree PNG
- Stone Heart PNG image
- Stone Wings PNG
- Girl PNG
- Seamless Chain PNG
- Key PNG
- Sunlight Overlay
- Bokeh hearts overlay
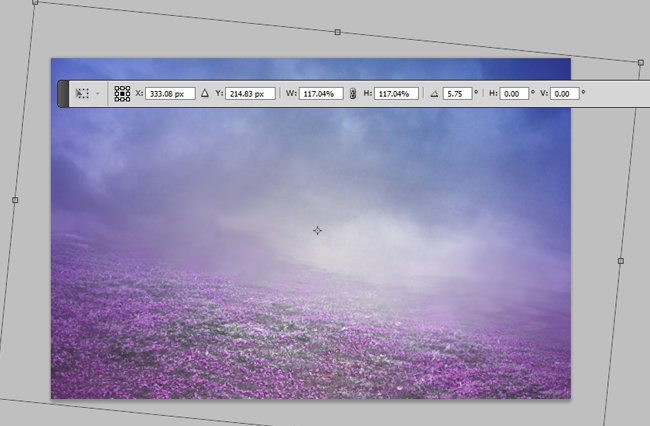
Add this beautiful Flower field premade background in a new layer.
Press Control-T to resize and rotate the image.
Use the Blur Tool to blur the foreground(the part of the photo that is nearest to the observer) of the flower field image. Use a Soft Round brush and 100% Strength.
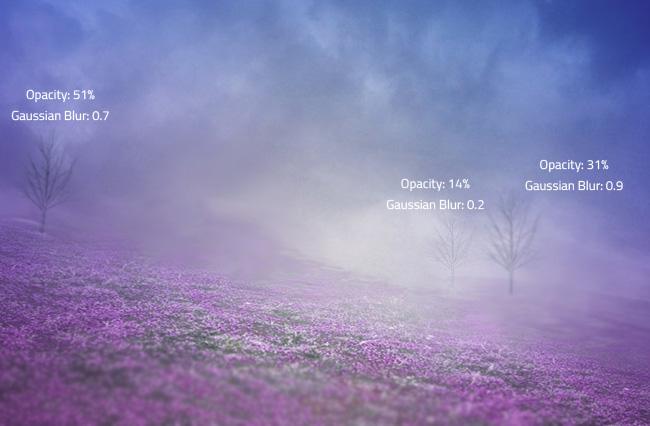
Add this Dead Tree PNG isolated image in a new layer. Duplicate the layer two times and resize and place the trees like shown in the image. Go to Filter > Blur > Gaussian Blur and set the Radius to 0.3 to 0.9. Also set the opacity of the layers to 14% - 51%.
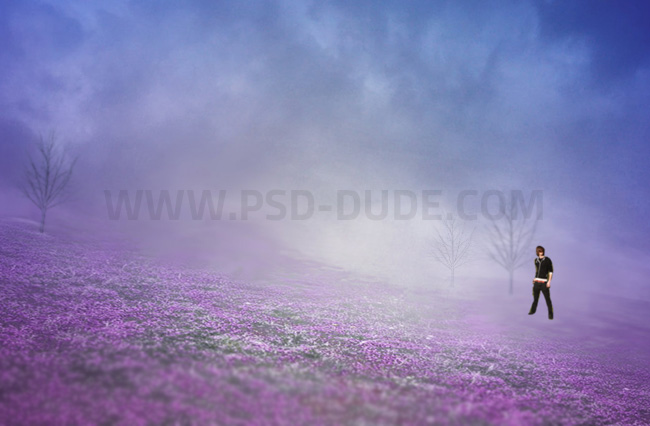
Place this Male Stock image and remove the background using one of the Photoshop Selection Tools techniques. I usually use the Pen Tool for removing the background.
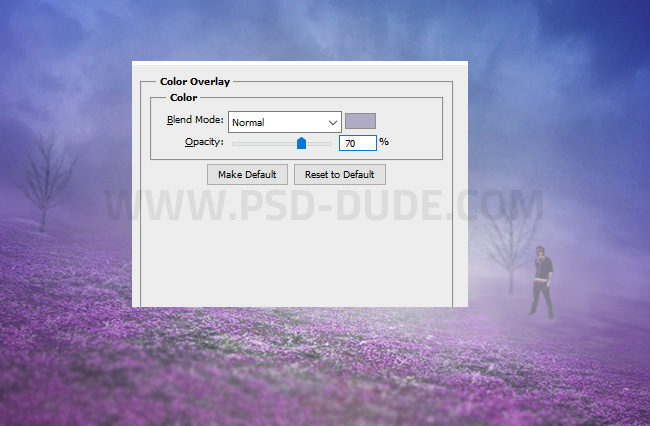
Add a Color Overlay layer style to the Man layer using this color #afabc5. Set the opacity to 70%.
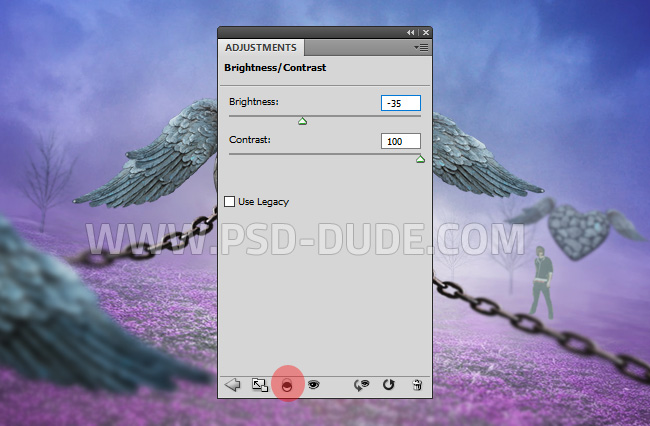
Add a Brightness/Contrast adjustment to lighten the image a little bit.

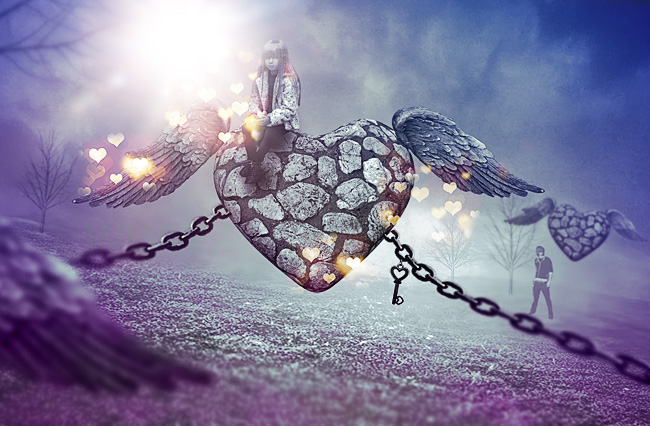
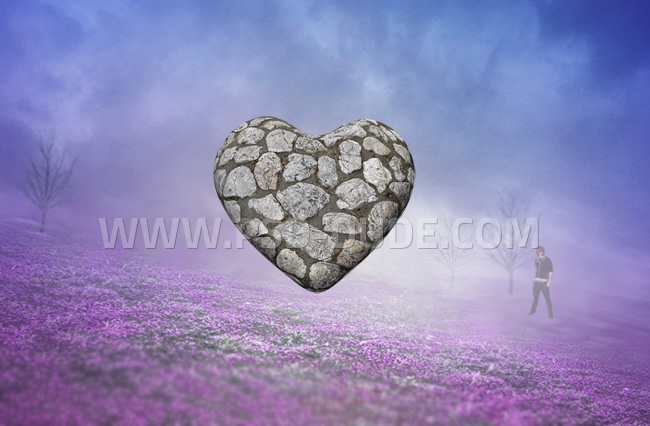
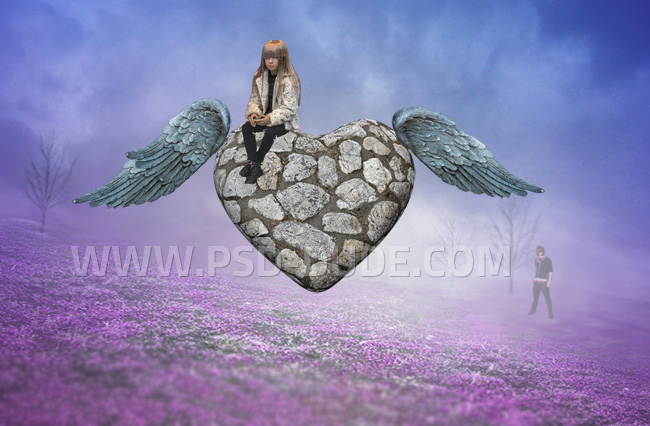
Place the Stone Heart PNG image in your PSD file.
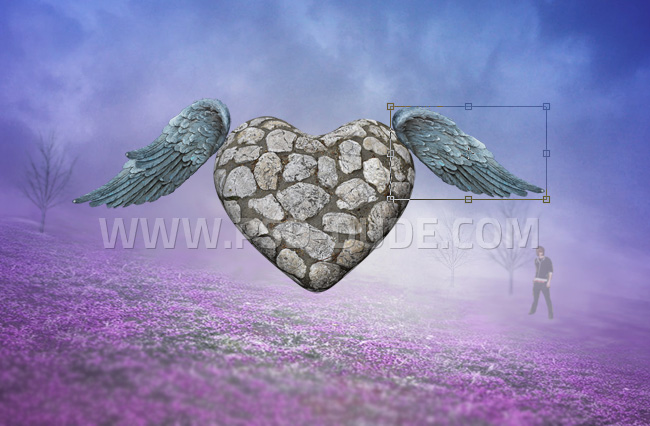
To create a flying heart, add this Stone Wings PNG image. Add each wing in separate layers. Resize the wing and rotate like shown in the image. I resized the image more on the horizontal scale to change its shape.
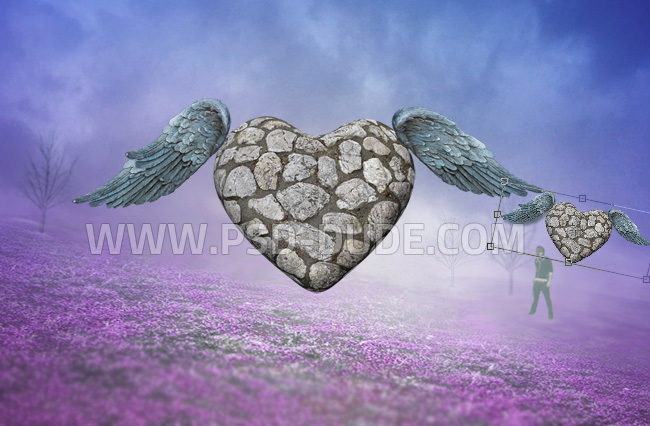
Merge the Stone heart and Wings layers. Duplicate this new layer. Resize it to around 35% and rotate it like shown in the screenshot.
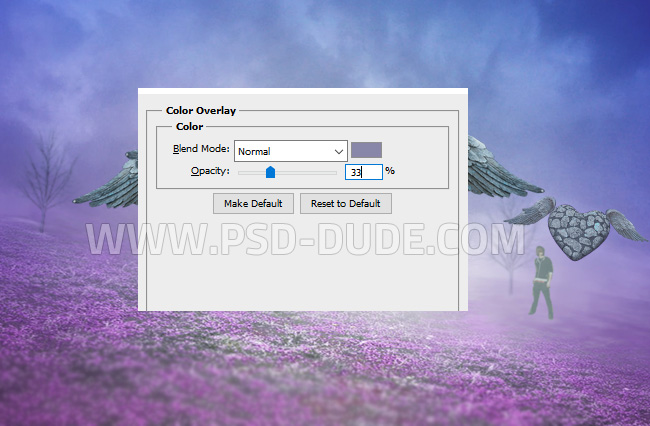
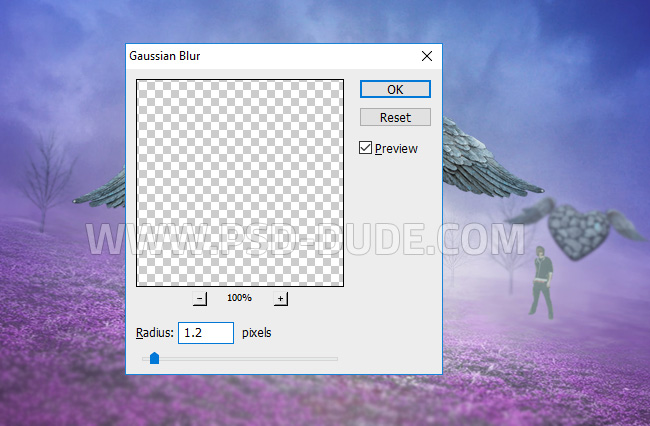
Add a Color Overlay layer style using the color #8886a8 and set the opacity to 33%.
Also add a Filter > Blur > Gaussian Blur of 1.2 pixels. You can also use Motion Blur if you want.
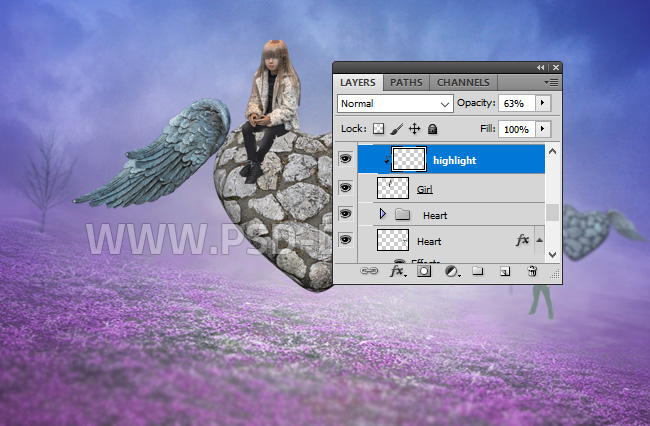
Add the Girl PNG photo on the heart.
Create a new layer above the Girl layer. Right click and choose Create Clipping Mask. Use the Brush Tool and color white to create some highlights. Use different opacity levels and the Blur Tool to create a relistic highlight.
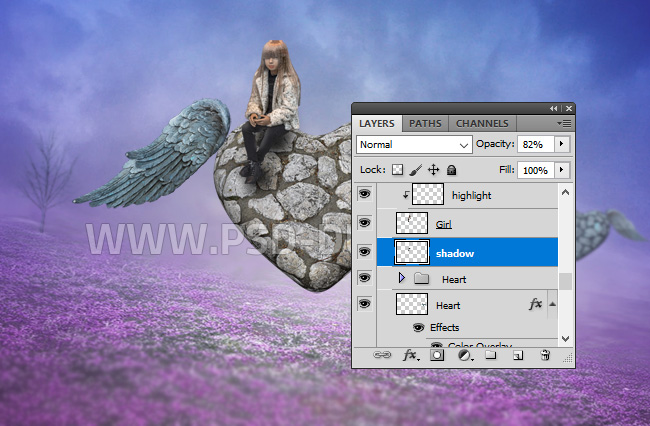
Drop Shadow Photoshop Effect
Create a new layer below the Girl layer. Use the Brush Tool and color black to create a cast shadow effect on the heart surface. Use different opacity levels and the Blur Tool to create a relistic drop shadow effect.
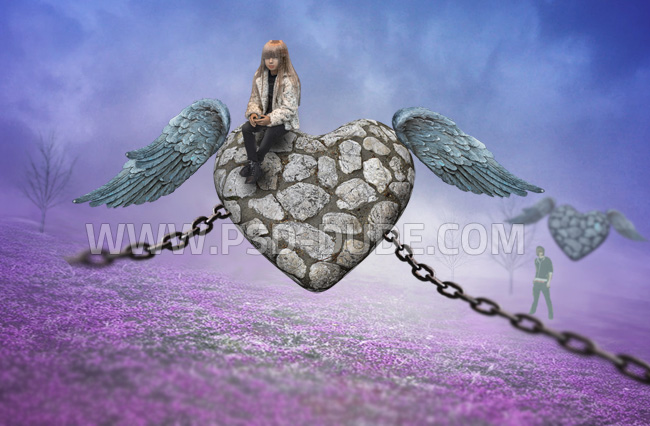
Add this Seamless Chain PNG image in a new layer. Rotate the chian like in the image. Also use the Edit > Transform > Warp tool to create a wavy effect.
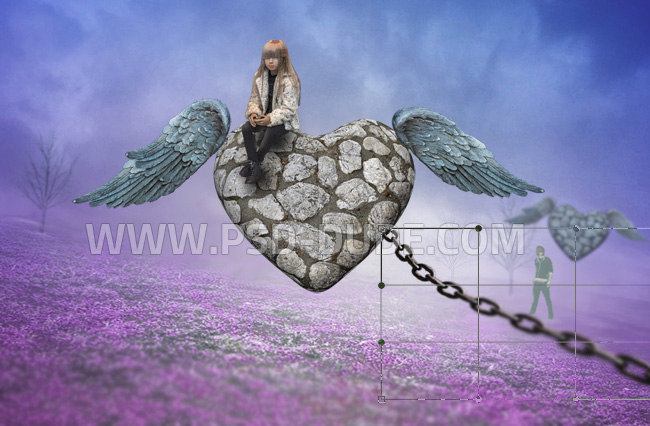
The foreground part of the chain has to be larger in size and also more blurry. So use the Blur Tool to add the blurry effect.
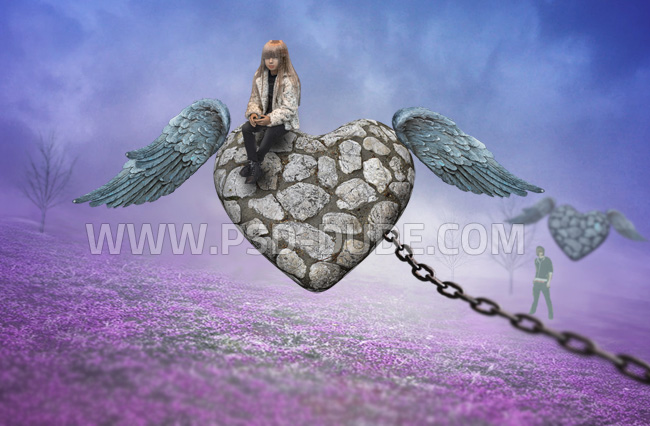
Create a similar chain on the left side. Again Use the Blur Tool and maybe the Dodge and Burn Tools to create highlights and shades.
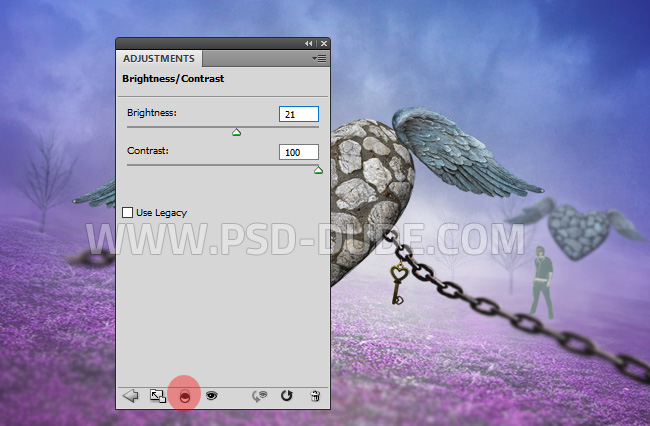
Add this decorative Key PNG hanging on the chain. Use a Brightness/Contrast adjustment just for this layer using clipping mask.
To create the depth of field I used the blurry background and also I added blur to different elements that are in the foreground. To create even more the illusion of depth, let's add the heart with wings in the foreground. Because it is so close, we will see only a part of the wing. So resize the image and use Gaussian Blur.

Add a Brightness/Contrast adjustment layer just for this layer.
Add another depth layer using the Dead Tree PNG. Again only a part of the tree will be visible. Use the Gaussian Blur filter again.

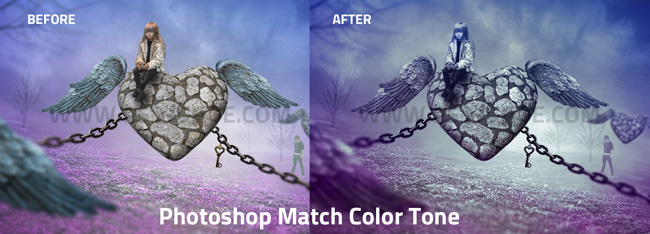
Photoshop Match Color Tone Technique
As you can see all the images that we added have different colors tones. So to blend all the images I wil use a Gradient map. Color match for multiple images in Photoshop can be done using a Gradient Map adjustment layer.
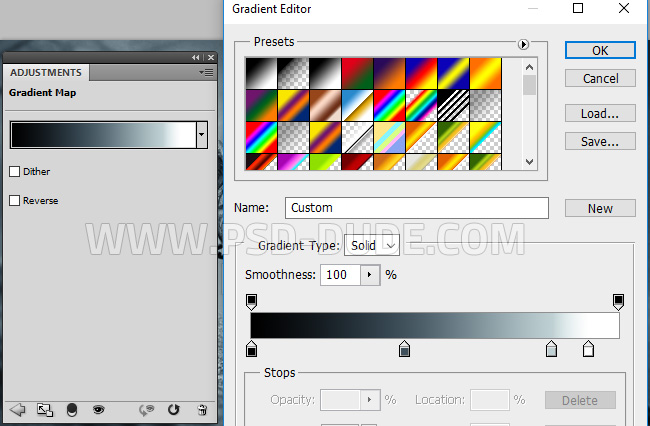
These are the colors for the Gradient Map: #000000 (location 0%), #40515c (location 42%), #bfd0d3 (location 82%) and #ffffff (location 92%). You can see the difference between the two images.
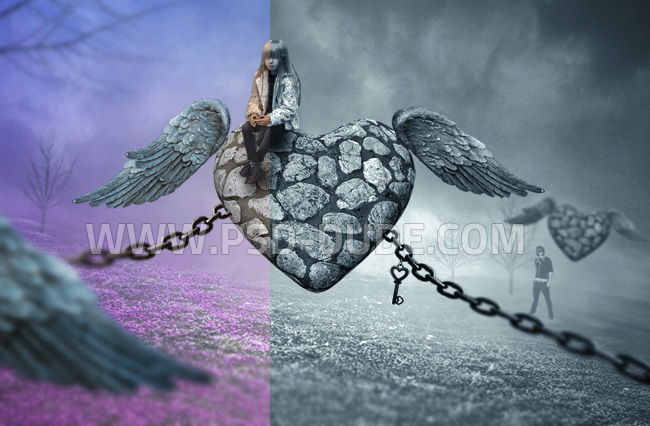
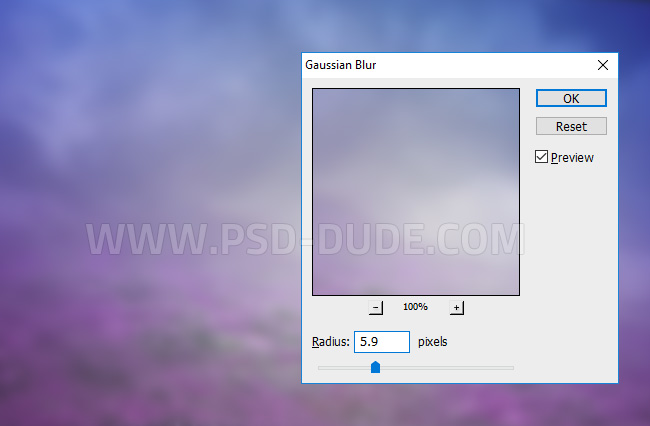
We did what we wanted, to match color across multiple images. But the image is too flat with only one color tone so to add a little color I will duplicate the background layer and place it above all the other layers. Add it a Gaussian Blur effect.
Set the blend mode to Color.
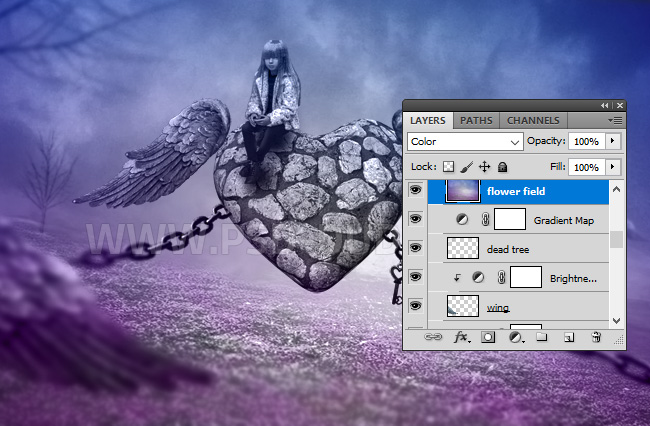
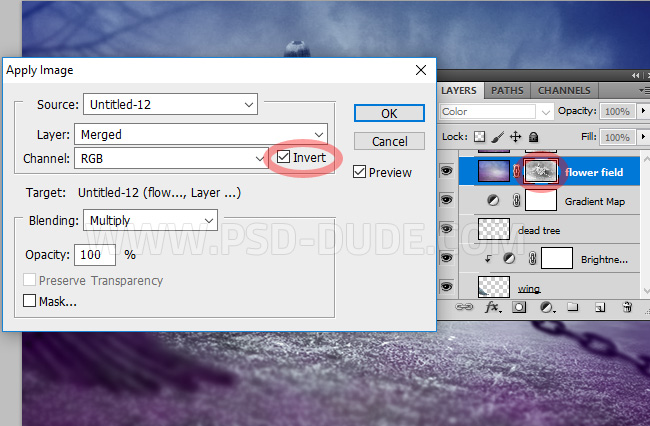
Add a Layer Mask to this layer. Go to Image > Apply Image.
Now to adjust the layer mask go to Image > Adjustments > Levels and make these settings.

Add Sunlight in Photoshop
Use this Sunlight Overlay image to create a light effect. Set the blend mode to Screen and also add a soft Gaussian Blur.
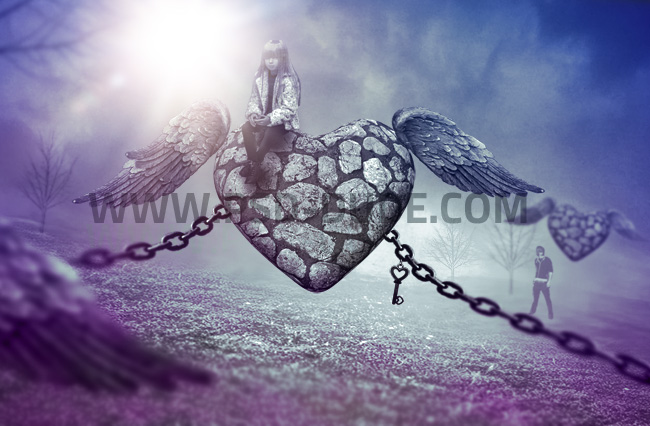
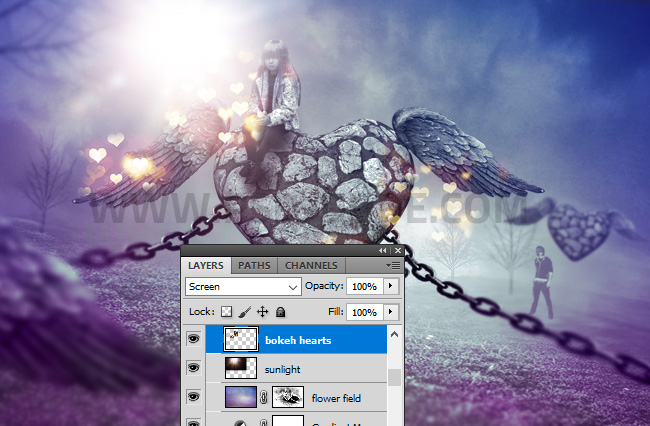
Add Bokeh Lights in Photoshop
I will now add some Bokeh lights using this Bokeh hearts overlay texture. Set the blend mode to Screen and use the Eraser Tool to delete the areas that you don't like. You can add more than one layer.
Sharpen Images in Photoshop
For the final touches you can use the High Pass Filter to sharpen the image in Photoshop as the result will look even better.
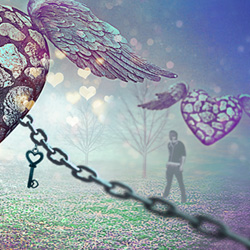
So this is the result for the Valentines Day Romatic Effect made in Photoshop using different stock images, textures, premade backgrounds, color adjustments and filters. I hope you like it :)
5 comment(s) for "Valentines Day Romantic Photoshop Effect"
Sincerely. reply
I added some blood drips on the wings :) I hope you like it!
http://www.textures4photoshop.com/tex/paint-stains-and-splatter/realistic-dripping-blood-png-with-transparent-background.aspx
I'm going to make more of your tutorials. The are really nice!
Thanks a lot for sharing this with us! Nicole
reply
I am so glad you liked our new Photoshop tutorial for Valentine's Day!
Me and my team really appreciate all the feedback, so thank you very much for your comment :)
By the way if you want you can share your result with us.
reply