


Step 1 - Write the Text
Today I want to show you a cool fire text effect in Photoshop. You can use this fire text as is or you could also add it over a photo. Check out this tutorial for how to edit text in image using Photoshop.
Create a new layer with a black square. Call this layer BACKGROUND LAYER Make a new layer with a text , color #f0462c.Call this layer RED LAYER

Duplicate this layer and make the text white. Call this layer FIRE BOTTOM
Select layer FIRE BOTTOM and Edit - Transform - Rotate angle 90 degree. We will add a Wind Filter and that filter only works on horizontal. We will rotate this layer back.

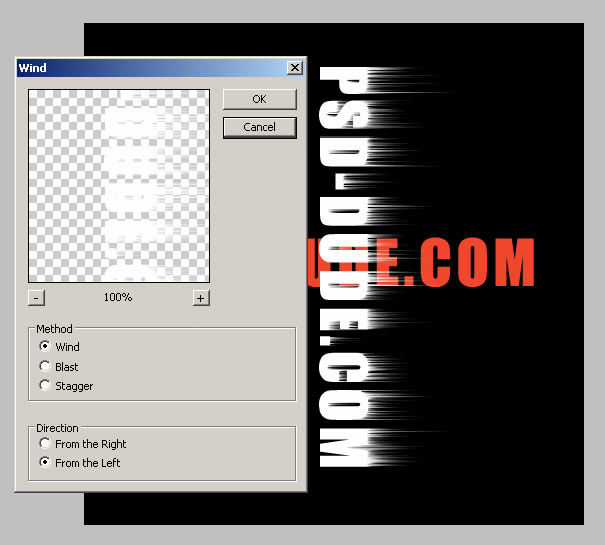
Step 2 - Add your Wind Filter to Your Text
For FIRE BOTTOM layer go to Filter - Stylize - Wind , select From the Left option. Apply this filter twice or three times it is up to you. You should have something like this
Step 3 - Add Wind Filter to Your Text
Now rotate the layer back to horizontal. Go to Filter - Blur - Gaussian Blur and choose 1,7.
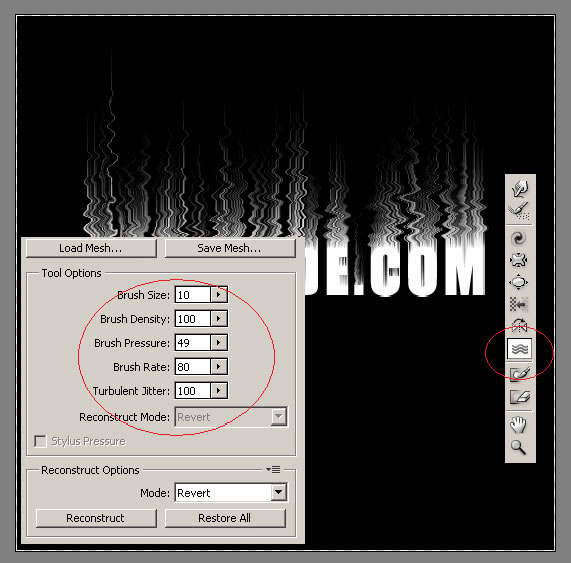
VERY IMPORTANT !!!!!!!!!!!Merge the FIRE BOTTOM with the BACKGROUND layer ; Call this new layer FIRE EFFECT LAYER.
Now go to Filter - Liquify and with the Turbulence Tool size 7; density 100; pressure 49 and from left to right start making waves.
Step 4 - Add Fire Color to Your Text Flames
Lets add some color. Work with Fire Effect Layer and go to Image - Adjustments - Hue/Saturation and select Colorize so we can fiddle with the color. Bring Saturation up to 100 and set Hue to about 40.
Duplicate this colorized layer and select this duplicate in the layers palette. Select Image->Adjustments->Hue/Saturation again, this time with Colorize off. Set the Hue to -20 to make the flames red. Set the Blending Mode of this duplicate layer to Overlay. Call this layer Fire Effect 2 Layer. Now we've got some nice looking flames:

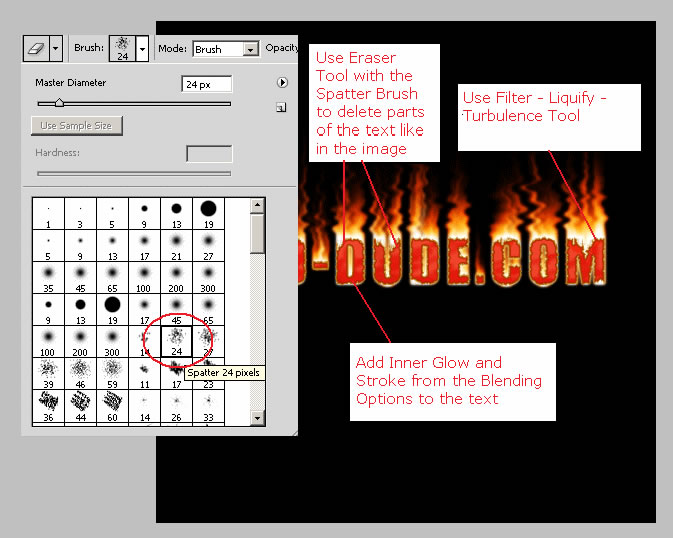
Step 5 - Bring the Text to the Front and Add it Effects
Now bring to front the RED Layer. I will apply to this layer different effects from the Blending Options window.
The first thing that you need to do is to go to Image - Transform - Scale and scale the text a little.
Than go to Filter - Liquify and with the Turbulence Tool brush between 4 and 7 and play with density , pressure , rate to see which is the best for you and simply disturb the edges of the text.
For a better effect I have used the Burn Tool to give more color to the text.
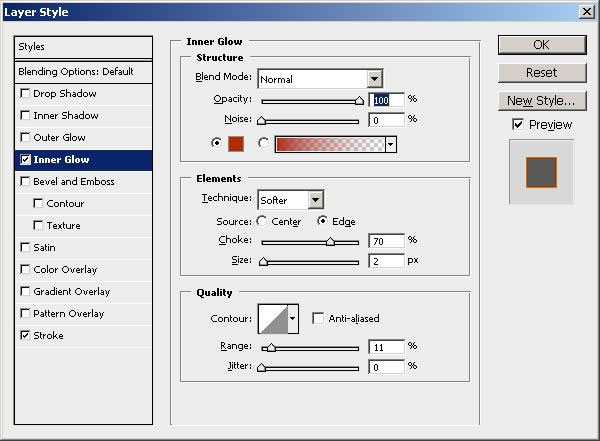
It is now time to make two settings in the Blending Options of this layer:
Stroke with color #ba780e
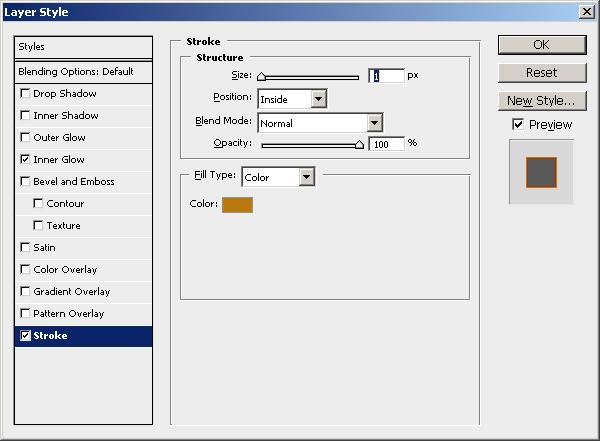
Inner Glow with color #b12b01
This is the result we have so far:
Step 6 - Text with Flames Sample 1
Now I will take this image and show you four different ways to change this text effect. The image below is Sample 1.

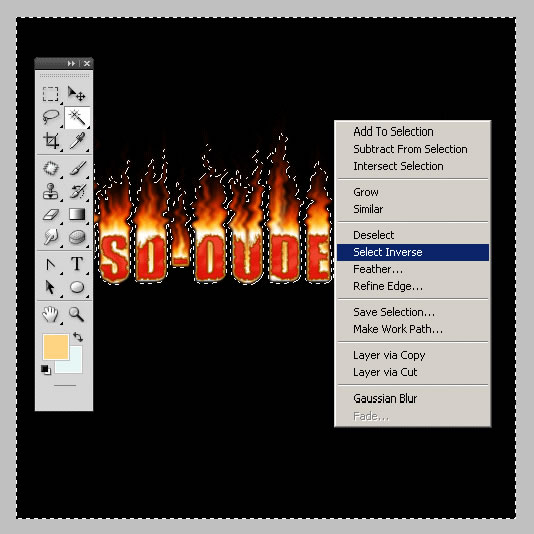
Step 7 - Text with Flames Sample 2
Take the Magic Wand Tool , go to Fire Effect 2 Layer and select th black area. Right click and select inverse. Press CTRL+C and CTRL+V. A new layer was created. Call it Sample 2 Layer.
Go to the Blending Options of Sample 2 Layer and do the following settings:
Outer Glow , color #694305
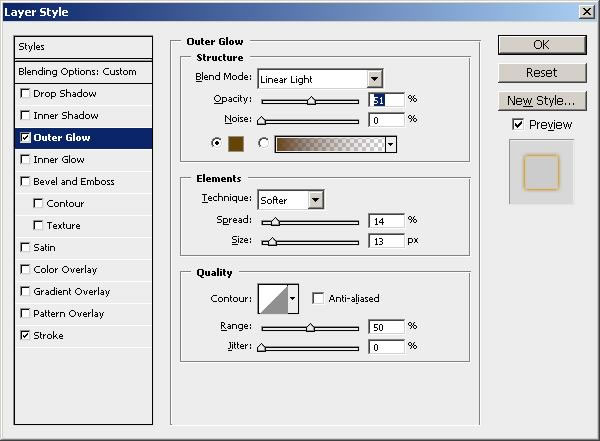
Stroke, color #d16719
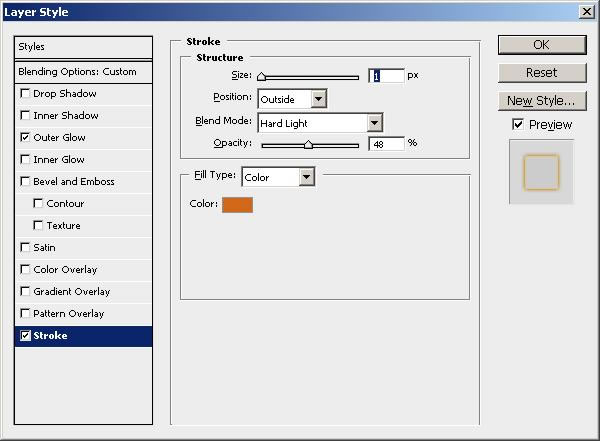
Change the Blending Mode of this layer to Overlay 100%. This is the Sample 2:

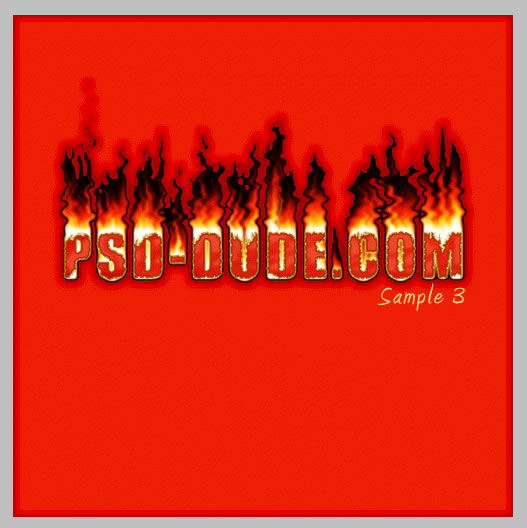
Step 8 - Text with Flames Sample 3
Take the Magic Wand Tool , go to Fire Effect 2 Layer and select th black area. Press CTRL+C and CTRL+V. A new layer was created. Call it Sample 3 Layer.
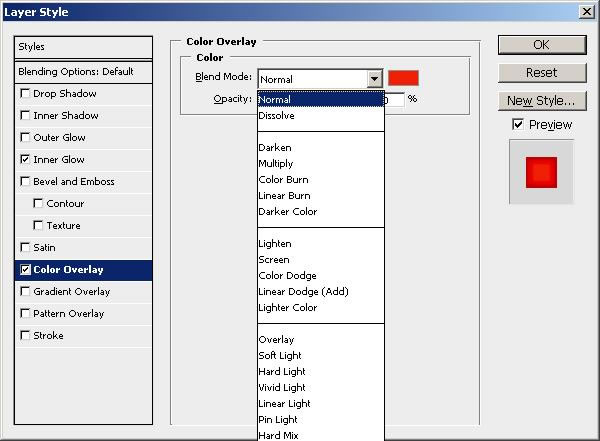
Go to Blending Options of Sample 3 layer and do the following settings:
Inner Glow, color #3d180c
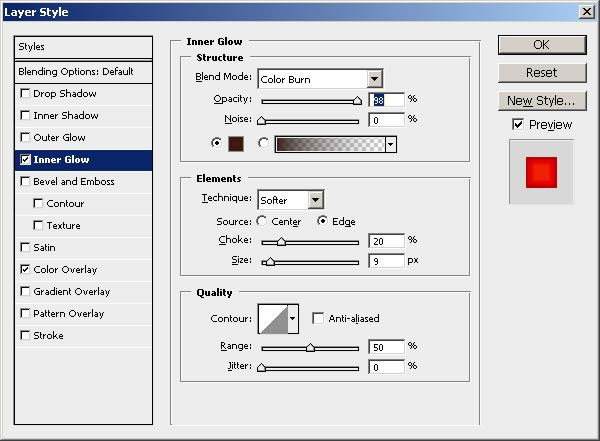
Color Overlay , color red. With this setting you practically change the color background of the fire text; you can play with colors and bending mode of Color Overlay to obtain a nice result:
This is the result for Sample 3:
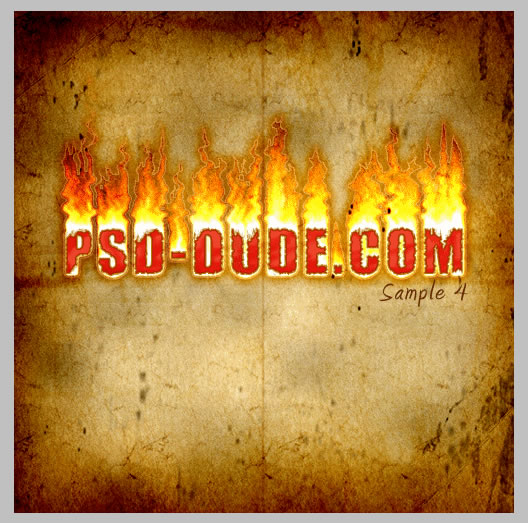
Step 9 - Text with Flames Sample 4
For this last sample I will add a texture into the scene. So hide the Sample 3 Layer and copy this beautiful old paper texture.
Place this Texture Layer right under Sample 2 Layer and change the Blending Mode to Linear Light 100%. Resize the image to have the dark frame in your canvas.
And this is the Sample 4:

10 comment(s) for "A Beautiful Way to Set Your Text on Fire"
reply
reply