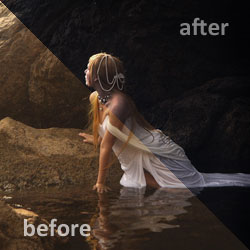
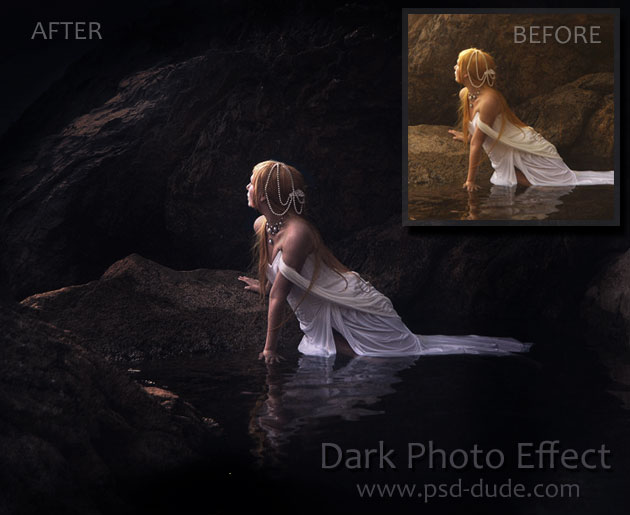
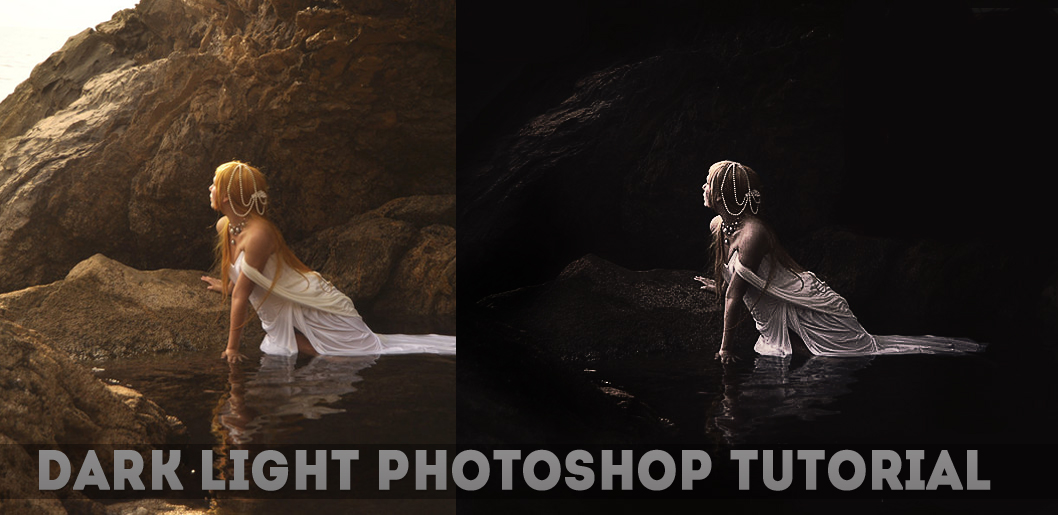
In this new Photoshop tutorial I will show you how to darken a photo and to obtain a more obscure photo effect, with less saturated colors. As you can see in the preview image the idea is to make de background dark and to lighten some areas/models. By adding this shady effect, you can clearly see that the mood of the image changes dramaticaly. This photo effect works great especially for people photography, action photography, portraits and so on.
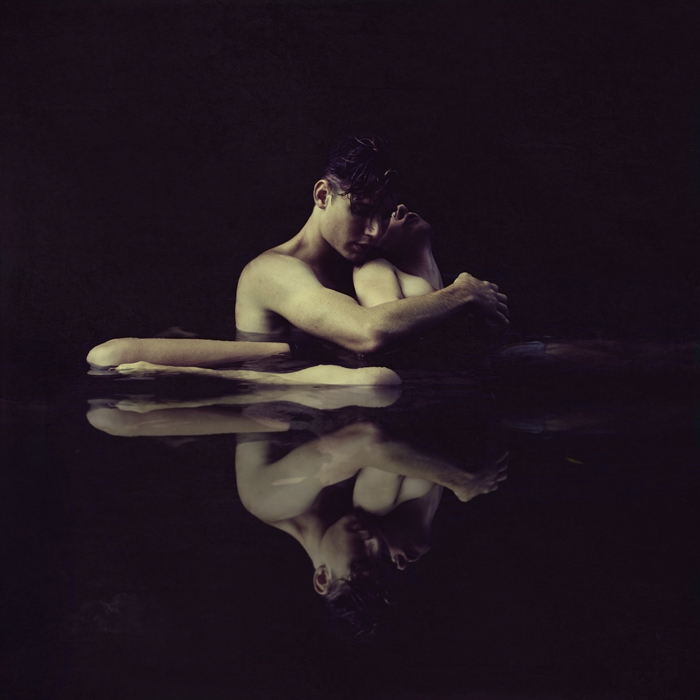
Actually I have tried to recreate the effect achieved by Brooke Shaden in one of her photos, from the serie "Frozen in Water" that you can see below. This photography shoot is all about beauty in darkness. It is a mixture between light and dark to create this misterious look.
Dark Color Photo Effect in Photoshop
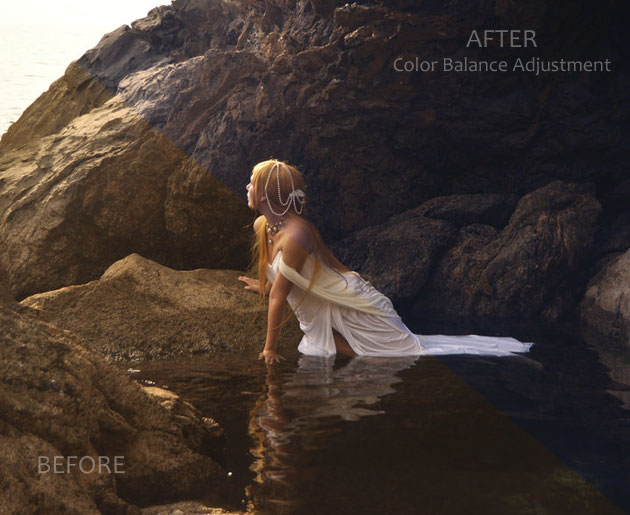
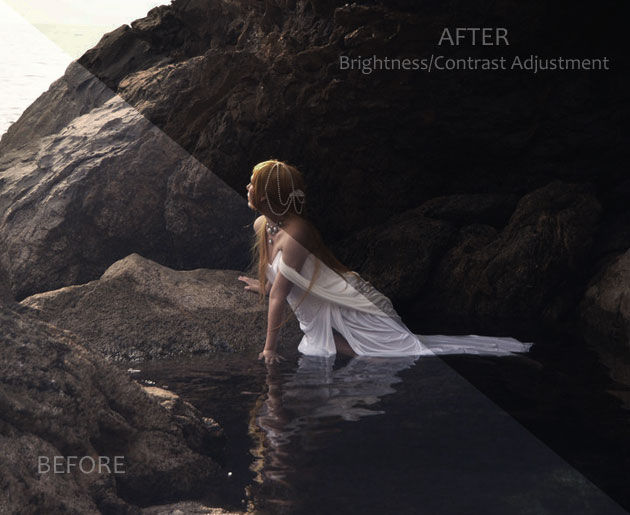
Here is the before and after applying the photo effect preview image. As you can see the we have reduced the brightness, increased the contrast and also changed the color tones and the hue/saturation levels. All I can say is that even if the process is the same, you have to adjust the levels depending on the type of photo that you have.
First we have to pick the photo that we want to transform. I picked up this image Nereid 2 simply because it has the water and water reflection elements. And also because of the yellow tone color and other things that will explain later on.

Color Adjustment
Name this first layer Original Image Layer so that we can refer to it in the following steps. Let's start with a simple color adjustment; as you can see the image has a yellow/orange color tone that we want to change, to look more like the "Frozen in Water" image.
To do that press the button Create New Fill or Adjustment Layer that you can find in the bottom area of the Layers Tab. So press the button and choose Color Balance/b> with the following settings:
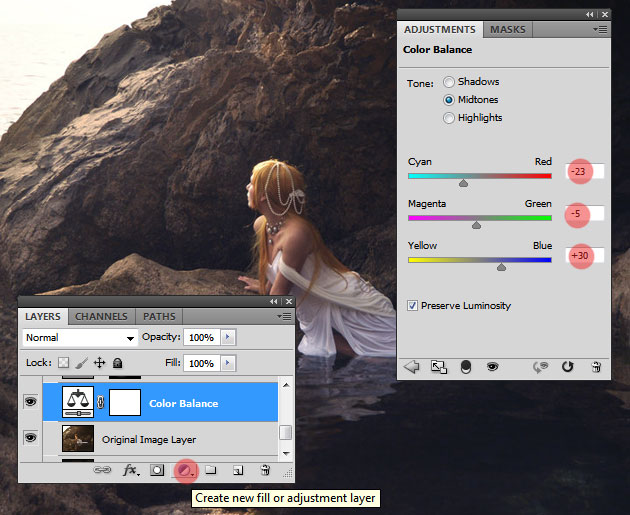
Here is the before/after color adjustment preview image. As you can see we have increased the blue color, cyan and magenta. But remember that these settings apply only to this image; you have to adjust the settings according to your image. It may not be necessary to make color adjustments!
Hue/Saturation Adjustment
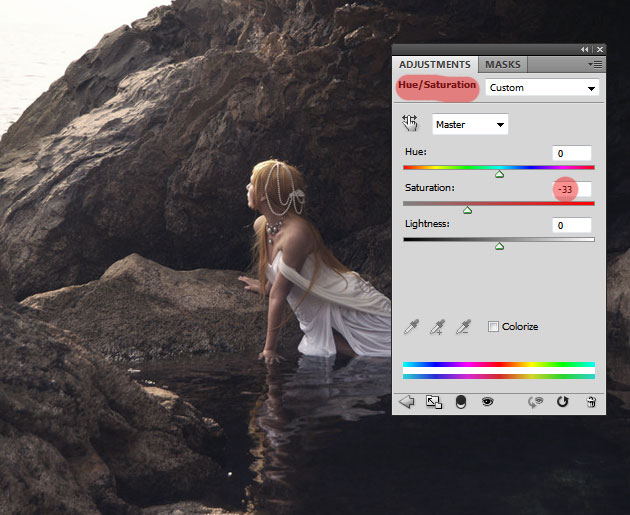
Press the button Create New Fill or Adjustment Layer but this time choose Hue/Saturation; we are doing that to decrease the saturation level and take the colors to more neutral tones. Again you may choose not to use this adjustment!
Brightness/Contrast Adjustment
The most important adjustment layer is the Brightness/Contrast that we are adding in this step. We simply darken the entire image by decreasing the brightness and at the same time increasing the contrast level.
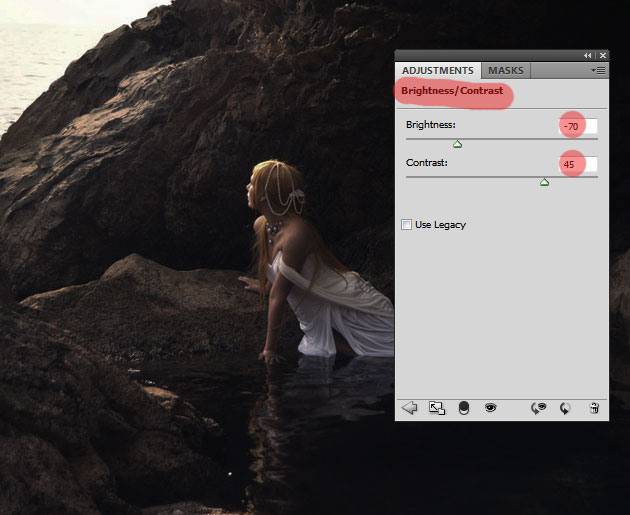
Even if this layer is mandatory, the setting will fluctuate from image to image. So it is important to adjust it right; the good thing is that you can return any time to all of these Adjustment Layers and modify the settings by double clicking on theit thumbnail.
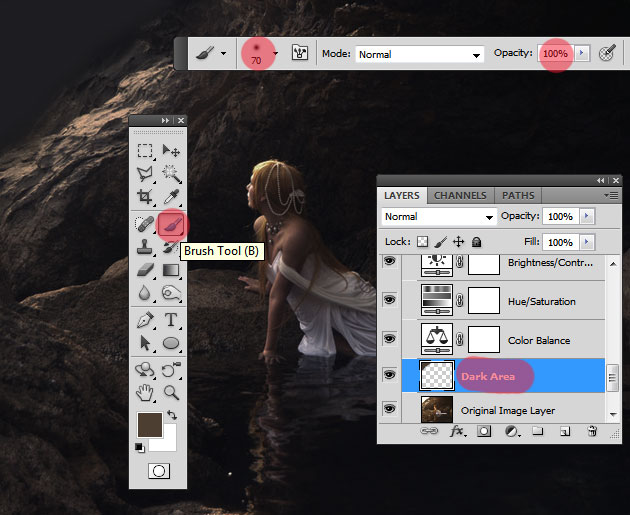
As you can see we have a pretty decent result so far. But what we are going to do with that white area in the left top corner? It is clear that we have to remove it. To do that there are several methods; you can pick the Burn Tool, Highlights Range and darken that area in the Original Image Layer or you can choose an even easier way. So, create a new layer just above the Original Image Layer and call it Dark Area Layer. Pick the Brush Tool(choose a Soft Round Brush, size around 70px, opacity 100%) and simply paint over that area. Pick a color from the image dark colors, for example #4c3e31.
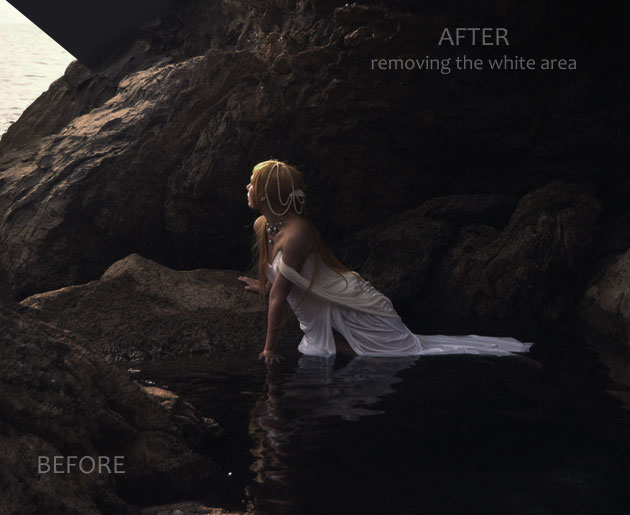
Here is the before/after removing that white area. Again it might not be necessary to use it but it is better to know how to deal with every unexpected detail.
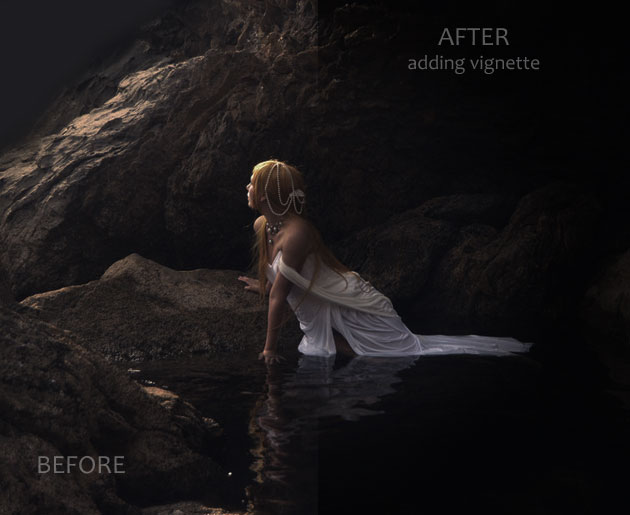
Add a Vignette in Photoshop
create a new layer above all the other layers. Fill it with white color. Reduce the Fill to 0% and add a Gradient Overlay in the layer style window. I will use a transparent gradient from 100% opacity to 0% opacity with color black. Choose the radial style, opacity around 60% and blend mode Hard Light
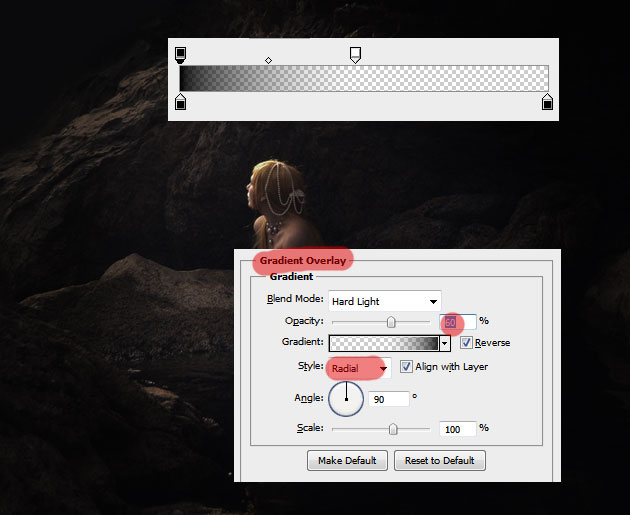
The vignette as you can see frames beautifuly the girl image. You can drag the gradient using the Move Tool while being in the Gradient Overlay window.
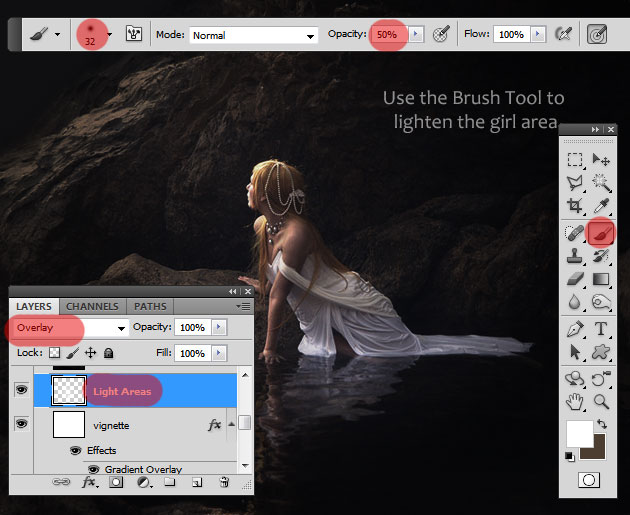
For the final touches add a new layer called Light Areas. Change the blending mode to Overlay for this layer and with the Brush Tool(choose a Soft Round Brush, size around 40px, opacity 50%) and simply paint over the girl and girl reflection area using white color. Playing with different brush sizes and opacities make certain areas brighter. You have to obtain a similar result.
If you want you can add a Photo Filter adjustment layer with Violet filter, density around 20%, just to make our result look more like the original image. So here is the final transformation of this photo from light to dark, made trough a few simple steps in Photoshop. To add different color variations and other effects you can try using a photo action. I hope you like it and I am really looking forward to see your results so upload them on our comments section.
If you want to sharpen blurry image Photoshop and to learn how to sharpen photos in Adobe Photoshop you can use some of these High Pass Filter techniques for instant results.
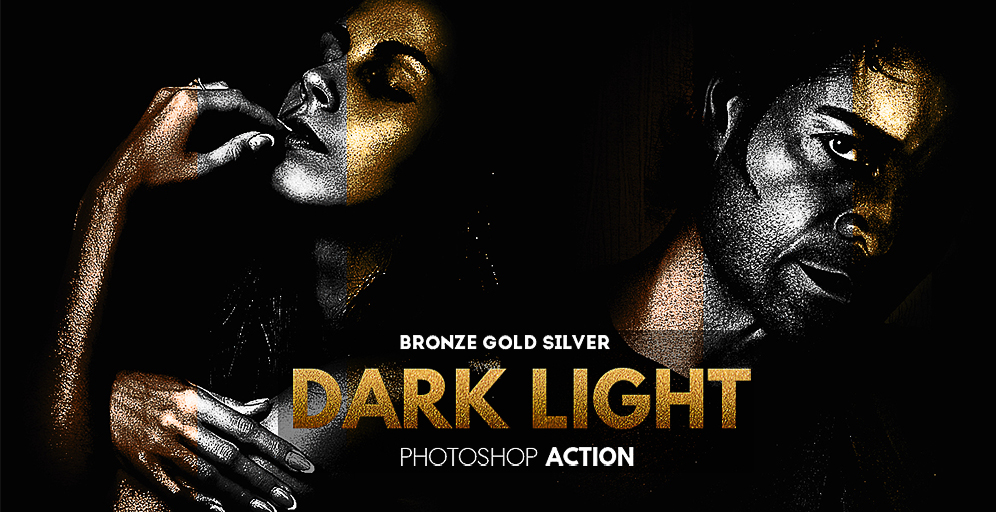
Dark Light Photoshop Action with Gold Skin Effect
9 comment(s) for "Photoshop Dark Photo Effect"
Soft Focus Shade Effect Photoshop Action
DOWNLOAD HERE
Was looking despertely for this kind of tutorial.
Regards
manas reply