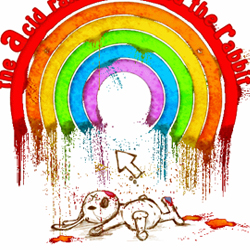
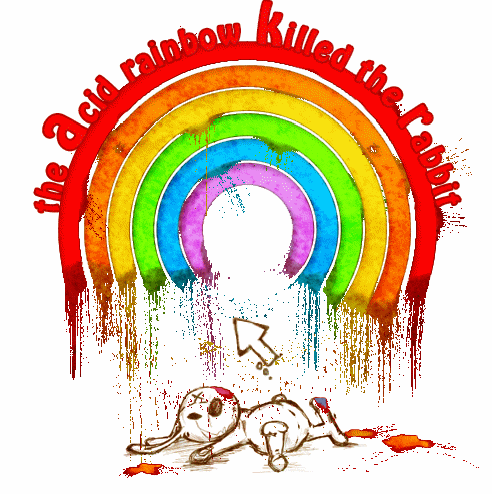
Step 1 - Create the rainbow
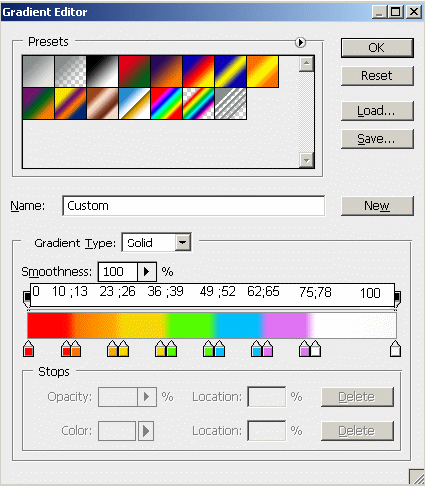
Open a new file, size 500/500 pixels. With the Ellipse Tool draw a perfect circle. Te color is not important. Call this layer Shape1. Lets add a gradient to this circle. Go to Blending Options and do the following settings:

The color for the gradient are:red #fe0101, orange #fe7201, yellow #f6d707, green #54fe01, blue #01bffe, purple #e073f4 and white.
As you can see I put the colors 2 times on the gradient at 3 % distance because I ont want to have a gradient from one color to another. I want distinct colors.
In the picture below I put all the distances for each color.
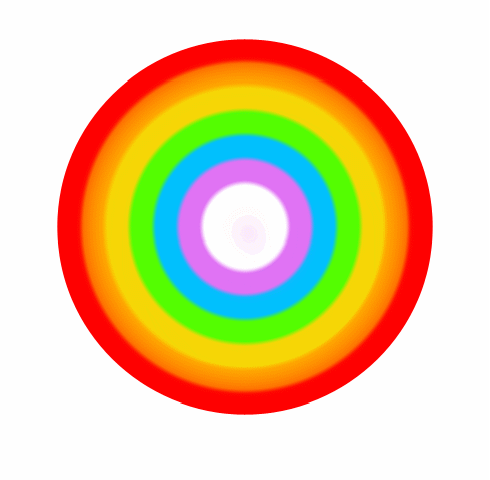
The result so far is this:
Step 2 - Rasterize the image
For now we have a vector shape with effects applied; I can not modify it as I want to so duplicate this layer and call it Shape2. Select the 2 layers Shape1 and Shape2 and merge it into one layer. Call this layer Rainbow.
Now with the Magic Wand Tool, tolerance 0 select the red area and press CTRL+C and CTRL+V. Another layer was created only with the red area from the rainbow. Call this layer Red.
Do the same for the other colors from the rainbow. You should obtain 6 new layers.
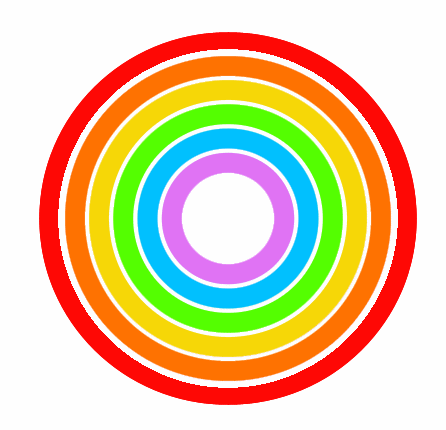
Hide the Rainbow layer. The result so far is this.
Step 3 - Add Blending Options to the Color Layers
I will take as an example the Red layer. Go to Blending Options of this layer and do the following settings:
Inner Shadow color #b70303
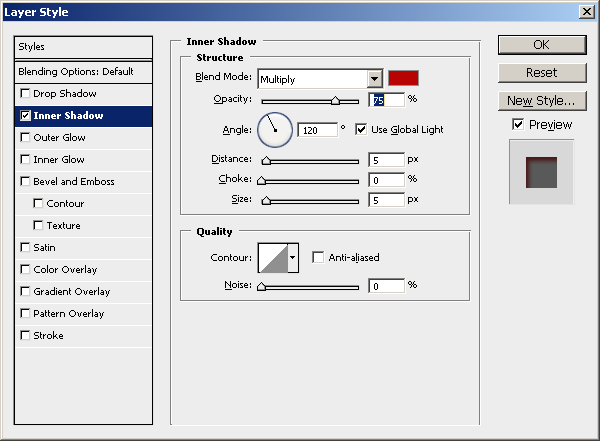
Stroke color #820202
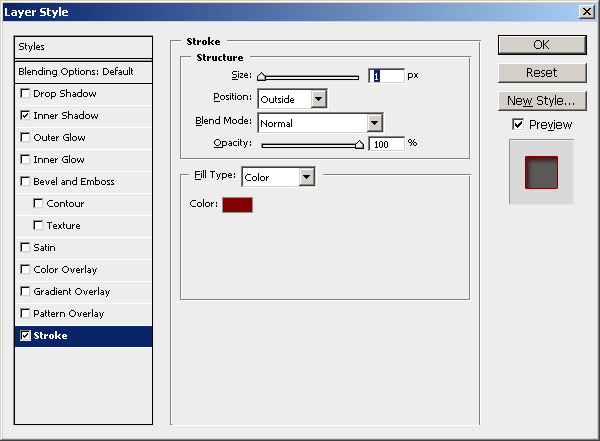
Do the same for all the other layers but with different colors from the palette of the layer color.
Y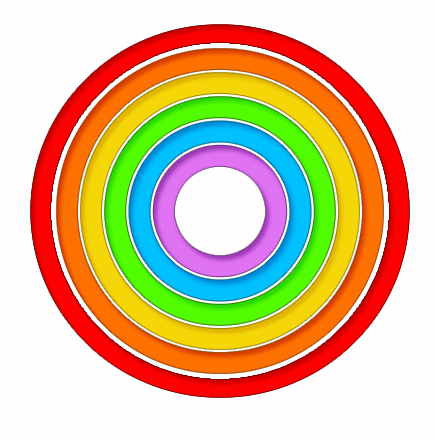
ou should obtain something like in the picture above.
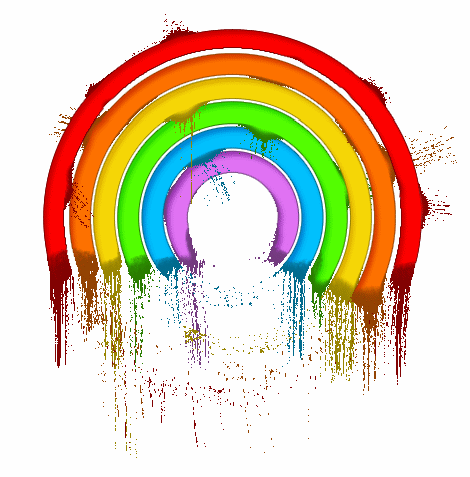
Step 4 - Add Rust Effect to the Rainbow
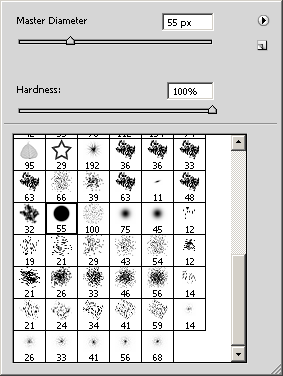
Go to every Color layer and delete the bottom part of the circle with the Eraser Tool, brush size 55, opacity 100%.
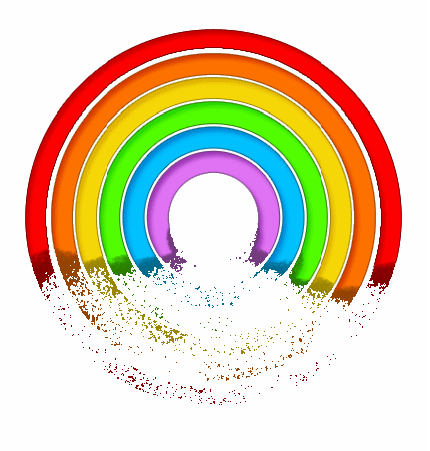
With Smudge Tool size 31 and opacity 25% , mode normal , smudge in the directions indicated in the image. Do the same for all the layers.
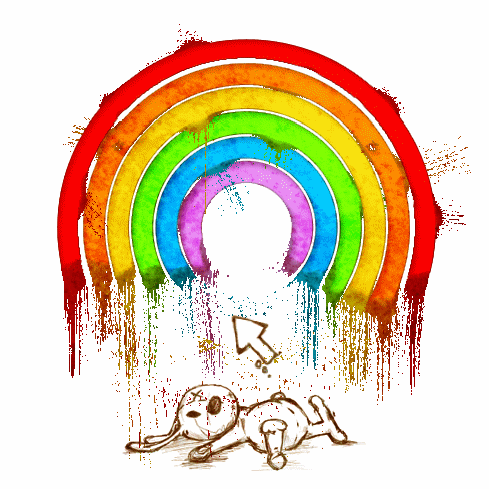
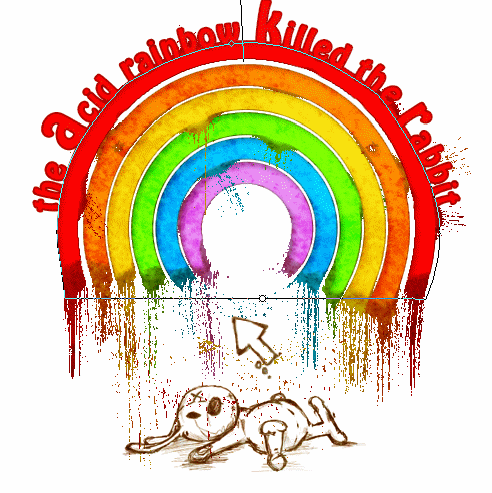
Step 5 - Add the rabbit brush
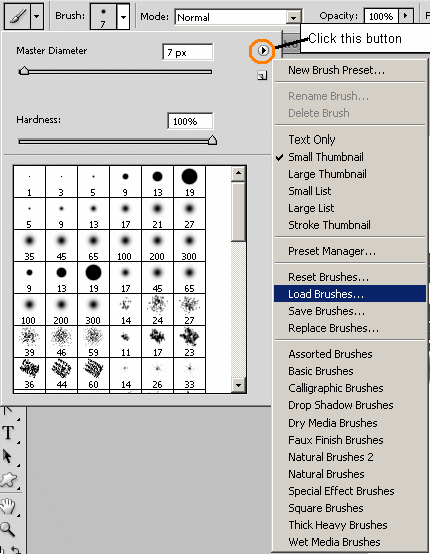
I have found a very nice cartoon brush set. So download this brush set.
It is an archive. Save it on your computer; right click on the archive an choose extract here. Now return to photoshop and select Brush Tool. Click the little button and choose Load Brushes...; search the path where you have downloaded the brush set and load the file with the extension "abr".
Set the Foreground Color to #342402, size of Brush Tool is 235 and pick from the brush list the bunny.psd and arrow.psd.
The result for now is this:
Step 6 - Add the text
It is time to add some nice text effect.
Use the Pen Tool to draw a simple vector shape like in the picture below. Be careful to choose Paths from the top bar; this way your shape will not be visible and the most important it will help you write a custom aligned text. Click on the shape to write the text following the path. If the text is perfect horizontal it is not good try again!

After you've drawn the shape with the Horizontal Type Tool write the text "the acid rainbow killed the rabbit". The settings for the text are:

If you want to move the text along the path simply drag one of the points from the picture below and the entire text will follow the path. If you want to modify the shape than choose Convert Point Tool from the toolbar and click on the vector points and move them up /down/right/left. It works just like another vector shape. You can Add points, Delete Points, etc.
As you can see some letters are bigger than the rest....select that letters and change the size.
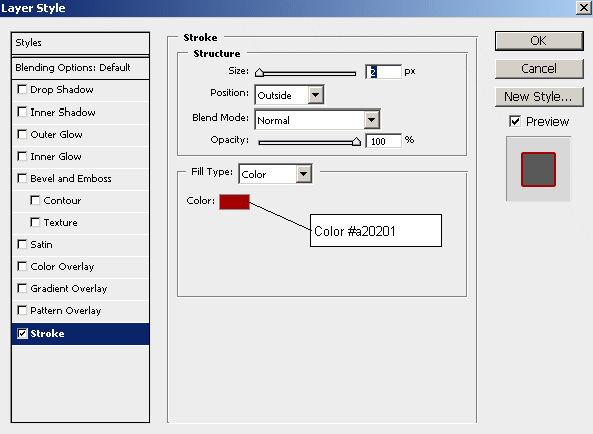
Go to Blending Options of the Text Layer and check the Stroke option:
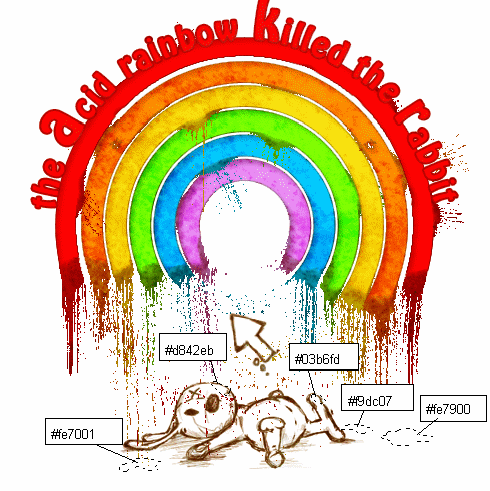
Step 7 - Add rainbow rusty acid blood
I decided to add some extra effect. Create a new layer and with Lasso Tool make five selections. Than with Brush Tool paint the selectons with different colors from the rainbow like as shown in the picture below:
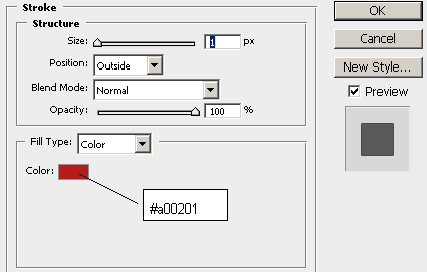
Now go to the Blending Options of this layer and check Stroke
With Smudge Tool easily smudge the edges of the newly painted colors. You can also with Burn Tool darken parts of the blood areas to give depth.

For the final touch copy this image of rust.
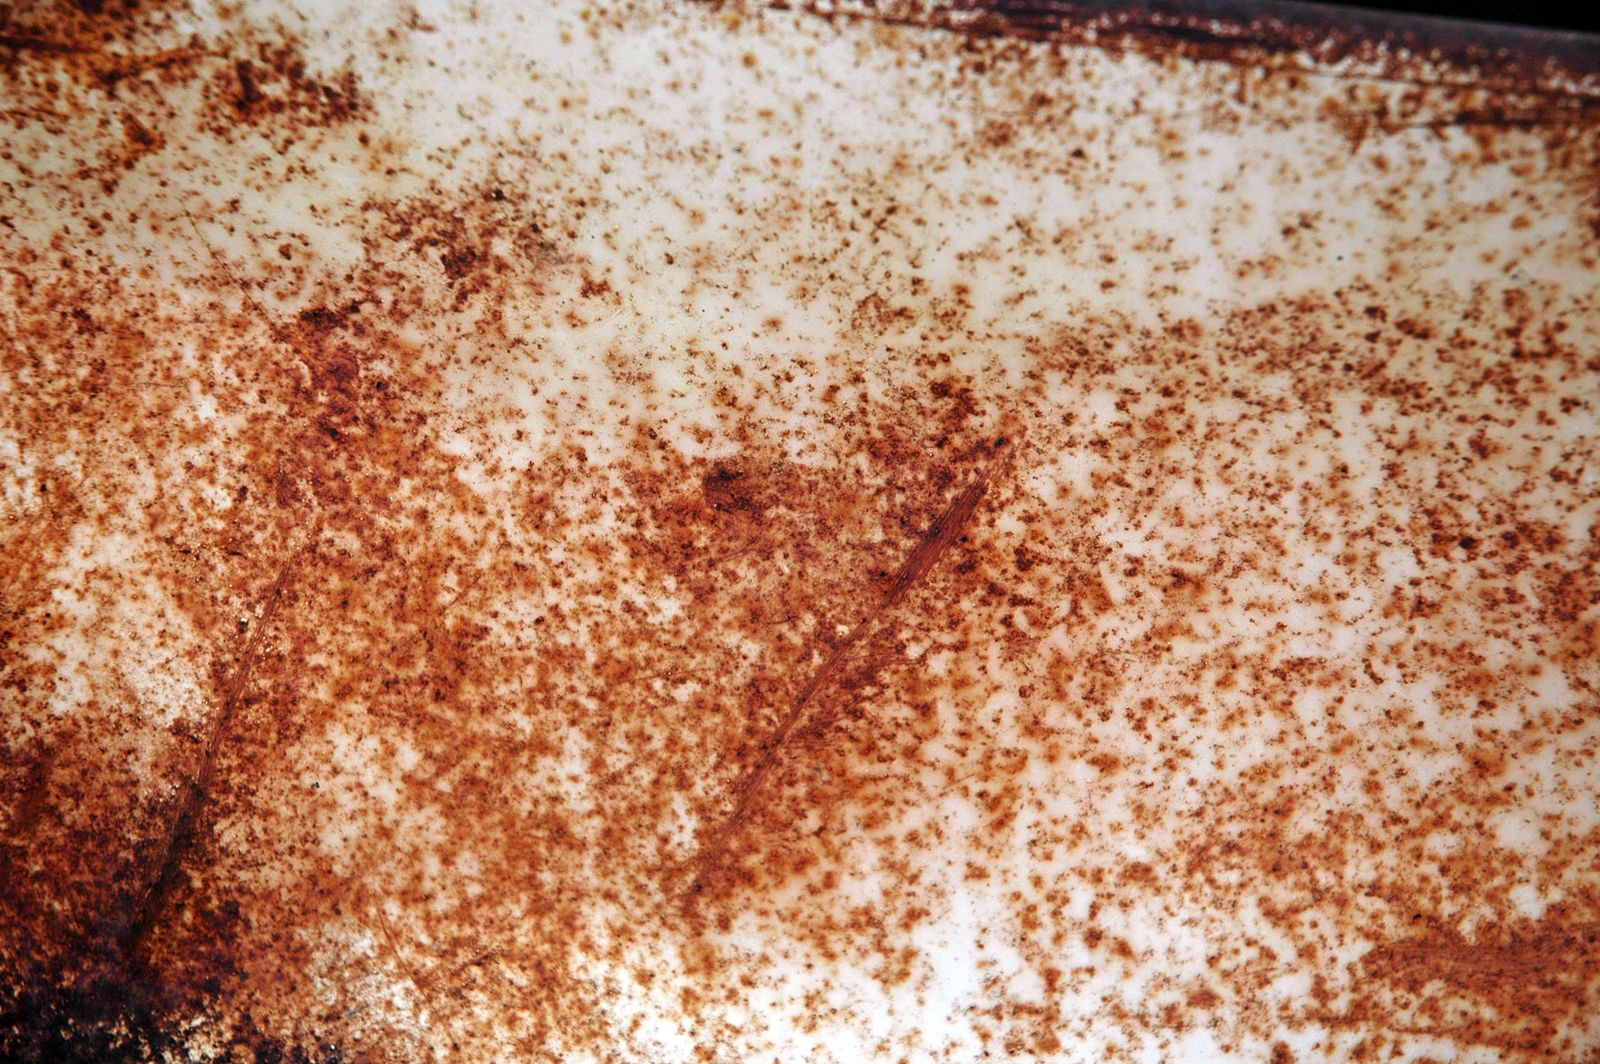
Scale the image to 50 % and put it on top of all the layers. Change the Blending Mode to Soft Light 100%.
Ok I guess that is all! You can of course improve my design or create your own images inspired by this tutorial!
I will be happy if you post that images to our Flickr Group "PSD-DUDE.COM" Group.
5 comment(s) for "The Rusty Rainbow Killed the Rabbit"
thanks reply