Liquid Blood Splatter
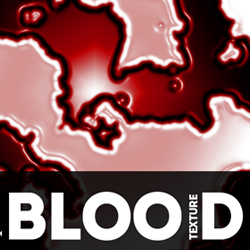
In this quick tutorial we will learn how to create realistic liquid blood texture in Photoshop using some basic filters and adjustments. Let's take a quick look at the final image that we will create.

Let's start by creating a new PSD file; you can choose any size you want. Fill the first layer with color white. Name this layer Blood Texture.
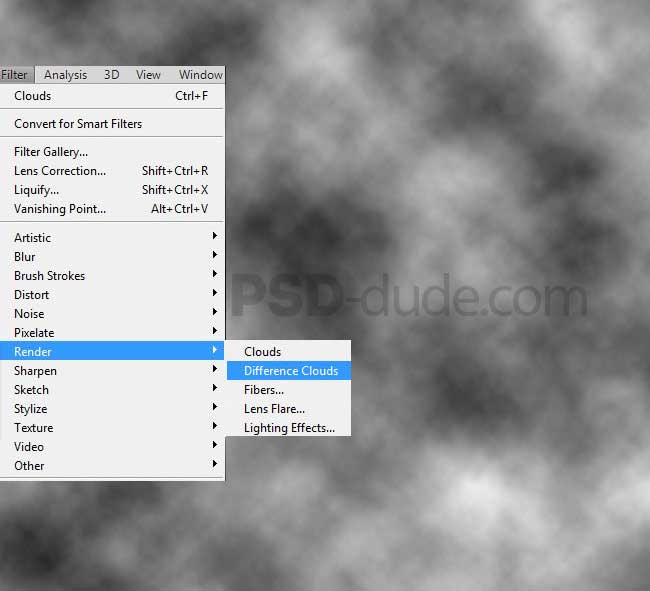
Make sure the Foreground Color is set to white and the Background Color is set to black. Go to Filter>Render>Difference Clouds.
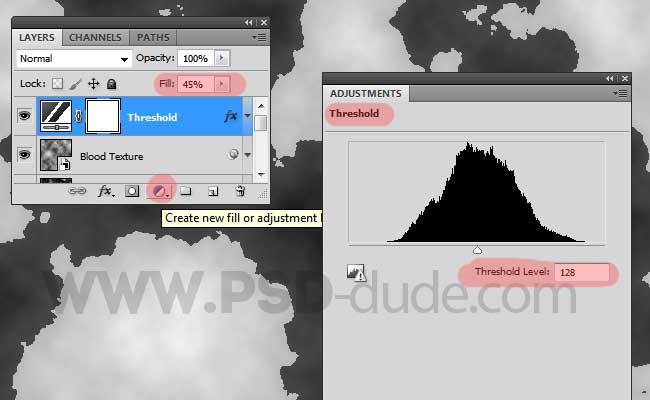
In this step we'll add a non-destructive Threshold adjustment by using the Create new fill or adjustment button found on the layers tab. Set the level of the Threshold to 128 and also the Fill to 45%.
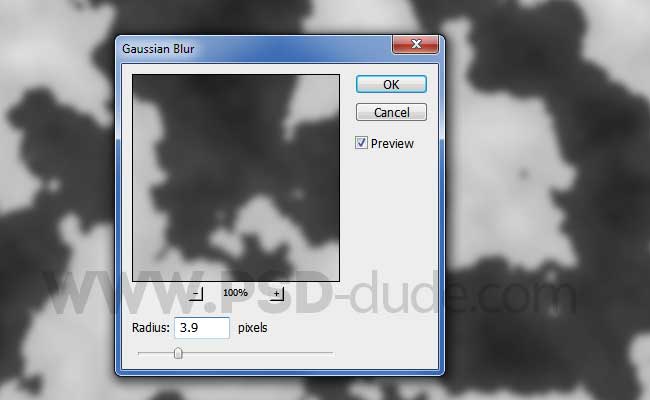
Select the two layers, Blood Texture and Threshold, and convert them into a smart object so that we can be able to modify the result later on. Go to Filter>Blur menuy and choose Gaussian Blur.
Now go to Filter>Artistic menu and choose the Plastic Wrap filter.
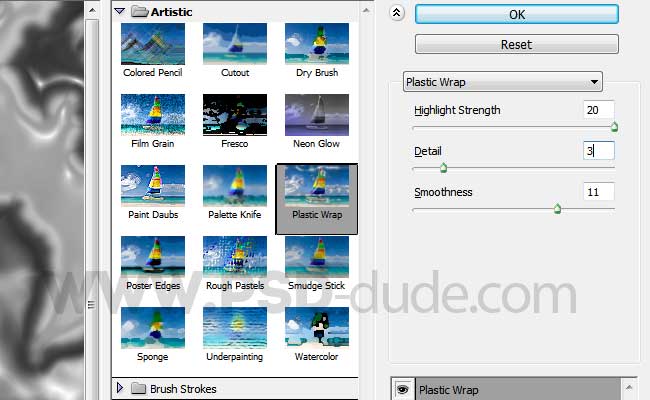
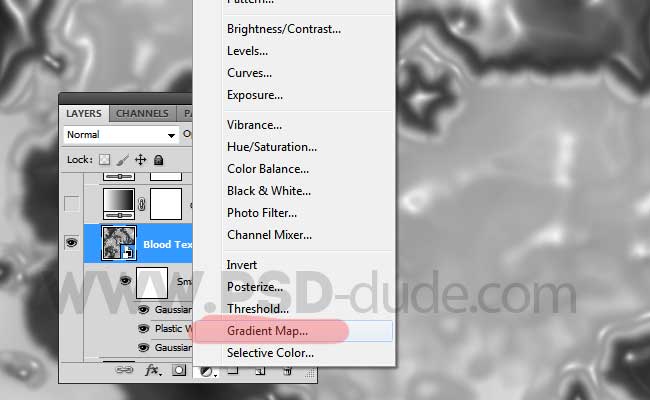
You can add another Gaussian Blur smart filter with a small size radius if you want a smoother result. From the Create new fill or adjustment menu choose Gradient Map.
- Gradient Map Adjustment
- The Gradient Map adjustment maps the equivalent grayscale range of an image to the colors of a specified gradient fill. If you specify a two‑color gradient fill, for example, shadows in the image are mapped to one of the endpoint colors of the gradient fill, highlights are mapped to the other endpoint color, and midtones are mapped to the gradations in between.Read more...
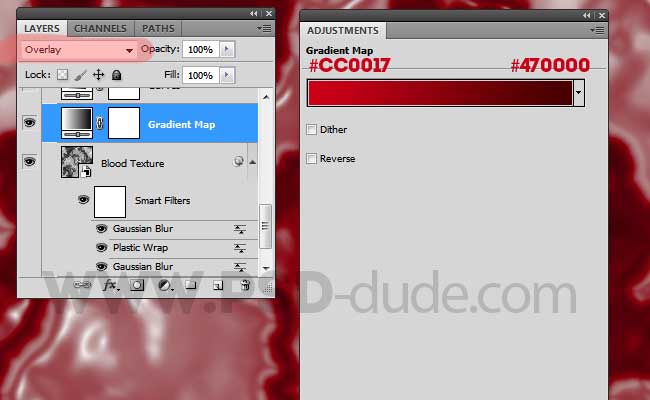
For the gradient map you have to choose a lighter and a darker tone of red like shown in the preview. Don't forget to set the blend mode of the Gradient Map adjustment to Overlay.
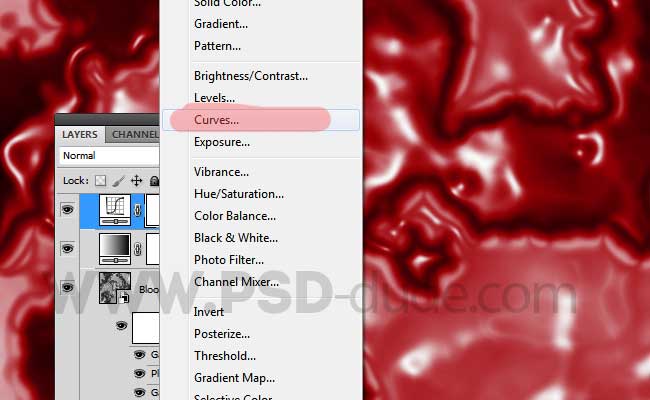
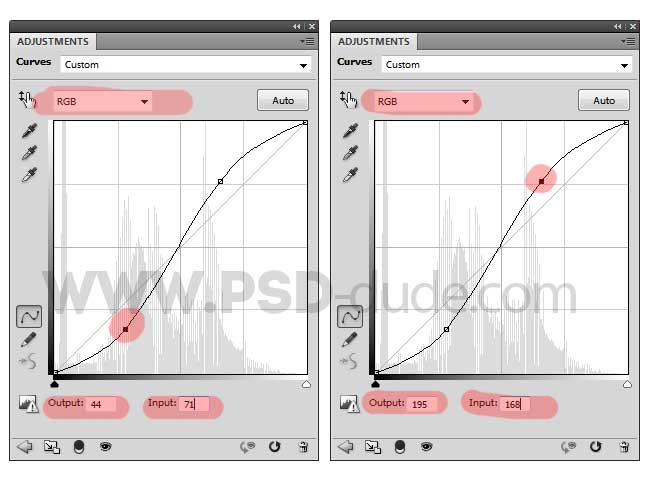
From the Create new fill or adjustment menu choose Curves.
- Curves Adjustment
- In the Curves adjustment, you adjust points throughout an image's tonal range. Initially, the image's tonality is represented as a straight diagonal line on a graph. When adjusting an RGB image, the upper-right area of the graph represents the highlights and the lower-left area represents the shadows. The horizontal axis of the graph represents the input levels (original image values) and the vertical axis represents the output levels (new adjusted values). As you add control points to the line and move them, the shape of the curve changes, reflecting your image adjustments. The steeper sections of the curve represent areas of higher contrast while flatter sections represent areas of lower contrast. Read more...
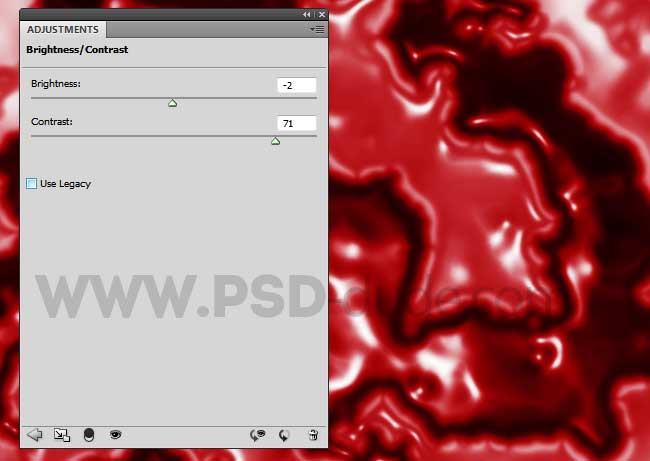
In this step you have to apply a Brightness/Contrast adjustment if you want to obtain a more vibrant color and more contrast.
- Brightness/Contrast Adjustment
- The Brightness/Contrast adjustment lets you make simple adjustments to the tonal range of an image. Moving the brightness slider to the right increases tonal values and expands image highlights, to the left decreases values and expands shadows. The contrast slider expands or shrinks the overall range of tonal values in the image. Read more...
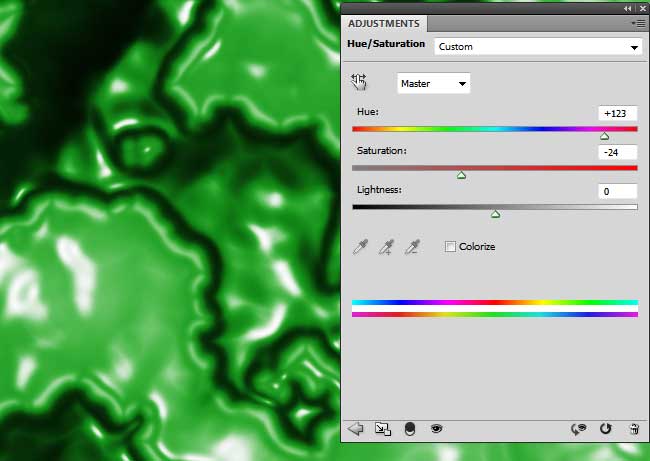
So here is the final result: blood texture made from scratch in Photoshop. You can customize the blood liquid stains simply by adjusting the filters that we used. If you want you can add a Hue/Saturation adjustment to create green alien blood.
No comment(s) for "Create Blood Texture in Photoshop"