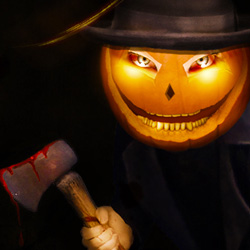
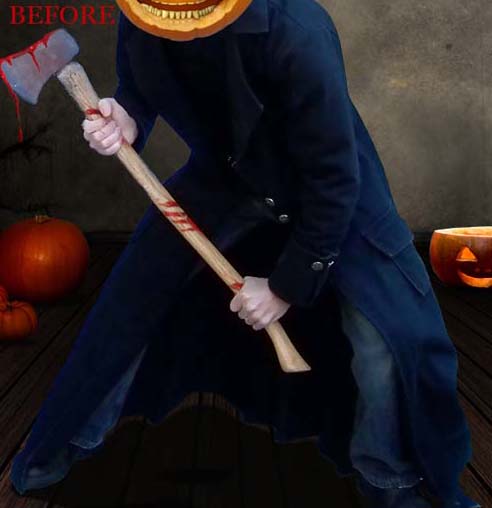
Add the Killer Image
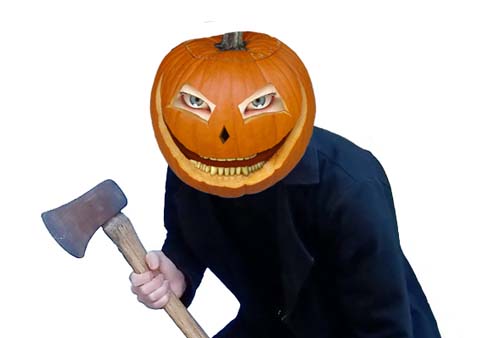
Open a new psd file and copy this image into your psd file killer (The stock image that I used is no longer available so I will give you some alternatives to choose from: killer 1 | killer 2 | killer 3 ) .
Call this layer Killer1. The image it will look like in the preview.

The first thing that we have to do is to remove the background. Use the Pen Tool (Path option selected) to draw the killer shape. Work carefully, zoom in, to obtain the perfect crop.
We can use also Zoom in and the Eraser Tool, hard round brush, to delete the background. Don't bother about the head and hair because we will replace it anyway. This is how it will look like:

Adjust the Man Photo
Duplicate the Killer1 layer to have a backup copy in case something goes wrong. There are a couple of things that are not right with this image. Fist of wall I will use the Clone Stamp Tool to hide the necklace and the hand tattoo. Zoom in the image for a better result and also use a lower size brush 5px or even 3px, 100% hardness.

Another thing that bothers me is the image resolution and quality, meaning that the killer outfit is too dark and noisy. So I need to apply the Noise Reduction Filter. So duplicate the Killer1 and call this layer Killer2. Go to Filter > Noise > Reduce Noise and do the following settings:

Now I will apply another filter to reduce even more the noise. Go to Filter > Blur > Surface Blur:

As you can see the new image from Killer2 layer is now too smooth and a little dark. So a simple way to lighten it is to change the Blending Mode of Killer2 layer from Normal to Screen 100%.

Add the Pumpkin Image
Copy this image pumpkin in a new layer. Rename this layer Pumpkin1 and place it above all the other layers. Remove the background of the pumpkin image. I did not scale the pumpkin yet because I want to retouch it, remodel it, add face features and than scale it to a proper size.
Cut the eye area. Flip the image horizontally : Edit > Transform > Flip Horizontal. Use the Clone Stamp Tool to hide the little skin imperfections.

Add the Evil Eyes
In this step I will add creepy eyes to the Halloween pumpkin. But first I need to change the shape of the eyes. Duplicate the Pumpkin layer and call it Pumpkin2 layer. Use Filter > Liquify to change the shape, using the Forward Warp Tool. Zoom in to 150% and choose brush size 60, brush density 100, brush pressure 49.

Leave the eye shape like this for now and copy this scary eyes stock photo. Name this layer Scary Eyes layer and place it behind the Pumpkin2 layer. Select the left eye and remove the rest. Go to Edit > Transform > Rotate or click CTRL+T. Copy the eye layer and flip it horizontally and place it on the right. Merge the left and right eye layers.

Remodel the Pumpkin Mouth
Pick the color #6b1e04 and with the Brush Tool(size between 10 and 3 px) draw the shape of the mouth. Use also the Clone Stamp Tool to adjust the brighten part of the mouth.

Select the pumpkin mouth with the Magic Wand Tool and copy this selection in a new layer. Call this layer Mouth layer. In the new layer with the selection still active go to Select > Modify > Contract and set 8px. Than right click on the selection and choose Select Inverse. With the Burn Tool darken that area, Range Midtones, Exposure 20%. Go to Filter > Blur > Gaussian Blur 3,5 px.

Add Scary Teeth
The mouth needs teeth to be more scary. So I have found this really nice stock image Teeth Front by Ellidegg Resize the image and crop the down teeth .
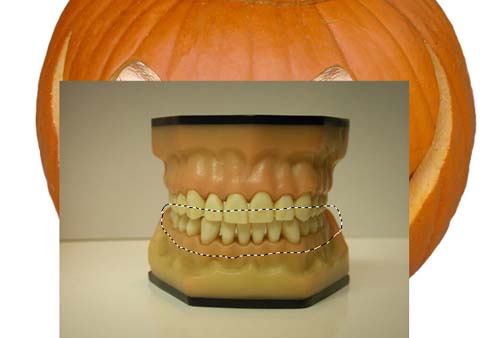
You can see that in the selection I have left a little part from the upper teeth. Easily select the part from the upper teeth and cut - copy it into another layer. So now we have to layers Down Teeth layer and Upper teeth layer.
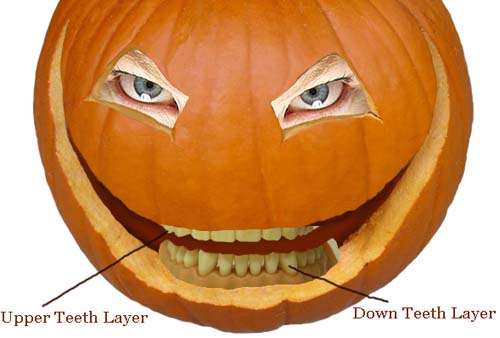
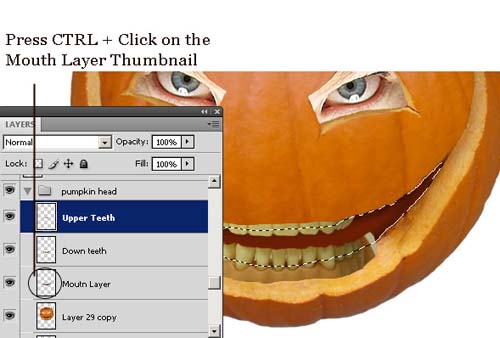
Zoom in and the image and lets adjust the teeth to blend with the pumpkin mouth. Lets start with the upper teeth. Use Smudge Tool and the Eraser Tool to fix the right part of the upper teeth. Select the Mouth Layer (CTRL+click Mouth layer thumbnail) , right click and choose select inverse. Press delete.
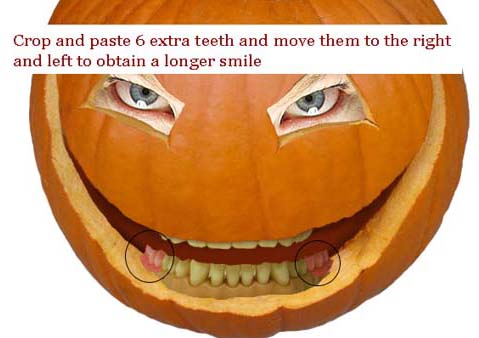
Now lets fix the down teeth. Zoom in and crop and paste 3 teeth from the left and 3 teeth from the right to create more teeth and the creepy smile wider. See the image below.
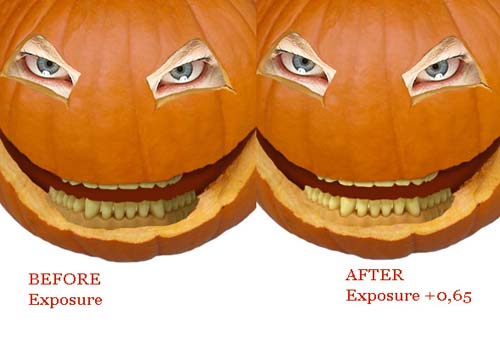
Merge the two teeth layers. Now I want to lighten the image, for that go to Image - Adjustments - Exposure and set exposure to +0,65 .
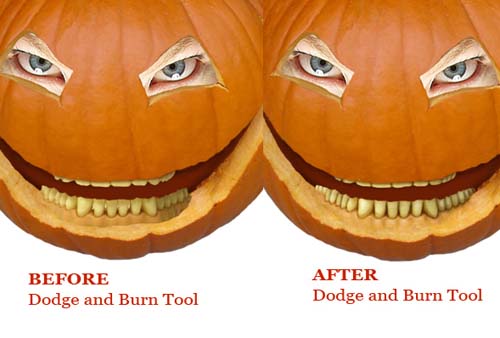
Zoom in. Use the Dodge Tool, midtones, exposure 20% to lighten more part of the teeth. Use also the Burn Tool to darken the area between the teeth. Use a small size brush, 3 or 5 px. If you have a graphic tablet you can paint over the teeth details to look better.
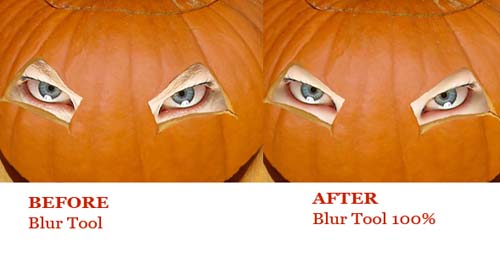
Adjust the pumpkin eyes
Return to the Scary Eyes layer and with the Blur Tool, strength 100%, blur the skin around the eyes and blur the white inside the eyes.
 Select all the layers with pumpkin face features (eyes, teeth, pumpkin) and put
them into a group called Pumpkin Head. Duplicate the Pumpkin Head Group.
Right click on Pumpkin Head Group and choose Merge Group.
Select the eyes and copy them in another layer. Call this layer Big Eyes Layer.
Resize Pumpkin Head layer to 80%.
Select all the layers with pumpkin face features (eyes, teeth, pumpkin) and put
them into a group called Pumpkin Head. Duplicate the Pumpkin Head Group.
Right click on Pumpkin Head Group and choose Merge Group.
Select the eyes and copy them in another layer. Call this layer Big Eyes Layer.
Resize Pumpkin Head layer to 80%.
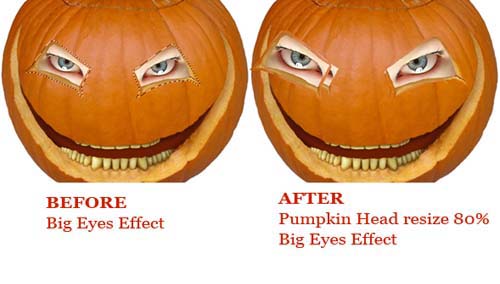
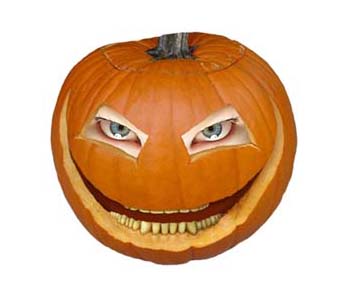
Select the left side eye and move it to the right and select the right side eye and move it to the left. Try to blend as good as you can the eyes with the rest of the pumpkin, using the Eraser Tool. Merge Pumpkin Head layer with the Big Eyes layer. Resize the merged layer to 50%.
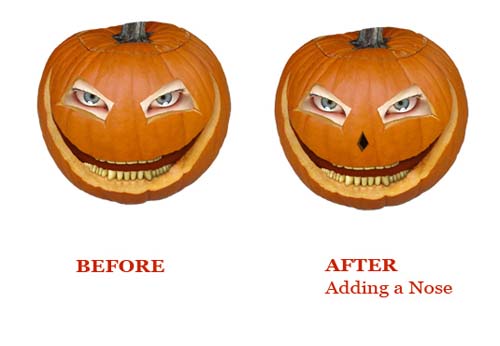
Add a Nose to the Pumpkin Head
With the Pen Tool draw a simple shape color #573615. Again with the Pen Tool draw another smaller shape, color #1b0a02. You should obtain an image like this:
Add a Hat to the Pumpkin Head
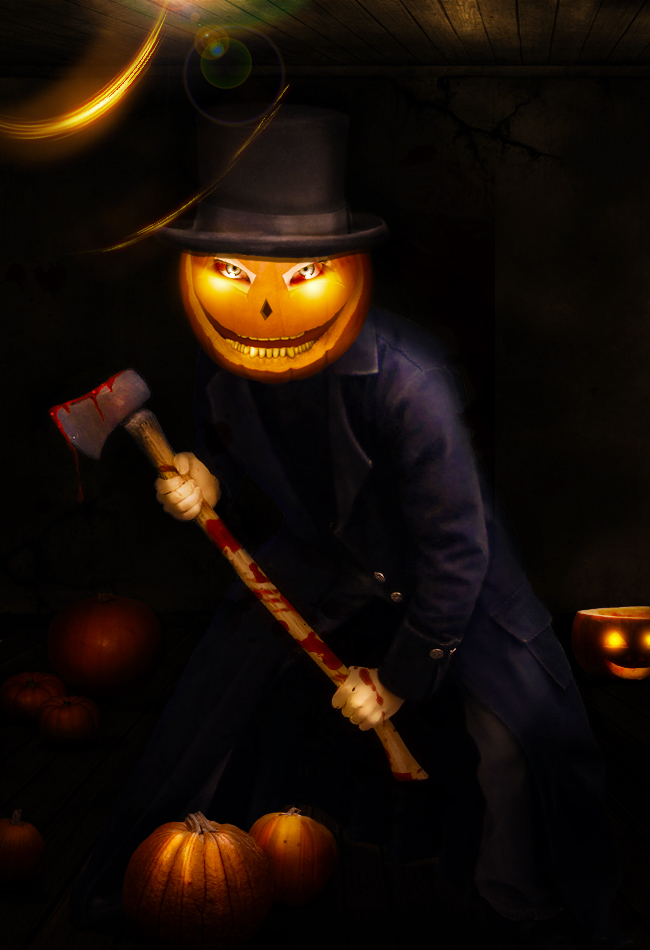
This is how the Killer Pumpkin looks like at this level.
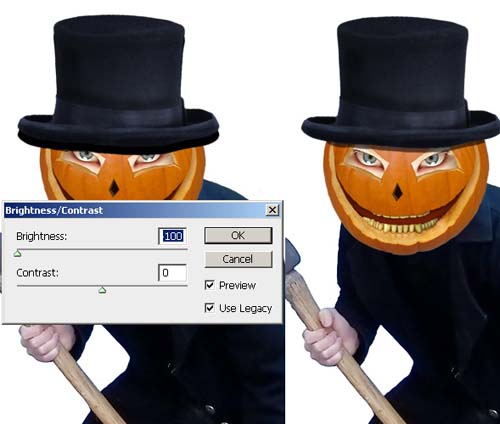
Now lets add a hat. Copy this image Time's Up by lindowyn-stock and crop only the hat. Resize the hat to 60%. Rotate it to be perfect horizontal. Go to Color Balance and give a blue tone to the image, using the following settings:

Use also the Dodge and Burn Tools to give shadow and light accents to the hat. Duplicate the Hat Layer and set the brightness from the Brightness/Contrast like in the image below. Set the opacity of this layer to 70% and erase the part that exceeds the pumpkin head.
Old Room Background and Wooden Floor
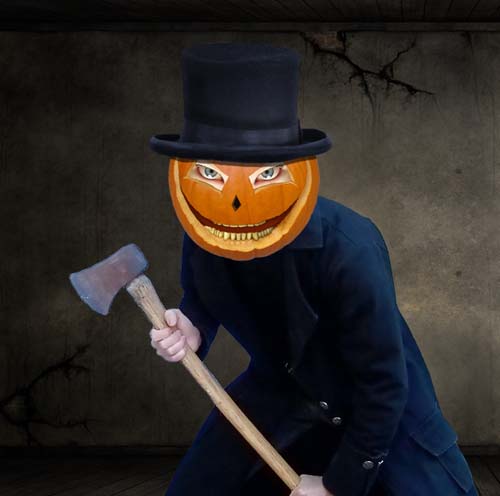
Now lets add a creepy background. I have found this image Old Dark Room by ~blOntj that I consider very suited. Just resize the image and use the Burn Tool to accentuate the wall cracks better. Select and delete the floor from the image.
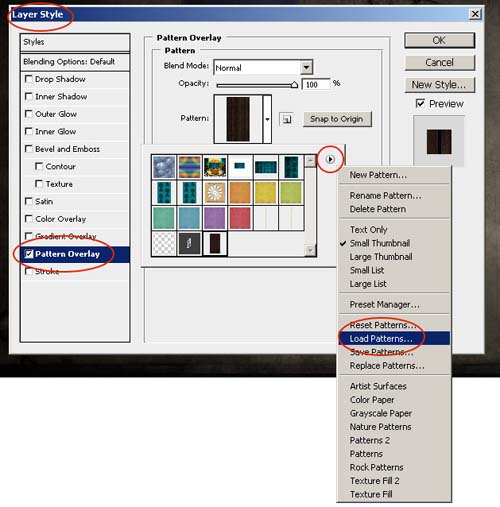
For the floor I will use this beautiful wood pattern Wood Pattern by *Sed-rah-Stock . Download the pattern and load it into your Photoshop.
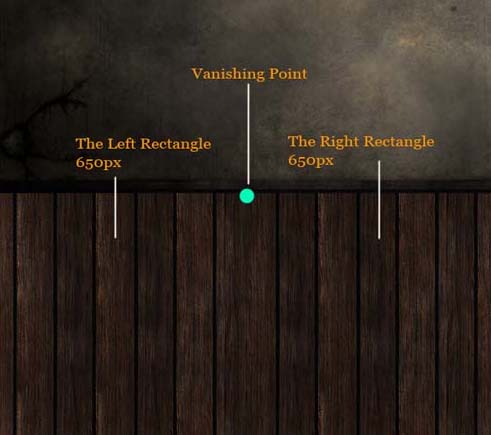
To draw a realistic floor we have to know something about vanishing point which is a point in a perspective drawing to which parallel lines not parallel to the image plane appear to converge. Vanishing points can also refer to the point in the distance where the two verges of a road appear to converge. (source: wikipedia - vanishing point) So lets choose the vanishing point in the center of the image. Draw a rectangle width 650 px that is the width of our image. Duplicate the rectangle. Move one rectangle to the left side of the screen so that it covers the half and the other rectangle to the right so that it covers the other half.

Go to the Blending Options of the two rectangles layers and apply the Wood Pattern, by checking Pattern Overlay.
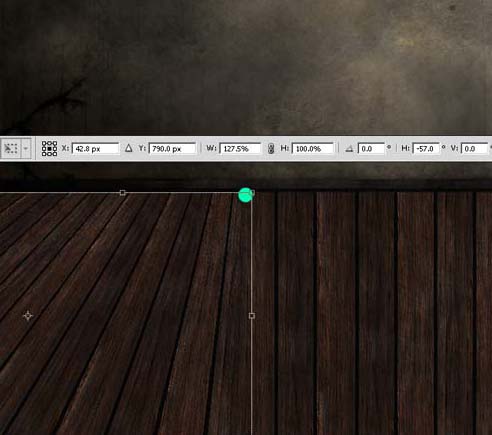
Duplicate Left Rectangle and merge the original with the copy, you will see that the image is not vectorial any more and the Pattern Overlay disappeared but the image looks the same. Now we can skew the image. Select the Left Rectangle layer and go to Edit - Transform - Skew with the following settings.
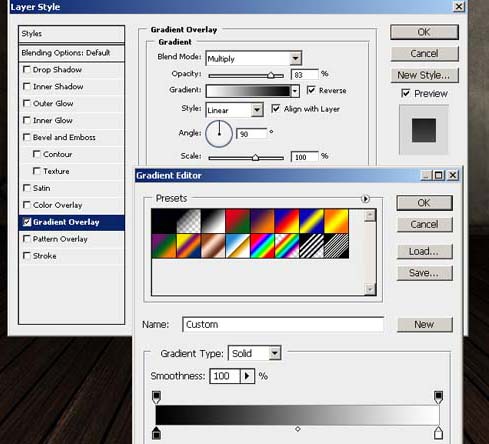
Make the similar settings for the other rectangle. You can use Skew once more and adjust the image for a better result. When you believe that you have obtained a good result merge the two layers and call the new layer Floor. Add also a Gradient Overlay to Floor Layer.
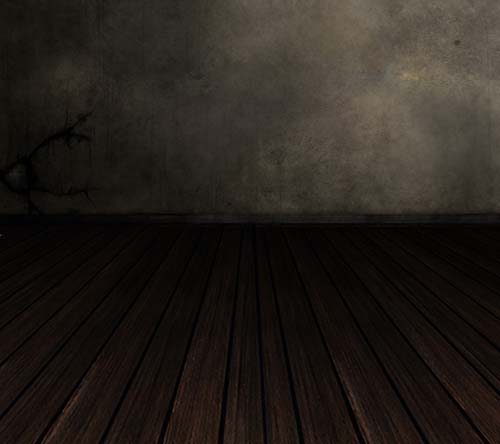
This is how the floor looks like. I will adjust the image when all the other images will be in place.
Background Pumpkins
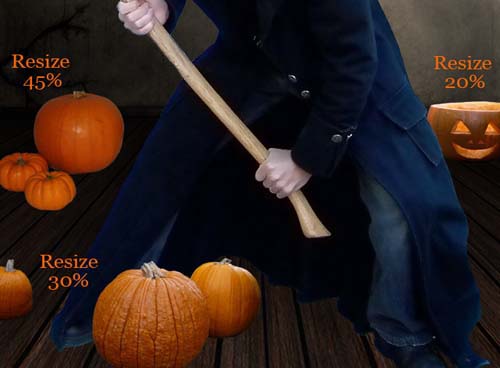
For the background I have found these pumpkin images: Pumpkin and Pumpkin Reference Stock . Now it is another time consuming and boring process, I am talking about the cropping process that has to be perfect. So crop the pumpkins carefully, resize and place them like in the image.
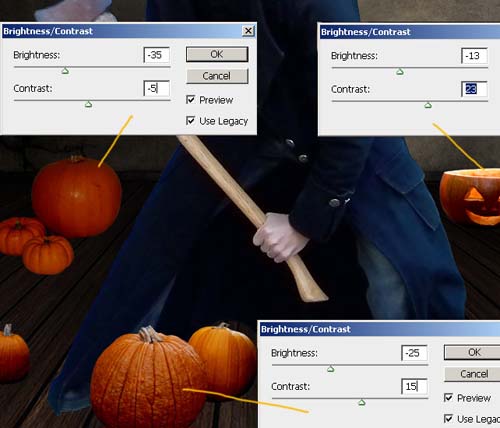
Another thing that I have to do is to adjust the three images to make them look that they belong to the same image. So I will adjust the Brightness/Contrast as shown in the image below.
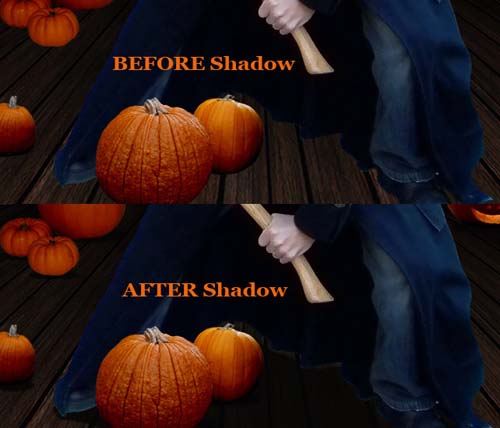
Create a new layer below all the pumpkin layers including all the killer layers and call it Shadow layer. With the Elliptical Marquee Tool draw shadows below all the pumpkins and fill the selections with the color #050504. Lower the opacity of this layer to 90%. Add Gaussian Blur , 1px. With the same color draw in another layer a shadow for the killer like in the image. Lower the opacity of this layer to 85%. Add Gaussian Blur , 1px.
Add Blood Drops
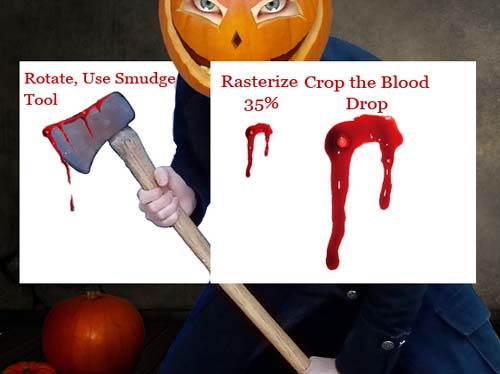
Copy this image with blood drops Dripping Blood Stock I . Crop a blood drop and resize it to 35%. Rotate the blood drop and place it on the axe. Erase the the parts that exceeds the axe. Use the Smudge Tool to blend the blood and make it real.
You can try other blood textures and brushes if you want. You can create bloody eyes simply by using one of these blood textures ; set the blend mode to Multiply and place the blood splash wherever you want.
Adjust the Killer Clothes
Return to the Killer Layer. You can see that the image is a little blurry and many details are not visible. So with the Burn Tool and Dodge Tool lighten and darken areas from the clothes. Especially pay attention to the clothes wrinkles. You can see the difference from the following Before and After Image.

Adjust the Killer Head
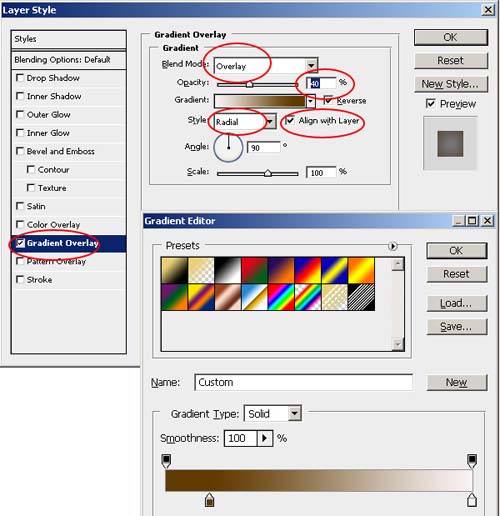
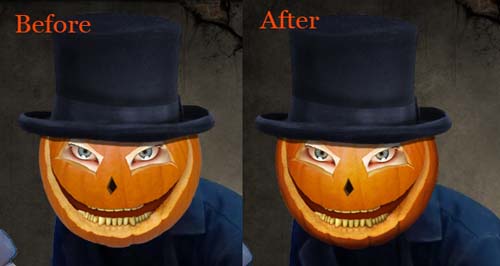
Return to the Pumpkin Head Layer and with the Burn Tool, midtones, exposure 10%, Protect Tones unchecked, darken the lower part of the head. Go to the Blending Options of this layer and check Gradient Overlay with the following settings. The colors for the gradient are #5f3a00, location 14% and white, location 100%.
This is how the pumpkin head looks like after this changes.
Ambient Light (Add Lighting and Shadows)
In this last step create a new layer above all the other layers and with the Brush Tool, size 60px, color black color the area around the killer pumpkin. Change the blending mode for this layer to Soft Light, opacity 80%. You can add Gaussian Blur for a soften look. With the Eraser Tool, different opacity settings erase some areas that you want to be lighter such as the left and right side pumpkins, areas from the ceiling etc.
With the same technique you can add more layers to paint dark and light accents depending oh how you want your image to look like.
For a more interesting effect you can add:
11 comment(s) for "The Night of the Halloween Killer Pumpkin"
:) i have tried to make it as realistic as i could, ... i am still learning and hope some of you learn along with me reading my tuts
this pumpkin is scary in a funny way, i could create s reply
for you effort. Wonderful job. reply
But, I agree with moogek, after all this hard work, why leave the eyes ? Just a little tweaks with t reply
Nice work man, thanks for the tut. reply