


Stock Images
As always the hard part is to find the idea/theme of the tutorial and to gather all the stock images that will bring that idea to life. I always liked fantasy characters like mermaids, unicorns, horses with wings etc. The fairy tales, the folklore from different countries, greek and roman mythology are a huge inspirational material for me. These characters are usualy supranatural beings, half human half animal or many morphed animals. There are a few good photoshop animal tutorial s on the internet and I hope that from today, my tut is one of them.
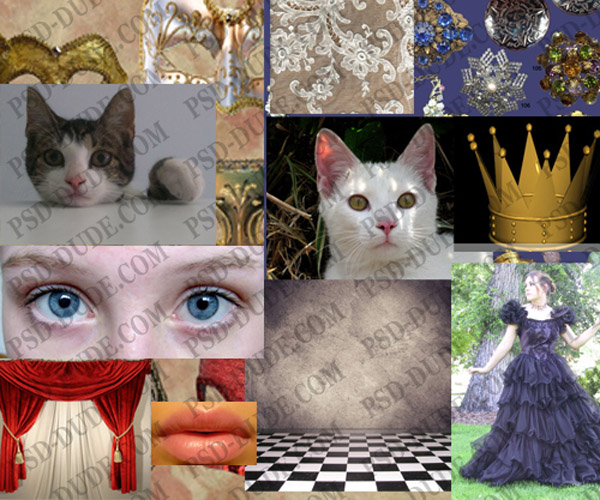
Tutorial Stock Images
- Cat
- White Cat
- Lips
- Cat Eyes
- Crown
- Jewelry
- Hands
- Mask
- Black dress
- Damask Wallpaper
- Room
- Curtain
- Wall Pattern
Crop The Images
Let's start with the cat princess. The first layer that I begin with is the Black Dress Layer. Crop only the dress. It is a very ugly job but it has to be done very carefuly. So take your time. Tip! Use the Eraser Tool and a Graphics Tablet to delete the background. Use the Zoom In option to be sure you see all the details. It is also important to use a Background Layer with a color opposite to the dress color. The erasing process will be faster.
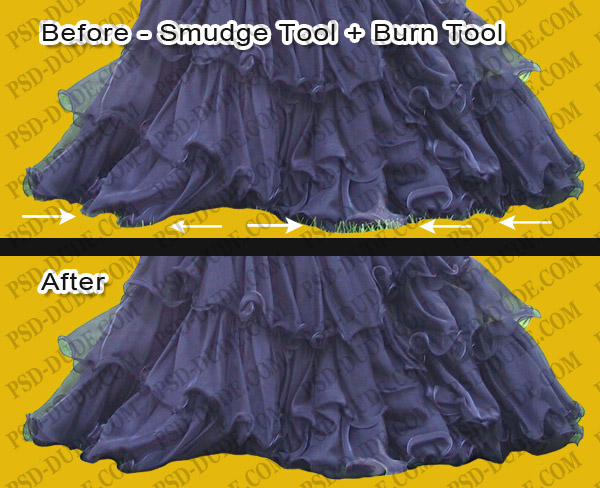
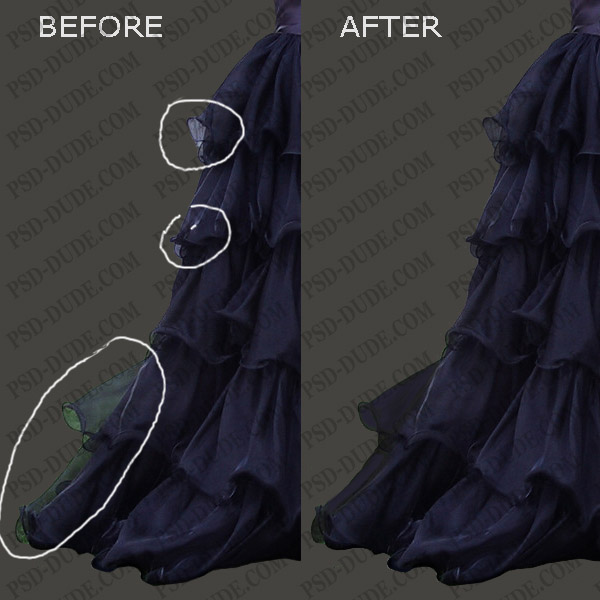
You see that the dress does not look ok in the bottom area where the grass from the initial image was over the dress. We have to fix that with the Smudge Tool. Again using a graphic tablet is esential for this job. Use a very small brush size and the opacity 90%. I don't use 100% opacity for the Smudge Tool because the result would be to rough, we need to obtain a realistic result. We will fix other details like color, saturation, light and contrast, when we will add the background. You can use the Burn Tool to darken the smudged edges to give volume to the dress.
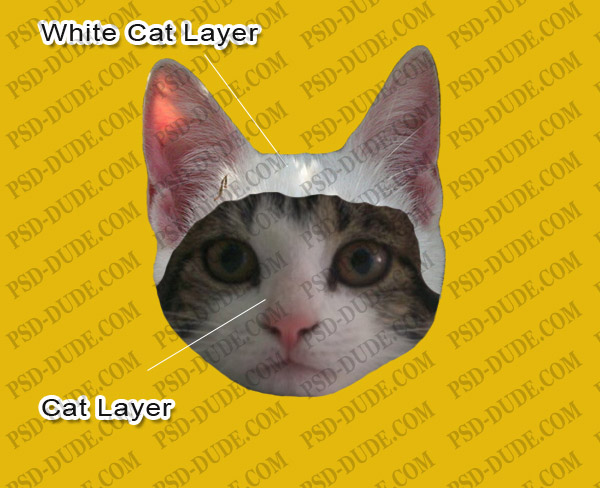
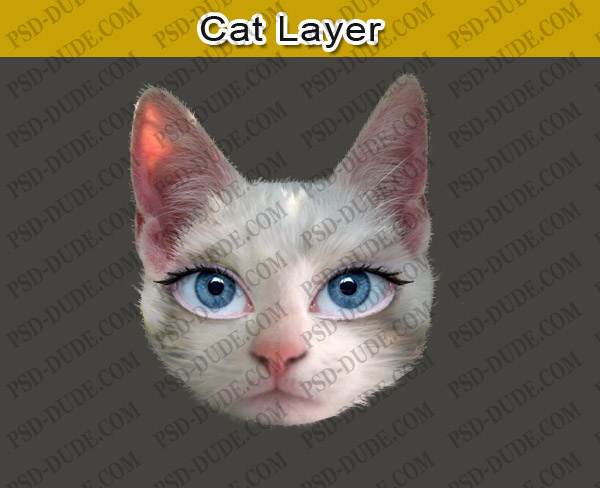
Let's crop the other images, the two cat, White Cat and Cat Stock Images. The Cat Head will be made from these two images as it follows: the ears and the top part from the White Cat Layer and the rest from the Cat Layer. Tip! When you are croping hair or in our case fur, don't worry about the details. Just erase along the main shape and then add the wires either with the Smudge Tool or the Brush Tools. As you can see the two images have different sizes. Time to reize the White Cat Layer to 65%. Erase as in the image below areas from both layers and put them together. The idea is to give to the face a feminin look similar to a woman's face.
Increase Image Exposure
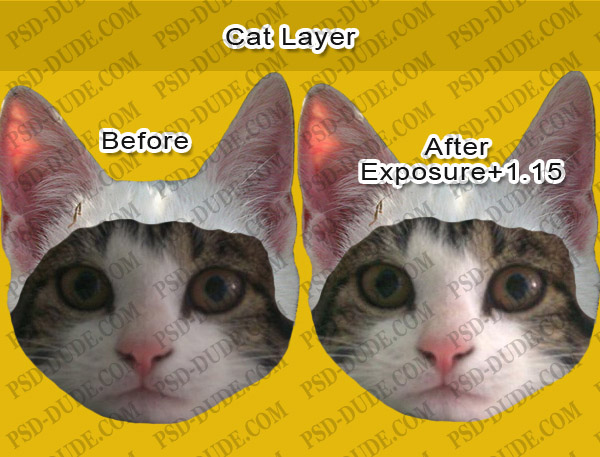
Another problem when we try to blend the two images is the exposure of the photos. The White Cat is more exposed, so more brite than the other. So I will increase the Exposure of the Cat Layer with Ư.15, the other settings stay as they are. You can find Exposure at Edit, Adjustments Menu.
Cat Layers Blending
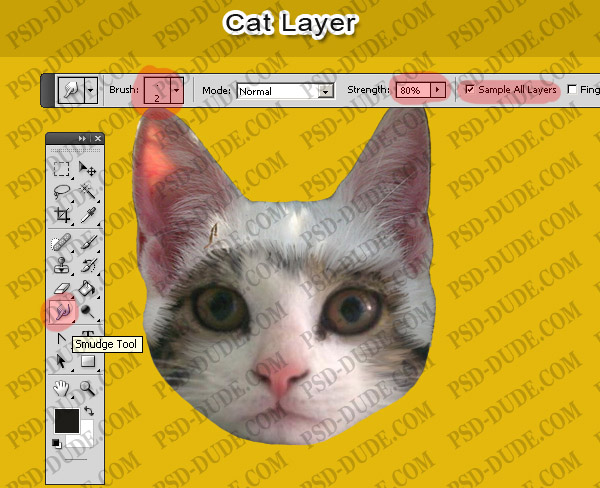
Now it is time to blend even more the two images. Work with Cat Layer. For that we will use the Smudge Tool, size 2px, opacity 80%, check Sample All Layers. This last setting means that even if the the two cat layers are not merged, the Smudge Tool will also use the colors of the White Cat Layer as well as the colors of our curent layer, the Cat Layer.
Be careful, work slowly and pay attention to all the details. The advantages of using a Graphics Tablet are worth their weight in gold in this kind of task. The reason for all that trouble is because I wanted a beautiful cute white cat. And I am pleased with that result.
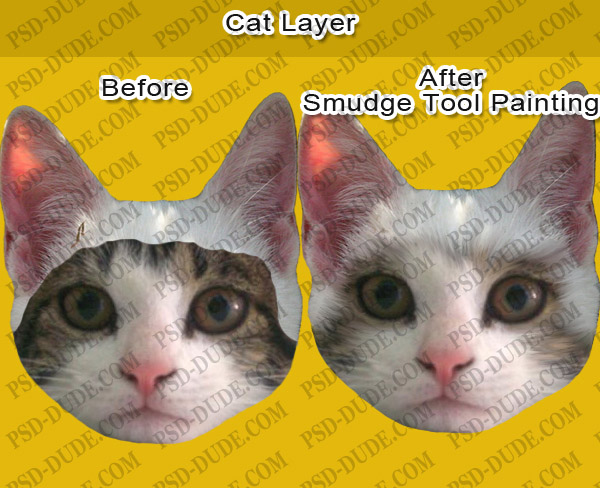
When you are ok with the result, merge the two layers. With the Smudge Tool again create the hair wires to make a more realistic cat fur.

Adding the Cat Eyes
Work with Eyes Layer. Resize to fit. Erase the useless areas like in the image below. Rotate a little the eyes and try to blend them with the rest of the cat face.
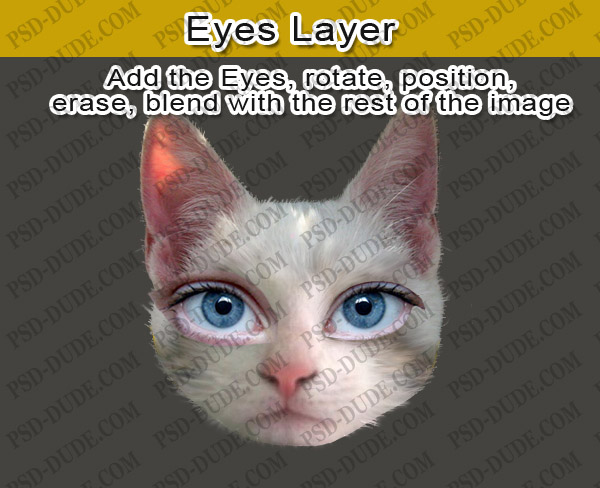
Use the Smudge Tool to obtain a perfect blending. Another useful tools for this task are the Burn/Dodge Tool, the Brush Tool etc. Do whatever it takes, paint over the image, darken certain areas so that the eyes fit perfect with the rest of the face. This is how it should now look like:
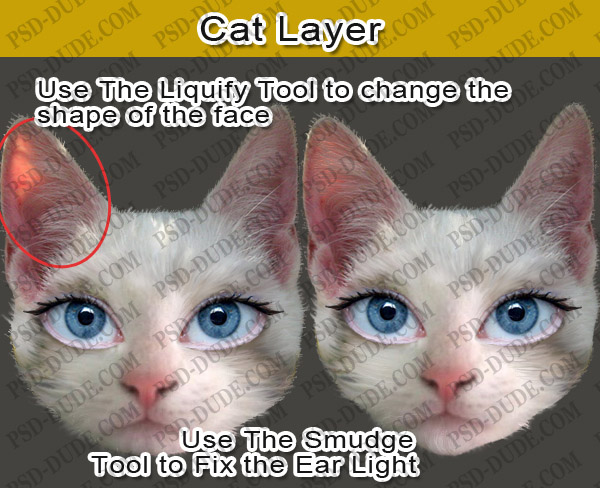
With the Liquify Tool adjust the cat face in the cheek and chin areas. In this step I adjusted also the lighting of the face: the left ear was too brite for a dark background so with the Smudge Tool I adjusted the ear and fur to be similar to the right ear.
Now merge all the layers: Cat, White Cat and Eyes layers are all merged into one layer called Cat FAce Layer.
Cat Dress
Now it is time to work with the Black Dress Layer. This is a black dress but because the photo was taken outside, the daylight changes the color of the dress. And also the photo is overexposed even for a photo taken in day time. So what we need to do is to fix that exposure problem. In the Image, Adjustments, Levels menu do the followin settings. You can see the huge difference between the two images, before and after.

Change the Hue Saturation value by setting the Saturation level of the image to -30 . Because the dess is made of veil some areas are transparent and we can still see the former background(the grass). So with the graphic tablet try to fix it usin the Pen Tool or the Smudge Tool. Darken certain areas using the Burn Tool. Try until you obtain a decent looking result. Remember that a perfect blending stays in the level of details.
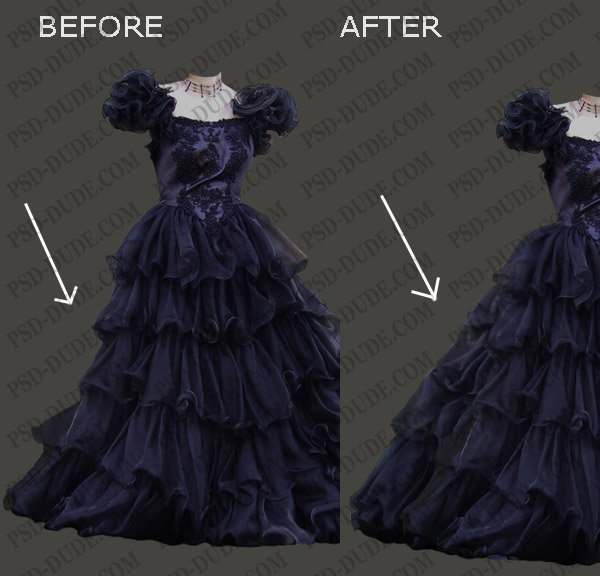
Resize the dress to 65%. Use the Liquify Tool (The Forward Wrap Tool) to give the bottom area of the dress a round shape. Duplicate the right part of the dress , flip it horizontaly and place it on the left side of the dress behind the Black Dress Layer.
Cat Lips
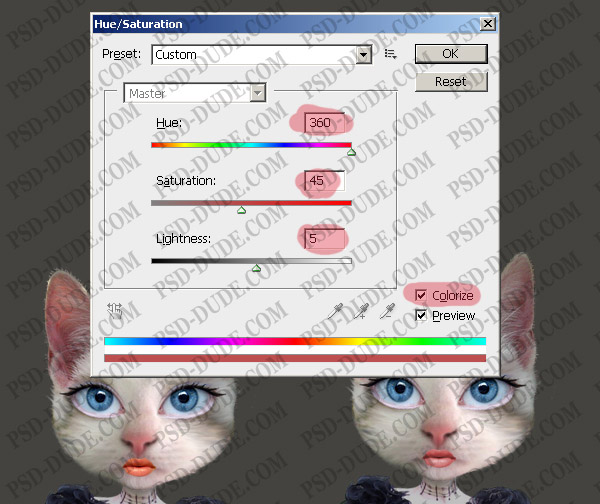
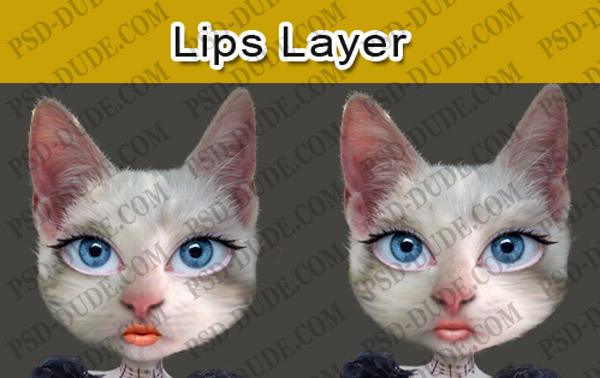
Copy the Lips image into your file and crop and resize the lips so that it fits the rest of the cat face. Like in all the cases the hard part is to match the tone color, the luminosity, the saturaturation of this image with the rest of the already blended images. For that I will modify the Hue Saturation balance value. The before and after result are:
Use the Blur Tool to blur only the edges of the lips so that it looks more realistic. Another trick is to use the Smudge Tool with a small size brush, strenght 60% and to drag the corners of the mouth so that the tones of the lips and face blends nicely. Create a layer beneath the Lips Layer and call it Lips Shadow. Following the rule that says that every item added must drop a shadow on the surrounding surface, paint the shadow using the Brush Tool. Use color #6b635c and opacity 60%. Your image should now look like this:
Cat Mask
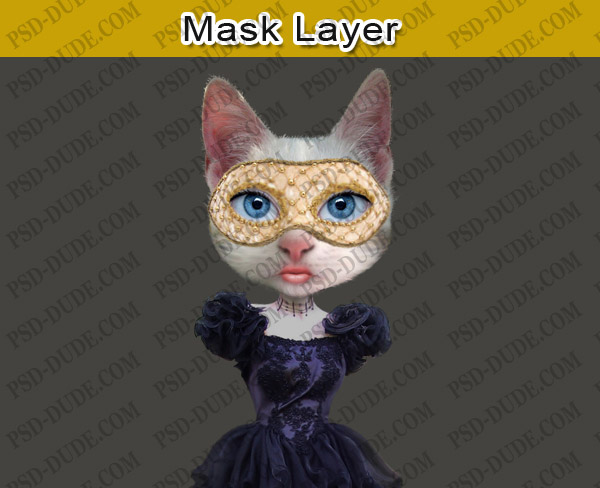
Open the Mask Image into your file and choose the white mask with pearls to crop and fit on the cat face. Now use the Liquify Filter to change the shape of the mask so that we can see the eyes of the cat. Use the Forward Warp Tool to obtain a similar result:
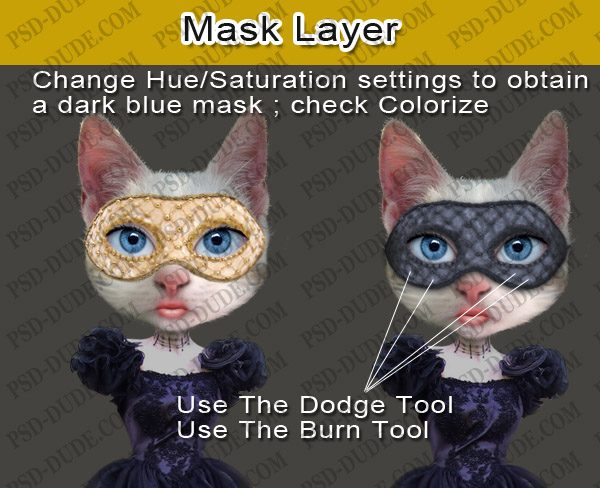
Use the Hue Saturation to adjust the Mask Layer. Make sure you check the Colorize option and input the following settings 230/ 13/ -55. You can see that the mask has now a similar tone with the dress. For a better contrast take the Dodge Tool, size 2px and lighten the areas indicated in the image. Use the Burn Tool to darken the other remaining areas until you obtain a similar result:
I have to be honest and tell you that the above step can be done way better using a graphic tablet. And also Zoom in the image to obtain a good result. As we did in the previous steps, we need to add a Shadow for this mask. So simply open the layer style window and add Drop Shadow (black; 80% opacity, 90 angle, distance 2 and sie 8...the rest remains the same)
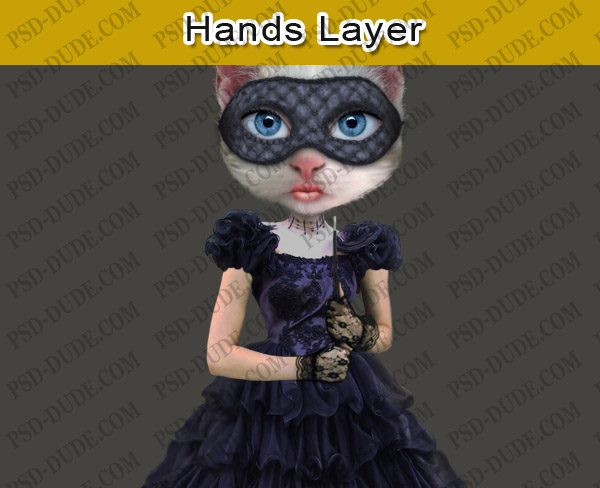
Cat Hands
Because the initial photo was over exposed the hands can not be used so I had to find other hands. It was a tough job I must say, I have searched a lot and even took photos of myself with different hand positions. In the end I have found something that works pretty well. So crop only the hands and resize to fit.
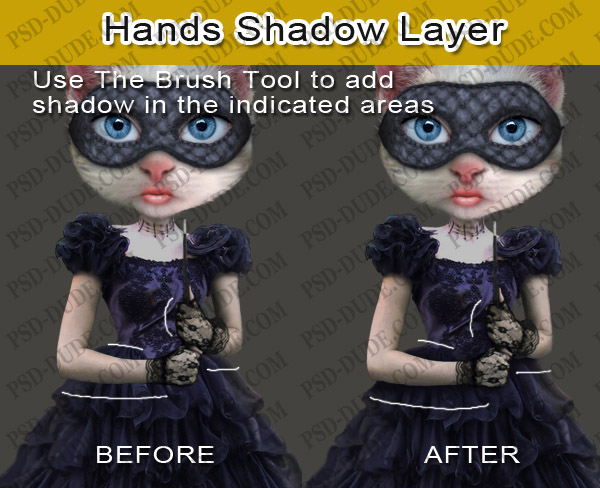
There is a small diference between the saturation of the neck and the saturation of the hands, so let's fix it. Open the Hue Saturation window and reduce only the saturation, input value to -50 . Another thing is to add shadow on the skin on the dress shoulders, areas indicated in the image below:

Another important shadow is the one left by the hands on the dress. For that create another layer behind the Hands Layer and with the Brush Tool, round shape brush, different sizes and opacities, simply draw the shadow. For the color I picked #0b0b13.
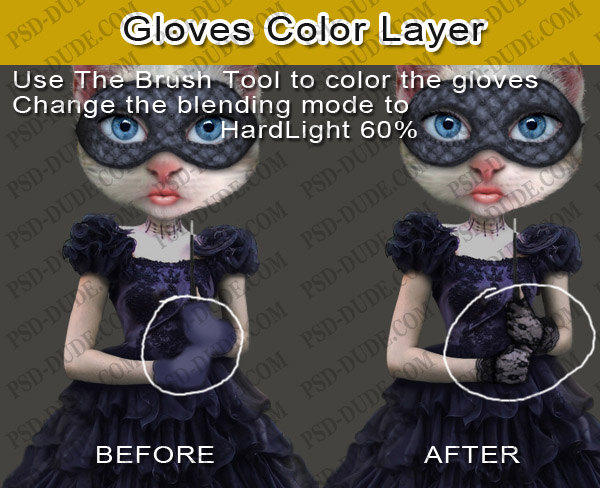
I don't like the color of the gloves, I want them to have the same tone color with the rest of the outfit. For that I will simply create a layer above the hands layer and with the Brush Tool I will draw over the gloves with color #313150. Change the blending mode of this layer to Hard light, 60% opacity.
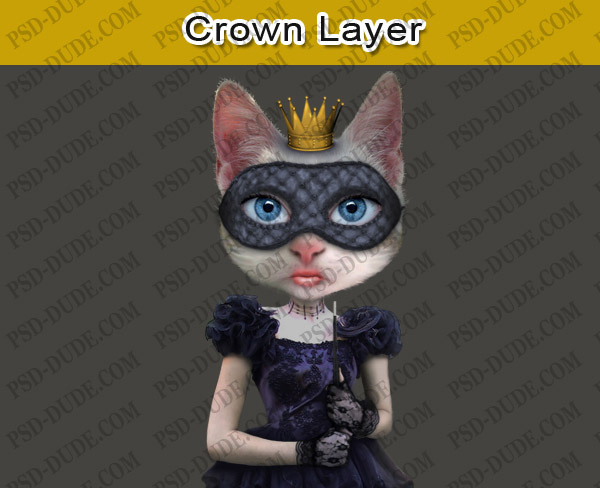
Cat Crown
Every princess must have a crown or a tiara. So crop the golden crown and resize it. Add a Crown Shadow in the same way we did with the Hands Shadow. And as an extra touch you can use the Burn/Dodge/Sponge(saturate) Tools to add contrast and sparkle to the crown. Use Zoom in and a 2px size brush.
Magic Wand
I will now add a magic wand in the cat hands. For that simply draw a rectangle, rasterize it and remove the areas hidden by the hands. Add a Grdient Overlay, linear with black, white, black. Don't forget about the darken parts (use the Burn Tool) where the wand meets the hands. Crop a part from the Magic Wand and increase Brightness so that you obtain the silver top.
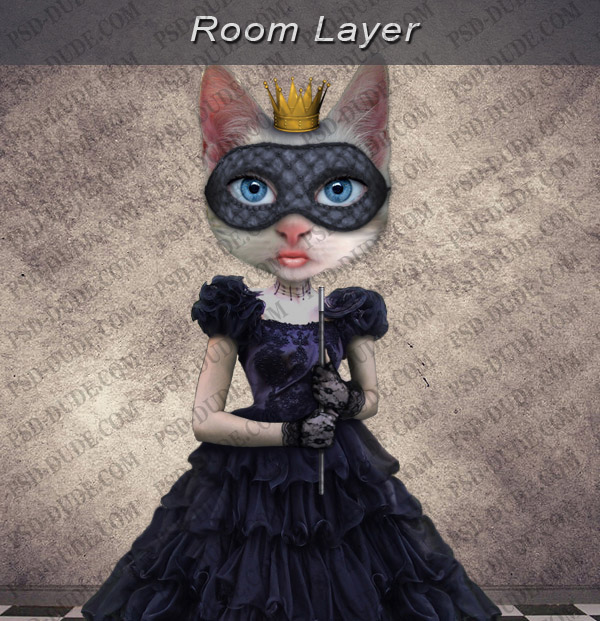
Room Background
I will use a premade background room. So simply copy the image into your file and put it in place. As you can probably see the image is to brite so the cat character is not very well framed by this light background. So I have to darken the image.
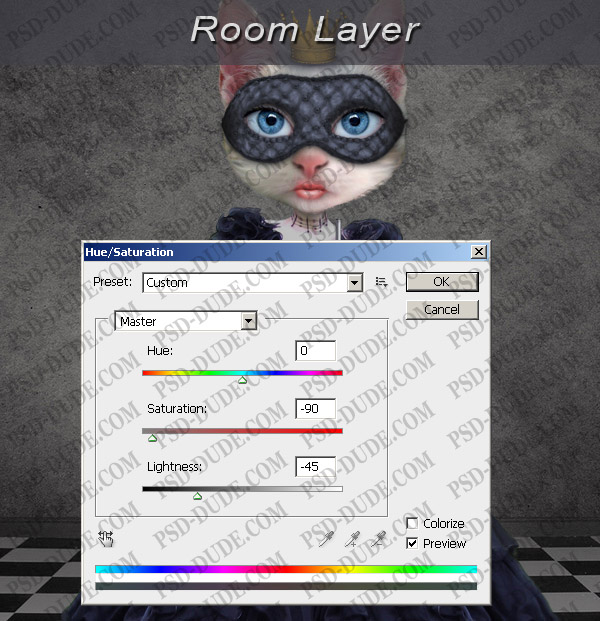
First adjust the lightness and the saturation of the hole image like shown below:
Then with the Burn Tool darken even more the back wall. Lighten The Floor in the front area with the Dodge Tool so that you give depth feel to the image.
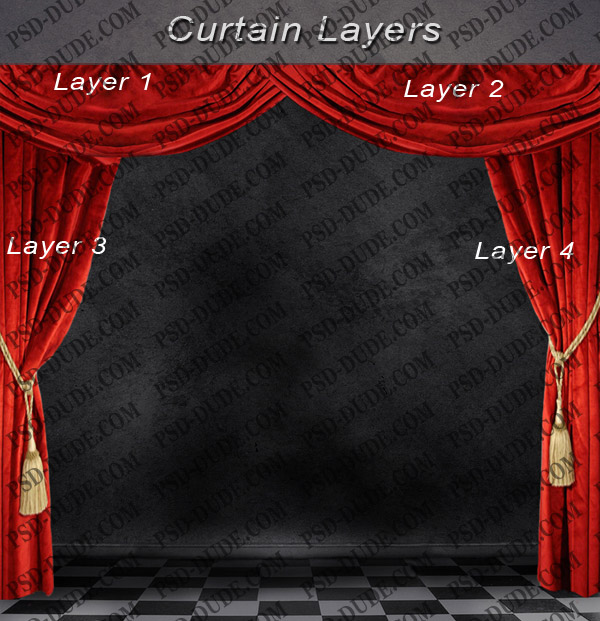
The Curtain
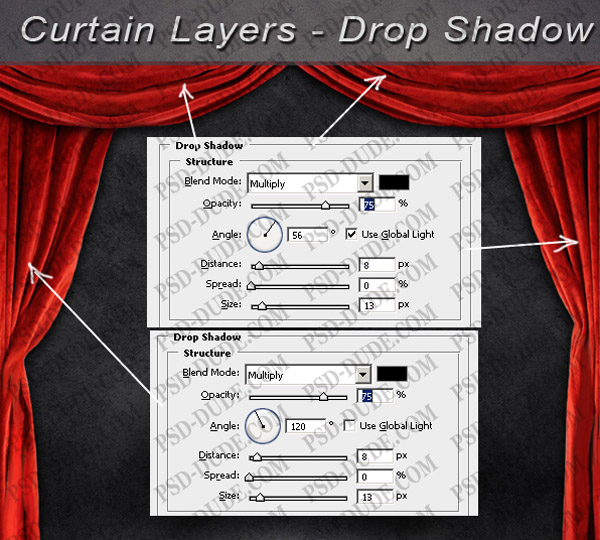
Resize the curtain image, crop only the curtain. Now crop all three distinct areas of the curtain and place them in 3 different layers like in the image. Duplicate the Top area and arange them as shown below. We now have four curtain layers.
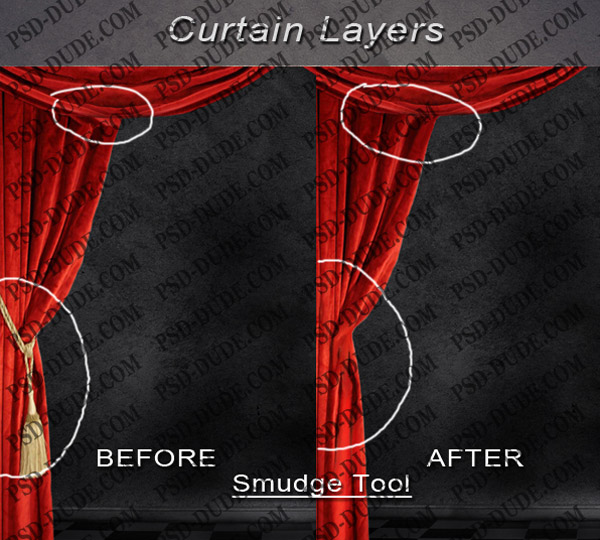
Now it looks weird so first I will remove the curtain ________________ with the help of Smudge Tool. This is a really hard job so it has to be done carefully and with the help of a graphic tablet. So Zoom in and start fixing the curtain! Use a small size brush, opacity 80 - 100% , it is similar to oil painting!
Open the Layer style window of al of these layers and add Drop Shadow. Use the default settings but with different angle. The angles for every layer is shown in the image below. You can see that the only one different is the left curtain.
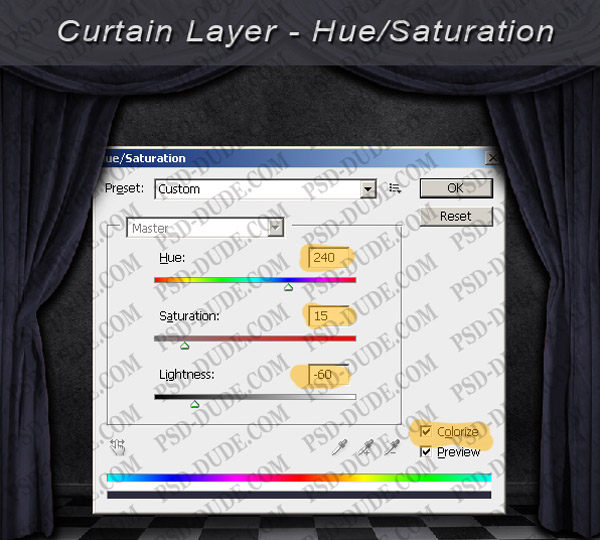
Select the Curtain Layers and merge them into one layer, Curtain Layer. Adjust the Hue Saturation value to turn the curtain from red to this dark blue purple color.
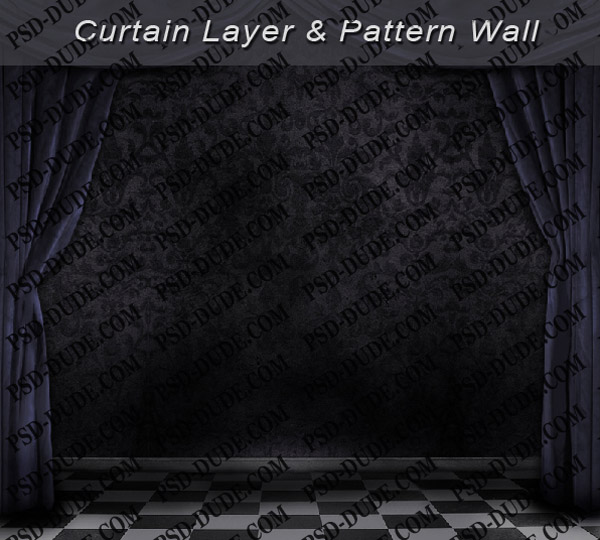
With the Burn/Dodge Tools add contrast to the curtains folds. Also create another layer behind the Curtain layer and add the shadow of the curtain on the floor as we did in the previous steps with other items(use the Brush Tool, Blur Tool etc.) If you want you can add a beautiful Wall Pattern after you changed the color with Hue Saturation Colorize and change the Blending Mode to Overlay.
Adding the Pearls
I decided to add some beautiful pearl details on the curtain, dress and floor because it seemed such a nice combination. With the Brush Tool, color #e3dcc5, Hard Round brush, size between 13 and 6 px, draw little round shapes like in the image. You can make multiple layers: one above the Dress Layer, one below the Dress Layer and one below the Curtain Layer so that the pearls to look more natural.
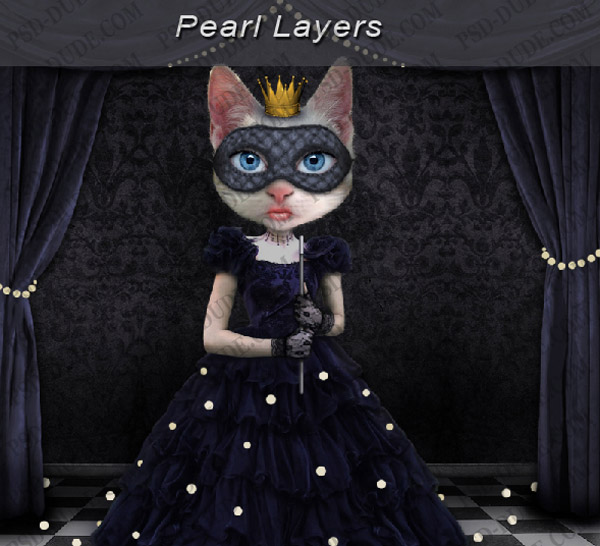
Transform this flat points into pearls by adding Drop Shadow, Inner Shadow and Inner Glow. You can see the settings in the image.

Another important thing is to create a Shadow Layer under each Pearl Layer and with the Brush Tool to add a diffusse shadow for the pearls that stand on the floor surface.

A Little Shadow and Light Before the Final Result
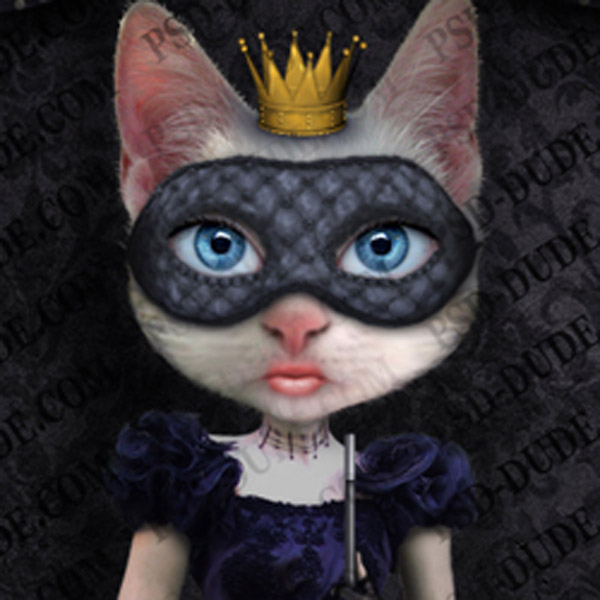
The image looks ok now but it is a little to flat so for that I want to add darken areas and lighten areas. The easiest way is to create a new layer above all the other layers and with the Brush Tool, color #1d1d20, round brush, paint over the image to create light and shadow. Change the blending mode of this layer to Hard Light. This is how my Cat Princess looks like : 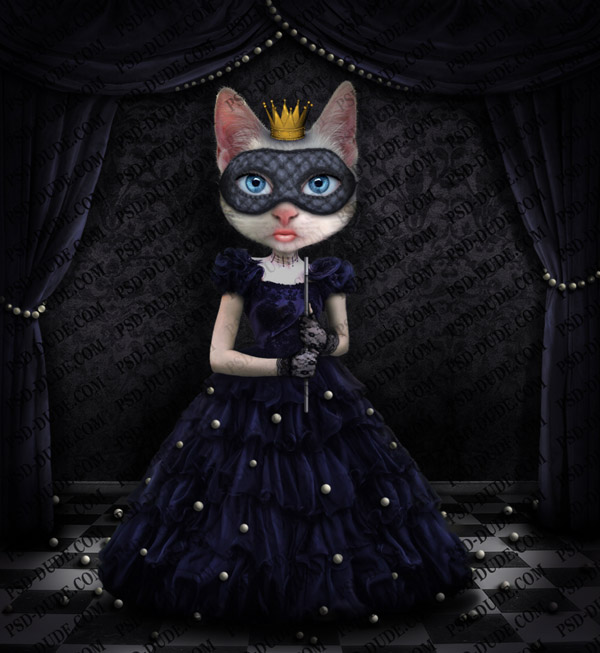

20 comment(s) for "Photoshop Cat Princess Tutorial"
There are small problems with the blending of the room, the floor and curtains but I think you have focused on the cat pri reply
I'm sorry that I have to use watermarks but as you guessed it is a way to discourage theft :) reply
You managed to make it clear enough, I learnt a lot from it and spent a lovely Sunday stormy afternoon !
I hope my advice helps you to improve your technique!
reply
http://tinyurl.com/63q6qbr