Painted Wood Photoshop Action Comics Book Photoshop Action Infographic JS Library Textures for Photoshop Online Label Maker

Future Foot

www.psd-dude.com
Tutorials Photo Manipulation 16335 June 30th, 2018

The idea for this tutorial came from a tv documentary about future technology. I am not a fan of SF but I thought it is a good subject for a photoshop tutorial.

Part 2

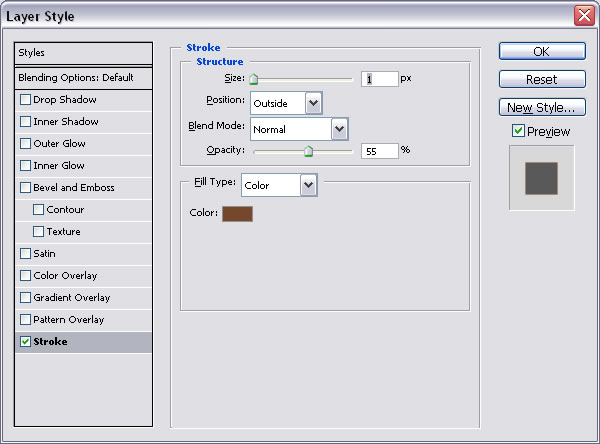
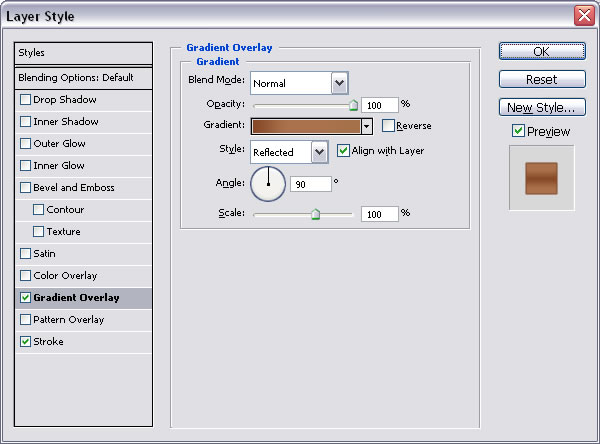
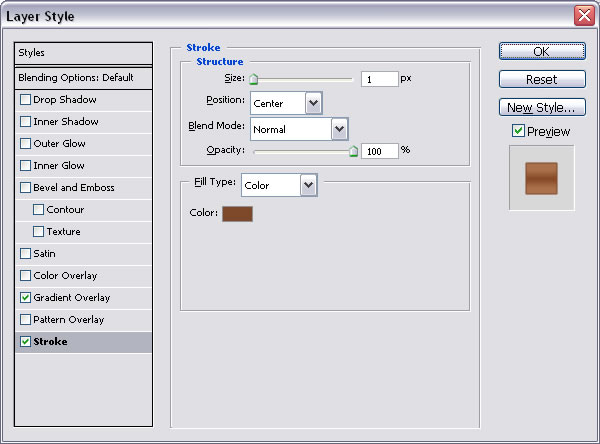
For the other 3 layers (2 ,3,4(color#9e694b)) make this settings:

future-foot tutorial intermediary image

future-foot tutorial intermediary image

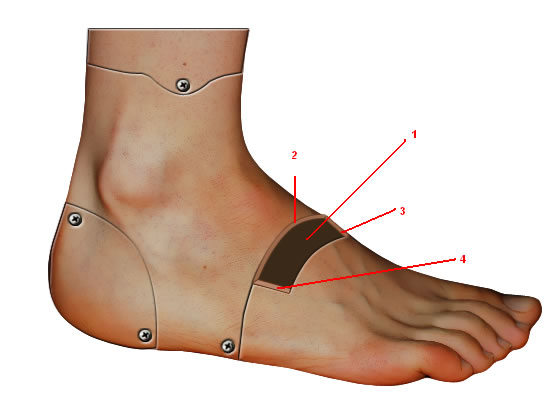
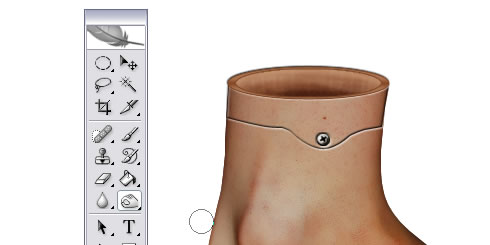
Step 7 - The top part of the foot

For the top part of the foot we will make a section and the foot will be empty inside.

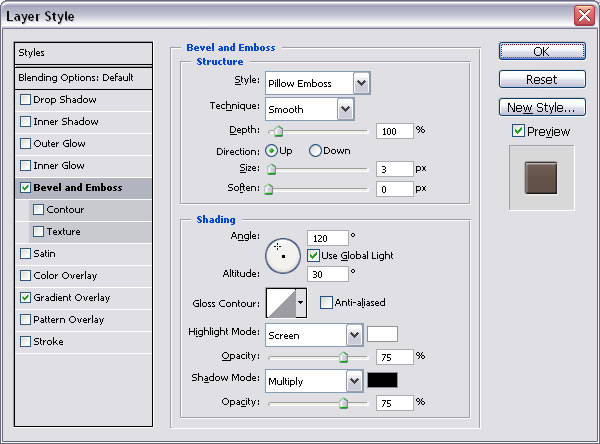
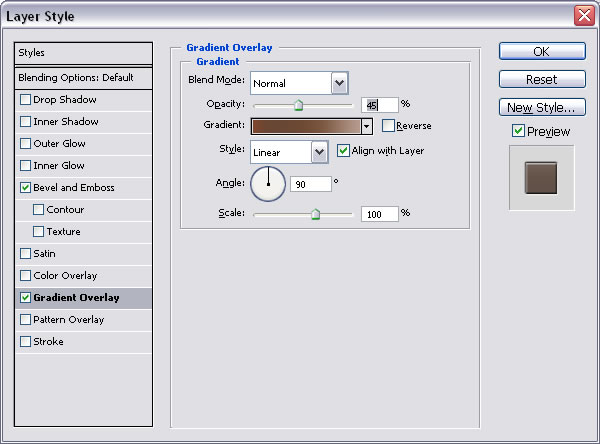
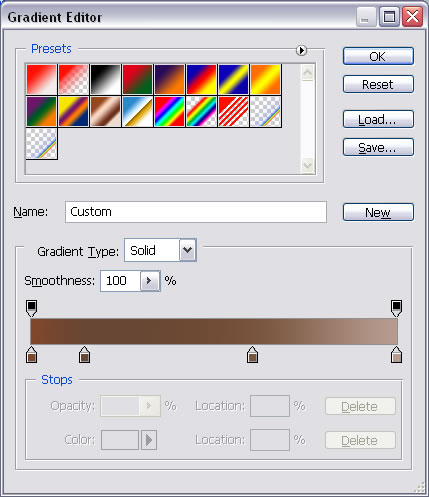
Draw a circle on the top part of the foot (color #b57e57) and make for it the settings:

future-foot tutorial intermediary image

And

future-foot tutorial intermediary image

future-foot tutorial intermediary image

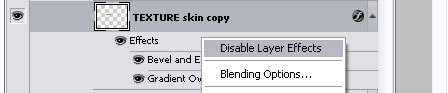
Duplicate this layer and rasterize it and disable layer's effects .

future-foot tutorial intermediary image

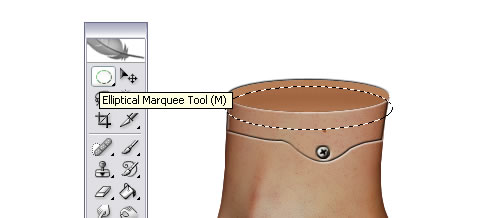
In this new rasterized layer make a selection with Elliptical Marquee Tool like in the picture below, and with Burn Tool(see the settings) gently darken the area.

future-foot tutorial intermediary image

future-foot tutorial intermediary image

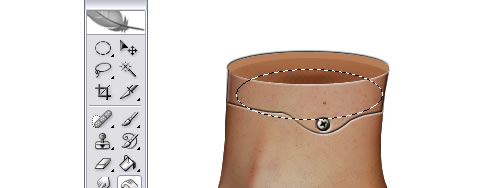
Make a new selection this time lower and burn some more. Now Blur the entire area for color to blend. You can use Dodge Tool and Burn Tool some more until you obtain a good result. You can make vertical lines with dodge tool and burn tool to obtain a 3d result.

future-foot tutorial intermediary image

future-foot tutorial intermediary image

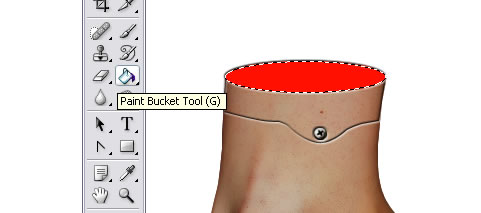
Press CTRL and the thumbnail of the layer above and create a new layer and call it margin. Use the Paint Bucket Tool and make it red. Now with the same sellection create a new layer, make it blue with Paint Bucket Tool and than resize it to 90%

future-foot tutorial intermediary image

future-foot tutorial intermediary image

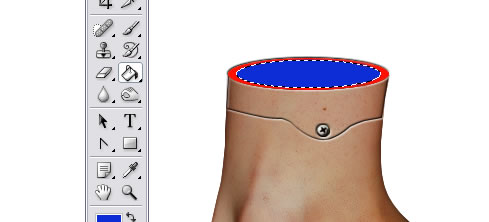
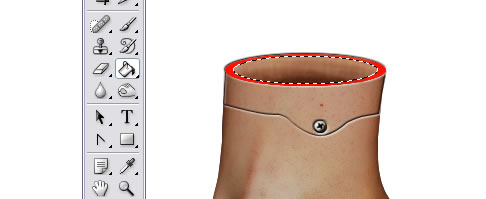
With this sellection go to red layer again and press delete. Now you can delete blue layer or hide it. The result should be this.

future-foot tutorial intermediary image

For this layer make the following settings:

future-foot tutorial intermediary image

future-foot tutorial intermediary image

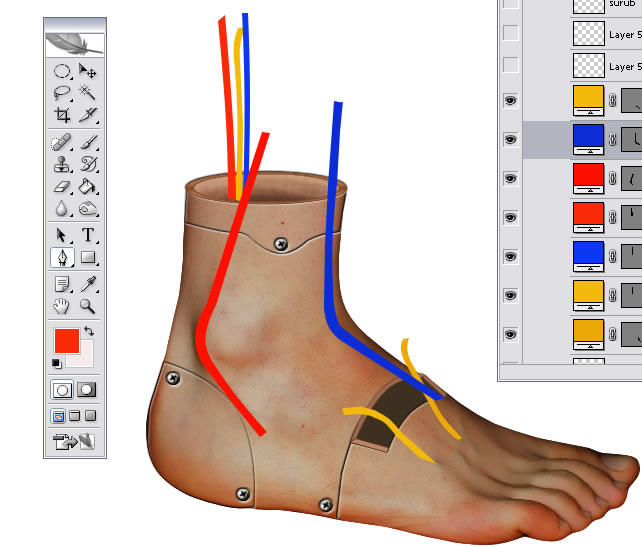
Step 8 - Add wires to the foot

As you can see there are lots of veins on the foot so with Pen Tool I will try to draw some of them. Select all of these layers(CTRL+click on the layers name) and go to Layer - New - Group from layers. Call this group VEINS.

future-foot tutorial intermediary image

Part 1Part 2Part 3
5 ( 100 votes)

If you're looking for amazing textures and backgrounds for Photoshop, explore Textures4Photoshop where you can find 1000+ unique images. You can download all these textures and backgrounds for free to use in personal or commercial projects!

Be a Cool Dude!

With your donation you can help us maintain this website and keep producing free resources many months to come! Any amount counts

6 comment(s) for "Future Foot"

Fanny
Fanny
7:00 AM Thursday, December 3, 2009
Interesting idea..i will adapt it a little! reply
cornel
cornel
7:00 AM Thursday, December 3, 2009
the tutorial is ok but i don't like that style! reply
Otto Carlo
Otto Carlo
7:00 AM Thursday, December 3, 2009
the result is amaizing,i like it reply
mani
mani
7:00 AM Thursday, July 1, 2010
good

good reply
PsdDude
7:00 AM Thursday, July 1, 2010
Thank you guys! reply
Liliane
Liliane
7:00 AM Wednesday, January 26, 2011
Prachtig, dank je wel reply

Have something to say? Leave us a comment

Click to Upload Fan Art!

Share your Psd Dude inspired works


Get new posts by email:
LIKE US ON FACEBOOK

      Online Photo Editor
top