In Photoshop you can align and distribute layer content using the Move Tool. In this quick tip tutorial we'll talk about distributing layers in Photoshop, a feature that can prove really useful as I am going to show you later on.
What Distribute Layers Mean?
Distribute function actually adds an equal amount of space between three or more layers. Objects/Layers on the middle(as position on canvas) are moved in order to create this evenly distribute equal space.
Things to Know
First thing that you have to know is that the distribute layers option is only available for more than 2 layers. Which is logic if you think about it. So if you have just two layers and try to distribute them the option will not be active/visible. You can use any type of layer(text layer, vector shape layer, smart object, raster layer,etc), the only restriction is about the number of layers. You can even use hidden layers, layers with opacity lower than 50% and so on.
Objects must be on separate, linked layers in order to use these functions. There must be at least three linked layers to allow distributing and aligning in Photoshop.
How to Use it
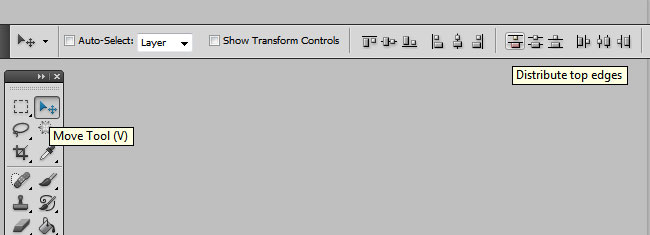
There are two ways in which you can distribute layers in Photoshop. The first one is trough the Move Tool; the Move tool has align and distribute functions that are accessed through 12 buttons in the Tools bar.
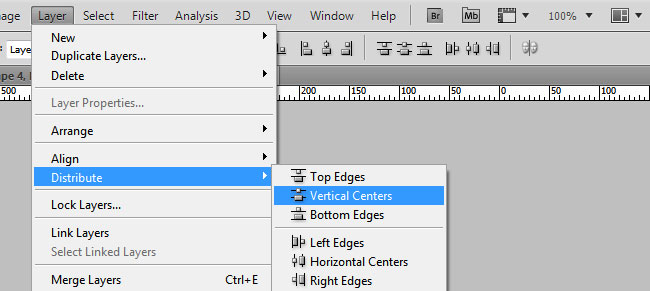
The second option is to use the Layer>Distribute menu options. In both cases you have to have three or more layers selected. If you use menu commands to align or distribute, the Move tool doesn't need to be active.
1. Distribute Vertical in Photoshop
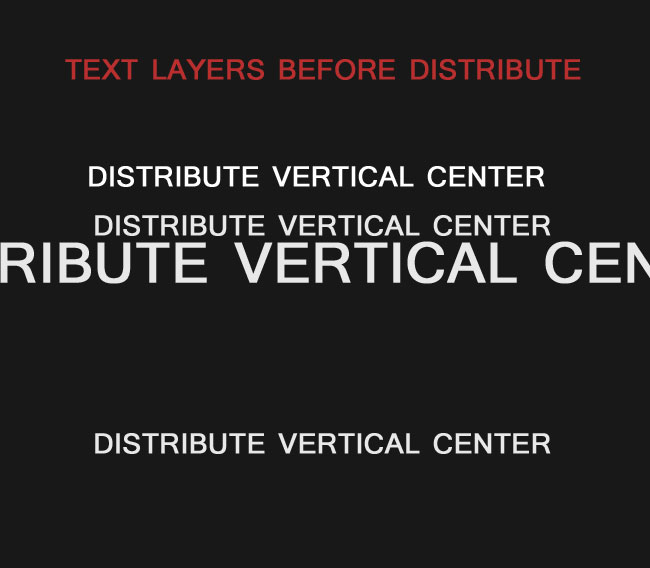
Ok so let's assume we have 4 layers(remember the minimum numer of layers is 3); I will use text layers; you can see you can use different text sizes, meaning that the content of the layer doesn't matter.
I've placed the layers one under the other, to show you a vertical distribution. As you can see the vertical space between the layers is not equal.
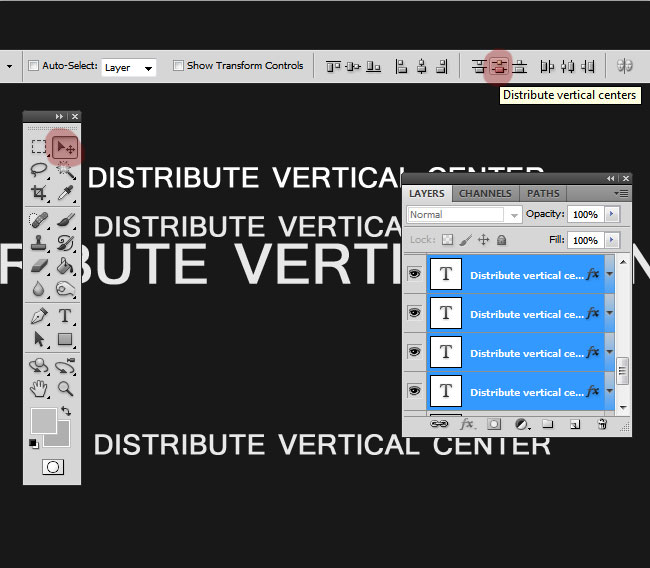
Select all the 4 layers, pick the Move Tool and click on the Distribute vertical centers button. You can of course choose one of the other two buttons(top edges, bottom edges) the only difference beeing the reference point.
As you can see in the image below, after clicking the distribute vertical centers button, the text layers from the middle were automatically moved, so that the space between their centers to become equal. So the result is an evenly distributed text layers.
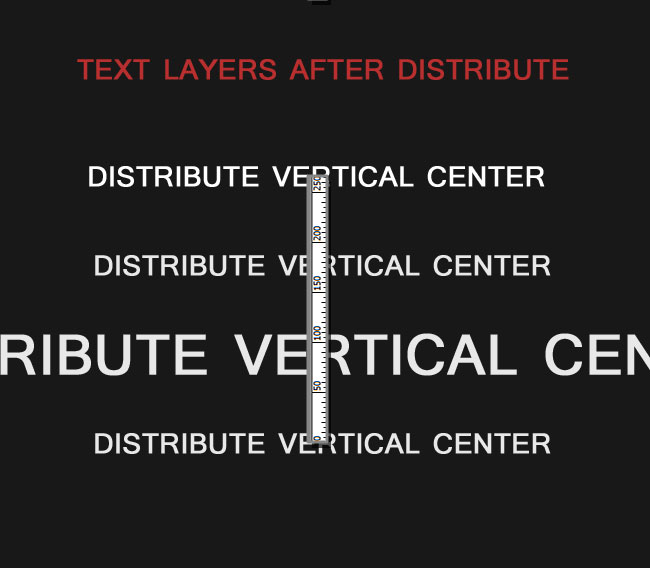
Important to notice that the position of the top layer and the bottom layer remains the same. The layer(s) from the middle are the one that are being moved. Practically the distance between the first and the last positioned layer is the same before and after.
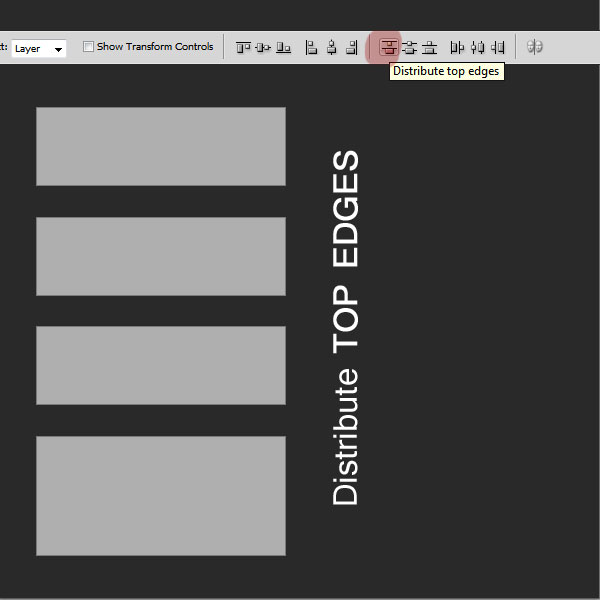
If you have layers with different content(different height size) like buttons for example use the Distribute TOP EDGES for equal space effect. If you want to create a vertical menu for example.
2. Distribute Horizontal in Photoshop
You can add even spacing align between three or more layers on the horizontal scale also. Let's say we want to create a horizontal menu and we have 4 layers
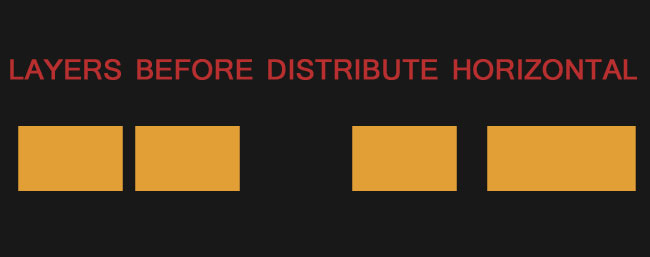
Select all the 4 layers, pick the Move Tool and click on the Distribute LEFT EDGES button. You can of course use one of the other two buttons(center, right) but for creating an equal space between the 4 buttons the "left edges" option is the correct one.
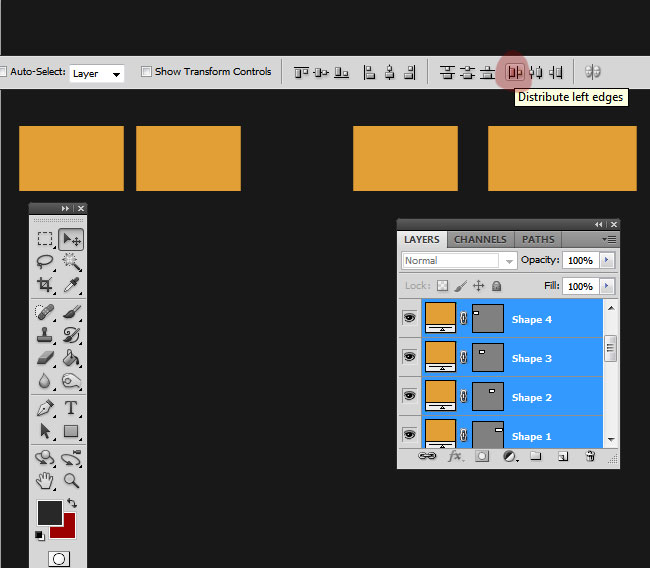
As you can see in the image below, after clicking the distribute vertical left edges button, the text layers from the middle were automatically moved, so that the space between their centers to become equal. So the result is an evenly distributed layers on the horizontal scale.

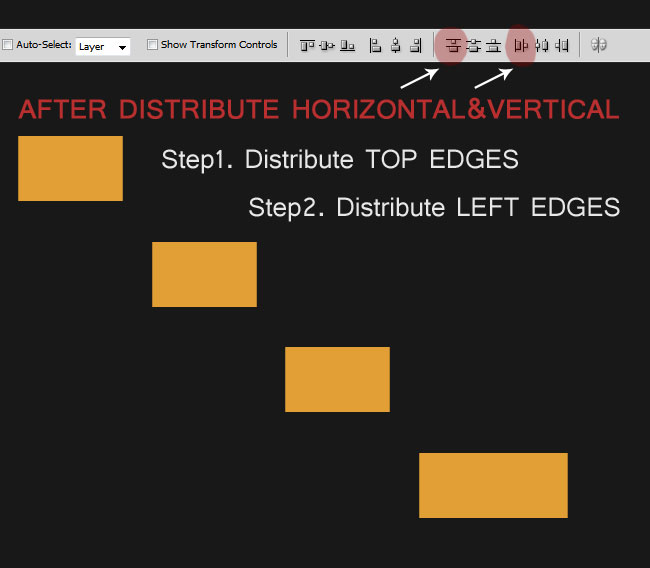
3. Combine Distribute Vertical with Distribute Horizontal in Photoshop
Let's say we want to evenly distribute each piece of navigation text so that there is the same amount of space between each both on vertical and horizontal scale.
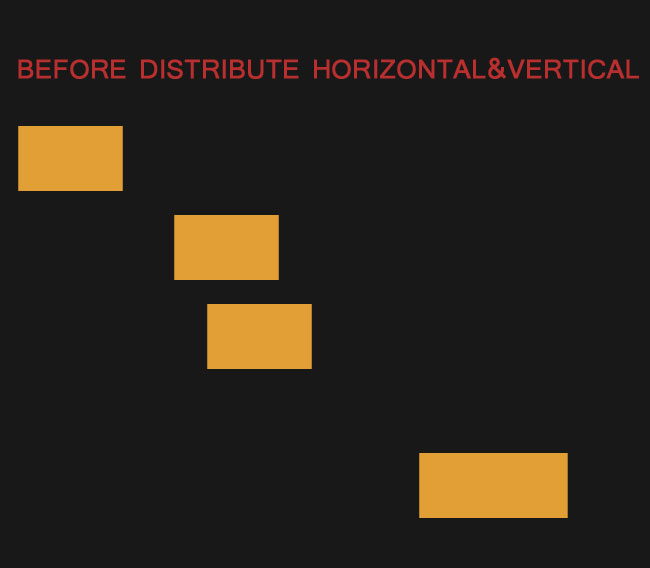
Select all the 4 layers, pick the Move Tool and click first on the Distribute LEFT EDGES button and than on the Distribute TOP EDGES button. You will have an evenly positioned layers on both scales.
Practical Samples
You can use this Photoshop option in many practical ways. For example the distributing align is used for creating 3D effects in Photoshop as you can see in this tutorial.
Another use is when you want to create perfect aligned menus, whether we talk about vertical menu or horizontal menu designs. So if you want to make a navigation in Photoshop this tool is more than useful.
Photoshop Grid
Another way to align design elements in Photoshop is to use the Photoshop Grid tool. You can also try this grid texture if you want a grid that can also be printed.
4 comment(s) for "Distribute Equal Space Between Layers in Photoshop"